Homemade Reese’s Cups Recipe
There’s something utterly magical about homemade treats, isn’t there? They transcend mere sustenance; they become vessels of love, memories, and joy. Today, I’m beyond excited to share my very own Homemade Reese’s Cups Recipe with you. This delightful confectionery captures the essence of nostalgia—a perfect blend of creamy peanut butter and rich chocolate that dances on your palate and warms your heart. As you embark on this culinary adventure, imagine the aroma of melting chocolate wafting through your kitchen, the sensation of smooth peanut butter filling melting in your mouth, and the sweet satisfaction that follows each bite. Trust me when I say that making these cups at home is not just about creating a dessert; it’s about crafting an experience, a revelation that will leave you feeling accomplished and utterly delighted.
And let’s be real: there’s a certain charm in whipping up these delightful cups right from scratch. It’s like reclaiming a piece of childhood—those lazy afternoons spent relishing store-bought treats can now be transformed into joyous moments spent in your own kitchen. Why settle for pre-packaged when you can have something so much better? With just a handful of simple ingredients—each playing a pivotal role—you’re about to discover how easy it is to create a batch that rivals any candy aisle offering. The beauty lies not just in the flavors but also in the process itself; each step brings us closer to those perfectly crafted little morsels of bliss.
Homemade Reese’s Cups Recipe: A Sweet Symphony of Peanut Butter and Chocolate
If you’ve ever craved that satisfying crunch followed by the creamy embrace of peanut butter enveloped in silky chocolate, this recipe is for you! Making these cups at home is not only simple but incredibly rewarding. You’ll find that every bite resonates with sweetness balanced by a hint of saltiness—an irresistible combination that hits all the right taste buds. So grab your favorite apron, gather your ingredients, and let’s dive into this delightful journey together!
Ingredients:
To create your homemade Reese’s cups, we’ll start with some key ingredients that make this treat sing with flavor and texture. Each component plays an essential role in crafting this delightful dessert.
- 14 ounces semi-sweet chocolate chips, divided in half. This rich chocolate serves as the foundation for our cups, providing that beloved outer shell which is both luscious and satisfying to bite into. Since we’re using semi-sweet chocolate chips, you’ll enjoy a balance of sweetness without being overwhelmed—perfectly complementing the savory notes from our peanut butter filling. When selecting your chocolate chips, look for high-quality brands; their flavor will shine through in every bite. If you’re looking for alternatives due to dietary preferences or allergies, dark chocolate or dairy-free options can work beautifully here too!
- 1 cup creamy peanut butter. Ahh, peanut butter—the star of our show! Its smooth texture creates a rich filling that’s both indulgent and comforting. I often opt for natural peanut butter without added sugars or oils because it allows for a more authentic nutty flavor while keeping things healthier. The fat content from the peanut butter also helps maintain that luxurious mouthfeel we’re after in our Homemade Reese’s Cups Recipe. And remember, don’t skimp on quality; choose a brand that uses real peanuts as its primary ingredient for the best results.
- 6 tablespoons powdered sugar. This sweet addition ensures our peanut butter mixture achieves that perfect balance between sweet and salty while providing a touch of creaminess too. The powdered sugar dissolves easily into the filling, avoiding any graininess which could disrupt that smooth texture we’re aiming for—absolute perfection! If you’re looking to make it healthier or suitable for special diets, consider using coconut sugar or another alternative sweetener; just keep in mind it may slightly alter the final taste.
- 4 tablespoons butter, softened. Butter adds richness and helps bind our filling together beautifully. Using softened butter is crucial here because it allows us to cream it smoothly with our other ingredients—this creates an airy texture that’s simply divine! If you prefer not to use dairy products or need an alternative due to dietary restrictions, vegan margarine works well too; just be sure it’s soft enough to blend seamlessly into your mixture.
Equipment You’ll Need:
Having the right tools at hand makes all the difference when embarking on this culinary journey! While they aren’t technically ingredients themselves, these pieces of equipment are essential partners in creating something wonderful.
- Microwave-safe bowl – This is where magic happens as we melt our chocolate chips! A microwave-safe bowl allows you to easily heat chocolate without risking burns or overheating it—a common pitfall if you’re not careful! Choose glass or ceramic materials over plastic to avoid any melting mishaps during heating.
- Cupcake liners – These little beauties are vital for shaping our homemade Reese’s cups and ensuring an easy release once they’re set! Opt for standard-size liners; they provide just enough structure while allowing those decadent layers of chocolate and peanut butter to shine through beautifully on your serving platter.
- Muffin tin – Your trusty muffin tin will act as the mold for our treats as they freeze into shape! It’s perfect because it keeps everything uniform while allowing easy removal once they’ve set properly—no one wants misshapen cups ruining their presentation!
- Mixing bowls – Having two mixing bowls handy means you can prepare different layers simultaneously without any fuss! This setup streamlines your process while keeping everything organized—a true time-saver!
Preparing the Homemade Reese’s Cups Recipe
Step 1: Melting Chocolate Magic
Let’s kick things off by melting half of those beautiful semi-sweet chocolate chips! Start by placing them into a microwave-safe bowl—a glass bowl works wonders here since it retains heat evenly. Microwave them in 30-second intervals; this gentle approach prevents any potential scorching or clumping—trust me; nobody wants burnt chocolate ruining their day! After each interval, stir vigorously until smooth; watch as those chips transform into velvety liquid gold before your eyes! Once melted completely, spoon about ½ tablespoon into each cupcake liner nestled snugly within your muffin tin. Give the tin a gentle shake—it helps spread out the melted chocolate evenly across the bottom so every bite has that glorious richness we crave!
Step 2: Freezing For Perfection
Now comes one of my favorite parts: freezing! Pop that muffin tin filled with melted chocolate into your freezer for about 15 minutes until set—it feels like waiting forever but trust me on this one—it’s absolutely paramount! Chilling ensures that base layer hardens perfectly before we add anything else atop it; skipping this step could result in messy fillings later on (and nobody wants that!). Use this time wisely—perhaps take a moment to enjoy some fresh air or contemplate what drink pairs best with these delectable treats!
Step 3: Crafting Creamy Peanut Butter Filling
While our first layer sets away peacefully in its frosty abode, let’s turn attention toward crafting our luscious peanut butter filling! Grab another mixing bowl (remember how I mentioned needing two?) and combine one cup of creamy peanut butter with 6 tablespoons powdered sugar along with those 4 tablespoons of softened butter we talked about earlier—this trio creates pure magic! Beat everything together until smooth and creamy—it should resemble silk once finished! This step is all about achieving harmony between flavors while ensuring no lumps remain so every bite delivers consistent delight throughout!
Step 4: Centering That Irresistible Filling
Once you’ve achieved that heavenly consistency (which I promise will tempt even the most disciplined among us!), it’s time for some fun—spoon approximately one tablespoon onto each hardened chocolate base layer from earlier! Make sure each dollop sits centered gracefully atop its chocolaty foundation; this attention-to-detail ensures everyone enjoys equal bites filled with blissful goodness later on down the line (and who wouldn’t want perfectly proportioned treats?). After adding all fillings back into their cozy muffin tin homes again briefly freeze them again—just five minutes should do—to help solidify before moving onto our final chocolaty coat!
Stay tuned as we dive deeper into finishing touches soon…
Step 5: Creamy Peanut Butter Bliss
Now, let’s dive into the heart and soul of our homemade Reese’s cups — that luscious peanut butter filling that will make your taste buds dance with joy! Start by grabbing a mixing bowl; I suggest using a medium-sized one to give yourself plenty of room to work. You’ll want to combine 1 cup of creamy peanut butter (the kind that just oozes goodness), 6 tablespoons of powdered sugar, and 4 tablespoons of softened butter. This is where the magic begins! The powdered sugar not only sweetens the mixture but also adds a delightful texture, allowing it to blend smoothly with the peanut butter and butter. Trust me on this: the combination of these ingredients creates a velvety filling that’s simply irresistible.
Once you’ve added everything into your mixing bowl, it’s time to get to work! Use a hand mixer or a sturdy spatula if you’re feeling strong. Beat those ingredients together until they reach an ultra-smooth consistency; this may take about 2-3 minutes with a mixer, but don’t rush this step—allowing the mixture to become airy and well-combined is absolutely paramount for achieving that creamy texture. When you’re finished, take a moment to appreciate how wonderful it smells; it should be rich and nutty, promising a truly extraordinary experience once we assemble our treats.
Step 6: The Perfect Peanut Butter Center
Now comes the fun part, where we create those delightful little pockets of joy! Retrieve your muffin tin from the freezer—the chocolate base should be beautifully set and firm by now, like a solid foundation ready for something special on top. Using a tablespoon, carefully scoop out about 1 tablespoon of your creamy peanut butter mixture and place it right in the center of each chocolate base. It’s essential to keep the filling centered because this ensures that every single bite will be infused with that heavenly peanut butter flavor—it’s all about balance here!
As you spoon in the filling, don’t worry if it overflows just a tad; after all, who can resist a generous amount of peanut butter? But do try to keep them contained as much as possible for an aesthetically pleasing finish later on! Once you’ve filled each cup, gently press down on the peanut butter mixture just enough to create an even surface without squishing it too much—this will help when we add the final layer of chocolate later on. Now it’s time for another chill session—pop these back into the freezer for about 5 minutes. This short wait might seem trivial, but trust me when I say it helps in setting the filling slightly so that when you pour on that next layer of melted chocolate, everything stays perfectly intact.
Step 7: Sealing in Chocolate Heaven
The anticipation is building as we prepare for what I like to call “the crowning glory”—the final layer of chocolate that seals our homemade Reese’s cups recipe into pure bliss! Take those remaining chocolate chips—about 7 ounces—and melt them just like before; remember, patience is key here. Heat them in short bursts of 30 seconds in your microwave-safe bowl, stirring thoroughly between intervals until you achieve that silky-smooth texture that looks like liquid gold. If you notice any lumps or if it seems too thick, don’t hesitate to give it another quick zap in the microwave; just be careful not to overheat because burnt chocolate is quite unforgiving!
Once your chocolate is beautifully melted and glossy, remove your muffin tin from the freezer once more. Carefully spoon this molten goodness over each peanut butter-filled cup until they are completely covered—this step isn’t just about aesthetics; it’s crucial for locking in all that creamy richness below. A gentle tap on your counter can help settle any air bubbles and ensure an even coating across each candy cup’s surface. Now here’s where patience pays off again: we’re going to freeze these beauties once more! Cover them loosely with plastic wrap and let them chill for about 10-15 minutes until fully set or pop them in the refrigerator for around 15-20 minutes if you prefer. The transformation happening during this chilling phase not only solidifies everything beautifully but also ensures that when you bite into one later, you’ll experience that satisfying crunch followed by smooth creaminess.
Step 8: The Grand Reveal – Unwrapping Your Creation
At last, after what feels like an eternity (but really has only been about half an hour), it’s time for the grand reveal! Remove your muffin tin from either the freezer or refrigerator—whichever method you opted for—and behold your homemade Reese’s cups masterpiece! As they come out from their chilly slumber, gently peel away those cupcake liners; take care during this step because while they should come off easily if set correctly, sometimes they can cling tight if left too long. If you encounter any resistance, simply run a butter knife along the edges to help ease them out without damaging those gorgeous cups.
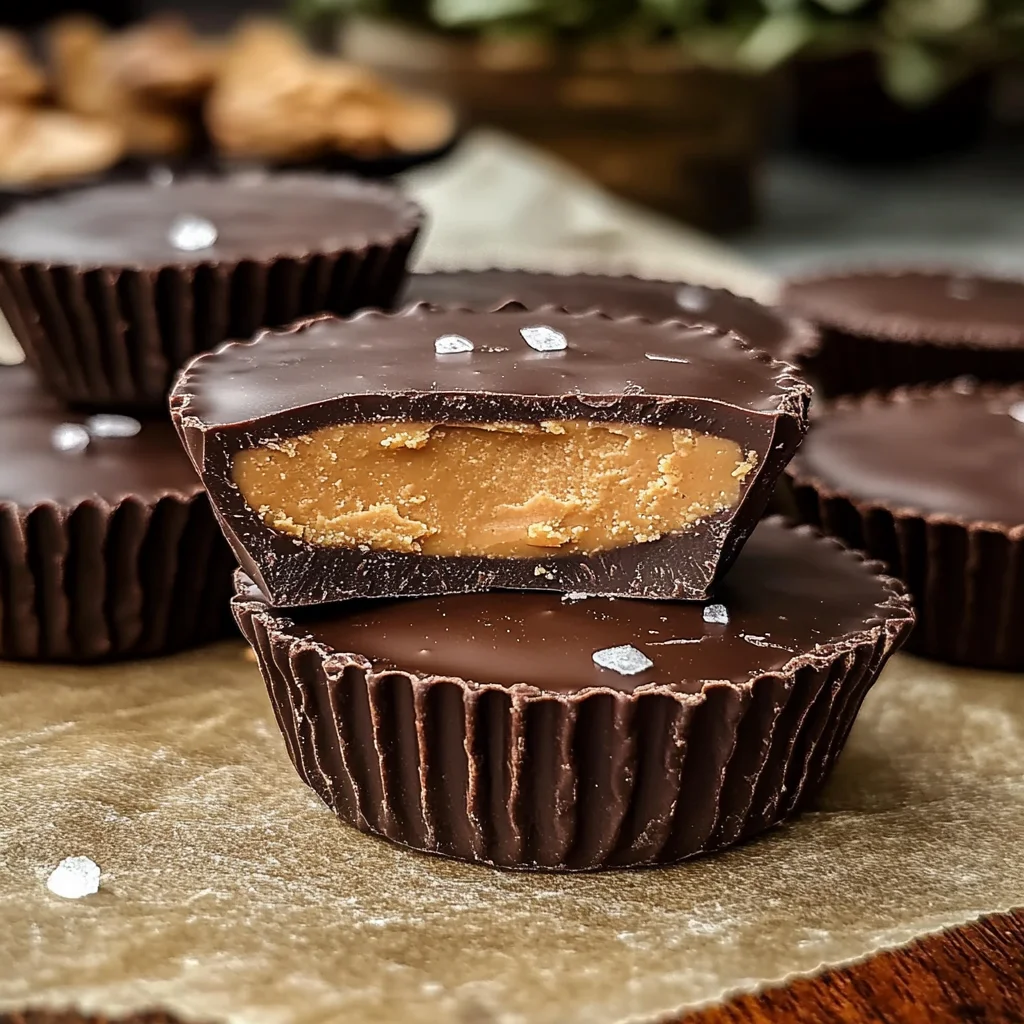
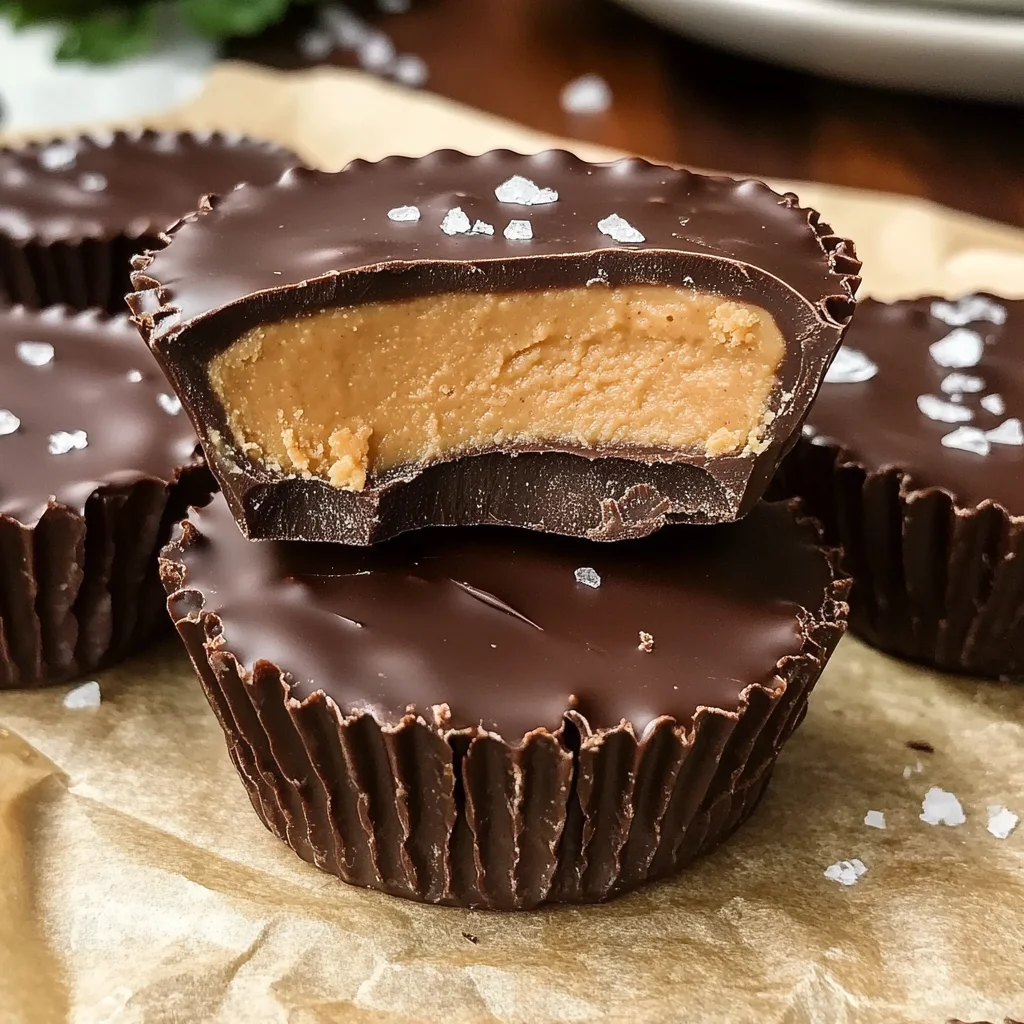
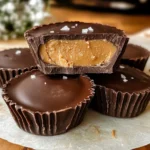
Now comes my favorite part: arranging them on a beautiful platter or serving dish where everyone can admire their beauty before indulging! To elevate this experience even further (and trust me when I say this makes ALL the difference), sprinkle a touch of flaky sea salt atop each cup right before serving; this simple addition creates an utterly intoxicating contrast against the sweetness, enhancing every flavor profile and making each bite feel like a celebration!
And there you have it — your very own batch of homemade Reese’s cups ready to bring smiles and happiness all around! Whether you’re enjoying these alone or sharing them with friends and family (who will undoubtedly be begging for seconds!), I promise you they’ll leave lasting impressions filled with nostalgic bliss. So go ahead—dive into this unforgettable treat you’ve created from scratch; it’s not just food—it’s love wrapped in chocolate!
Storage and Enjoyment Tips for Your Homemade Reese’s Cups Recipe
Now that you’ve crafted these delightful homemade Reese’s cups, it’s time to bask in the joy of your creation! This recipe is not just about satisfying a sweet tooth; it’s about reliving those nostalgic moments and sharing them with loved ones. Whether you’ve made them for a special occasion or simply because you craved a taste of childhood, let’s talk about how to savor every last bite and keep these treats fresh for as long as possible.
Storing Leftover Homemade Reese’s Cups Recipe
To store any leftover homemade Reese’s cups (though I doubt there will be many!), place them in an airtight container—this is absolutely paramount to preserving their deliciousness. You can keep them at room temperature for up to a week, but if you want to maintain that perfect creamy texture and rich chocolate flavor, I recommend storing them in the refrigerator. They’ll stay fresh for up to two weeks this way! For even better quality, consider placing a slice of bread in the container with the cups; it helps retain moisture and keeps your chocolate from becoming too hard. Trust me on this—after storage, these little gems still deliver that profoundly satisfying combination of flavors and textures. When you’re ready to indulge again, simply allow them to sit at room temperature for a few minutes before enjoying; this helps soften the chocolate just enough for that melt-in-your-mouth experience we all adore.
Freezing Homemade Reese’s Cups for Later
If you find yourself with a surplus of these scrumptious treats—or if you’re just planning ahead—freezing is a fantastic option! To freeze your homemade Reese’s cups properly, wrap each cup individually in plastic wrap or place them in a freezer-safe bag, ensuring as much air is removed as possible. They’ll stay deliciously fresh in the freezer for up to three months. When cravings hit, there’s no need to thaw the entire batch; simply pop one out and enjoy it frozen for a delightful twist on texture! The convenience factor here is unbeatable—imagine having a stash of these heavenly treats ready at your fingertips whenever you need a little pick-me-up or want to impress unexpected guests. It’s like having your very own secret stash of happiness!
Homemade Reese’s Cups
Experience the joy of nostalgia with our Homemade Reese’s Cups Recipe, an easy-to-make treat that combines creamy peanut butter and rich chocolate for an indulgent dessert. Perfect for any occasion, these delightful cups are not just a sweet snack; they’re a celebration of flavors and memories. With each bite, you’ll enjoy the satisfying crunch of chocolate followed by the smooth, velvety peanut butter filling that melts in your mouth. Ideal for sharing with friends or enjoying during cozy nights at home, this recipe brings the magic of childhood treats right into your kitchen.
- Prep Time: 15 minutes
- Cook Time: 10 minutes
- Total Time: 25 minutes
- Yield: Approximately 12 servings 1x
- Category: Dessert
- Method: No-bake
- Cuisine: American
Ingredients
- 14 ounces semi-sweet chocolate chips
- 1 cup creamy peanut butter
- 6 tablespoons powdered sugar
- 4 tablespoons softened butter
Instructions
- Melt half of the chocolate chips in a microwave-safe bowl in 30-second intervals, stirring until smooth.
- Spoon about ½ tablespoon of melted chocolate into cupcake liners placed in a muffin tin and freeze for 15 minutes.
- In another bowl, combine peanut butter, powdered sugar, and softened butter until smooth.
- Remove the muffin tin from the freezer, place 1 tablespoon of peanut butter filling on top of each hardened chocolate layer, and freeze for another 5 minutes.
- Melt remaining chocolate chips and pour over the filled cups to cover completely. Freeze again for 10-15 minutes until set.
- Carefully peel off cupcake liners and serve.
Nutrition
- Serving Size: 1 cup (40g)
- Calories: 180
- Sugar: 12g
- Sodium: 45mg
- Fat: 11g
- Saturated Fat: 5g
- Unsaturated Fat: 6g
- Trans Fat: 0g
- Carbohydrates: 17g
- Fiber: 1g
- Protein: 4g
- Cholesterol: 15mg