Classic Homemade Reese’s
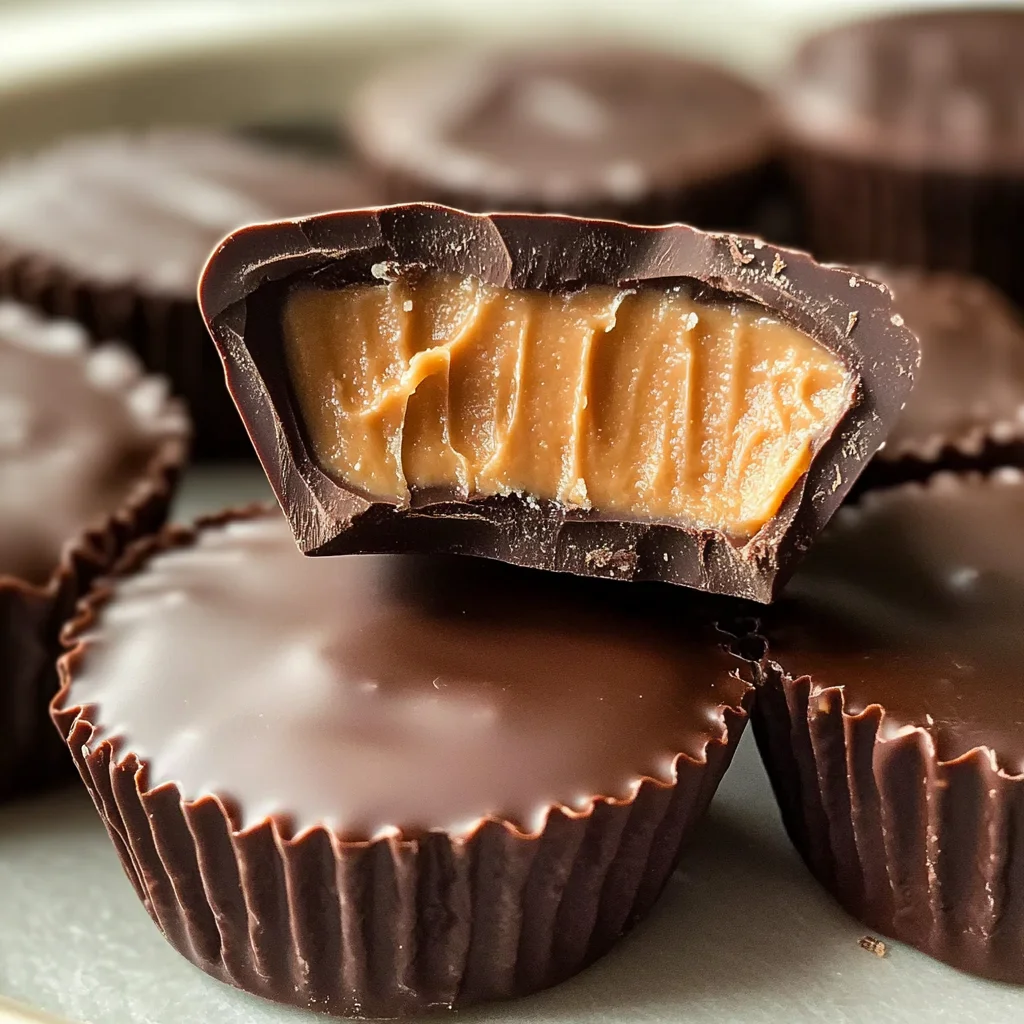
There’s something profoundly nostalgic about making chocolate and peanut butter treats at home, isn’t there? For me, it’s a delightful journey back to childhood, where the mere thought of biting into a sweet, creamy morsel of bliss brought instant joy. With each bite of these Classic Homemade Reese’s, you’re not just enjoying a candy; you’re indulging in an experience that bridges the gap between tradition and innovation. The rich aroma of melting chocolate wafting through your kitchen mingles with the comforting scent of peanut butter, creating a symphony of flavors that dances on your palate. I promise you, once you make these yourself, you’ll never look at store-bought candy the same way again. Each candy is a little treasure, enveloped in smooth milk chocolate, hiding a luscious peanut butter filling that feels like pure nostalgia wrapped in happiness.
But why do we love this combination so much? It’s more than just sweet and salty; it’s about the emotions tied to those flavors and memories. Think about it: many of us grew up savouring these delicious treats during festive seasons or as a special reward after school. They represent moments of comfort and celebration—whether you’re making them for a holiday gathering or simply indulging in a personal treat after a long day. This recipe is not just about crafting candy; it’s about recreating those cherished memories while adding your own twist to something timeless. So roll up your sleeves—let’s embark on this delightful culinary adventure together!
Classic Homemade Reese’s: A Sweet Symphony of Peanut Butter and Chocolate
I am beyond excited to share this recipe for Classic Homemade Reese’s with you! It’s incredibly simple yet utterly indulgent—a perfect blend of creamy peanut butter filling coated in luscious milk chocolate that will leave your taste buds singing. Whether you’re looking to impress friends at a gathering or simply satisfy your own sweet tooth, this decadent treat will bring smiles all around.
Ingredients:
As we set out on this delightful journey to create homemade Reese’s, let’s take a moment to appreciate each ingredient. Each one plays an essential role in crafting these little pieces of heaven.
- 1 cup creamy peanut butter. This is the star of our show! The creamy texture provides that signature mouthfeel we’re all familiar with when we think of Reese’s. Opt for high-quality peanut butter without added sugars or oils if possible; it makes all the difference in flavor and consistency. You want that rich nuttiness to shine through every bite! If you prefer crunchy peanut butter for an extra layer of texture, go ahead—just know it will change the final consistency slightly but still be oh-so-delicious.
- 1/4 cup unsalted butter, softened. The unsalted variety is crucial here because it allows us to control the saltiness of our candy precisely. Softening the butter brings out its natural sweetness and helps create that dreamy texture we’re aiming for when combining it with peanut butter. If you forget to soften it beforehand, no worries—just cut it into small cubes and let it sit at room temperature while you gather other ingredients; it’ll soften faster than you think!
- 1 teaspoon vanilla extract. Ahh, vanilla—the magical ingredient that adds warmth and depth to our flavors! It’s like that secret ingredient everyone wishes they knew about but often overlooks. Pure vanilla extract elevates our filling by adding complexity; trust me on this—it transforms good into extraordinary!
- 2 cups powdered sugar. This is what gives our filling its characteristic sweetness and structure. When mixed with our creamy components, powdered sugar creates a firm yet melt-in-your-mouth consistency that’s crucial for shaping those perfect little candies. Remember to sift it first if you can; no one wants any lumps ruining their blissful experience!
- 2 cups milk chocolate chips. A classic choice for coating our treats! The smooth richness of milk chocolate complements the salty sweetness of peanut butter beautifully—a match made in dessert heaven! Feel free to use dark chocolate if you’re looking for something a bit more sophisticated since its slightly bitter notes can balance out the sweetness effectively.
- 1 tablespoon coconut oil (optional). Adding coconut oil can make melting your chocolate easier and gives it a glossy finish—think liquid gold! It’s entirely optional but recommended if you want that professional touch when dipping your candies.
Equipment You’ll Need:
Having the right tools at your disposal makes creating these Classic Homemade Reese’s not only smoother but also more enjoyable! Think of them as trusty companions on this delightful journey.
- Mixing bowl – A sturdy mixing bowl is essential for combining our ingredients effectively without making too much mess! Look for one that’s large enough to accommodate everything comfortably—you want room to mix without spilling over the edges.
- Hand mixer or stand mixer – While you could mix everything by hand (and get quite the arm workout!), using an electric mixer helps achieve that perfectly smooth consistency in no time at all. It saves effort and ensures thorough mixing—both paramount when combining buttery goodness with sugary delight!
- Measuring cups and spoons – Precision is key when baking or making candies; measuring accurately ensures consistent results every time. Make sure they are dry before using them especially with sticky ingredients like peanut butter.
- Parchment paper – This is where your beautiful candies will rest while they cool down! Parchment paper prevents sticking and makes clean-up easy-peasy—a non-negotiable step if you ask me!
With all our ingredients prepped and tools ready, let’s dive into creating these delightful morsels!
Step 1: Whipping Up That Irresistible Filling
Start by grabbing your mixing bowl—add in the creamy peanut butter along with softened unsalted butter and vanilla extract. Using either your hand mixer or stand mixer on medium speed, blend these three until they meld together into an irresistibly smooth concoction (about 2 minutes). Trust me when I say this step matters immensely; achieving that velvety base is critical before moving forward! Now gradually add in powdered sugar—sifted if possible—for optimal texture—and mix slowly until fully combined (don’t rush this part!). You’ll notice how the mixture starts thickening up beautifully as you go along; keep blending until it reaches a firm yet pliable consistency—this will be crucial when shaping later!
Step 2: Shaping Your Candies
Now comes one of my favorite parts: shaping those heavenly fillings into cute little balls or pressing them into muffin liners! If choosing balls (which I personally adore), take about 1 tablespoon-sized portions from your mixture (you might want to grease your hands lightly), rolling them gently between your palms until perfectly rounded—aim for about 1 inch in diameter here! Alternatively, line mini muffin pans with cupcake liners before pressing equal amounts into each liner—this method ensures uniformity while saving time too! Once shaped, place them onto parchment-lined trays and pop them in the fridge for about 30 minutes until they firm up nicely—you don’t want them too soft when dipping later.
Step 3: Melting That Luxurious Chocolate
While those beauties chill, we need to focus on melting our milk chocolate chips (and coconut oil if using). Start by placing them in a microwave-safe bowl—microwave at 20-second intervals stirring in between until fully melted (this usually takes around 1–2 minutes total). Be careful not to overheat as burnt chocolate is no fun—it becomes gritty instead of silky smooth which won’t give us that perfect finish during dipping later on! The addition of coconut oil helps achieve ultimate creaminess so don’t skip it unless you’re going strictly dairy-free!
Step 4: Dipping Into Chocolate Bliss
Now comes perhaps the most exciting part: dipping those chilled peanut butter balls into warm melted chocolate goodness! Using two forks or toothpicks works wonders here—simply dip each ball carefully ensuring they’re fully covered before lifting back out letting any excess drip off gently before transferring onto parchment paper again—it may take some practice but don’t worry—you’ll get better with each dip! Repeat until all are coated then return them back into refrigerator once again (for about another 20–30 minutes) allowing everything set perfectly before devouring!
And there we have it—the first stages towards creating these delightful Classic Homemade Reese’s candies filled with love, nostalgia, creativity… oh yes—and plenty of deliciousness too! Keep an eye out as we continue through each step together—I can’t wait for you to taste these divine creations yourself—they truly are extraordinary!
Crafting Your Classic Homemade Reese’s: The Sweet Symphony Unfolds
Now that we’ve laid the foundation with our creamy peanut butter filling, let’s take this delightful journey to the next level by melting chocolate and transforming our sweet spheres into a delectable treat! This step is where the magic truly happens, as we coat each peanut butter ball in a luscious layer of chocolate that will not only enhance the flavor but also provide the satisfying crunch that contrasts beautifully with the creaminess of the filling.
Step 5: Melting Chocolate to Perfection
To create that silky, smooth coating that clings lovingly to your peanut butter centers, you’ll need to melt the chocolate chips along with a touch of coconut oil. I find that using coconut oil is optional but highly recommended; it adds an extra sheen and helps keep the chocolate from becoming too thick as it cools. Place your 2 cups of milk chocolate chips into a microwave-safe bowl and add 1 tablespoon of coconut oil if you’re using it. Now, microwave this mixture in short bursts—about 30 seconds at a time—stirring between each interval until you achieve a glossy, melted consistency. This gentle melting method is crucial because it prevents the chocolate from seizing up or burning, which can happen if you heat it too aggressively.
As you stir, take a moment to inhale the intoxicating aroma of melting chocolate—it’s one of those little joys in life that can put a smile on anyone’s face! You want your melted chocolate to be smooth and fluid so it easily envelops your peanut butter balls. If you find that it’s too thick after melting, don’t hesitate to add another teaspoon of coconut oil; trust me on this one! Once you’ve reached a beautiful, pourable consistency, you’re ready for the next step.
Step 6: Dipping Like a Pro
Now comes the fun part—dipping those chilled peanut butter creations into your melted chocolate! If you pressed your filling mixture into mini muffin liners earlier, simply remove them gently; they should pop out beautifully if you’ve lined them properly. For those rolling balls, grab a fork or a dipping tool (if you have one) and carefully lower each peanut butter ball into the warm chocolate bath. Ensure every inch is coated evenly—this is where they transform from delicious to utterly extraordinary!
Once dipped, let any excess chocolate drip off back into the bowl before placing them on a sheet of parchment paper. This step is absolutely paramount because it ensures that each candy has just the right amount of coating without becoming overly clumpy or messy. Take your time here; there’s no need to rush! The visual cue for perfection is when they glisten invitingly under your kitchen lights—truly an irresistible sight!
Step 7: The Chilling Game
With all your candies dipped and arranged on parchment paper like little golden nuggets waiting for their moment in the spotlight, it’s time for another important chill session. Place these beauties in your refrigerator for about 20-30 minutes, or until the chocolate has set completely and feels firm to the touch. Why chill? Well, allowing them to rest in cooler temps solidifies that decadent layer of chocolate, locking in flavor while giving it that satisfying snap when bitten into.
During this chilling phase, try not to be tempted to nibble on your creations just yet (I know it’s hard!). Patience here pays off immensely—the contrast between smooth peanut butter and crisp chocolate is what makes these candies so profoundly satisfying. So pour yourself a cup of tea or coffee and enjoy the anticipation—good things come to those who wait!
Step 8: The Grand Reveal
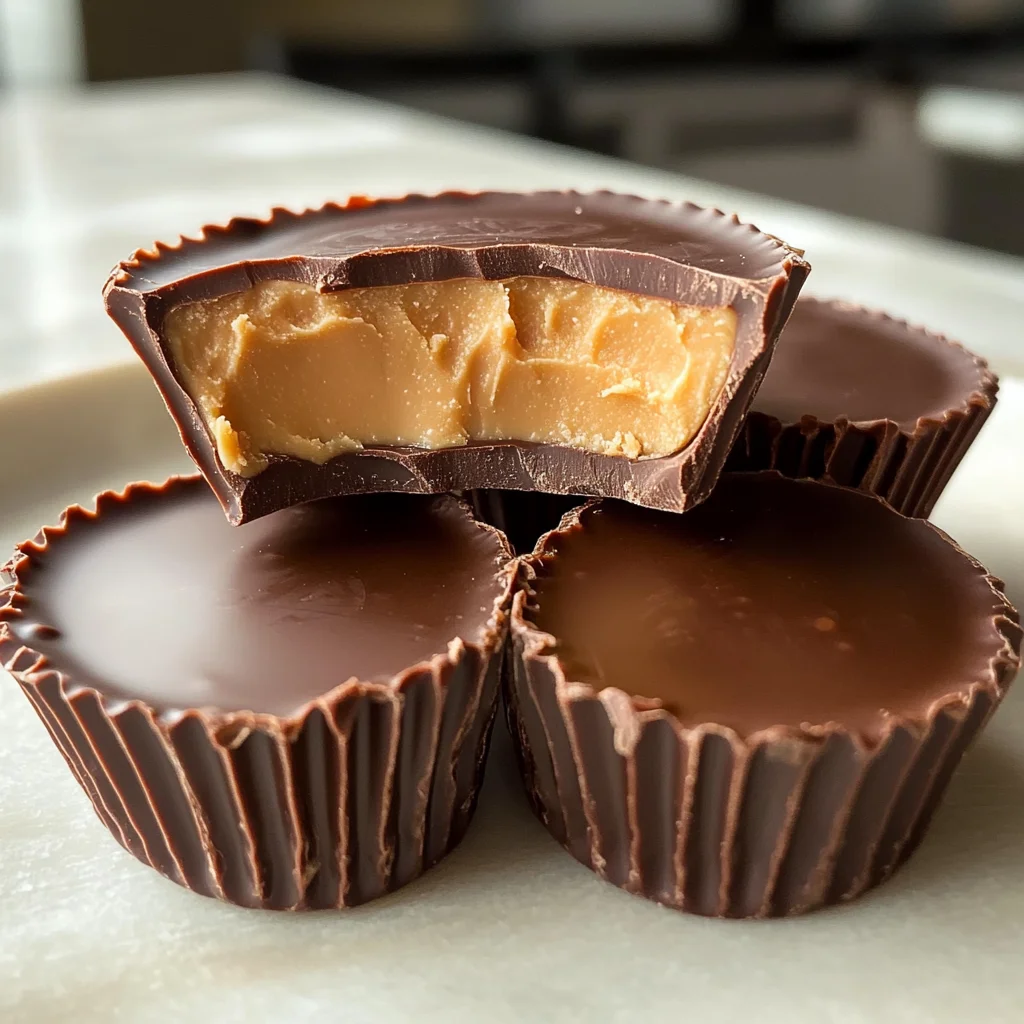
After what will feel like an eternity (but really isn’t), it’s time for the grand reveal! When you finally pull those chilled candies out of the refrigerator, prepare yourself for sheer delight as you witness their transformation into classic homemade Reese’s! Each piece should showcase a perfectly set layer of glossy chocolate covering its rich peanut butter heart. To check if they are ready to devour, gently press one with your finger; if it feels firm yet slightly springy under pressure, congratulations—you’ve nailed it!
At this point, feel free to arrange them beautifully on a serving platter or store them in an airtight container for later enjoyment (if they last long enough!). Each bite promises an explosion of flavors; as soon as you sink your teeth into one, you’ll experience that symphony of creamy peanut butter mingling with rich milk chocolate—a moment worth savoring. Trust me when I say these little gems will bring smiles all around!
Final Touches: A Finishing Flourish
Before we conclude our delightful culinary adventure together with these Classic Homemade Reese’s, let’s talk about presentation—a crucial aspect when sharing your lovingly crafted treats with family and friends! You might consider dusting them lightly with sea salt or drizzling some additional melted chocolate over them for an elegant flair that elevates their appearance even further.
And there you have it—a recipe bursting with warmth and love that brings together simple ingredients to create something truly special. These homemade treats not only satisfy sweet cravings but also evoke cherished memories every time they’re made and enjoyed together with loved ones. I promise you—they’re more than just candy; they’re bites filled with nostalgia and joy ready to be shared around any table.
Now grab some plates and share these gems with those who matter most—you’ve earned every bit of praise you’ll receive for this delightful creation! Happy indulging!
Storage and Enjoyment Tips for Your Classic Homemade Reese’s
Now that your Classic Homemade Reese’s are ready to enjoy, I can hardly contain my excitement! These delightful treats not only satisfy your sweet tooth with their creamy peanut butter filling enveloped in rich chocolate, but they also bring a sense of joy reminiscent of childhood. Whether you’re indulging solo or sharing them with friends and family, trust me when I say you’ll want to savor every single bite. But what if you have leftovers? No worries! Let’s talk about how to preserve these little nuggets of happiness so you can enjoy them for days (or even weeks) to come.
Storing Leftover Classic Homemade Reese’s
To keep your Classic Homemade Reese’s at their best, I recommend storing them in an airtight container. This is absolutely crucial because it prevents moisture from creeping in and ruining that decadent texture we all love. A simple Tupperware or a glass container will work wonders; just make sure the lid seals tightly. When stored properly in the refrigerator, these delights can last up to two weeks—though I promise they’ll be devoured long before that! If you find yourself with a few leftover treats (a rare occurrence, I know), consider placing a slice of bread in the container alongside the candies. This clever trick helps maintain moisture levels, keeping those chocolates perfectly soft and indulgent. After a few days, while they may lose some of their fresh-from-the-kitchen charm, they still pack that irresistible flavor punch—making them an utterly satisfying treat whenever you crave something sweet. When you’re ready to enjoy them again, simply pull them out and let them sit at room temperature for a few minutes to soften slightly before diving in.
Freezing Classic Homemade Reese’s for Later
Now, if you’re looking to extend the life of your Classic Homemade Reese’s even further, freezing is an absolute game-changer! To freeze these beauties properly, simply place your candies in a single layer on a baking sheet lined with parchment paper and pop them into the freezer for about an hour until they’re solid. Once firm, transfer them to an airtight freezer bag or container—this will keep them well-protected from any frostbite. You can store them like this for up to three months! When you’re ready for a sweet treat, just take out as many as you’d like and let them thaw at room temperature for about 15-20 minutes. Trust me; this method is fantastic because it allows you to indulge in homemade goodness whenever the craving strikes without worrying about waste. The convenience factor is simply unmatched—imagine having a stash of these delightful candies waiting just for you!
Classic Homemade Reese’s

Indulge in the nostalgia of childhood with these Classic Homemade Reese’s, where creamy peanut butter meets rich chocolate in a delightful treat that’s easy to make at home. Each bite delivers a perfect balance of sweet and salty, wrapped in a smooth chocolate coating that will have you reminiscing about simpler times. Whether you’re preparing for a festive gathering or looking for a satisfying snack after a long day, this recipe is sure to impress friends and family alike. With just a handful of key ingredients and minimal effort, you can create these delightful candies that are far superior to store-bought versions. Let’s dive into this fun kitchen adventure!
- Prep Time: 20 minutes
- Cook Time: 10 minutes
- Total Time: 30 minutes
- Yield: Approximately 12 servings 1x
- Category: Dessert
- Method: No-bake
- Cuisine: American
Ingredients
- 1 cup creamy peanut butter
- 1/4 cup unsalted butter, softened
- 1 teaspoon vanilla extract
- 2 cups powdered sugar
- 2 cups milk chocolate chips
- 1 tablespoon coconut oil (optional)
Instructions
- In a mixing bowl, combine peanut butter, softened butter, and vanilla extract. Beat until smooth.
- Gradually mix in sifted powdered sugar until fully blended and firm.
- Shape the mixture into balls or press into mini muffin liners and refrigerate for 30 minutes.
- Melt the chocolate chips with coconut oil in the microwave until smooth.
- Dip each chilled peanut butter ball into the melted chocolate and place on parchment paper.
- Chill again for 20-30 minutes until set.
Nutrition
- Serving Size: 1 candy (28g)
- Calories: 140
- Sugar: 12g
- Sodium: 50mg
- Saturated Fat: 4g
- Unsaturated Fat: 3g
- Trans Fat: 0g
- Carbohydrates: 15g
- Fiber: 1g
- Protein: 3g
- Cholesterol: 5mg