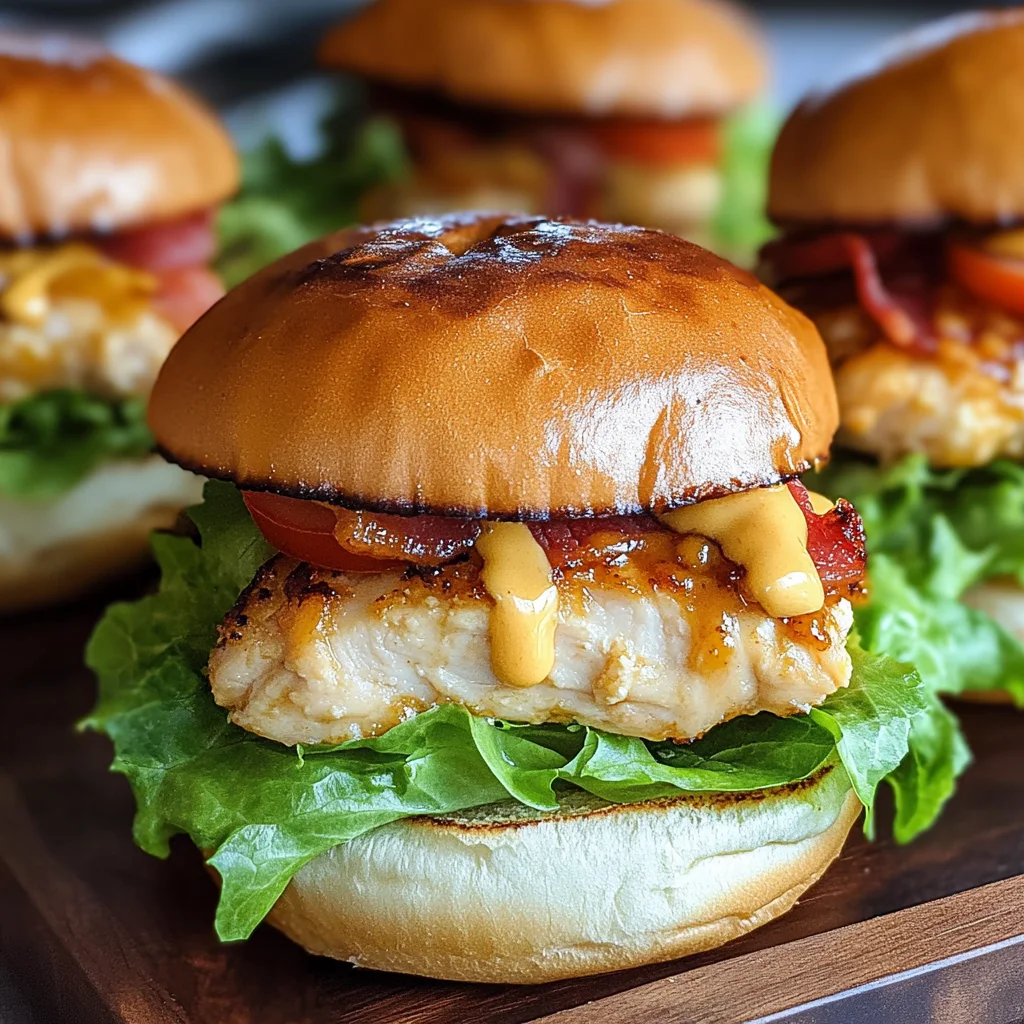
Honey Mustard BLT Chicken Sliders
It’s with a heart full of excitement and a kitchen brimming with the aroma of cooking that I share with you today one of my absolute favorite recipes: Honey Mustard BLT Chicken Sliders. You see, this recipe isn’t just about satisfying hunger; it’s a canvas on which flavors dance and memories are made. Imagine sinking your teeth into a perfectly crafted slider, where the tender, juicy chicken meets the sweetness of honey mustard, all while crispy bacon provides a delightful crunch. Each bite is not just food—it’s an experience that takes me back to gatherings filled with laughter, warmth, and an unspoken love for good food shared among friends.
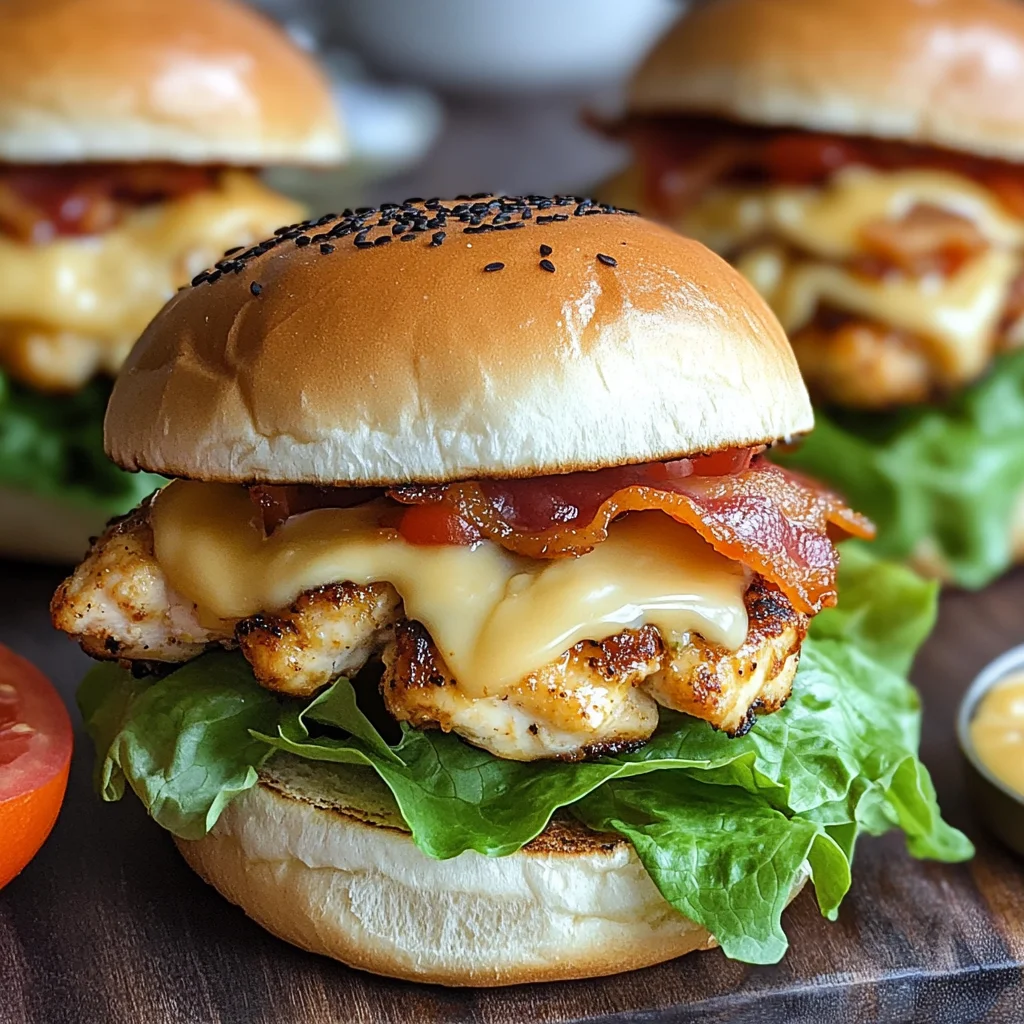
Why do these sliders hold such a special place in my heart? Well, there’s something utterly comforting about the classic BLT flavor profile combined with succulent chicken served on pillowy Hawaiian rolls. This twist transforms traditional elements into something truly extraordinary. It’s like taking a warm hug from your grandma and wrapping it up in deliciousness. Whether you’re celebrating a festive occasion or simply enjoying a cozy weeknight dinner, these Honey Mustard BLT Chicken Sliders are guaranteed to bring joy to your table and smiles to those you share them with.
Honey Mustard BLT Chicken Sliders: A Bite-Sized Explosion of Flavor
Let’s embark on this culinary journey together! The moment you lay out your ingredients is when the magic begins. The blend of textures and flavors will make these sliders an instant favorite at any gathering. So roll up your sleeves, gather your loved ones around (or enjoy some solo kitchen therapy), and let’s create something special!
Ingredients:
As we dive into the ingredient list, think of each item as a vital player in our culinary symphony. Every ingredient has its role to play and contributes uniquely to the overall masterpiece that is our Honey Mustard BLT Chicken Sliders.
- 2 lbs. boneless chicken tenders. Choosing quality chicken is absolutely paramount for the juiciest result. I love using tenders for this recipe because they cook quickly and stay incredibly moist—perfect for sliders! If you can’t find tenders, feel free to use boneless chicken breasts or thighs; just ensure they’re cut into manageable pieces for even cooking.
- 1 pack Hawaiian slider buns or dinner rolls. These little gems are known for their slightly sweet flavor and soft texture, making them a perfect vessel for our flavorful filling. Hawaiian rolls also add an extra touch of delight that complements the savory notes from our chicken and bacon beautifully.
- Mayonnaise, to taste. This creamy addition isn’t just about moisture; it acts as a base layer that enhances every other flavor while providing richness to each bite. You can adjust the amount based on how creamy you want your sliders—don’t be shy here!
- Sweet Baby Ray’s Golden Mustard (or any honey mustard). The tangy sweetness from honey mustard is what makes this dish sing! It offers that perfect balance between sweet and savory that elevates our sliders from ordinary to extraordinary. If you can’t find Golden Mustard, any quality honey mustard will do just fine.
- 8 strips crispy bacon. Ahh, bacon—the beloved element that brings crunch and smokiness! When cooked until crisp, it creates a beautiful contrast against the tender chicken and soft buns. If you’re looking for alternatives, turkey bacon can be used as well; just make sure it’s cooked until crispy.
- Colby Jack cheese slices (enough for all sandwiches). Creamy Colby Jack melts beautifully over warm chicken, adding depth and flavor complexity to each bite. You could easily swap it out for cheddar or Monterey Jack if you prefer something sharper or more mild.
- 1/2 head lettuce (shredded). Adding fresh lettuce not only provides a delightful crunch but also balances the richness of the other ingredients. Opt for iceberg or romaine—it adds freshness without overpowering the flavors.
- 1/2 small red onion (thinly sliced). The crispness of red onion offers both texture and a pop of color to our sliders while imparting a mild sharpness that complements everything beautifully.
- 2 Roma tomatoes (thinly sliced). Sweet tomatoes bring brightness and acidity that cuts through richer flavors—trust me when I say they elevate this dish to new heights!
- 4-5 tablespoons oil (for marinade/cooking chicken). A high-quality oil helps in marinating the chicken while ensuring it gets that lovely golden crust when cooked. Olive oil is my go-to here; its flavor adds an extra layer of deliciousness.
- My Blackened Seasoning: This magical blend is what makes our sliders truly stand out! It consists of:
- 2 tablespoons smoked paprika (or regular) – contributes deep color and earthy flavor.
- 1 tablespoon cayenne pepper – adds heat; adjust according to your spice tolerance.
- 1 tablespoon onion powder – enhances sweetness without overpowering.
- 2 teaspoons garlic powder – brings aromatic warmth.
- 1 teaspoon ground black pepper & salt – essential seasonings!
- 1/2 teaspoon dried thyme & oregano – these herbs provide depth and fragrance!
- For Butter Topping:
- 1/2 stick softened butter – this is crucial for creating our golden topping; softened butter spreads easily onto buns without tearing them.
- 1 tablespoon fresh parsley (chopped) – adds freshness beside buttery richness.
- 2 cloves garlic (minced) – garlic transforms ordinary butter into something utterly intoxicating!
Having gathered all these wonderful ingredients, it’s time to get cooking!
Equipment You’ll Need:
Now let’s talk about tools—you’ll need some trusty partners along this culinary adventure! Having the right equipment not only streamlines the process but also ensures that every step goes off without a hitch.
- Large zip-top bag or bowl: For marinating your chicken tenders effectively, this is where we’ll mix everything together so they soak up all those delightful spices before cooking!
- Oiled skillet or grill: Depending on how you choose to cook your chicken—both options yield scrumptious results! An oiled skillet allows for easy flipping while retaining moisture; grilling provides that irresistible charred flavor everyone loves.
- Baking sheet: Essential for holding those buns as they toast under the broiler! A sturdy baking sheet evenly distributes heat ensuring perfect browning while keeping things tidy in your workspace.
- Serrated knife: This tool will help slice through those slider buns effortlessly without squishing them too much—a gentle hand here goes a long way!
Now that we have our ingredients ready and tools at hand, let’s dive into preparing these glorious Honey Mustard BLT Chicken Sliders!
Step 1: Marinating Magic
Begin by placing those succulent chicken tenders into either a large zip-top bag or mixing bowl—this step isn’t just about tossing ingredients together; it’s where flavors begin their transformation! Add several tablespoons of your homemade blackened seasoning alongside just enough oil to coat each piece thoroughly (think shiny but not swimming!). Give everything a good shake or stir until every tender is enveloped in fragrant seasoning—it’s like wrapping each piece in love before cooking! Allow them to marinate while you prep other components; even just fifteen minutes can significantly enhance their flavor.
Step 2: Sizzling Perfection
Next up is cooking our marinated tenders—this process can happen two ways depending on what suits your style best! If using an oiled skillet over medium-high heat, cook each tender about three minutes per side until they’re golden brown but still juicy inside—resist flipping too often as patience here pays off with nicely seared surfaces! Alternatively, if opting for grilling instead? Simply preheat your grill before placing those beauties down gently allowing them space between each piece so they don’t overcrowd—they’ll need about three minutes per side again flipping just once until perfectly done!
Step 3: Creating Irresistible Butter Topping
As your chicken cooks away creating mouthwatering aromas throughout your kitchen—it’s time we whip up our butter topping which adds such lushness later on! In a small bowl combine softened butter with chopped parsley and minced garlic before giving everything gentle stir until well mixed—we want harmony here folks! To infuse flavors further quickly microwave it all together for thirty seconds just enough time for melting without bubbling over—stir once more ensuring everything melds beautifully together!
Step 4: Toasting Buns to Perfection
Once you’ve finished cooking those glorious tenders—and believe me when I say resisting snacking during this step is tough—you’ll want prepare those heavenly Hawaiian slider buns next! If necessary slice them horizontally using serrated knife taking care not squish down too hard—you want fluffy interiors intact as they’ll hold onto fillings later so treat them gently! Place cut side up onto baking sheet then toast under broiler until golden brown—a few minutes should do here—but keep close eye since broilers work fast! Once toasted flip tops facing upward adjacent bottom halves awaiting delicious assembly ahead!
With those initial steps completed successfully—you’re already halfway towards slider bliss my friend! Let’s dive deeper into assembling these delightful morsels next…
Step 5: Toasting the Perfect Slider Buns
Now that your chicken is sizzling away and filling your kitchen with its tantalizing aroma, it’s time to turn our attention to the buns. You’ll want to get those slider buns nice and toasty, as this will add a delightful crunch to each bite and help hold all the delicious fillings without getting soggy. If you have a serrated knife handy, carefully slice the sliders horizontally. Make sure to do this gently so you don’t squish them—nobody wants a sad, flattened bun. Once they’re sliced, place them cut side up on a baking sheet.
The real magic happens when you slide that tray under the broiler for just a few minutes. Keep a watchful eye—it only takes a moment for those buns to transform from soft to beautifully golden brown! You’ll know they’re ready when they have a lovely toasted color and give off that irresistible scent of warm bread. This step is crucial because a perfectly toasted bun not only enhances texture but also creates that satisfying contrast with the juicy chicken and creamy toppings. Don’t rush this step; your patience will be rewarded with sliders that have both flavor and structural integrity!
Step 6: Assembling Your Flavor Masterpiece
With your chicken cooked to perfection and your buns toasted just right, it’s time for the fun part—assembly! Start by taking those bottom buns and generously squeezing some mayonnaise onto each one. You might wonder why mayo? Well, it acts as a flavor enhancer, adding creaminess that perfectly balances the tangy honey mustard and savory chicken. Spread it out evenly; this ensures every bite contains that delightful richness.
Next, take your tender pieces of chicken and scatter them across the bottom buns like you’re creating a masterpiece—don’t be shy! Each slider should get at least one piece of chicken so everyone can experience that juicy goodness in every single bite. Don’t forget about the golden honey mustard; a dollop on top of the chicken will elevate the flavor profile further by introducing sweetness with just enough tang to keep things exciting. Finally, lay down slices of colby jack cheese over everything; this melty layer will bind all these wonderful ingredients together into one cohesive dish. Trust me on this—it’s going to be utterly intoxicating!
Step 7: The Butter Mixture Magic
While you’re in full assembly mode, let’s elevate our sliders even more with that luscious butter mixture we prepared earlier! It’s time to spread it across the tops of those delicious buns like a warm hug before they go back into the oven. This butter topping is not just for flavor; it brings an added richness that complements everything else beautifully while helping to achieve that perfect golden-brown finish during baking.
Once you’ve spread it lovingly over each top bun, return your baking sheet back under the broiler for another minute or two. Keep an eye on them because this is where things can go from perfect to burnt in no time flat! You want those tops lightly toasted while allowing the cheese beneath to melt gloriously into gooey perfection. The combination of heat from below and moisture from the melted cheese will create an enchanting aroma wafting through your kitchen—a sign that you’re oh-so-close to slider heaven!
Step 8: Finishing Touches: Layering Freshness
As if we weren’t already tantalized enough, now comes the time for fresh toppings! After removing your sliders from under the broiler (and trying not to devour them right then!), it’s essential to add layers of freshness for balance and crunch—this is where those vibrant veggies come into play! Start with crispy bacon—yes! That salty crunch adds an addictive texture contrast against everything else, making each bite feel like a celebration.
Next up are those bright slices of Roma tomatoes and thinly sliced red onion; their juiciness will infuse every slider with an extra layer of flavor while providing stunning color contrast. Don’t skimp on adding crisp lettuce either; its refreshing crunch rounds out this flavor symphony perfectly! Just before placing those top buns back on, drizzle another touch of honey mustard over everything—because why not? This final flourish brings all those gorgeous flavors together in harmony, creating what I promise you will be an unforgettable experience for everyone lucky enough to enjoy these Honey Mustard BLT Chicken Sliders.
Final Touches: Slice & Serve
Now comes perhaps my favorite part—the moment we finally get to serve these beauties! With great anticipation, take a sharp knife (a serrated one works best) and slice through your assembled sliders gently but confidently so they remain intact yet easy to pull apart later. Arrange them on a beautiful platter or serving dish as if presenting fine art; after all, cooking is just as much about aesthetics as it is about taste!
Finally, don’t forget to gather around friends or family when serving these glorious sliders—because food is meant to be shared! As you watch everyone take their first bites filled with joy and satisfaction etched across their faces, you’ll know you’ve created something truly extraordinary together. Whether it’s game day or just an average Tuesday night dinner turning special thanks to these Honey Mustard BLT Chicken Sliders, I promise you they’ll quickly become a cherished favorite in your home—just like they are in mine! Enjoy every flavorful moment!
Storage and Enjoyment Tips for Your Honey Mustard BLT Chicken Sliders
Now that your delightful Honey Mustard BLT Chicken Sliders are fresh from the oven, it’s time to dig in and savor every luscious bite! The aroma wafting through your kitchen is simply intoxicating, and I promise you, they will vanish from the platter faster than you can say “delicious!” But if by some miracle you find yourself with leftovers (which I highly doubt!), don’t worry—I’ve got you covered on how to keep them fresh and tasty for those moments when you crave a little more of that comfort food magic.
Storing Leftover Honey Mustard BLT Chicken Sliders
To preserve the mouthwatering goodness of your sliders, make sure to store them in an airtight container. This is absolutely crucial; it locks in moisture and keeps the flavors vibrant. Ideally, place them in the fridge where they can stay fresh for up to three days. If you want to maintain that soft bun texture, consider placing a paper towel at the bottom of the container before adding your sliders. This little trick absorbs excess moisture that could make the bread soggy while allowing it to breathe. When reheating, I recommend using an oven or toaster oven rather than a microwave—this way, you’ll revive that crispy element of the buns and melt the cheese back into its gooey perfection without losing any of the sliders’ charm. Trust me on this: a few minutes in the oven will transport you right back to that first glorious bite!
Freezing Components for Later
If you’re looking to enjoy these Honey Mustard BLT Chicken Sliders at a later date—and trust me, you’ll want to—freezing is a brilliant option! You can freeze the chicken tenders separately after cooking them; just make sure they cool completely before wrapping them tightly in plastic wrap or aluminum foil. Place them in a freezer bag, removing as much air as possible before sealing. This method helps prevent freezer burn and keeps your chicken tender and juicy when you’re ready to indulge again. They’ll keep well frozen for up to three months! When you’re ready for another slider feast, simply thaw in the refrigerator overnight, then reheat as mentioned above. Having these delicious bites at your fingertips is a lifesaver on busy weeknights or impromptu gatherings, making meal prep feel like a breeze!
Honey Mustard BLT Chicken Sliders

Experience the joy of cooking with these Honey Mustard BLT Chicken Sliders, a delightful twist on a classic favorite. Bursting with flavor, these bite-sized sandwiches feature tender, juicy chicken marinated in a savory blackened seasoning, complemented by the sweet tang of honey mustard. Each slider is nestled between soft Hawaiian rolls and topped with crispy turkey bacon (or your preferred alternative), fresh veggies, and melted cheese for an unforgettable taste adventure. Perfect for gatherings or cozy weeknight dinners, this recipe will surely be a hit with family and friends alike.
- Prep Time: 20 minutes
- Cook Time: 15 minutes
- Total Time: 35 minutes
- Yield: Serves approximately 8 sliders 1x
- Category: Dinner
- Method: Baking/Frying
- Cuisine: American
Ingredients
- 2 lbs boneless chicken tenders
- 1 pack Hawaiian slider buns
- Mayonnaise (to taste)
- Honey mustard sauce
- 8 strips crispy turkey bacon (or alternative)
- Colby Jack cheese slices
- 1/2 head lettuce (shredded)
- 1/2 small red onion (thinly sliced)
- 2 Roma tomatoes (thinly sliced)
- Oil (for marinating/cooking chicken)
Instructions
- Marinate the chicken tenders in oil and blackened seasoning for at least 15 minutes.
- Cook the chicken in an oiled skillet over medium-high heat for about three minutes per side until golden brown.
- While the chicken cooks, toast the sliced Hawaiian slider buns under the broiler until golden.
- Spread mayonnaise on the bottom buns, layer with cooked chicken, drizzle honey mustard, add cheese, and top with crispy turkey bacon and fresh veggies.
- Spread garlic butter on top buns and broil briefly until toasted again.
Nutrition
- Serving Size: 1 slider (75g)
- Calories: 250
- Sugar: 4g
- Sodium: 600mg
- Fat: 12g
- Saturated Fat: 5g
- Unsaturated Fat: 4g
- Trans Fat: 0g
- Carbohydrates: 25g
- Fiber: 2g
- Protein: 16g
- Cholesterol: 60mg