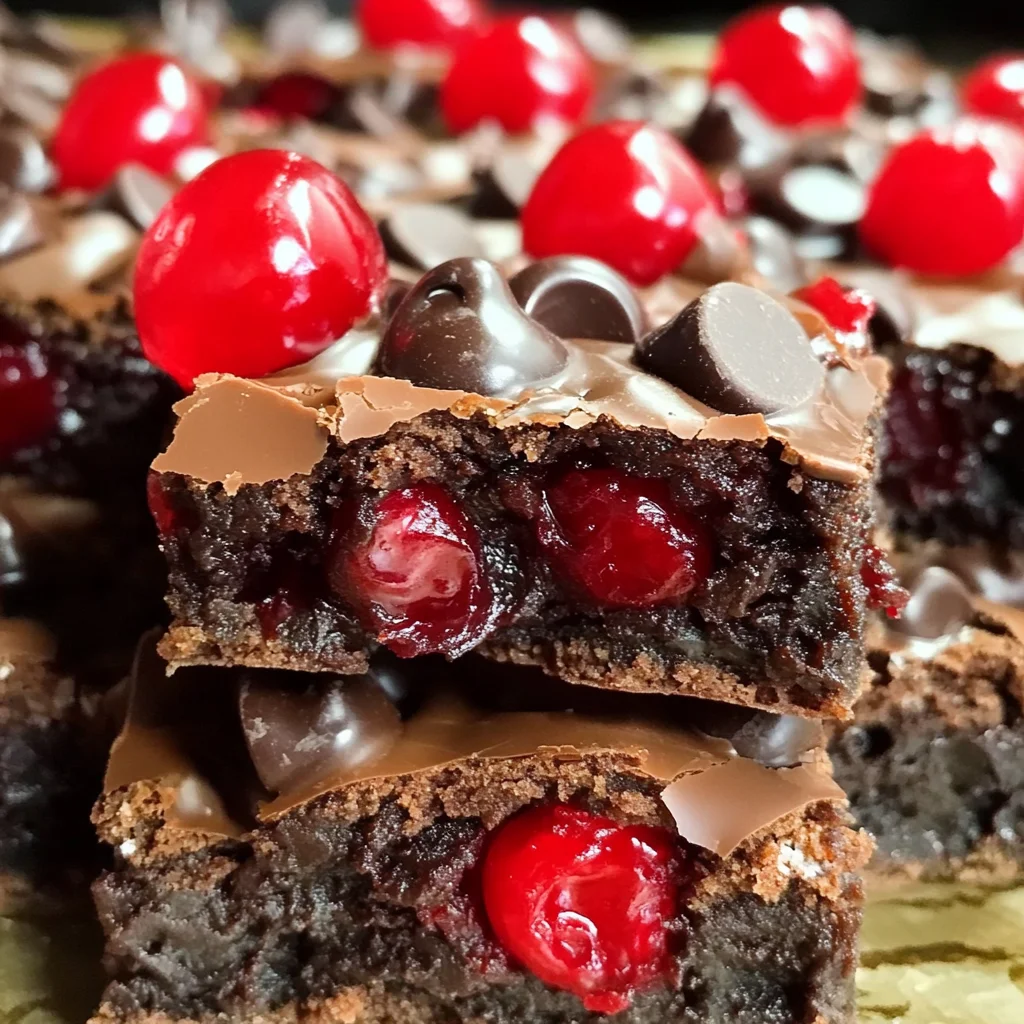
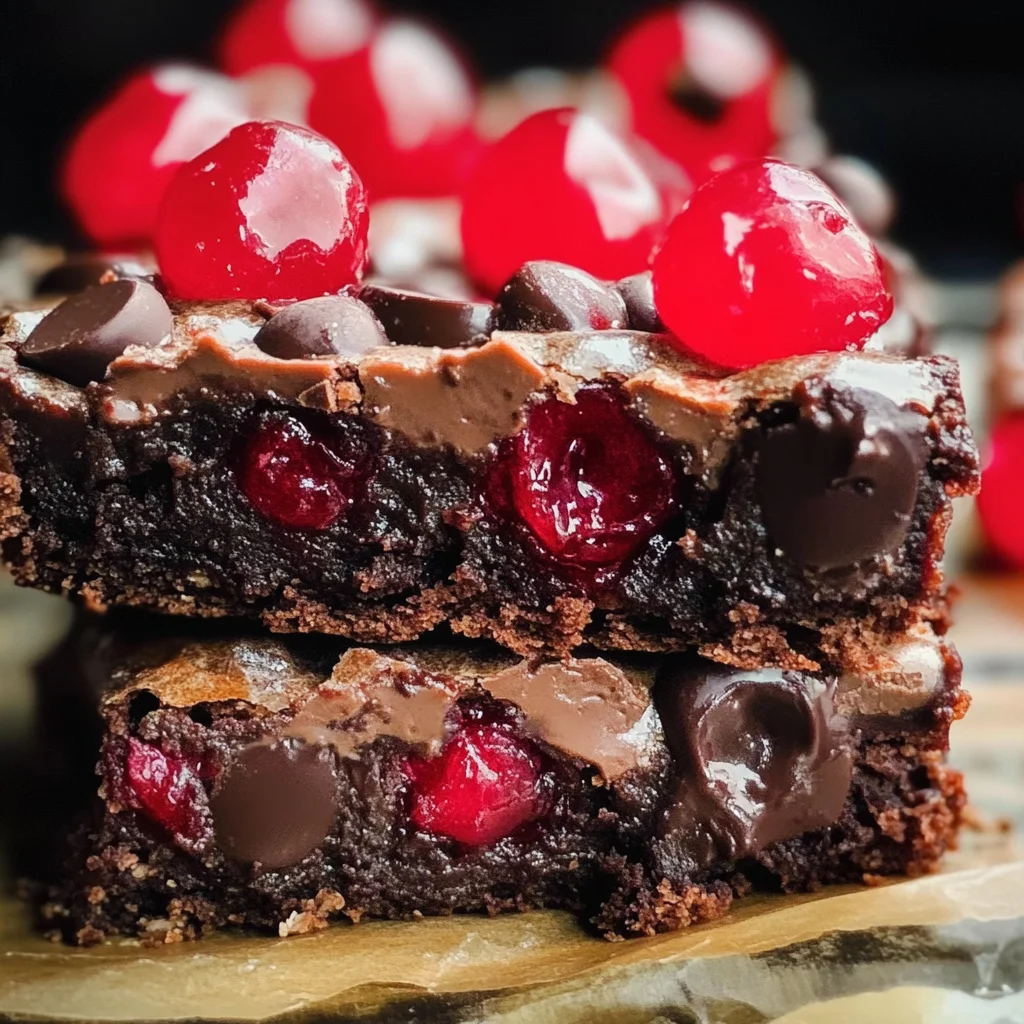
Chocolate Covered Cherry Magic Bars
There’s something truly magical about desserts that remind us of childhood, isn’t there? The sweet, nostalgic aroma wafting through the air can transport us back to simpler times filled with laughter and love. When it comes to indulgent treats, Chocolate Covered Cherry Magic Bars stand out as a beacon of delight. These bars are more than just a dessert; they’re an experience wrapped in layers of rich chocolate, gooey goodness, and the vibrant burst of cherries that dance across your palate. Just imagine biting into a soft brownie base topped with juicy cherries and a cascade of melted chocolate; it’s an utterly intoxicating combination that elicits joy with every bite. I promise you, these bars will become a cherished favorite in your home and heart.
As we embark on this culinary journey together, I want to share not just the recipe but also the passion behind it. Magic bars have captured hearts for generations; they embody a blend of tradition and creativity that makes them deeply loved in many households. The way this recipe infuses the classic magic bar concept with the flavors of cherry and chocolate is simply extraordinary. It’s perfect for celebrations, cozy gatherings, or even those quiet moments when you need a little pick-me-up after a long day. So grab your apron, preheat your oven, and let’s create something that not only satisfies your sweet tooth but also warms your soul.
Chocolate Covered Cherry Magic Bars: A Decadent Delight to Savor
These Chocolate Covered Cherry Magic Bars are an exquisite fusion of flavors and textures that come together beautifully. With their brownie-like base and luscious toppings, they are sure to be the star of any dessert table! Each layer adds its own charm—rich cocoa, sweet cherries, and creamy chocolate meld into one harmonious treat that’s both satisfying and indulgent.
Ingredients:
As we gather our ingredients for this delightful creation, let’s take a moment to appreciate each component’s unique role in crafting these magic bars. Each ingredient contributes not only flavor but also texture, making every bite an experience worth savoring.
- 1 cup all-purpose flour (scooped and leveled). This humble ingredient is the backbone of our magic bars. Flour provides structure while ensuring that our bars don’t crumble upon cutting. It’s essential to scoop it gently into your measuring cup without packing it down; leveling off with a knife gives us precisely what we need for balance in texture.
- 1 cup sugar. Ah, sugar—the sweet enchantment that binds everything together! Sugar brings sweetness but also moisture and tenderness to our bars. The texture is crucial here; granulated sugar dissolves beautifully into the batter as it bakes, creating that perfect melt-in-your-mouth experience we’re after.
- 1/4 tsp salt. While salt might seem like an insignificant addition in desserts, it’s absolutely paramount! It enhances flavors beautifully and balances the sweetness of our magic bars—bringing out the richness of chocolate while preventing them from tasting flat.
- 1/4 tsp baking powder. This little leavening agent is crucial for giving our bars some lift! Baking powder reacts during baking to create tiny air bubbles within the mixture, resulting in a lighter texture instead of a dense brownie-like finish.
- 1/2 cup unsweetened cocoa powder. Cocoa powder is where the magic begins! It infuses depth and richness into our bars, providing that deep chocolate flavor we crave. Look for high-quality cocoa—it’ll make all the difference in creating a luxuriously chocolaty experience.
- 1 stick butter (8 TBSPS). Butter is liquid gold in baking! It brings richness and moisture while contributing to the soft texture we’re aiming for in our Chocolate Covered Cherry Magic Bars. Ensure it’s softened to room temperature so it blends smoothly into the batter—this step is crucial for achieving that perfect consistency.
- 1/4 cup chocolate chips. These little morsels add bursts of melted chocolate throughout our bars! They create pockets of decadence that contrast beautifully with the cherry topping—a truly delightful surprise with each bite!
- 1 tsp vanilla. A splash of vanilla extract elevates everything! It adds warmth and depth while rounding out the flavor profile perfectly—think of it as the hug all your ingredients need!
- 2 eggs. Eggs serve as binding agents here—helping hold everything together while contributing moisture to keep our magic bars soft and chewy in texture!
- 10 oz jar maraschino cherries (drained and cut in half). These vibrant gems are what set this recipe apart! Their sweet-tart flavor complements rich chocolate brilliantly while adding a pop of color that makes these bars stunningly beautiful—perfect for impressing guests at any gathering!
- 1 cup semi-sweet chocolate chips. More chocolate? Yes, please! These chips melt beautifully over our cherry topping once baked—creating an irresistible layer that makes each bar even more decadent!
- 3/4 cup sweetened condensed milk (not evaporated milk). This creamy goodness binds everything together while adding luscious sweetness—a non-negotiable element if we want those magic layers to shine!
Equipment You’ll Need:
Before diving into this magical baking adventure, let’s ensure we have all our trusty tools ready at hand—it makes all the difference when creating something wonderful! Having the right equipment not only streamlines the process but also allows you to focus on enjoying every moment spent in your kitchen.
- 9 by 13 inch baking dish – This size is perfect for achieving those ideal thicknesses without compromising on texture or flavor distribution within each bar! You could use glass or metal—both work well—but remember to grease it generously so nothing sticks!
- Mixing bowls – A set of mixing bowls will be your best friend here! Use a large bowl for combining dry ingredients separately from another bowl where you’ll mix wet ones before combining both mixtures later on—which helps ensure even distribution throughout!
- Measuring cups & spoons – Precise measurements are key when baking—you wouldn’t want too much flour or sugar ruining your masterpiece now would you? Invest in dry measuring cups (for flour/sugar) as well as liquid measuring cups (for things like melted butter).
- Rubber spatula or wooden spoon – For mixing up batters thoroughly without leaving lumps behind—a rubber spatula is particularly handy since its flexible edge gets into all those nooks & crannies at corners efficiently!
Now that we have gathered all necessary components—from ingredients down through equipment—we’re ready to transform simple pantry staples into something utterly enchanting: Chocolate Covered Cherry Magic Bars await ahead!
Preparing the Chocolate Covered Cherry Magic Bars
Step 1: Prepping Our Oven & Baking Dish
Let’s kick things off by preheating your oven to 350 degrees Fahrenheit—it sets up an ideal environment for baking perfection! While it’s warming up, grab your trusty 9 by 13 inch baking dish; spray it liberally with cooking spray (or line with parchment paper) so nothing sticks—this ensures easy removal once cooled down later on! Don’t rush this step; taking time now means less frustration later when you’re trying to slice those beautiful magic bars without tearing them apart!
Step 2: Mixing Dry Ingredients
In a large mixing bowl reminiscent of childhood memories filled with laughter around family bake-offs—combine 1 cup all-purpose flour, 1 cup sugar (sweet joy!), 1/4 teaspoon salt, 1/4 teaspoon baking powder, along with 1/2 cup unsweetened cocoa powder using either whisk or spatula until blended evenly together—the goal here being no lumps remain visible! This process creates even distribution among ingredients which ultimately affects overall taste as well as consistency during baking—trust me on this detail; skipping proper mixing can result in uneven flavors later on.
Step 3: Melting Butter & Chocolate Chips
Now comes one of my favorite parts: melting together 1 stick butter alongside 1/4 cup chocolate chips—we’re talking serious indulgence here folks! To achieve this velvety mixture without burning anything (which would ruin flavor), microwave both components together at intervals lasting roughly thirty seconds each time whilst stirring between sessions until fully smooth—that liquid gold will then seamlessly blend into batter afterwards providing richness beyond compare!
Step 4: Creating The Brownie Base
Once melted concoction cools slightly—it’s time to bring eggs plus vanilla extract into play by whisking them gently before incorporating them directly within dry mixture prepared earlier on top—all blending should happen gradually until fully combined yielding thick brownie-like batter before pressing it evenly onto bottom surface area inside greased dish(s) previously prepared ahead—the technique known as “pressing” ensures compactness necessary so every piece retains shape post-baking ensuring happiness abounds every time someone bites into these dreamy treats!
Stay tuned as we continue crafting these spectacular Chocolate Covered Cherry Magic Bars together—I assure you there’s much more deliciousness ahead waiting patiently inside those tantalizing layers just waiting for us!!
Step 5: Layering the Decadence
Now that we’ve pressed that luscious brownie base into our baking dish, it’s time to elevate our creation to new heights of indulgence. Carefully take your drained maraschino cherries and cut them in half if you haven’t done so already. The beauty of these cherries lies not just in their vibrant color that adds a pop of joy to your dessert, but also in their sweet, tangy flavor that perfectly complements the rich chocolate. Begin by evenly distributing the cherry halves over the brownie layer; don’t rush this step! Each slice will be a delightful surprise when someone bites into a juicy cherry nestled within a rich chocolate base.
Once you’ve adorned your brownie base with cherries, it’s time to sprinkle a generous layer of semi-sweet chocolate chips on top. This is crucial because these little morsels melt beautifully during baking, creating pools of liquid gold that will meld with the cherries and brownie beneath. Finally, pour the sweetened condensed milk over the entire surface. I know it sounds simple, but trust me—this is where the magic truly happens! The condensed milk acts as a binding agent while introducing an incredibly creamy texture that ensures every bite is profoundly satisfying. You want to see it evenly coat everything; this is what transforms your bars into something truly extraordinary.
Step 6: Baking to Perfection
With all those layers assembled, it’s time to slide your creation into the preheated oven set at 350 degrees Fahrenheit. Bake for 28 to 30 minutes, but keep an eye on those edges—they should turn a beautiful golden brown as they bake, creating a delightful contrast against the deep chocolate center. Why is this step so important? Well, achieving that perfect balance between chewy and fudgy is paramount for the ultimate dessert experience! If you take them out too early, you might end up with bars that are too soft and won’t hold their shape when cut. On the flip side, leaving them in too long can lead to dry and crumbly squares—a fate we absolutely want to avoid.
As they bake, your kitchen will fill with an utterly intoxicating aroma—a warm hug of chocolate and cherries that will have everyone eagerly anticipating dessert. But here’s where patience comes into play: once they’re done baking, resist the urge to dive right in! Allowing them to cool completely and then resting them overnight is non-negotiable for achieving optimal texture and flavor melding. Trust me on this; the flavors deepen remarkably as they rest together.
Step 7: The Cooling Phase—A Lesson in Patience
After your bars have baked beautifully and filled your home with that nostalgic scent of sweetness, it’s time for them to cool down before we slice them up into heavenly pieces. This process may seem tedious—waiting overnight—but I promise you it’s worth every moment! Once out of the oven, let them cool in the pan on a wire rack for about an hour at room temperature before transferring them to the refrigerator. Chilling not only solidifies all those layers but also makes cutting easier later on since everything firms up nicely.
Why chill? Well, as those Chocolate Covered Cherry Magic Bars rest in the fridge, they undergo a transformative effect—the flavors meld together harmoniously while giving you that perfectly chewy bite when you finally do indulge. Additionally, if you attempt to cut them while they’re still warm, you’ll likely end up with a messy chocolate-cherry situation instead of neat squares—nobody wants that! So be kind to yourself and let nature take its course; good things come to those who wait.
Step 8: Slicing & Serving Your Magical Treats
Finally, after what might feel like an eternity (but is truly just one night), it’s time for my favorite part—slicing into those gorgeous bars! Gently lift them out of the baking dish using parchment paper if you’ve lined it (which I highly recommend). Using a sharp knife warmed under hot water helps create clean cuts without pulling apart or tearing through those luscious layers inside. Picture yourself slicing through that shiny top layer of melted chocolate chips revealing glistening cherries peeking from below; it’s pure bliss!
Take care when portioning these delights because each bar packs quite a punch in terms of flavor and richness—about two inches by two inches is usually plenty! Serve them as-is or maybe add a light dusting of powdered sugar on top for added elegance—it feels special without much extra effort at all! And if you’re feeling extra generous (which I know you are), pair these magical bars with a scoop of your favorite vanilla non-dairy ice cream for a decadent dessert experience that’s simply unforgettable.
Conclusion:
As we wrap up this delightful journey through creating Chocolate Covered Cherry Magic Bars, I hope your excitement mirrors my own! There’s something profoundly satisfying about pulling these beauties from the oven—the glossy sheen of melted chocolate intermingled with vibrant cherry halves creates not just a visual feast but also an experience that lingers on your palate long after the last bite. The harmonious blend of textures—from fudgy brownie base to creamy condensed milk—makes this dessert anything but ordinary; it’s truly extraordinary!
You simply must try making these magic bars; not only are they easy to whip up, but they also bring such joy during gatherings or even quiet afternoons at home. Imagine slicing into that dense brownie crust, revealing layers of cherries and chocolate chips that beckon you closer with each enticing whiff. Whether it’s a birthday party, holiday celebration, or just because it’s Tuesday—these bars shine bright as a centerpiece for any occasion. They invite laughter and connection as people gather around the table to share stories and savor these treats together.
For an afternoon pick-me-up, imagine savoring one alongside a steaming cup of coffee or tea; the richness pairs beautifully with both beverages! Alternatively, if you’re feeling adventurous, why not indulge in one with a scoop of vanilla ice cream melting atop? The contrast between warm chocolatey bites and cold creaminess creates an utterly intoxicating experience that will elevate your dessert game to new heights!
Feeling adventurous? This recipe is wonderfully adaptable! You could swap out maraschino cherries for dried cranberries or add nuts for extra crunch—it opens up so many possibilities while still delivering on that decadent flavor profile we all adore. So why not give it a whirl? Try it out, let those creative juices flow, and then share your experiences with me—I’d love to hear how you made this recipe uniquely yours!
Chocolate Covered Cherry Magic Bars
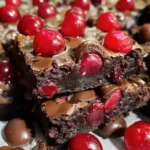
Indulge in the delightful nostalgia of Chocolate Covered Cherry Magic Bars. These irresistible treats bring together a fudgy brownie base topped with juicy cherries and a rich layer of melted chocolate. Perfect for sharing at gatherings or enjoying as a sweet pick-me-up, each bite offers a harmonious blend of flavors that will transport you back to joyful childhood memories. Easy to make, these magic bars are ideal for any occasion, from festive celebrations to cozy family nights. Dive into this enchanting dessert and experience the joy of creating something truly special.
- Prep Time: 20 minutes
- Cook Time: 30 minutes
- Total Time: 50 minutes
- Yield: Serves approximately 16 bars 1x
- Category: Dessert
- Method: Baking
- Cuisine: American
Ingredients
- 1 cup all-purpose flour
- 1 cup granulated sugar
- 1/4 teaspoon salt
- 1/4 teaspoon baking powder
- 1/2 cup unsweetened cocoa powder
- 1 stick (8 tablespoons) softened butter
- 1/4 cup chocolate chips
- 1 teaspoon vanilla extract
- 2 eggs
- 10 oz jar maraschino cherries (drained and halved)
- 1 cup semi-sweet chocolate chips
- 3/4 cup sweetened condensed milk
Instructions
- Preheat your oven to 350°F (175°C) and prepare a greased 9×13 inch baking dish.
- In a large bowl, mix together flour, sugar, salt, baking powder, and cocoa powder until well combined.
- Melt butter and chocolate chips in the microwave; stir until smooth. Let cool slightly.
- Whisk eggs and vanilla into the cooled butter mixture, then combine with dry ingredients until just mixed.
- Press the batter evenly into the prepared baking dish for the brownie base.
- Distribute cherry halves over the brownie layer followed by a sprinkle of semi-sweet chocolate chips.
- Pour sweetened condensed milk evenly over the top and bake for 28–30 minutes until edges are golden brown.
- Allow to cool completely before slicing into squares.
Nutrition
- Serving Size: 1 bar (50g)
- Calories: 210
- Sugar: 16g
- Sodium: 70mg
- Fat: 9g
- Saturated Fat: 5g
- Unsaturated Fat: 3g
- Trans Fat: 0g
- Carbohydrates: 32g
- Fiber: 1g
- Protein: 3g
- Cholesterol: 25mg