Zucchini Brownies
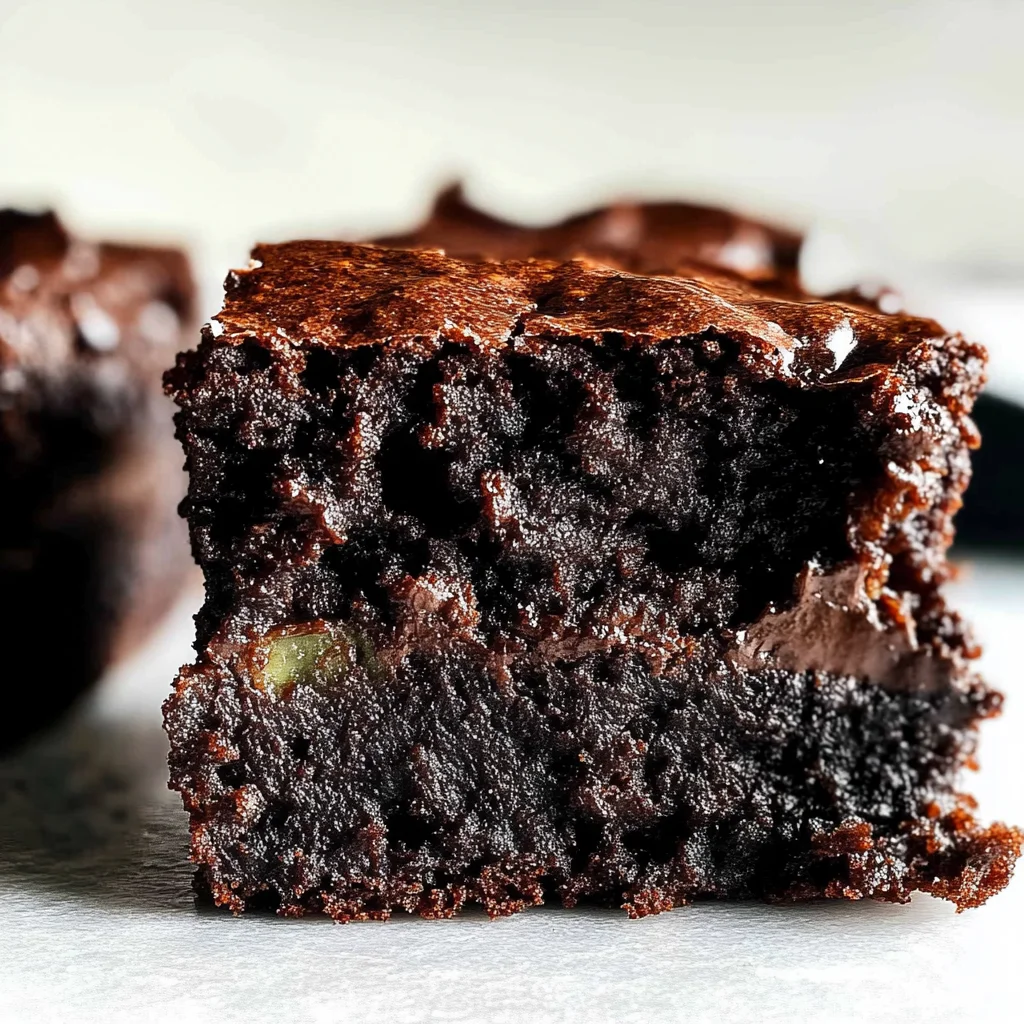
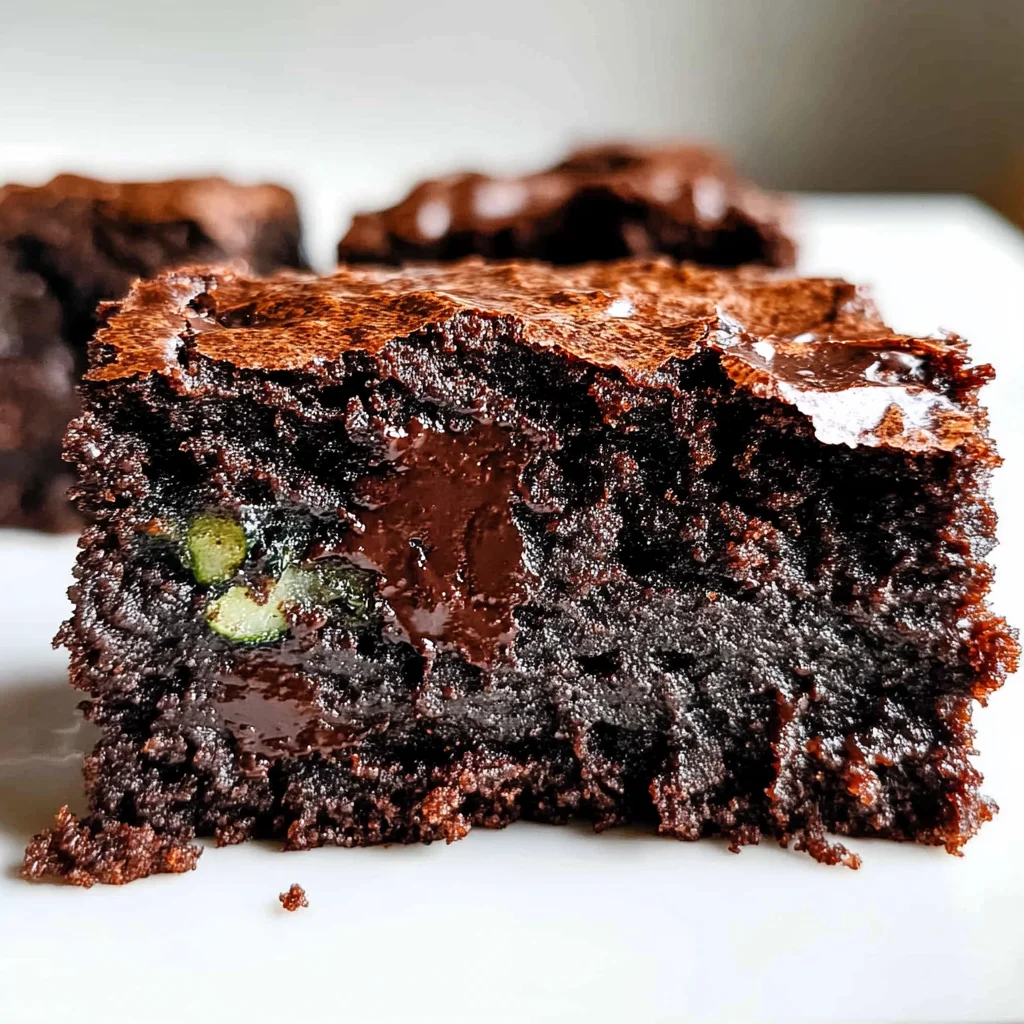
There’s something profoundly magical about discovering a recipe that transforms a humble vegetable into a decadent treat, and let me tell you, these Zucchini Brownies are just that! Imagine biting into a rich, chocolaty brownie that’s not only indulgent but also has the secret power of hidden veggies. The addition of zucchini creates an astonishingly moist texture that will leave your taste buds singing in delight. This isn’t just cooking; it’s an experience that bridges the comforting nostalgia of childhood baking with the innovative spirit of modern cuisine. The moment you take your first bite, you’ll be enveloped in a symphony of rich chocolate flavor, with just a hint of sweetness from the zucchini that makes each mouthful utterly intoxicating.
I’ve always been captivated by recipes that surprise and delight, and these brownies are the perfect example. They’re not only easy to whip up but also an incredible conversation starter at gatherings or family dinners. Picture this: your friends eagerly gathering around as they catch wind of the luscious aroma wafting through your kitchen, eyes widening as you reveal the secret ingredient tucked away in those fudgy squares! It’s moments like these that remind me why I fell in love with baking in the first place. Plus, who wouldn’t want to sneak some veggies into their dessert? These Zucchini Brownies are absolutely perfect for any occasion—be it a cozy family dinner, a potluck with friends, or simply when you’re craving something sweet yet wholesome.
Zucchini Brownies: A Chocolate Lover’s Dream
Let me guide you through this delightful journey of creating Zucchini Brownies that will not only satisfy your sweet tooth but also nourish your body. As we dive into this recipe together, remember that the magic lies in the details—each ingredient plays its part in crafting something truly extraordinary.
Ingredients:
As we embark on this culinary adventure, let’s take a moment to appreciate each ingredient and its role in creating these delicious brownies. Each element contributes to an exceptional outcome, so don’t skimp on understanding what they bring to our creation!
- ½ cup (112 g) vegetable oil. This ingredient serves as our source of moisture and tenderness in these brownies. Vegetable oil blends seamlessly into the batter without solidifying, unlike butter which can harden if chilled too much. When using oil, be sure to choose a neutral flavor; canola or sunflower oil works beautifully here. The liquid gold helps maintain that wonderfully moist texture we all crave in brownies!
- 1 ½ cups (300 g) granulated sugar. Ah, sugar—the sweet companion that brings our brownies to life! Not only does it provide sweetness, but sugar also plays a crucial role in achieving that perfect chewy texture. It caramelizes slightly during baking, contributing to a rich flavor profile while balancing the cocoa powder’s bitterness. When measuring out your sugar, ensure it’s leveled off for accuracy; too much could lead to overly sweet brownies!
- 1 tablespoon vanilla extract. This is where the magic truly happens! Vanilla enhances all other flavors and adds depth to our chocolatey delight. It’s like a warm hug for your taste buds! Always opt for pure vanilla extract over imitation for an authentic flavor experience; trust me—it makes all the difference.
- 2 cups (256 g) all-purpose flour. Flour is our structural foundation—it gives these brownies their shape and substance. While all-purpose flour is a fantastic choice for balance between tenderness and strength, consider sifting it to aerate before measuring. This will help keep our brownies light and fluffy rather than dense.
- ½ cup (64 g) unsweetened cocoa powder. Cocoa powder is essential for achieving that deep chocolate flavor we all adore! Opt for high-quality unsweetened cocoa powder because it carries more complex flavors than low-quality options; this will elevate your brownies from good to unforgettable.
- 1 ½ teaspoons baking soda. Baking soda acts as our leavening agent here; it helps create those lovely bubbles within our batter giving us lift and fluffiness without compromising richness. Its activation occurs when mixed with acidic ingredients like cocoa powder or zucchini juice—so don’t skip this step!
- 1 teaspoon kosher salt. Salt may seem humble in stature but don’t underestimate its power! Just like vanilla enhances sweetness, salt elevates flavors across the board—it balances sweetness and deepens chocolate notes making every bite breathtakingly satisfying.
- 3 cups finely shredded zucchini (DO NOT DRAIN). Zucchini is truly our star player! When finely shredded and added directly into the batter without draining excess moisture, it brings unparalleled juiciness that keeps these brownies soft and tender—no one will ever guess there are veggies involved!
- 1 ¼ cups semi-sweet chocolate chunks. Finally, we have chocolate chunks! Adding them into our batter provides bursts of melty goodness throughout each brownie square—a true chocolate lover’s dream come true! For best results, choose high-quality semi-sweet chocolate chunks; they melt beautifully without becoming overly sugary.
Equipment You’ll Need:
Having the right tools at your disposal can make all the difference when creating scrumptious treats like these Zucchini Brownies! While they may not be ingredients per se, think of them as essential partners on this delightful journey toward brownie perfection.
- 9×13 inch baking pan – This size is absolutely paramount for evenly baked brownies; anything larger could lead to thin edges while smaller pans might result in undercooked centers. If you don’t own one yet—trust me—you’ll want one after experiencing these rich delights!
- Mixing bowls – A couple of large mixing bowls will help keep things organized while allowing ample space for combining wet and dry ingredients thoroughly without spills or messes.
- Whisk or spatula – A sturdy whisk is essential for blending those wet ingredients perfectly together before adding dry ones while ensuring no lumps remain—this process is crucial for achieving smooth batter consistency!
- Grater or food processor – You’ll need either tool for shredding zucchini efficiently! A box grater works wonders if you prefer manual labor while a food processor can make quick work of transforming whole zucchinis into silky shreds effortlessly.
Now that we have everything ready to go let’s dive into preparing these delectable Zucchini Brownies!
Step 1: Preheat Your Oven & Prepare Your Pan
Before we get started mixing up our delicious ingredients, let’s set ourselves up for success by preheating our oven to 350°F (175°C). This step is non-negotiable as having an even temperature ensures consistent baking throughout every bite of brownie goodness you’ll soon create! While that’s warming up, grab your trusty 9×13 inch baking pan and prepare it by greasing it with butter or using baking spray—whichever suits your style best—and then line it with parchment paper allowing some excess to hang over the edges for easy removal later on.
Once you’ve got everything set up nicely in place—don’t rush this step—your future self will thank you later when it’s time to pull out those gooey delights from the pan once baked!
Step 2: Combine Wet Ingredients
Now onto mixing our wet ingredients together—the heart and soul of any great brownie recipe! In a large mixing bowl (the kind big enough to invite all your ingredients), combine ½ cup vegetable oil with 1½ cups granulated sugar along with 1 tablespoon pure vanilla extract until everything feels fully incorporated—that means no streaks left behind! Using either a whisk or spatula here allows us adequate control while blending thoroughly together (trust me: no one wants clumps!).
This process helps dissolve sugar granules so they meld seamlessly throughout the batter during subsequent steps; plus creates an inviting aroma already wafting through your kitchen enticing everyone nearby!
Step 3: Add Dry Ingredients
Next comes perhaps one of my favorite stages—the integration of dry components into our luscious mixture! To do this successfully requires careful attention: slowly add two cups all-purpose flour along with half cup unsweetened cocoa powder alongside one-and-a-half teaspoons baking soda plus one teaspoon kosher salt directly into that beautiful bowl full of wet goodness we’ve prepared earlier.
But here’s where patience pays off: gently mix until combined—you want things blended but avoid overmixing lest gluten develops too much leading us down tough brownie road instead of soft fudgy paradise…
Step 4: Fold In Zucchini
Now comes perhaps my most cherished moment—the incorporation dance with finely shredded zucchini which takes place right inside that bowl brimming with chocolatey goodness we created moments prior! Gently fold three cups worth straight into your mixture using clean hands or spatula ensuring everything gets evenly distributed throughout without losing any moisture present within those delicate veggie strands (remember—we want them intact!).
Allowing this delightful concoction some rest time afterward grants opportunity for flavors meld gracefully together resulting ultimately leads towards creating moistness beyond compare once baked…
Stay tuned as I guide you further down this delightful path toward finishing touches which result ultimately yield irresistible Zucchini Brownies everyone will adore…
Step 5: The Magic of Mixing and Resting
Now that we’ve incorporated our dry ingredients, it’s time to fold in the star of our show: the zucchini. This is where your patience pays off, my friends! Gently add the finely shredded zucchini into your brownie batter, taking care to fold it in by hand using a spatula or a wooden spoon. The goal here is to combine the ingredients without overmixing—this allows us to maintain a tender crumb while also ensuring that every bite is packed with that delightful zucchini goodness. As you fold, you’ll notice that the batter may feel quite stiff at first; don’t worry! It’s perfectly normal for the mixture to seem dry at this stage. What’s truly extraordinary is that once the moisture from the zucchini begins to mingle with the other ingredients, everything transforms beautifully.
Now here comes an essential step: let the batter rest for about 5 minutes after folding in the zucchini. Why rest, you ask? This brief pause allows the flour to fully absorb the moisture released by the zucchini, which will ultimately lead to an incredibly moist brownie texture. Think of it as giving your batter a little moment of zen before it heads into the oven; trust me on this one! After those 5 minutes, give it another gentle stir—if you notice it looks a bit more cohesive and less dry, you’re on the right track. If not, allow it to rest for an additional 5 minutes before stirring again. This step is non-negotiable because it sets up your brownies for success!
Step 6: The Sweet Symphony of Chocolate
With our zucchini now perfectly integrated into our brownie mix, it’s time to bring in some rich semi-sweet chocolate chunks. Measure out 1¼ cups—because who doesn’t love an abundance of chocolate?—and gently fold these luscious morsels into your batter. At this point, you’ll see how beautifully glossy and inviting your mixture becomes as you incorporate those chocolate chunks. They melt ever so slightly into pockets of gooeyness throughout each brownie, creating a symphony of flavors that will make every bite utterly intoxicating.
Remember, this is where we add depth and richness—chocolate isn’t just a flavor; it’s part of what makes these Zucchini Brownies so special! Stir until evenly distributed throughout the batter, which now should appear more wet and cohesive after all that resting time we allowed earlier. This is crucial because it means that our brownies will bake up soft and fudgy rather than dry and crumbly. Once everything is well combined, you’re ready to spread this heavenly mixture into your prepared pan!
Step 7: Spreading with Love
Now comes one of my favorite parts: spreading this delicious brownie mixture into your pan! Take a moment to appreciate how thick and rich your batter looks—it’s truly a sight to behold! Using a spatula or a spoon, carefully transfer your brownie mixture into the prepared 9×13 baking pan. It’s essential to spread it evenly across the bottom so every corner gets its fair share of that chocolatey goodness when baked. Trust me; no one wants sad corners in their brownies!
As you smooth out the mixture, keep an eye on how thick it seems. You want an even layer—not too thin but not overly mounded either—and if necessary, use your spatula to push it gently towards the corners of the pan. This attention to detail ensures uniform baking throughout! Once you’ve got everything nicely spread out (and maybe even licked some batter off your fingers!), it’s time for those brownies to meet their fate in the oven.
Step 8: Baking Your Perfect Zucchini Brownies
Slide that pan filled with promise into your preheated oven set at 350°F (175°C) and close that door like you’re sealing in all the wonderful aromas! Now comes one of life’s most beautiful rewards—the wait! Bake those beauties for about 25-35 minutes; however, I encourage you not to rush this step! Ovens can vary significantly; therefore, begin checking around the 25-minute mark for doneness by inserting a toothpick into the center.
What are we looking for? The toothpick should come out with moist crumbs attached but no wet batter—this is crucial because we want fudgy brownies without being undercooked. If you pull out a toothpick covered in gooey batter, just pop them back in for another few minutes and be patient! Keep in mind that while they might look slightly underdone when they first come out (which is perfect!), they will continue cooking from residual heat as they cool down in their own pan—a magical process if there ever was one!
Next Major Phase – Cooling and Slicing Your Masterpiece
Once those glorious Zucchini Brownies have finished baking and have passed your toothpick test with flying colors, it’s time for an equally important phase: cooling them down properly before slicing. Yes, I know waiting can feel torturous when you’re surrounded by such mouthwatering smells—but trust me when I say it’s absolutely worth it!
Step 9: Cooling Down Before Indulgence
After removing your brownies from the oven, let them cool in their pan on a wire rack (or even on your kitchen counter if that’s what you’ve got) for about 20-30 minutes or until they’re warm but not hot to touch. This cooling period allows them to set properly—ensuring those edges hold together beautifully when sliced while also giving you just enough time to gather yourself before indulging in pure decadence.
As tempting as it may be to dig right in (I totally get it!), allowing them some time helps enhance their texture dramatically—you’ll end up with perfectly chewy edges and soft centers that melt in your mouth like liquid gold! Once cooled sufficiently—though maybe still slightly warm—you can grab a sharp knife and slice them into squares or rectangles depending on how indulgent you’re feeling today.
And there you have it—a batch of Zucchini Brownies that’s not only incredibly moist but also bursting with layers of chocolate flavor intertwined with subtle hints of sweetness from our beloved zucchini. These brownies are not merely dessert; they’re an experience waiting for you and whoever you’re sharing them with because let’s be honest—good food shared is good food multiplied!
So go ahead and enjoy these irresistible treats—you’ve earned every last bite!
Storage and Enjoyment Tips for Your Zucchini Brownies
Now that your Zucchini Brownies are baked to perfection, the moment has finally come to indulge in this rich, chocolatey delight! I can hardly contain my excitement as I imagine you cutting into those moist squares, revealing their luscious texture. But wait—let’s talk about how to store these beauties so you can savor them for days (or even weeks) after baking. Trust me, you’ll want to keep some on hand for those moments when a chocolate craving strikes!
Storing Leftover Zucchini Brownies
To keep your Zucchini Brownies fresh and delicious, I recommend placing them in an airtight container. This will create a cozy little environment that preserves their moisture and keeps them from drying out. If you don’t have a container handy, wrapping them tightly in plastic wrap works just as well—just ensure there’s no air getting in! Stored properly at room temperature, these brownies will remain wonderfully soft for about 3-4 days. And here’s a little pro tip: placing a slice of bread in the container with the brownies can help maintain their moisture even longer; the brownies will absorb the bread’s moisture, keeping them delectably tender. As for the taste after storage? Oh my goodness—it only gets better! The flavors deepen over time, resulting in an even more intensely chocolaty experience. If you’re feeling indulgent, pop one in the microwave for about 10 seconds before serving; it’ll be like enjoying a warm hug of chocolate heaven.
Freezing Zucchini Brownies for Later
If you’ve found yourself with an abundance of these delicious treats or simply want to prepare ahead for future cravings, freezing your Zucchini Brownies is an excellent option! Start by letting them cool completely before cutting them into individual squares. Then, wrap each brownie tightly in plastic wrap or aluminum foil and place them into a freezer-safe bag or container. They’ll hold up beautifully frozen for up to three months—perfect for those unexpected sweet tooth moments. When you’re ready to enjoy one (or two), there’s no need to thaw; just pop it in the microwave for about 30 seconds or let it sit at room temperature for a bit. This convenience means you’ll always have a delectable treat waiting whenever you need a pick-me-up or something special to share with friends!
Zucchini Brownies
If you’re looking for a guilt-free dessert that satisfies your chocolate cravings, these Zucchini Brownies are the answer! Moist, rich, and surprisingly easy to make, these brownies incorporate finely shredded zucchini for added texture and nutritional benefits without sacrificing flavor. Each bite is a delightful balance of fudgy chocolate goodness, enhanced by bursts of semi-sweet chocolate chunks. Perfect for family gatherings or a cozy night in, these brownies prove that sneaking veggies into dessert can be a deliciously rewarding experience. With their enticing aroma and decadent taste, they are sure to impress anyone lucky enough to enjoy them.
- Prep Time: 15 minutes
- Cook Time: 30 minutes
- Total Time: 45 minutes
- Yield: Approximately 24 servings 1x
- Category: Dessert
- Method: Baking
- Cuisine: American
Ingredients
- ½ cup vegetable oil
- 1 ½ cups granulated sugar
- 1 tablespoon vanilla extract
- 2 cups all-purpose flour
- ½ cup unsweetened cocoa powder
- 1 ½ teaspoons baking soda
- 1 teaspoon kosher salt
- 3 cups finely shredded zucchini (do not drain)
- 1 ¼ cups semi-sweet chocolate chunks
Instructions
- Preheat your oven to 350°F (175°C) and prepare a 9×13-inch baking pan by greasing it and lining with parchment paper.
- In a large mixing bowl, combine vegetable oil, sugar, and vanilla extract until well blended.
- Add flour, cocoa powder, baking soda, and salt to the wet ingredients; mix until just combined.
- Fold in the shredded zucchini gently.
- Allow the batter to rest for about 5 minutes before stirring again.
- Add the chocolate chunks and fold until evenly distributed.
- Pour the batter into the prepared pan and spread it evenly.
- Bake for 25–35 minutes or until a toothpick inserted comes out with moist crumbs.
- Let cool for at least 20 minutes before slicing into squares.
Nutrition
- Serving Size: 1 brownie square (40g)
- Calories: 160
- Sugar: 14g
- Sodium: 120mg
- Fat: 7g
- Saturated Fat: 1g
- Unsaturated Fat: 6g
- Trans Fat: 0g
- Carbohydrates: 23g
- Fiber: 2g
- Protein: 2g
- Cholesterol: 0mg