Banana Crumble
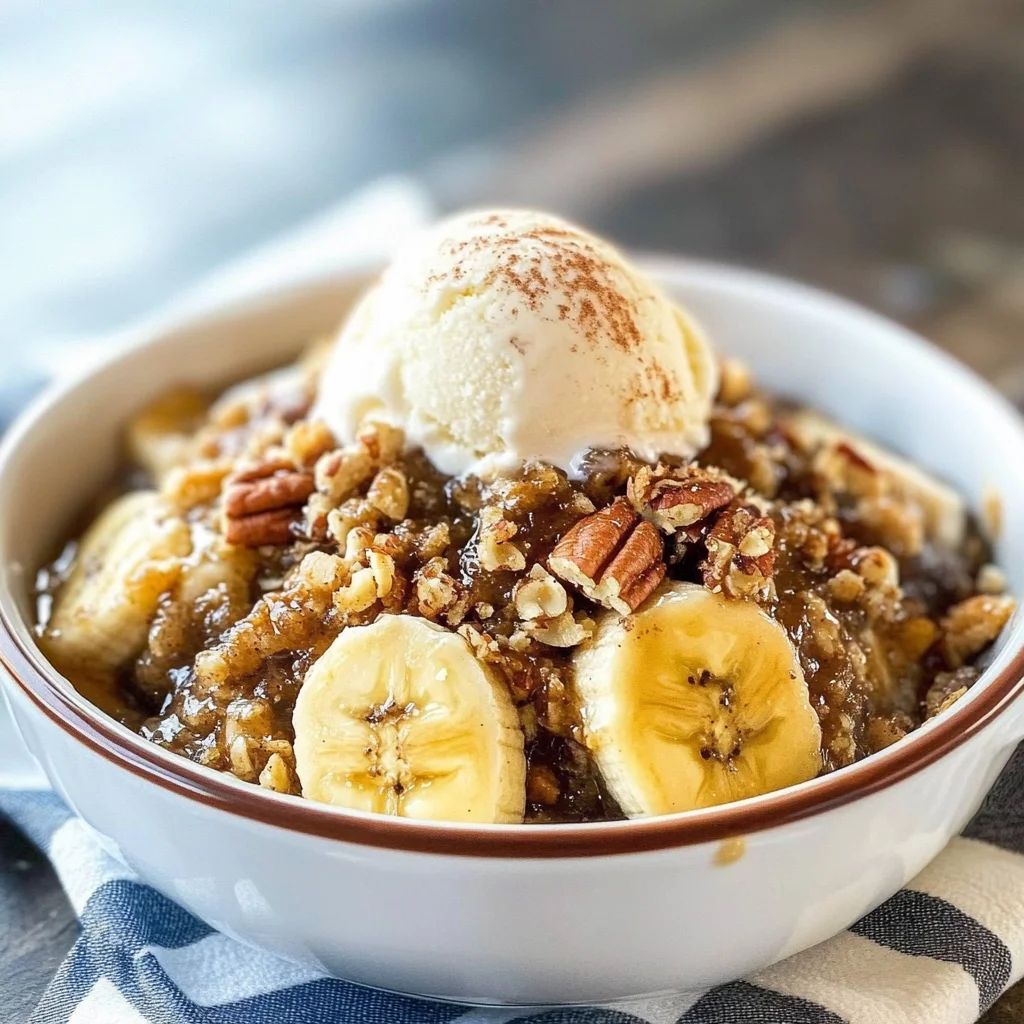
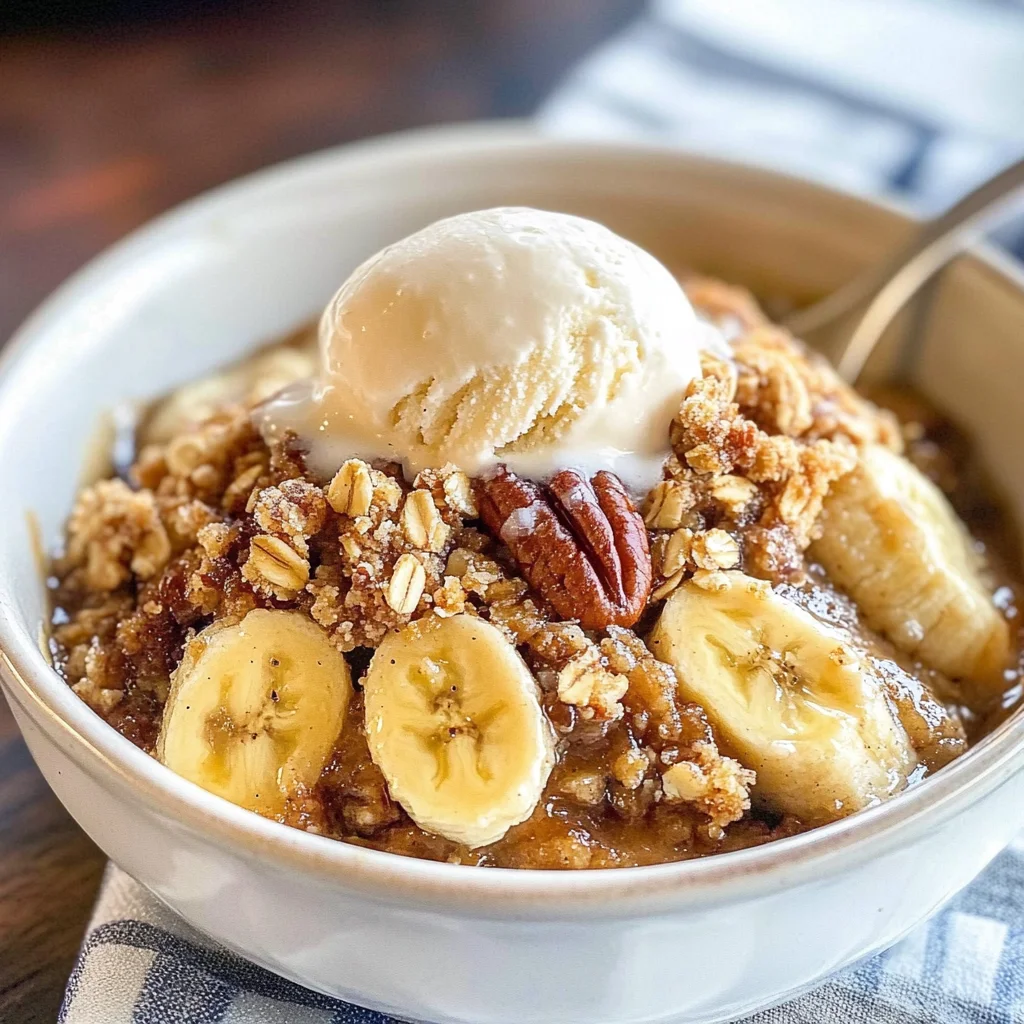
This Banana Crumble is more than just a delightful dessert; it’s a heartfelt embrace in the form of food, a melody of flavors that dances on your palate. Imagine the warm aroma of ripe bananas melding beautifully with the sweetness of brown sugar and the spice of cinnamon wafting through your kitchen. As you take your first bite, the comforting crunch of toasted pecans meets the lusciousness of soft, caramelized bananas. It’s a symphony of textures and tastes that transcends mere sustenance; it’s an experience that wraps you in nostalgia and warmth. Trust me when I say that this Banana Crumble isn’t just a recipe—it’s a cherished memory waiting to be created.
Every time I make this dessert, I can’t help but think about family gatherings where laughter fills the room and everyone gathers around to share stories over warm desserts. The beauty of this Banana Crumble is its versatility. It fits perfectly into any occasion—whether it’s a cozy family dinner or a casual get-together with friends. And let’s not forget about serving it with a scoop of velvety vanilla ice cream or fluffy whipped topping! That contrast between hot and cold takes this dish from delicious to absolutely extraordinary. So, let’s roll up our sleeves and embark on this culinary adventure together!
Banana Crumble: A Heartwarming Dessert Experience
Get ready to dive into this easy-to-follow recipe that transforms simple ingredients into something magical! This Banana Crumble is not only delicious but also incredibly satisfying to make. The combination of juicy bananas nestled under a crunchy topping makes for a perfect treat any day of the week. Let’s gather our ingredients and create something unforgettable together!
Ingredients:
As we embark on this culinary journey, each ingredient plays its unique role in crafting this beautiful dessert. Let’s explore what makes them special!
- 1/4 cup light or dark brown sugar. This sweetener brings depth and richness to our Banana Crumble, infusing it with that delightful caramel-like flavor we all adore. The molasses content in brown sugar adds moisture to the crumble topping, ensuring it doesn’t dry out during baking while creating those lovely golden edges. Whether you choose light or dark brown sugar is entirely up to your taste; light brown has a milder flavor while dark offers more intensity.
- 1/4 cup old-fashioned oats. These little gems are essential for giving our crumble its signature texture—a mix between chewy and crunchy that elevates every bite. Old-fashioned oats soak up flavors beautifully without turning mushy, which means they will contribute to the overall heartiness of the dish without losing their integrity. Plus, they add an extra layer of nutrition, making this dessert feel just a tad more wholesome.
- 1/4 cup flour. Flour acts as the backbone of our crumble topping, providing structure while allowing us to achieve that crumbly texture we’re after. I recommend using all-purpose flour here for its versatility; however, if you’re looking for gluten-free options, almond or oat flour can be great substitutes! Just keep in mind that different flours may yield slightly different textures.
- 4 Tablespoons cold butter (cut into cubes). This is crucial for achieving that wonderful flaky texture in our topping! Cold butter ensures that when it’s combined with the dry ingredients, it creates those beautiful little pockets of fat which melt during baking—resulting in a crispy topping that’s pure heaven! Make sure to cut your butter into small cubes before mixing; if it’s too soft or melted, you’ll end up with more of a dough than a crumble.
- 3/4 cup pecans (toasted). Toasted pecans add not only a delightful crunch but also an extra layer of flavor with their nutty richness! Toasting them enhances their natural oils and brings out their inherent sweetness—the aroma alone is intoxicating! To toast them perfectly, simply spread them on a baking sheet and pop them in the oven at 350°F (175°C) for about 8-10 minutes until golden brown—just watch closely so they don’t burn!
- 2 Tablespoons butter (for filling). This butter goes into our banana mixture, enriching it further with creamy goodness! It helps meld all those sweet flavors together while creating a silky texture as they bake down into luscious softness.
- 1/2 cup light or brown sugar (for filling). Just like in our crumble topping, sugar here helps caramelize those bananas beautifully as they cook down in the oven. You can easily adjust how sweet you want your filling by playing around with light versus dark sugar—both will work wonderfully!
- 1/4 cup orange juice. This vibrant liquid acts as both acid and sweetness; brightening up the natural sugars from bananas while balancing everything out harmoniously! The citrus notes elevate this dish beyond ordinary banana desserts—trust me when I say it makes all the difference!
- 1 teaspoon cinnamon. Cinnamon adds warm spice notes that perfectly complement bananas’ natural sweetness—it’s almost like wrapping everything up in cozy blankets! Don’t be shy about using fresh ground cinnamon if you can; it truly elevates flavors unlike anything else.
- 1/8 teaspoon salt. Yes, salt might seem like an odd addition to something sweet but hear me out—this non-negotiable ingredient rounds out flavors beautifully! A pinch here enhances sweetness without overpowering it—balance is key!
- 6 medium-sized bananas (not thin slices, cut into chunks about an inch long). Ripe bananas are essential for achieving maximum sweetness and flavor—look for ones with speckled skins for optimal ripeness! By cutting them into larger chunks rather than thin slices, they hold their shape better during baking while allowing those gorgeous caramelization processes to occur.
- Vanilla ice cream or whipped topping (for serving). Truly no dessert feels complete without these two companions! Their creamy textures provide contrast against warm banana goodness—a pairing so classic yet utterly comforting!
Equipment You’ll Need:
Having the right tools at hand makes all the difference when whipping up something special like this Banana Crumble! Here’s what you’ll need for success:
- Mixing bowls – A set of sturdy mixing bowls will serve as your best friends throughout this process—trust me! You’ll need varying sizes to mix dry ingredients separately from wet ones before combining them later on.
- Baking dish – An ideal choice would be an 8×8 inch glass or ceramic dish which allows even heat distribution; making sure every corner gets heated just right.
- Spatula – A good rubber spatula is essential for folding ingredients together gently without damaging delicate structures—we want fluffy crumbles!
- Measuring cups and spoons – Accurate measurements ensure consistency each time you make this recipe—it really does matter when baking!
Now that we have everything ready let’s move onto preparing our glorious Banana Crumble!
Preparing the Banana Crumble
Step 1: Crafting Our Topping
Start by preheating your oven to 350°F (175°C)—this step sets us up for success right from the get-go! In one mixing bowl combine brown sugar, oats, flour, and toasted pecans—you’re building layers upon layers of flavor here! Use your fingertips (yes—they’re magical!) or a fork to incorporate those cold butter cubes into dry ingredients until mixture resembles coarse crumbs—it should clump together but still have some texture left intact—that’s crucial! Set aside while we prepare our luscious filling.
Step 2: Creating That Irresistible Filling
In another bowl melt those two tablespoons of butter gently over low heat—this step allows us control over melting without burning anything—and once melted add in both types of sugar along with orange juice, cinnamon & salt stirring until mixed thoroughly together—you’re creating liquid gold here! Now gently fold in those glorious banana chunks; we want them coated beautifully without mashing them too much because we desire some structure even after baking.
Step 3: Marrying Flavors Together
Grab your prepared baking dish now and pour half banana mixture evenly across bottom before sprinkling half crumb topping over top—this layering technique ensures every spoonful contains both gooey goodness alongside crunchy bites afterwards—the ultimate balance achieved effortlessly! Repeat by layering remaining banana mixture followed by remaining crumble—it’ll look beautiful already even before baking begins!
Step 4: Baking Until Golden Brown
Slide your creation into preheated oven then take deep breaths while aromas begin wafting throughout kitchen—it won’t take long before you start getting hints from warm spices mingling deliciously amongst sugary notes coming alive as time passes slowly forward towards golden perfection—bake anywhere between 30–35 minutes until bubbly around edges & crisp across top surface—you’ll know it’s ready once everything comes together beautifully!
Letting it cool slightly before serving allows flavors time settle down nicely too—but trust me… patience might be tested once smells hit nose invitingly calling forth indulgence immediately afterwards…
There you have it—the perfect opportunity awaits as soon as slice through crust revealing warm banana layers underneath paired alongside scoops ice cream atop each serving plate ready devour wholeheartedly! Enjoy every moment spent savoring creation made lovingly crafted right within home kitchens everywhere…
Step 5: Creating the Crumble Topping
Now that we’ve lovingly prepared our banana filling, it’s time to turn our attention to the crumble topping—a crucial element that elevates this Banana Crumble from good to utterly extraordinary. In a medium mixing bowl, combine 1/4 cup of light or dark brown sugar with 1/4 cup of old-fashioned oats and 1/4 cup of flour. The sugar will introduce a luscious sweetness, while the oats contribute a delightful chewiness and texture that contrasts beautifully with the creamy bananas below. When you add the flour, remember that this is what binds everything together; it acts as the scaffolding for our crumble.
Next comes the butter, which is absolutely paramount in achieving that golden-brown, crispy top we all crave. Cut 4 tablespoons of cold butter into small cubes; it’s essential that the butter remains cold because this will help create those beautiful little pockets of flakiness when baked. Using your fingertips (or a pastry cutter if you prefer), gently rub the butter into the dry ingredients until it resembles coarse crumbs—think beach sand! This step requires a delicate touch; you want to avoid overworking the mixture. As you do this, breathe in deeply—the rich scent of brown sugar mingling with buttery goodness is truly intoxicating! Once you’ve achieved that perfect crumbly texture, fold in 3/4 cup of toasted pecans for an added layer of nutty richness.
Step 6: Preparing the Banana Filling
With our topping ready to shine, let’s prepare the star of this show—the bananas! In a large skillet over medium heat, melt 2 tablespoons of butter until it shimmers like liquid gold. This is where some magic happens; adding the bananas to a hot pan allows them to caramelize slightly, enhancing their natural sweetness and infusing them with a buttery richness that’s simply irresistible. Add in 1/2 cup of light or brown sugar along with 1/4 cup of fresh orange juice—this combination will create a syrupy sauce that envelops each banana chunk in flavor. It’s important to choose ripe bananas for this recipe; they should be spotty and fragrant. Not only do ripe bananas have more natural sweetness, but they also break down beautifully during cooking.
Sprinkle in 1 teaspoon of cinnamon and 1/8 teaspoon of salt; these two elements harmonize perfectly to balance out the sweetness while bringing warmth and depth to every bite. Stir everything gently but thoroughly, allowing those chunks of banana—cut into generous one-inch pieces—to mingle with the syrupy concoction for about five minutes until they start to soften and release their juices. Be patient during this step—don’t rush it! You’re looking for just a hint of softness while still retaining some structure; we want those lovely banana pieces to hold their shape in the final bake while being tender enough to melt in your mouth.
Step 7: Combining Filling and Topping
Now comes one of my favorite parts: assembling your masterpiece! Once your banana mixture has cooked down beautifully and smells like heaven (and trust me, it will!), carefully transfer it into a greased baking dish—an eight-inch square dish works wonderfully here. This size ensures even cooking and allows for just enough room for those glorious toppings without making things overcrowded. Spread the banana filling evenly across the bottom using a spatula—you want every corner filled because each spoonful should be bursting with flavor!
Now, take that crumble mixture we crafted earlier and sprinkle it generously over the top of your warm banana filling. Don’t just dump it all in one spot; instead, aim for an even distribution across every inch, allowing some bits to clump together while others fall apart—that variety in texture is what makes each bite so exciting! And don’t worry about perfection here; rustic charm is precisely what we’re aiming for. Each spoonful should feel like home—unrefined yet lovingly made with care.
Step 8: Baking Your Perfect Banana Crumble
Preheat your oven to 350°F (175°C) because we’re about to transform our delicious assembly into a bubbling dish of comfort food nirvana! Carefully place your baking dish on the middle rack once it’s heated through—this ensures even heat circulation around your Banana Crumble as it bakes. Now comes another critical aspect: patience. Bake for approximately 30-35 minutes or until you see that divine golden-brown crust forming on top and can smell that heavenly aroma wafting through your kitchen.
What you’re looking for here are slight bubbling edges emanating from beneath your crumble topping—the telltale sign that everything is melding together beautifully inside! Your kitchen will soon be filled with scents so enticing they’ll make anyone nearby swoon with anticipation. Keep an eye on it during those last few minutes; ovens can vary quite a bit in temperature, so watching closely can make all the difference between perfectly crisped topping and something too dark or burnt on top—trust me on this! Once it’s achieved that beautiful color, remove it from the oven and allow it to cool slightly before serving—a warm dessert straight from the oven might be delicious but can also be scalding hot!
Final Touches: Serving Your Banana Crumble
Ah, here we are at last—the moment we’ve all been waiting for! Once you’ve given your Banana Crumble about 10 minutes to cool (trust me, letting it rest helps everything settle beautifully), you’re ready to serve up generous portions that are sure to impress everyone around your table. Grab a large spoon and scoop out servings into bowls—it’s delightful how each scoop reveals those warm pieces of caramelized banana peeking through beneath layers of crunchy topping.
And let’s not forget about accompaniments! There’s something profoundly satisfying about pairing warm desserts with creamy delights like vanilla ice cream or fluffy whipped topping—it creates a blissful contrast between warm and cold textures while enhancing flavors beautifully as they mingle together on your palate. As each bite melts away in your mouth amidst those sweet bananas and crunchy pecans topped off by your chosen creaminess, I promise you will find yourself transported back home again—in my case, fond memories flooding back from sitting around family tables sharing stories over delicious desserts.
Enjoy every moment as you savor this Banana Crumble—it’s not just dessert; it’s love served warm in a bowl!
Storage and Enjoyment Tips for Your Banana Crumble
Now that you’ve created this delectable Banana Crumble, it’s time to dive into the joy of enjoying it! Picture the moment: you pull a warm, golden-brown dish from the oven, and the aroma envelops your kitchen like a cozy hug. You can almost hear the soft crunch of the topping as you scoop out a generous portion. Whether you’re indulging right away or saving some for later, I promise you’ll find it just as delightful. Let’s talk about how to preserve that scrumptiousness for another day without losing any of its charm!
Storing Leftover Banana Crumble
To keep your Banana Crumble fresh and delicious, store any leftovers in an airtight container. This is crucial because it prevents air from drying out your dessert and keeps it moist and inviting. Ideally, place it in the fridge where it will stay good for about three to four days. I recommend placing a slice of bread inside the container with your crumble; this little trick helps maintain its moisture while also keeping the topping perfectly crisp! When you finally dig in after a day or two, you’ll be pleasantly surprised at how well the flavors meld together—it’s like a comforting hug on a plate. To enjoy again, simply reheat individual servings in the microwave for about 30 seconds or warm them gently in an oven at 350°F (175°C) until heated through; trust me, that familiar scent will waft through your home and make your heart sing!
Freezing Banana Crumble for Later
If you want to stock up on this delightful treat, freezing is an excellent option! Allow your Banana Crumble to cool completely before transferring it to a freezer-safe container or wrapping it tightly in plastic wrap followed by aluminum foil. This double-layered approach is absolutely paramount for preserving flavor and texture—it keeps that heavenly crumble intact while preventing freezer burn. You can freeze your Banana Crumble for up to three months without compromising its quality! When you’re ready to indulge again, simply thaw it overnight in the fridge and reheat as mentioned earlier. The convenience of having this lovely dessert on hand during busy weeks or unexpected guests is simply wonderful; it’s like having a sweet little secret waiting to be revealed!
Banana Crumble
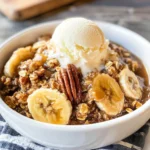
Banana Crumble is the ultimate cozy dessert, combining the natural sweetness of ripe bananas with a crunchy topping that’s sure to satisfy your sweet tooth. This easy-to-make recipe features caramelized bananas infused with warm spices, all nestled beneath a golden layer of oats, brown sugar, and toasted pecans. Perfect for family gatherings or a simple weeknight treat, this Banana Crumble can be served warm with a scoop of velvety vanilla ice cream or fluffy whipped topping to create an irresistible contrast of textures. Each bite offers a delightful blend of flavors that will transport you back to cherished moments spent around the table. Gather your ingredients and let’s whip up this heartwarming dessert!
- Prep Time: 15 minutes
- Cook Time: 35 minutes
- Total Time: 50 minutes
- Yield: Serves approximately eight people 1x
- Category: Dessert
- Method: Baking
- Cuisine: American
Ingredients
- 6 medium-sized ripe bananas
- 1/4 cup light or dark brown sugar (for topping)
- 1/4 cup old-fashioned oats
- 1/4 cup flour
- 4 tablespoons cold butter (for topping)
- 3/4 cup toasted pecans
- 2 tablespoons butter (for filling)
- 1/2 cup light or brown sugar (for filling)
- 1/4 cup orange juice
- 1 teaspoon cinnamon
- Pinch of salt
Instructions
- Preheat your oven to 350°F (175°C).
- In one bowl, combine brown sugar, oats, flour, and toasted pecans for the crumble topping. Cut in cold butter until crumbly.
- In another bowl, melt butter and mix in both sugars, orange juice, cinnamon, and salt. Fold in banana chunks gently.
- Layer half the banana mixture in a greased baking dish, top with half the crumble mixture. Repeat layers.
- Bake for 30–35 minutes until bubbly and golden on top.
Nutrition
- Serving Size: 1/8 of recipe (approx. 150g)
- Calories: 290
- Sugar: 25g
- Sodium: 100mg
- Fat: 11g
- Saturated Fat: 5g
- Unsaturated Fat: 6g
- Trans Fat: 0g
- Carbohydrates: 43g
- Fiber: 3g
- Protein: 3g
- Cholesterol: 15mg