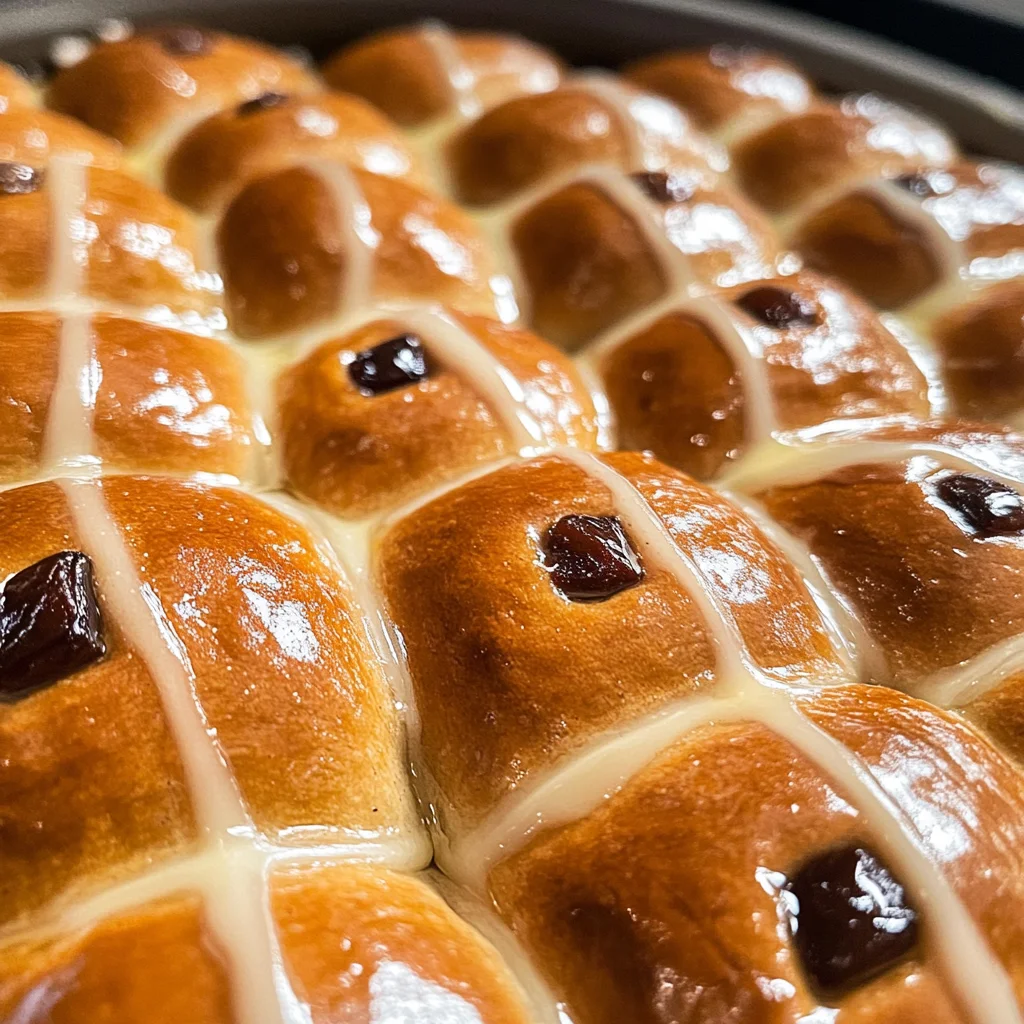
Easy Hot Cross Buns
Who doesn’t love the smell of fresh hot cross buns wafting through the house on Easter weekend mornings? The scent of warm spices mingling with sweet, soft dough creates an atmosphere that feels like a warm hug. These Easy Hot Cross Buns are not just a recipe; they embody tradition, nostalgia, and the joy of gathering around the table with loved ones. I promise you, the moment you pull these golden beauties from the oven, your kitchen will transform into a sanctuary of warmth and comfort. The crispy crust gives way to a pillowy interior studded with sultanas, all brought together by fragrant spices that whisper tales of family gatherings and cherished moments. This is more than food; it’s an experience that lingers long after the last crumb has been savored.
As I embarked on this culinary journey, I found myself captivated by the simplicity yet profound satisfaction these buns provide. They are perfect for those chilly mornings when you want nothing more than to wrap your hands around something warm and delicious. Traditionally enjoyed during Easter but delightful any time of year, they represent a beautiful balance between sweetness and spice. Each bite is like a warm embrace—a reminder that some things in life are best shared. Whether you’re enjoying them fresh out of the oven or toasted with a pat of butter, these buns have an incredible way of bringing people together.
Easy Hot Cross Buns: A Sweet Embrace on Any Morning
Let’s dive into this recipe together! Making hot cross buns at home is not only rewarding but also incredibly straightforward. With simple ingredients and easy-to-follow steps, you’ll be amazed at how easily you can create these delightful treats right in your own kitchen.
Ingredients:
As we gather our ingredients, think about each one as a crucial note in the symphony of flavors that will come together to create these beautiful buns. Each element plays its part in crafting something truly extraordinary.
- 1/2 cup warm water – This gentle warmth is essential for activating our yeast without shocking it. The water needs to be around 110°F (43°C) so that it wakes up the yeast without killing it; too hot and we risk losing those little organisms that make our dough rise! If you find yourself without a thermometer, just touch it—if it feels comfortably warm to your wrist, you’re right on track.
- 1/2 cup warm milk – Milk adds richness and tenderness to our buns while also giving them a slight sweetness. The fats in milk contribute to that beautifully soft texture we crave when biting into fresh bread. Look for whole milk for the best results or even try oat or almond milk if you prefer plant-based options!
- 1/2 cup plus 1 tbsp light brown sugar – This sugar is what sweetens our dough while also providing moisture and flavor depth. It caramelizes beautifully during baking, lending those lovely golden hues we adore in freshly baked goods. Always opt for light brown sugar if possible—it brings just enough molasses flavor without overpowering our cinnamon and spices.
- 4 tsp active dried yeast – This little powerhouse is responsible for making our buns rise! Active dry yeast needs to be ‘proofed’ before mixing into your dough—this means we’ll ensure it’s alive and kicking before adding it to our mixture. Be sure to store your yeast properly; keep it in a cool, dark place or even in the fridge for longevity.
- 1/3 cup (75g) melted butter – Butter is liquid gold in baking! It imparts flavor while also enriching our dough with fat which helps create that tender crumb texture we all love. Make sure it’s melted but not too hot—if it’s sizzling, let it cool slightly before incorporating.
- 1 egg – Eggs play multiple roles here: they enrich our dough, add moisture, and help bind everything together. When eggs are at room temperature rather than straight from the fridge, they blend more seamlessly into the batter, ensuring uniformity throughout.
- 1 tsp salt – A crucial component that enhances flavor! Salt balances sweetness and helps control yeast activity during fermentation—too much can inhibit rising while too little will lead to blandness.
- 4 cups bread flour or plain flour – Bread flour has higher protein content which gives structure and chewiness to our buns while ensuring they rise beautifully. If using plain flour, just be mindful that your buns may have a slightly softer texture.
- 1 tbsp mixed spice or pumpkin pie spice – This blend is where tradition meets creativity! Mixed spice often contains cinnamon along with nutmeg and ginger—giving us those cozy autumn vibes no matter the season. Feel free to adjust according to your preferences!
- 1 tbsp cinnamon – Ahh, cinnamon—the quintessential spice that pairs perfectly with sweet treats like these hot cross buns! Its aroma alone can transport you back to cozy kitchens filled with laughter and love.
- 1 tsp vanilla extract – A splash of vanilla elevates flavors beautifully; it’s like adding a secret ingredient that makes everything taste better! Ensure you use pure vanilla extract for the richest taste—you deserve nothing less!
- 1 cup sultanas or mixed fruit – These little jewels add bursts of sweetness throughout each bun; sultanas are particularly lovely as they plump up nicely during baking. If dried fruit isn’t your thing or if you’re feeling adventurous, chocolate chips could be a delightful substitute!
- 1/4 cup flour (for crosses) – To create those iconic crosses atop our buns, we need this simple mixture of flour and water—it’s essential for achieving that classic look!
- 2 tbsp water (for crosses) – Just enough moisture joins forces with flour to make a paste that’ll hold its shape when piped onto the buns—allowing us all to proudly display those traditional crosses!
- 1 tbsp water (for glaze) – Adding this small amount helps us achieve a lovely sheen once brushed onto our freshly baked buns after they’ve cooled slightly; trust me—it makes all the difference visually!
- 1 tbsp maple syrup – This natural sweetener does wonders as part of our glaze; it adds depth while giving us a glossy finish that’s simply irresistible.
Equipment You’ll Need:
Cooking should be an enjoyable experience—a dance between creativity and technique—and having the right tools makes all the difference! While not technically ingredients, these essential partners will help you create something wonderful without any hiccups along the way.
- Large mixing bowl – A must-have for combining ingredients without worrying about spills or messes! Opt for glass or stainless steel as they’re durable and won’t react negatively with acidic ingredients like vinegar if ever needed down the line.
- Stand mixer or hand mixer – While kneading by hand builds character (and muscles!), using either type of mixer can save time significantly—especially if you’re making multiple batches! The dough hook attachment on stand mixers does an excellent job mimicking hand-kneading motion which leads us closer toward perfect results every time!
- Measuring cups & spoons – Accurate measurements are non-negotiable in baking; using proper measuring tools ensures consistency across batches so every bun turns out perfectly delicious every single time!
- Piping bag or ziplock bag (with tip cut off) – For piping those iconic crosses onto each bun effortlessly; if you don’t have either handy—don’t fret! You can simply use an old ketchup bottle instead—it’ll do just fine!
- Baking tin/casserole dish – A sturdy vessel where all magic happens as we bake up these beauties until golden brown perfection arises from within; choose one based on how many batches you’d like to make at once!
Now that we’ve gathered everything we’ll need let’s move on to creating these scrumptious Easy Hot Cross Buns together!
Step 1: Activating Our Yeast
First things first—we need to bring our yeast to life! In a large mixing bowl (or stand mixer bowl), combine your warm milk, warm water, one tablespoon of brown sugar, and active dried yeast. This step is crucial because we’re not just throwing ingredients together haphazardly; we’re creating an environment where magic can happen! Allow this mixture to sit undisturbed for about 2 minutes until it becomes bubbly—a sign that those tiny organisms are waking up from their slumber ready for action! If there’s no froth after two minutes? It might mean your yeast was either inactive or your liquids were too hot—trust me when I say there’s nothing worse than deflated dough due lackluster yeast activity.
Once you’ve confirmed bubbling bliss has arrived—give it a gentle stir ensuring all granules dissolve completely before adding two cups of flour into this happy concoction. Cover with plastic wrap or clean cloth allowing its contents some quiet time—let sit undisturbed again for about 30 minutes so gluten starts forming within this sticky batter leading towards soft fluffy buns later on down this journey together!
Step 2: Creating Dough Bliss
Now comes one of my favorite parts—the blending process! In another bowl (yes—we’re still doing dishes later!), mix your melted butter alongside remaining brown sugar until well combined—you want this sweet goodness melded flawlessly together before introducing anything else into their midst! Once that’s done successfully beat in one egg followed by salt along with cinnamon then mixed spice/pumpkin pie spice alongside vanilla extract too—everything should harmonize perfectly creating an intoxicating aroma already filling up space around us reminding why we started cooking today…
Next comes adding plump sultanas (or whatever alternative you’ve selected)—they’ll bring bursts sweetness throughout each bite later once baked properly—and finally fold-in risen yeast mixture along remaining flour gradually working everything together until cohesive dough forms itself naturally around hands like second skin comforting yet slightly sticky at same time… if mixture appears overly dry? Add small amounts water here there slowly until balance achieved while avoiding being too wet causing stickiness beyond repair needing extra flour instead…
Step 3: Kneading Our Dough
Now let’s get physical—it’s time for kneading action which allows gluten development improving overall structure resulting softer fluffier textures within final product ahead… On lightly floured surface push away dough using heel palm hand folding top back over itself repeating quarter turn movement continuously working magic through hands firm encouraging pressure consistently applied until smooth ball forms springing back gently when poked ever-so-slightly reminds us progress being made successfully after approximately ten minutes’ worth kneading effort put forth diligently here…
Step 4: Shaping Into Buns
Once kneaded thoroughly divide entire batch evenly into four pieces then further section each piece down further thirds resulting twelve total individual portions awaiting transformation ahead… Shape them gracefully into small balls bringing edges under pinching them tight ensuring smooth surface shines forth welcomingly inviting anyone nearby wanting take bite immediately upon sight alone… Place formed balls delicately greased casserole dish spaced apart roughly 1cm allowing breathing room necessary whilst covering tightly either cloth wrap cling film letting rise double size comfortably warmer spot nearby estimated timeframe taking anywhere between thirty minutes hour depending ambient temperature surrounding area—patience truly pays off during this step friends!
Stay tuned as we continue crafting these delectable Easy Hot Cross Buns through careful attention detail following each subsequent step leading toward glorious end result everyone will adore come savor first bites afterwards…
Step 5: The Magic of Rising – Let Those Buns Bloom!
Now comes one of the most delightful parts of making these Easy Hot Cross Buns: the rising! After you’ve shaped those little dough balls, it’s time to let them relax and grow in size. This step is crucial because it allows the yeast to work its magic, filling the dough with air pockets that will result in a light and fluffy texture. Without this rising phase, your buns may end up dense and heavy, which is absolutely not what we’re aiming for! So, find a cozy spot in your kitchen—perhaps near a warm oven or on a sunny windowsill—and let the dough do its thing. Covering the dish with a clean kitchen towel helps to retain warmth and moisture, ensuring that the yeast remains active.
You’ll want to give these beauties about 30 minutes to an hour to double in size. Patience is key here; don’t rush this step! Keep an eye on them—after about 30 minutes, peek under that towel. You should see a noticeable puffiness; they’ll be soft and pillowy, ready for their next transformation. If they haven’t risen enough, give them a little more time. Remember, every kitchen environment is different—factors like humidity and temperature can affect rising time. Trust me on this: allowing your buns to rise properly will yield a profoundly satisfying result.
Step 6: Creating Beautiful Buns – The Cross That Ties It All Together
Once your buns have risen beautifully, it’s time for one of the most iconic features of hot cross buns: the cross itself! This isn’t just for decoration; it symbolizes so much more and adds that extra touch of charm. To create this cross mixture, combine 1/4 cup flour with enough water to make a thick paste—about two tablespoons should do the trick. This mixture needs to be thick enough to hold its shape when piped onto the buns but thin enough to flow smoothly from your piping bag or zip-lock bag with the tip cut off.
Now, about 20 minutes before the buns are ready to bake (you’ll want them perfectly risen), preheat your oven to 220°C (425°F). Once preheated, grab your piping bag filled with that glorious flour mixture and get ready for some fun! Pipe a cross over each bun by drawing two lines—one horizontal and one vertical—creating a beautiful ‘X’ shape on top of each dough ball. This step is not only visually appealing but also provides an opening for steam to escape during baking, preventing any unwanted bursting while they cook. A good rule of thumb here is to keep your piping steady and firm; if you find it difficult to pipe neatly, don’t worry—a rustic look adds character!
Step 7: Baking Bliss – Transforming Dough into Heavenly Buns
With the crosses piped elegantly across each bun, it’s time for the real magic—the baking! Slide those beauties into your preheated oven and let them work their wonders. You’ll want to bake them for about 15-20 minutes until they are golden brown and sound hollow when tapped gently on the bottom—a sure sign they are cooked through! The aroma that fills your kitchen during this time? Absolutely intoxicating! I promise you’ll be tempted to sneak a taste before they’ve even cooled.
While they bake, let’s talk about how important it is not just to rely on timing alone but also visual cues. Every oven behaves uniquely; some run hotter than others or may have hot spots that affect how evenly things cook. So keep an eye out for that golden hue—the tops should look like sun-kissed perfection when you pull them out! If you notice that they are browning too quickly but still need more baking time inside, simply cover them loosely with aluminum foil halfway through cooking.
Step 8: The Glorious Glaze – Final Touches for Irresistible Buns
As soon as those buns emerge from the oven all golden and glorious, you have one last step before sinking your teeth into their soft goodness: glazing! In a small saucepan over low heat, mix together one tablespoon of maple syrup with one tablespoon of water until combined—this creates a lovely glossy finish that elevates your hot cross buns from delicious to utterly extraordinary!
As soon as you remove those freshly baked buns from the oven (remember my earlier tip about tapping them?), brush this glaze generously over each bun while they’re still warm. This step is absolutely paramount—it not only adds beautiful shine but also helps seal in moisture so each bite remains soft and tender long after cooling down. Feel free to be generous; there’s no such thing as too much glaze when it comes to hot cross buns! Once glazed, allow them to rest briefly before transferring them onto a cooling rack where they’ll continue their transformation from warm dough into delightful treasures.
The Joyful Finale – Enjoying Your Easy Hot Cross Buns!
Step 9: Cooling Down – The Sweet Anticipation Before Indulgence
After all your hard work has paid off—and believe me, it truly has—you might feel tempted just to dive right in as soon as they come out of the oven. But wait! It’s essential now to let these beauties cool slightly before serving. Allowing them around 10-15 minutes will help set their structure and enhance those delectable flavors you’ve coaxed out during baking.
When you finally take a bite into these Easy Hot Cross Buns, you’ll experience an explosion of warmth and spice that dances upon your palate—a symphony of flavors created by all those fragrant spices mingling together so beautifully throughout each bun. I can’t stress enough how much joy these little masterpieces bring—not only in taste but in memories made while crafting them alongside family or friends. So gather around those warm buns with loved ones, slather on some butter if you’re feeling indulgent (trust me—it’s divine!), and enjoy every cherished moment together because classic recipes like these are meant not just for eating but sharing too.
Now go ahead—bake up those Easy Hot Cross Buns and fill your home with love (and delicious aromas). Happy baking!
Storage and Enjoyment Tips for Your Easy Hot Cross Buns
Now that you’ve crafted these lovely Easy Hot Cross Buns, let’s talk about how to preserve that delightful freshness so you can enjoy them long after they come out of the oven. The aroma wafting through your home is just a precursor to the joy of biting into these soft, spiced treasures. But what if I told you that you can keep the magic alive, even after Easter weekend? Storing these buns properly will ensure they don’t just taste good fresh out of the oven; they’ll stay tantalizing and utterly delicious for days to come!
Storing Leftover Easy Hot Cross Buns
To store your leftover Easy Hot Cross Buns, it’s best to place them in an airtight container at room temperature. This method keeps them soft and prevents them from drying out — trust me, stale buns are a tragedy! They will maintain their quality for about 2-3 days; however, if you find that you’ve made more than you can consume in that time, don’t worry! To keep them at their absolute best, consider placing a slice of bread in the container with the buns. This clever trick works wonders by adding moisture and ensuring every bite remains soft and fluffy. When you take one out later, you’ll be met with that same sweet aroma and tender texture as when they were first baked. If you’re looking to reheat them for an indulgent breakfast or snack, simply pop them in the microwave for about 10-15 seconds or warm them gently in the oven — it’s like having them fresh all over again!
Freezing Easy Hot Cross Buns for Later
If you want to prepare ahead or simply save some for later enjoyment, freezing your Easy Hot Cross Buns is an excellent choice! First, allow the buns to cool completely before wrapping each one tightly in plastic wrap or aluminum foil. Be sure to place them in a freezer-safe bag or container afterward — this extra layer helps prevent freezer burn. They can be stored this way for up to three months without losing their delightful qualities. When you’re ready to enjoy a bun from frozen, just take it out and let it thaw at room temperature, or if you’re like me and can’t wait that long, pop it directly into a preheated oven at 350°F (175°C) for about 10 minutes. The convenience of having homemade buns on hand is absolutely glorious; imagine pulling one out on a busy morning and enjoying its warm, spiced goodness with your favorite jam or butter!
Easy Hot Cross Buns
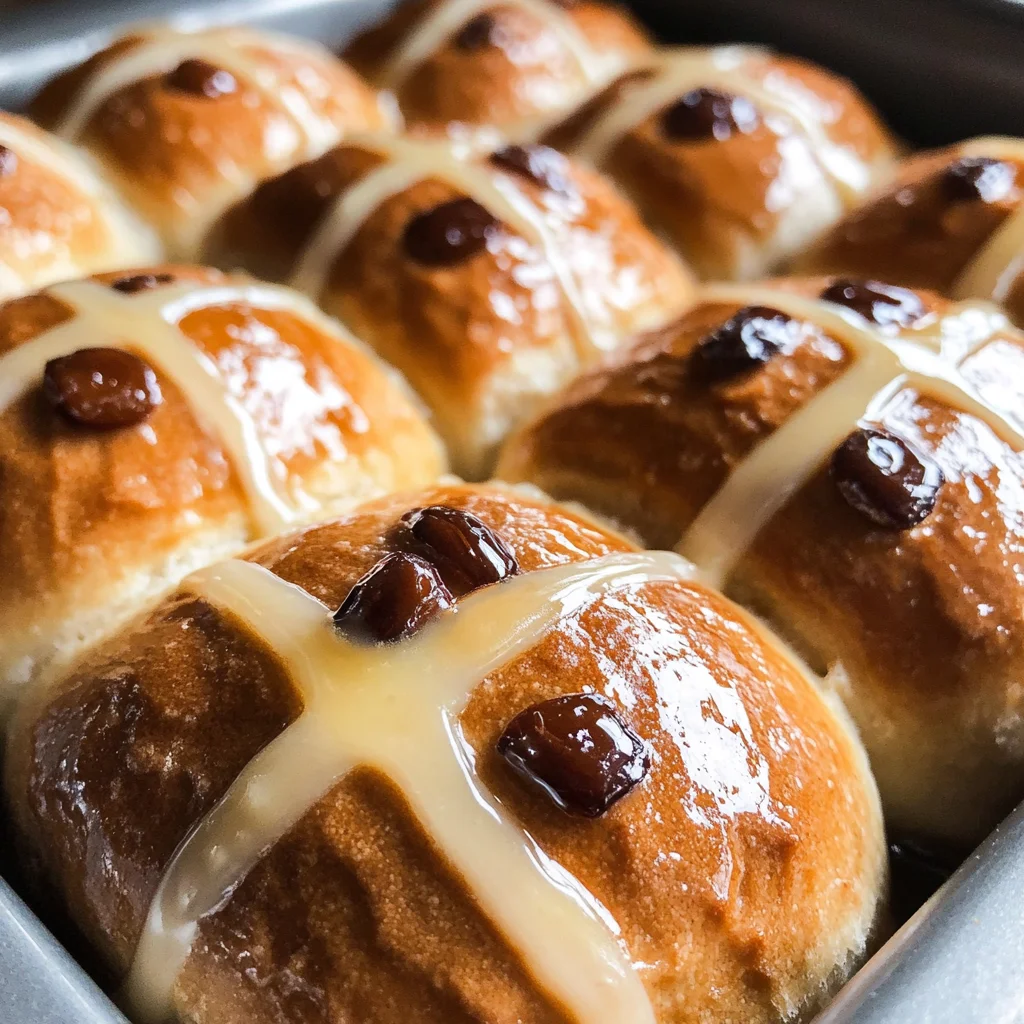
Indulge in the warmth and nostalgia of Easy Hot Cross Buns, a delightful treat perfect for any occasion. These soft, spiced buns are studded with sweet sultanas and topped with iconic crosses, making them an irresistible addition to your breakfast table or holiday gatherings. The inviting aroma will fill your home, creating a sense of comfort and joy that lingers long after they’re devoured. Whether enjoyed fresh out of the oven or toasted with a spread of butter, these buns promise to bring loved ones together around the table. Perfectly balanced between sweetness and spice, they embody not just a recipe but a cherished tradition.
- Prep Time: 20 minutes
- Cook Time: 20 minutes
- Total Time: 40 minutes
- Yield: About 12 servings 1x
- Category: Breakfast
- Method: Baking
- Cuisine: General
Ingredients
- 1/2 cup warm water
- 1/2 cup warm milk (or plant-based milk)
- 1/2 cup plus 1 tbsp light brown sugar
- 4 tsp active dried yeast
- 1/3 cup melted butter (or plant-based alternative)
- 1 egg (room temperature)
- 4 cups bread flour
- 1 tbsp mixed spice or pumpkin pie spice
- 1 tbsp cinnamon
- 1 cup sultanas (or chocolate chips for variation)
- 1/4 cup flour (for crosses)
- 2 tbsp water (for crosses)
- 1 tbsp maple syrup
- 1 tbsp water (for glaze)
Instructions
- In a large bowl, combine warm milk, warm water, one tablespoon of brown sugar, and yeast. Let sit for about 2 minutes until bubbly.
- Stir in two cups of flour and cover with plastic wrap, letting it rise for about 30 minutes.
- In another bowl, mix melted butter and remaining sugar until combined. Add egg, salt, spices, vanilla extract, and mix well.
- Slowly incorporate the risen yeast mixture followed by remaining flour to form a cohesive dough.
- Knead on a floured surface until smooth (about 10 minutes), then shape into balls.
- Place in a greased dish and let rise until doubled in size (30 minutes to an hour).
- Preheat oven to 220°C (425°F). Pipe crosses on buns using flour and water paste before baking for about 15-20 minutes until golden brown.
- Brush with maple syrup glaze after baking and let cool before enjoying.
Nutrition
- Serving Size: 1 serving
- Calories: 190
- Sugar: 8g
- Sodium: 150mg
- Fat: 5g
- Saturated Fat: 3g
- Unsaturated Fat: 2g
- Trans Fat: 0g
- Carbohydrates: 32g
- Fiber: 2g
- Protein: 4g
- Cholesterol: 25mg