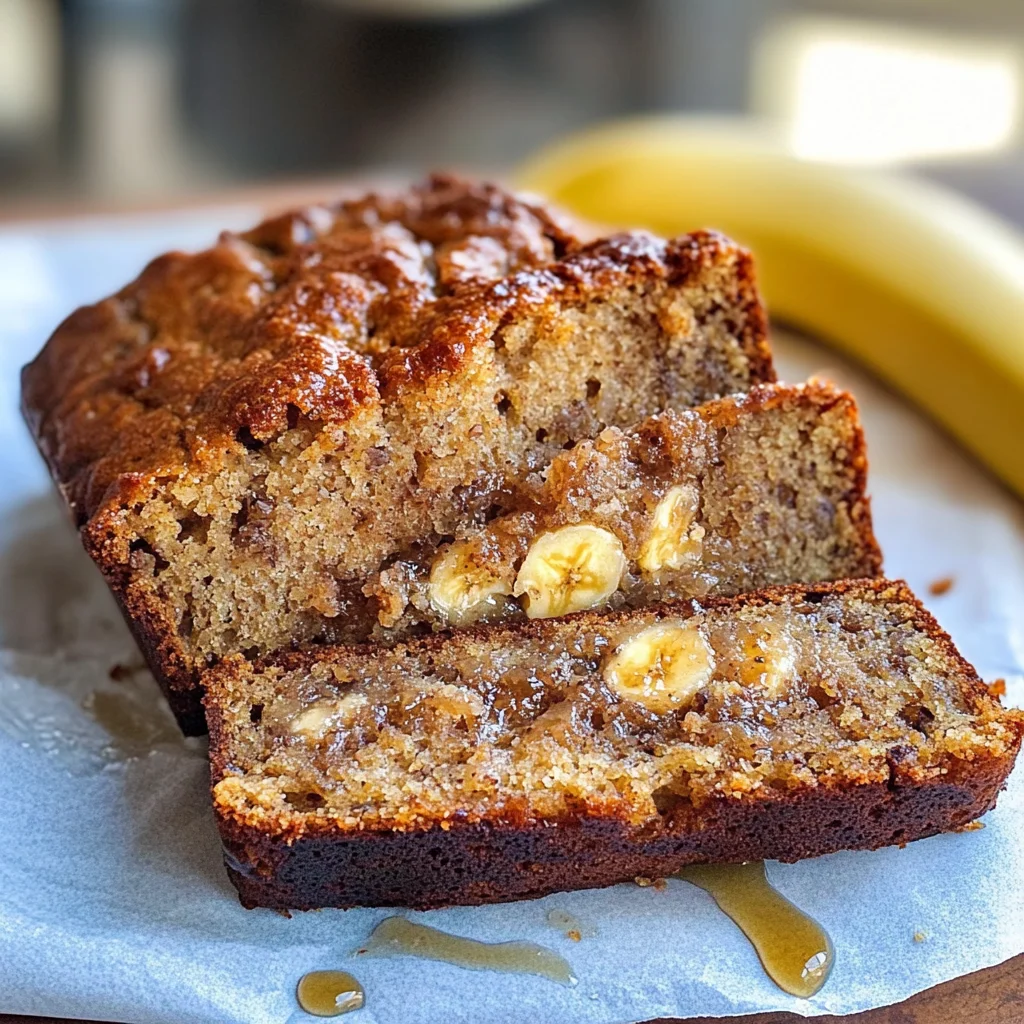
Fuel Your Day: The Ultimate High Protein Banana Bread (Seriously Delicious!)
There’s something truly extraordinary about the aroma of freshly baked banana bread wafting through your kitchen. It’s as if the very air has been infused with warmth and love, wrapping you in a cozy embrace. This isn’t just any banana bread; it’s Fuel Your Day: The Ultimate High Protein Banana Bread (Seriously Delicious!). This recipe is more than just a delightful snack; it’s an experience that merges the comforting nostalgia of home baking with the nutritional power of protein – perfect for busy mornings, post-workout fuel, or an afternoon pick-me-up. Imagine slicing into a loaf that’s not only deliciously moist but also brimming with wholesome ingredients that make you feel good inside and out. Each bite is a harmonious blend of sweetness from ripe bananas and maple syrup, complemented by the crunchy texture of walnuts and the rich creaminess from Greek yogurt. Trust me, this banana bread is going to change the way you think about snacking.
I’ve always been captivated by recipes that balance taste and nutrition, and this one checks all the boxes! It’s like giving a warm hug to your body while treating your taste buds to something special. The great thing about this high-protein banana bread is its versatility; it can be enjoyed for breakfast, as part of your meal prep for the week, or even as a guilt-free dessert. Whether you’re running out the door or settling in with a cup of tea, every slice promises to deliver not just flavor but also sustenance. So grab those ripe bananas, and let’s embark on this culinary journey together!
Ingredients:
Before we dive into the mixing bowl, let’s gather our beautiful ingredients. Each one plays a vital role in crafting our ultimate banana bread that is both satisfying and nourishing.
- 3 ripe bananas, mashed (about 1 ½ cups). Ripe bananas are essential for our recipe because they bring natural sweetness and moisture to the bread without needing too much added sugar. Look for bananas that are heavily speckled with brown spots; they’ll be extra sweet and easy to mash into a creamy consistency. The sugars develop as they ripen, creating that lovely depth of flavor we want in our banana bread.
- ½ cup unsweetened applesauce. This liquid gold not only helps keep our banana bread moist but also adds another layer of sweetness without extra sugar. You can easily find applesauce at most grocery stores or make your own by gently cooking down apples until soft and then pureeing them. If you’re looking for even more flavor, try using cinnamon or spiced applesauce!
- ¼ cup maple syrup or your favorite sugar substitute. Maple syrup is not just a sweetener; it brings an earthy richness that pairs beautifully with bananas. It’s important to use pure maple syrup rather than imitation syrups for authentic flavor—trust me on this! If you prefer a sugar substitute, look for options that measure cup-for-cup like Stevia or monk fruit sweetener.
- ¼ cup melted coconut oil or vegetable oil. This ingredient introduces healthy fats that contribute to the tender crumb of our banana bread while adding a subtle coconut flavor if you’re using coconut oil—absolutely delightful! Make sure it’s melted but slightly cooled before adding it to avoid cooking the eggs prematurely.
- 2 large eggs or egg substitute. Eggs serve as binders in our batter while providing protein and structure—truly non-negotiable here! If you’re opting for an egg substitute like flaxseed meal mixed with water or chia seeds, you’ll want to prepare it ahead of time so it becomes gel-like before mixing.
- ½ cup Greek yogurt or cottage cheese (for moisture and extra protein). This ingredient is my secret weapon! Greek yogurt adds creaminess while packing in protein which elevates our banana bread from mere snack territory to a hearty meal option. If using cottage cheese instead, blend it slightly for an ultra-smooth texture before incorporating it into the mix.
- 1 tsp vanilla extract. A splash of vanilla enhances all those lovely flavors we’re working with; think of it as an aromatic bridge uniting everything together. Choose quality pure vanilla extract over synthetic options—your taste buds will thank you!
- 2 scoops (around ½ cup) vanilla or chocolate protein powder. Adding protein powder boosts not only the nutritional value but also creates a wonderfully fluffy texture in your loaf—a must for anyone looking to fuel their day! Pick flavors that complement bananas well; I recommend vanilla for its versatility.
- 1¾ cups oat flour or whole wheat flour. Oat flour provides a nutty flavor profile while being gluten-free—and it’s incredibly easy to make at home by simply blending rolled oats until fine! Alternatively, whole wheat flour offers heartiness along with fiber benefits but may yield a denser loaf compared to oat flour.
- 1 tsp baking soda. This leavening agent works wonders by creating those beautiful air pockets in our loaf as it bakes—trust me, we want this reaction! Be sure your baking soda is fresh so we get maximum rise.
- ½ tsp ground cinnamon. Ahh, cinnamon—the spice that evokes feelings of comfort and nostalgia! It complements bananas beautifully while adding warmth that’s simply irresistible!
- ¼ tsp salt. Just a pinch goes a long way in enhancing flavors; salt balances sweetness so don’t skip this step!
- ½ cup chopped walnuts or pecans (optional). Nuts add delightful crunch along with healthy fats; feel free to toast them lightly beforehand to elevate their flavor even further!
- ¼ cup peanut butter (optional) (for added protein and flavor). Peanut butter gives richness while also enhancing chewiness; opt for natural varieties without added sugars for best results!
Equipment You’ll Need:
Now that we’ve gathered our ingredients, let’s talk about tools—the unsung heroes of any successful baking venture! Having the right equipment on hand makes everything smoother and more enjoyable when diving into your culinary creations.
- 9×5 inch loaf pan – This size is absolutely paramount for achieving that classic loaf shape we’re after here! A sturdy metal pan ensures even heat distribution during baking which leads to perfectly cooked edges and crumb—no soggy bottoms allowed!
- Mixing bowls – You’ll need at least two: one large bowl for combining wet ingredients and another medium bowl for whisking dry ones together separately first—this step ensures even mixing later on.
- Mashing tool (fork or potato masher) – You can’t go wrong with either option when it comes time to turn those ripe bananas into mushy goodness! Ensure there are no lumps left behind so each slice has consistent texture throughout.
- Whisk – This handy tool will help you combine dry ingredients effortlessly while ensuring there are no clumps left behind from flour or baking powder—smooth batter = happy baker!
- Rubber spatula – Perfect for folding ingredients gently together without deflating any air bubbles we’ve carefully incorporated earlier—which leads us straight towards fluffy perfection!
Preparing Fuel Your Day: The Ultimate High Protein Banana Bread (Seriously Delicious!)
Step 1: Preheat & Prepare Your Pan
Let’s start off strong by preheating your oven to 350°F (175°C). This step isn’t just about warming things up; it’s crucial because it allows us to achieve an even bake right from the get-go! While waiting patiently during those few minutes—as tempting as it may be—prepare your trusty loaf pan by greasing it lightly with either coconut oil spray or vegetable oil followed by dusting with flour afterward—this prevents sticking later on when we want smooth slices coming out effortlessly post-bake.
Step 2: Combine Wet Ingredients
In your large mixing bowl, let’s move forward by mashing those ripe bananas until they resemble creamy perfection—think baby food consistency here! Once you’ve achieved this delightful state, add unsweetened applesauce alongside maple syrup followed by melted coconut oil (or veggie oil), eggs (or substitute), Greek yogurt (or cottage cheese), and finally vanilla extract—all these elements harmonize beautifully creating layers upon layers of flavor magic within our batter! Stir gently but thoroughly until everything becomes smooth & cohesive—a visual cue would be seeing no lumps remaining which could otherwise interrupt our quest towards deliciousness ahead.
Step 3: Mix Dry Ingredients Separately
Now onto mixing dry components—grab another bowl where you’ll whisk together oat flour (or whole wheat flour), baking soda, ground cinnamon & salt until evenly distributed among themselves making sure there are no rogue clumps hanging around waiting mischievously! Mixing dry ingredients separately first allows them time enough build momentum before diving headfirst into wet mixture—a technique known colloquially among bakers as “pre-mixing”—and trust me when I say this helps immensely come baking time!
Step 4: Combine Wet & Dry Mixtures
With both mixtures now prepared masterfully—it’s time we unite them into one glorious batter masterpiece! Slowly pour dry ingredients over wet mixture while stirring gently using rubber spatula until just blended—be cautious here; overmixing leads us down path towards dense loaf territory which none desire! The goal should be integrating everything seamlessly without losing air bubbles created earlier through mashing/whipping techniques employed thus far—we want fluffy heaven contained within each slice after all!
Stay tuned as we continue crafting this incredible high-protein banana bread—I can’t wait for you all to experience what awaits once baked perfectly golden brown on outside yet moist within…
Step 5: Embrace the Harmony of Wet and Dry Ingredients
Now that we’ve introduced our dry ingredients, it’s time to gently bring everything together. Take the bowl filled with your wet mixture—oh, that velvety smoothness is just a prelude to the magic that’s about to happen! Gradually add the flour mixture to the banana concoction. This step is crucial because it allows for the even distribution of leavening agents, ensuring that your banana bread rises beautifully and has an airy texture. Here’s where patience is key: mix just until you see no streaks of flour—trust me, overmixing can lead to a dense loaf. As you stir, you’ll notice how the batter transforms, thickening into a luscious blend that smells like pure comfort.
What you want to achieve is a consistency that’s thick yet pourable; think of it as a silky blanket enveloping those glorious bananas. Visually, it should look homogenous without any lumps or dry patches. And remember, this step isn’t just about combining ingredients; it’s about coaxing out the flavors and creating a batter that promises joy in every bite. So take your time—don’t rush this step! Enjoy the process, breathe in those intoxicating aromas wafting from your mixing bowl.
Step 6: Fold in Nature’s Crunch—The Optional Add-ins
Here comes one of my favorite parts: adding in some optional extras! If you’re feeling adventurous (and I wholeheartedly encourage you to be), now’s the moment to fold in those chopped walnuts or pecans. These nuts aren’t just for crunch; they introduce a nutty depth that dances playfully with the sweetness of bananas and maple syrup while also delivering healthy fats and protein. If you’re opting for peanut butter, this is when you’ll want to incorporate it as well. The creamy richness of peanut butter will elevate your banana bread into something truly extraordinary, adding an indulgent layer of flavor and more protein to fuel your day.
Gently fold these ingredients into your batter using a spatula or wooden spoon—think of this as tucking them into their cozy bed rather than stirring aggressively. This technique helps maintain the tenderness of your batter while ensuring even distribution. You want those delightful bits of nuts or peanut butter dispersed throughout so every slice packs a flavorful punch! Just imagine slicing through that warm loaf later and discovering little nuggets of deliciousness nestled within—that’s what makes this bread special!
Step 7: Pouring with Purpose—Get Ready for Baking Bliss
Once your batter is fully mixed and infused with all those wonderful flavors, it’s time to transfer it to your prepared loaf pan. Carefully pour the luscious mixture into the pan, using a spatula to scrape every last bit from your mixing bowl—after all, we don’t want any deliciousness left behind! Gently shake the pan side-to-side and tap it on your counter to level out the batter; this helps eliminate any air bubbles trapped inside, which can affect how evenly your bread bakes.
As you look at that pan filled with potential goodness, pause for a moment and appreciate how far you’ve come! You’re about to embark on an aromatic journey as this beauty bakes in the oven. The next step is crucial: slide it into your preheated oven set at 350°F (175°C) and set a timer for 45 minutes. But don’t wander too far away just yet! The aroma will begin filling your kitchen soon enough—a sweet invitation that will draw everyone nearby.
Around the thirty-minute mark, start keeping an eye on it through the oven door (I know it’s tempting to peek!). You’re looking for a golden-brown crust forming on top—a lovely visual cue indicating that things are progressing beautifully inside. Trust me when I say patience is vital here; let it bake fully without opening that door too often since each peek can cause fluctuations in temperature that may impact rising!
Step 8: The Perfect Bake—Testing for Doneness
When those 45 minutes are up (or maybe even a tad longer if needed), it’s time for one last test before we indulge in our creation! Grab a toothpick or skewer and gently insert it into the center of your banana bread—this simple act will reveal whether it’s ready for its grand debut or if it needs just a few more minutes in the oven. If it comes out clean or with just a few moist crumbs clinging to it (not wet batter!), congratulations—you’ve got yourself some absolutely fantastic banana bread!
If not quite there yet, don’t fret; pop it back into the oven for an additional 5-10 minutes but keep an eye on it during this time because ovens can vary significantly in baking power. Once done, let it rest in its pan for about 10 minutes before transferring it onto a wire rack; this resting phase allows steam to escape and prevents sogginess while maintaining moisture within—the perfect balance!
As you allow your masterpiece to cool completely (if you can resist diving right in!), take a moment to savor this experience. You’ve crafted something that’s not just food but also love baked right into each slice—a true testament to what home cooking is all about!
Conclusion:
As we wrap up our journey through baking this extraordinary recipe together, I hope you feel as excited as I do about creating something truly special right in your own kitchen. There’s something undeniably magical about watching simple ingredients transform into a loaf of high-protein goodness that is both nourishing and utterly delicious. With every bite of this banana bread, you’re not just tasting the wonderful combination of flavors but also experiencing the joy of making something wholesome with love. It’s these moments spent baking—filled with laughter and perhaps a little mess—that make cooking such a profoundly satisfying endeavor.
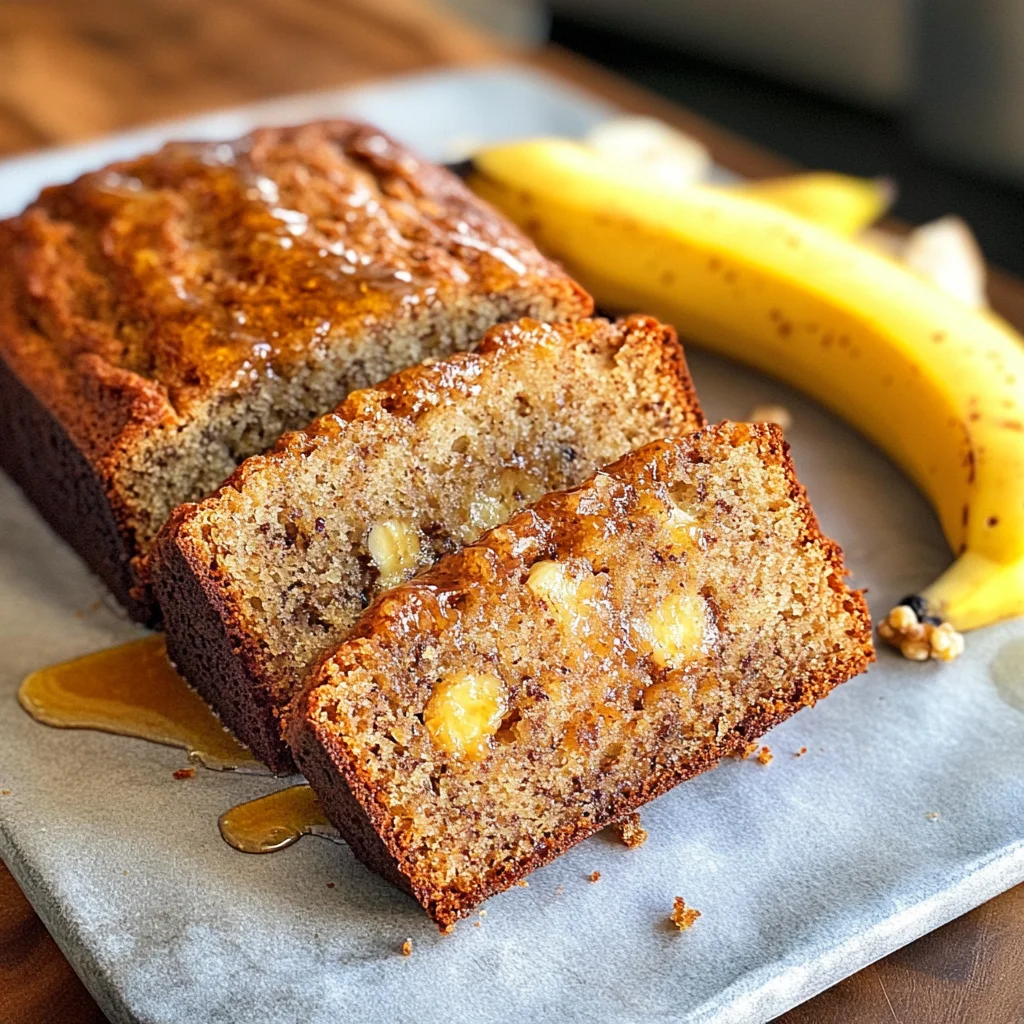
This recipe is an absolute must-try not just because of its heartwarming taste but also due to how wonderfully versatile it is! Picture pulling this loaf from the oven—the golden crust glistening under the kitchen light—and feeling that warm rush of accomplishment wash over you. Whether you’re enjoying it for breakfast with your morning coffee or serving slices as an afternoon snack during family gatherings, this high-protein banana bread fits perfectly into any occasion. It’s a delightful way to share warmth and joy with friends and family!
Imagine savoring one slice with creamy nut butter spread across its surface while sipping on your favorite tea; for an afternoon pick-me-up, try pairing it with some fresh fruit or yogurt; or for a truly decadent experience, serve warm slices alongside a drizzle of honey or syrup—it’s pure bliss! The beauty lies not only in its flavors but also in how beautifully adaptable this recipe is; whether you’re adding chocolate chips for sweetness or swapping out nuts based on what you have on hand, each iteration offers something new while still keeping that signature taste intact.
Feeling adventurous? This recipe is wonderfully adaptable! You could incorporate spices like nutmeg or cardamom for an exotic touch or swap bananas out entirely for other fruits such as applesauce or pumpkin puree depending on what inspires you at the moment. Each twist offers another layer of creativity while still shining brightly in its own unique way. So go ahead—give this recipe a try, embrace your culinary instincts, share your creations with loved ones, and connect over the joy of baking together. I can’t wait to hear how yours turns out!
Fuel Your Day: The Ultimate High Protein Banana Bread (Seriously Delicious!)
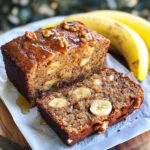
Fuel Your Day: The Ultimate High Protein Banana Bread (Seriously Delicious!) is more than just a recipe; it’s a nourishing treat that will elevate your snack game. The delightful aroma of this banana bread baking fills your kitchen with warmth and comfort, making it the perfect choice for busy mornings, post-workout snacks, or an afternoon pick-me-up. Bursting with sweetness from ripe bananas and maple syrup, complemented by the creaminess of Greek yogurt, every slice is moist and satisfying. This high-protein banana bread is versatile enough to enjoy at any time of day, offering a delicious way to fuel your body while indulging your taste buds.
- Prep Time: 15 minutes
- Cook Time: 45 minutes
- Total Time: 1 hour
- Yield: Approximately 12 servings 1x
- Category: Dessert
- Method: Baking
- Cuisine: American
Ingredients
- 3 ripe bananas, mashed
- ½ cup unsweetened applesauce
- ¼ cup pure maple syrup
- ¼ cup melted coconut oil or vegetable oil
- 2 large eggs or egg substitute
- ½ cup Greek yogurt or cottage cheese
- 1 tsp vanilla extract
- 2 scoops vanilla protein powder
- 1¾ cups oat flour or whole wheat flour
- 1 tsp baking soda
- ½ tsp ground cinnamon
- ¼ tsp salt
Instructions
- Preheat oven to 350°F (175°C) and grease a 9×5 inch loaf pan.
- In a large bowl, mash bananas until smooth. Add applesauce, maple syrup, melted oil, eggs (or substitute), Greek yogurt, and vanilla extract. Mix until well combined.
- In another bowl, whisk together oat flour, baking soda, cinnamon, and salt.
- Gradually add dry ingredients to wet mixture. Stir until just combined.
- Fold in chopped walnuts or pecans if using.
- Pour batter into the prepared loaf pan and level it out.
- Bake for 45 minutes or until a toothpick inserted in the center comes out clean.
- Let cool in the pan for 10 minutes before transferring to a wire rack.
Nutrition
- Serving Size: 1 slice (approximately 70g)
- Calories: 145
- Sugar: 8g
- Sodium: 90mg
- Fat: 4g
- Saturated Fat: 2g
- Unsaturated Fat: 2g
- Trans Fat: 0g
- Carbohydrates: 24g
- Fiber: 3g
- Protein: 5g
- Cholesterol: 20mg