15 Elegant Lavender And Lemon Recipes for Spring
When I think of spring, my heart dances at the thought of blossoms bursting forth in a riot of colors, the air filled with the intoxicating scent of fresh blooms, and the promise of warmth after those long winter months. It’s a time when we can shed our heavy coats and embrace lightness—both in spirit and in our meals. This season inspires me to create dishes that are not just food but joyful experiences. That’s why I’m thrilled to share with you 15 Elegant Lavender And Lemon Recipes for Spring. These delightful creations marry the floral notes of lavender with the zesty brightness of lemon, crafting a culinary symphony that’s truly extraordinary. Each recipe is infused with love and care, designed to elevate your gatherings, be it brunches or afternoon teas.
Lavender has always held a special place in my heart—it evokes memories of sun-drenched gardens and serene moments spent sipping lemonade on a warm afternoon. And when you pair it with the vibrant acidity of lemons, you unlock a world where flavors flirt and dance together in perfect harmony. Whether you’re planning a baby shower, bridal brunch, or simply wanting to treat yourself on a sunny Sunday morning, these recipes will serve as your go-to guide for creating something magical in your kitchen. Trust me; these are not just any recipes; they’re invitations to celebrate springtime with elegance and joy.
15 Elegant Lavender And Lemon Recipes for Spring: A Fresh Approach to Seasonal Delights
These recipes are perfect for all your warm-weather showers and gatherings. They encapsulate the essence of spring while offering versatility that can brighten any occasion.

Ingredients:
As we embark on this culinary journey together, let’s take a moment to appreciate each ingredient that will transform our simple dishes into something memorable and utterly delightful.
- 1 tablespoon dried culinary lavender: This is where the magic begins! The delicate yet aromatic essence of culinary lavender adds an enchanting floral note that elevates every dish it touches. Look for high-quality lavender—make sure it’s labeled as food-grade—to avoid any pesticides or chemicals. If you’re ever unsure about using an ingredient like this, remember that less is more; a little can go a long way in providing that unique flavor profile!
- 1 large lemon, zest and juice: Ah, lemons—the sunny jewels of spring! Their bright acidity brings life to everything from cakes to sauces. When selecting your lemon, look for ones that feel heavy for their size—the juicier they are, the better! The zest is particularly important here; it contains essential oils that add depth to our recipes. Just remember to wash them thoroughly before zesting because you want only the fragrant outer layer and not the bitter white pith beneath it.
- ¾ cup granulated sugar: This sweetener does more than just add sweetness; it balances out the tartness of our lemons beautifully while enhancing the flavors of lavender. When you’re choosing sugar, opt for organic varieties when possible—they often have fewer additives and offer a cleaner taste. Don’t rush this step; allowing the sugar to dissolve properly during mixing helps create that lovely texture we all crave.
- ½ cup blackberries: These juicy gems not only provide bursts of sweetness but also add gorgeous color to your dishes. Make sure to pick ripe blackberries—look for deep black hues with no mushy spots! They’ll pair perfectly with both lemon and lavender, creating layers upon layers of flavor that are nothing short of delightful.
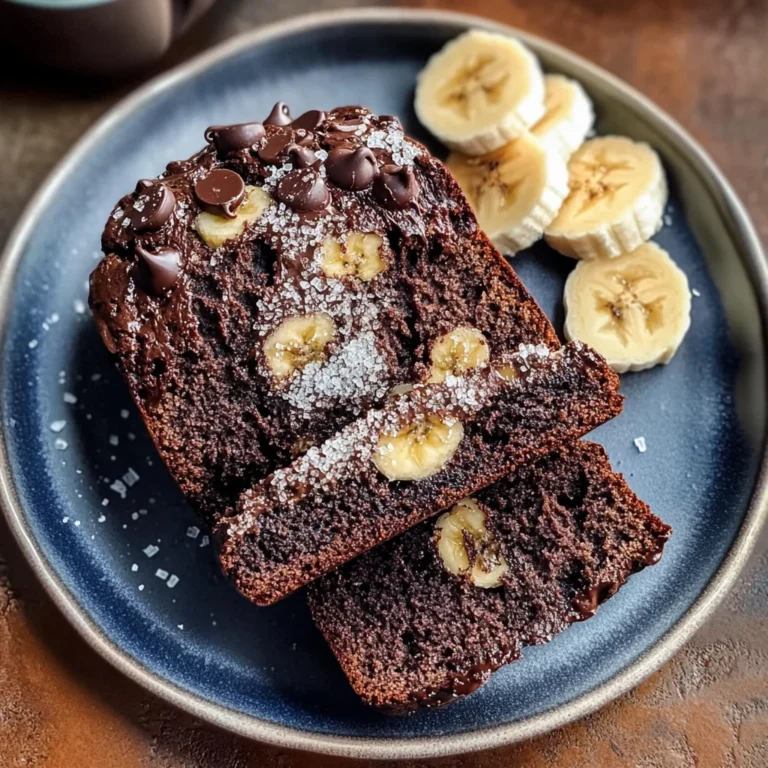
- ½ cup dark chocolate chips: Chocolate is always welcome at any table! Adding dark chocolate chips introduces a rich depth that contrasts beautifully with our brighter ingredients while satisfying any sweet tooth present at your gathering. Aim for high-quality chocolate with at least 60% cocoa content for maximum flavor impact—it’s essential!
- 1 tablespoon fresh spearmint leaves, chopped: Spearmint adds an invigorating freshness to our recipes—a nod toward spring’s rejuvenating spirit! When selecting mint, look for vibrant green leaves without signs of wilting; they should smell wonderfully fragrant as well! Chopping them releases their essential oils, so don’t skip this step—you want every bit of flavor!
- 2 large eggs: Eggs act as binding agents in many desserts while also contributing moisture—essential elements for achieving fluffy textures! Always use fresh eggs (check expiration dates) as they significantly improve your results; they’ll whip up lighter and fluffier than older ones.
- ½ cup unsalted butter, softened: This ingredient is crucial for creaming properly and achieving that lightness we aim for in our elegant recipes! If your butter is too cold or too warm (melted), you won’t get quite the same airy texture—so let it sit out until it’s soft enough to press into easily but still holds its shape.
- ½ cup sparkling grape juice: A delightful non-alcoholic alternative that brings effervescence without compromise! The fizz enhances both flavor and texture while maintaining sophistication—a perfect choice when hosting friends or family who appreciate something refreshing yet elegant!
- 1 ½ cups all-purpose flour: Flour is what gives structure to our baked goods—it’s essentially the backbone! Be sure not to pack it down into your measuring cup; instead, spoon it loosely before leveling off—this ensures accurate measurements which are absolutely paramount in baking.
- ½ cup buttermilk: Buttermilk adds richness while also reacting with baking soda (if used) or making things tender due to its acidity—it’s an ingredient I swear by! If you find yourself without it, fear not; mix one tablespoon of vinegar or lemon juice into regular milk—it’ll mimic buttermilk perfectly!
- 1 teaspoon pure vanilla extract: Vanilla enhances flavors beautifully; it’s like putting on a finishing touch that pulls everything together harmoniously! Always choose pure extracts over imitation ones—the difference is profound!
- 8 oz cream cheese, softened: Cream cheese provides richness and smoothness that’s hard to replicate—it’s indispensable for achieving creamy frostings or fillings. Let it soften completely at room temperature before using so that it blends seamlessly into whatever dish you’re preparing.
I promise you these ingredients will work together beautifully—a true testament to what spring has to offer us in terms of flavor!
Equipment You’ll Need:
Having the right tools makes all the difference when creating something extraordinary in your kitchen. While they may not be ingredients, these essential partners will help ensure everything runs smoothly as we embark on crafting these elegant recipes.
- Mixing bowls – A set of various sizes allows flexibility when tackling different components simultaneously without creating chaos on your countertop! Choose bowls made from glass or stainless steel—they’re durable and won’t absorb odors or stains.
- Measuring cups & spoons – Precision matters immensely in baking; accurate measurements lead directly toward success! Opting for clear glass or metal options ensures durability over time.
- Whisk – A sturdy whisk is essential for aerating batters effectively during mixing; this process known as whipping creates lightness—trust me on this one!
- Spatula – A good silicone spatula helps scrape down sides seamlessly without leaving anything behind—a must-have tool when ensuring even mixing throughout.
- Baking pans (various sizes) – Depending on which delicious creation you decide upon today (cakes versus tarts!), having multiple options will serve you well!
Now that we’ve gathered everything we need let’s dive into preparing those incredible 15 Elegant Lavender And Lemon Recipes for Spring together!
Step 1: Infusing Flavor with Lavender
First things first—we need to infuse those lovely floral notes into our base mixture! Begin by gently heating some water with dried culinary lavender on low heat until fragrant—it should take only about 5 minutes max. This process extracts essential oils from the flowers while keeping bitterness at bay—trust me, what seems like an extra step now will yield profoundly satisfying results later on when combined with other ingredients!
Once you’ve achieved aromatic bliss (a divine scent wafting through your kitchen), remove from heat immediately so nothing scorches during steeping—it can happen fast if left unattended! Strain out those lovely buds using cheesecloth or fine mesh strainer before incorporating liquid back into whatever dish calls for it next—every drop counts!
Step 2: Creating Your Base
Now let’s bring together some magic by creaming softened butter alongside granulated sugar until lightened in color—a process typically taking around 3–5 minutes using either hand mixer/stand mixer fitted with paddle attachment works wonders here too! Don’t rush this step; proper aeration leads directly towards achieving fluffy textures later down line so patience pays off big time!
Add eggs one at a time after initial mixture reaches desired consistency—this ensures thorough blending without curdling happening mid-way through mixing process either way around (we wouldn’t want those pesky lumps ruining things!). Continue beating until fully incorporated before moving onto next phase involving dry ingredients combined separately beforehand…
Step 3: Introducing Dry Ingredients
In another bowl combine flour along side baking powder/soda depending upon chosen recipe variations throughout round-up here today—all whisked together thoroughly ensures proper distribution evenly across batter itself avoiding clumps forming during final stages later down line affecting rise/evenness overall outcome too much overall which isn’t ideal either way around either direction overall speaking!
Gradually fold dry mixture into wet batter carefully utilizing spatulas movements rather than vigorous stirring motions whilst trying maintain airiness achieved previously via creaming—isn’t this exciting? Watching how elements join forces harmoniously leads directly towards end goal bringing us closer together whilst crafting beautiful delights ahead waits patiently just beyond horizon awaiting completion soon enough!
Step 4: Adding That Zing
To finish off our glorious concoction don’t forget about adding freshly squeezed lemon juice/zest alongside infused lavender mixture previously prepared earlier too ensuring balance achieved harmoniously between sweetness.
Step 5: Infusing the Essence of Lavender and Lemon
Now that we have our ingredients prepped, it’s time to bring the beautiful flavors of lavender and lemon together in a way that will create a truly unforgettable experience. Start by taking a small saucepan and adding 1 cup of water along with 2 tablespoons of dried culinary lavender. This infusion is the heart of our elegant recipe—it extracts the delicate floral notes from the lavender while providing a soothing aroma that fills your kitchen with warmth and comfort. Over medium heat, allow this mixture to simmer gently for about 10 minutes. As the water heats, you’ll notice a delightful fragrance wafting through the air—this is your cue that magic is happening! Remember, don’t rush this step; patience here allows the flavors to develop fully, creating a rich essence rather than just a hint of lavender.
Once your infusion has simmered, strain it through a fine mesh sieve into a bowl or measuring cup to remove the lavender buds. Trust me, this step is absolutely paramount as it ensures that only the silky liquid gold remains for your recipe—any lingering bits would detract from the final texture and presentation of your dish. Let this infusion cool while you prepare for the next steps; it’s essential because incorporating hot liquids can sometimes alter how other ingredients behave in baking. By allowing your lavender-lemon infusion to come to room temperature, you’re ensuring everything blends harmoniously when combined later on.
Step 6: Mixing Your Dry Ingredients
With our infusion cooling beautifully, let’s pivot to those dry ingredients that will form the backbone of our dessert. Grab another mixing bowl and combine 2 cups of all-purpose flour, 1 teaspoon of baking powder, and ½ teaspoon of baking soda. These leavening agents are crucial for achieving that light, airy texture we crave in spring desserts—they help elevate each bite into something ethereal. Use a whisk to ensure even distribution; this simple action prevents any clumps from forming and creates an even rise throughout your baked goods.
As you mix these dry ingredients together, take a moment to appreciate how they come together like an orchestra tuning up before a grand performance. Each component plays its part, building towards something extraordinary. Once mixed well, set this bowl aside because we’ll be coming back to it shortly when it’s time to introduce our wet mixtures. Remember, incorporating dry ingredients properly not only affects texture but also influences how flavors intermingle during baking—so give it your full attention!
Step 7: Creaming Butter and Sugar
Now let’s move on to one of my favorite parts—creaming together butter and sugar! In a large mixing bowl, add ½ cup (1 stick) of softened butter alongside 1 cup of granulated sugar. Using either an electric mixer or good old-fashioned elbow grease with a whisk (I often find joy in doing it by hand!), cream these two together until you achieve a light and fluffy consistency—this typically takes about 3-5 minutes. The reason we cream butter and sugar is twofold: first, it incorporates air into the mixture which results in that wonderfully tender crumb we all adore; second, it allows the sugar to dissolve slightly into the butter before eggs are added later on.
As you mix, take note of how the color transforms from yellowish-golden into a pale pastel hue—it’s like watching sunrise over golden fields! You want this mixture to almost double in volume; if you rush through this step, you risk dense baked goods instead of the light texture we’re aiming for. So take your time here—enjoy the rhythmic sound of your mixer or whisk as it beats against the sides of your bowl—and be sure to scrape down those sides every now and then so everything gets beautifully incorporated.
Step 8: Adding Eggs and Lavender-Lemon Infusion
With our butter and sugar perfectly creamed together, it’s time to introduce our eggs—this is where things start getting exciting! Crack 2 large eggs one at a time into your mixture while continuing to beat at medium speed until fully blended in each addition. Eggs lend moisture but also act as emulsifiers; they help bind everything together so that there are no stray ingredients drifting apart in your batter. After both eggs are well incorporated, pour in your cooled lavender-lemon infusion along with 1 teaspoon of vanilla extract, stirring gently until just combined.
Why do we use vanilla? It adds depth—a warm undertone that enhances both flavors without overpowering them. As you stir in this fragrant infusion, pay attention—the aroma should coax memories from lazy summer afternoons spent sipping lemonade on sun-drenched patios! Make sure not to overmix at this point; gentle folding is key as overworking can lead to tough textures rather than tender bites bursting with flavor. Your mixture should appear smooth but may have tiny flecks from the lavender—a charming reminder of what’s about to blossom in your oven!
And there you have it—a shining example showcasing why springtime deserves celebration through elegant recipes infused lovingly crafted around flavors reminiscent warmth nature provides us generously year after year! From vibrant lemon zest echoing sunshine days ahead alongside hints sweetened whispers delicate florals dancing gracefully throughout dishes enjoyed among loved ones gathered close—all collectively creating symphonies flavors worth sharing endlessly till next season rolls around yet again…
Storage and Enjoyment Tips for Your 15 Elegant Lavender And Lemon Recipes for Spring
Now that you’ve crafted these beautiful 15 Elegant Lavender And Lemon Recipes for Spring, it’s time to bask in the glory of your creation! The tantalizing aroma of lemon zest mingling with the floral notes of lavender is simply irresistible, and trust me, your friends and family will be clamoring for a taste. Before you dive into this delectable feast, let’s talk about how to preserve any leftovers (if there are any!) so you can savor this delightful experience a little longer.
Storing Leftover 15 Elegant Lavender And Lemon Recipes for Spring
When it comes to storing these elegant treats, using the right container is absolutely paramount. Opt for airtight containers made from glass or high-quality plastic, as they help maintain the freshness and flavor of your creations. Ideally, you’ll want to keep your lovingly prepared dishes in the refrigerator, where they can last up to three days without losing their charm. To extend their shelf life while keeping them soft and scrumptious, consider placing a slice of bread in the container with them; this little trick helps maintain moisture and ensures that every bite retains its delightful texture. After storage, you’ll notice that flavors might meld beautifully—especially if you’ve made anything with a creamy base or infused syrup—enhancing that symphony of flavors even further. When you’re ready to enjoy again, simply let them come to room temperature or warm them gently in the oven; trust me on this, the scents that will waft through your kitchen are utterly intoxicating!
Freezing Components for Later
If you’re eager to enjoy these delightful recipes beyond just a few days or want to prepare ahead of time for impromptu gatherings (because who doesn’t love spontaneity?), freezing certain components is a fantastic option! To freeze effectively, first ensure everything has cooled completely before transferring it into freezer-safe bags or containers—this helps prevent ice crystals from forming and ruining textures. Most components can stay frozen for up to three months without losing their quality. Just remember to label each bag with the date so you can keep track of your delicious investments! When you’re ready to use them, simply thaw overnight in the fridge or pop them directly into a preheated oven or microwave depending on what you’re after. This method not only saves time but also allows you to indulge in those fabulous flavors whenever the mood strikes—a true convenience factor that makes cooking even more joyful!
Dessert
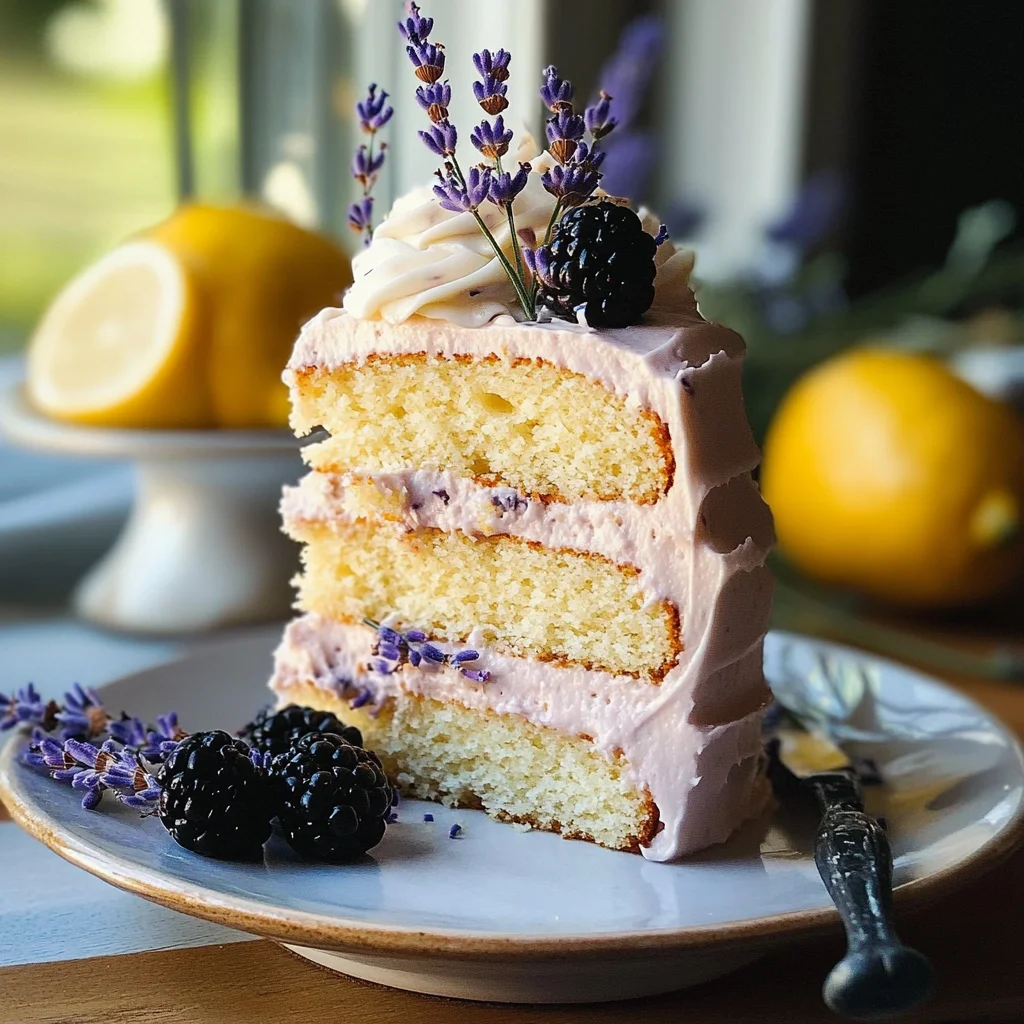
15 Elegant Lavender And Lemon Recipes for Spring
Spring is the season of renewal, and what better way to celebrate its arrival than with 15 Elegant Lavender And Lemon Recipes? These delightful creations combine the floral essence of lavender with the bright zest of lemon, crafting refreshing desserts that are perfect for any gathering.
- Prep Time: 20 minutes
- Cook Time: 30 minutes
- Total Time: 50 minutes
- Yield: Serves 12 1x
- Category: Dessert
- Method: Baking
- Cuisine: American
Ingredients
- 1 tablespoon dried culinary lavender
- 1 large lemon, zest and juice
- ¾ cup granulated sugar
- ½ cup blackberries
- ½ cup dark chocolate chips
- 1 tablespoon fresh spearmint leaves, chopped
- 2 large eggs
- ½ cup unsalted butter, softened
- ½ cup sparkling grape juice
- 1 ½ cups all-purpose flour
- ½ cup buttermilk
- 1 teaspoon pure vanilla extract
- 8 oz cream cheese, softened
Instructions
- Preheat oven to 350°F (175°C) and grease two round cake pans.
- Infuse 1 cup of water with 2 tablespoons dried lavender over low heat for 10 minutes; strain and cool.
- In a mixing bowl, combine softened butter and sugar until fluffy.
- Add eggs one at a time, then mix in the cooled lavender infusion and vanilla extract.
- In another bowl, whisk together flour, baking powder, and baking soda.
- Gradually fold dry ingredients into the wet mixture along with buttermilk until just combined.
- Pour batter into prepared pans and bake for 25–30 minutes or until golden brown.
Nutrition
- Serving Size: 1 slice
- Calories: 220
- Sugar: 18g
- Sodium: 120mg
- Fat: 9g
- Saturated Fat: 5g
- Unsaturated Fat: 4g
- Trans Fat: 0g
- Carbohydrates: 30g
- Fiber: 1g
- Protein: 3g
- Cholesterol: 45mg