Salted Caramel Mocha Cookies
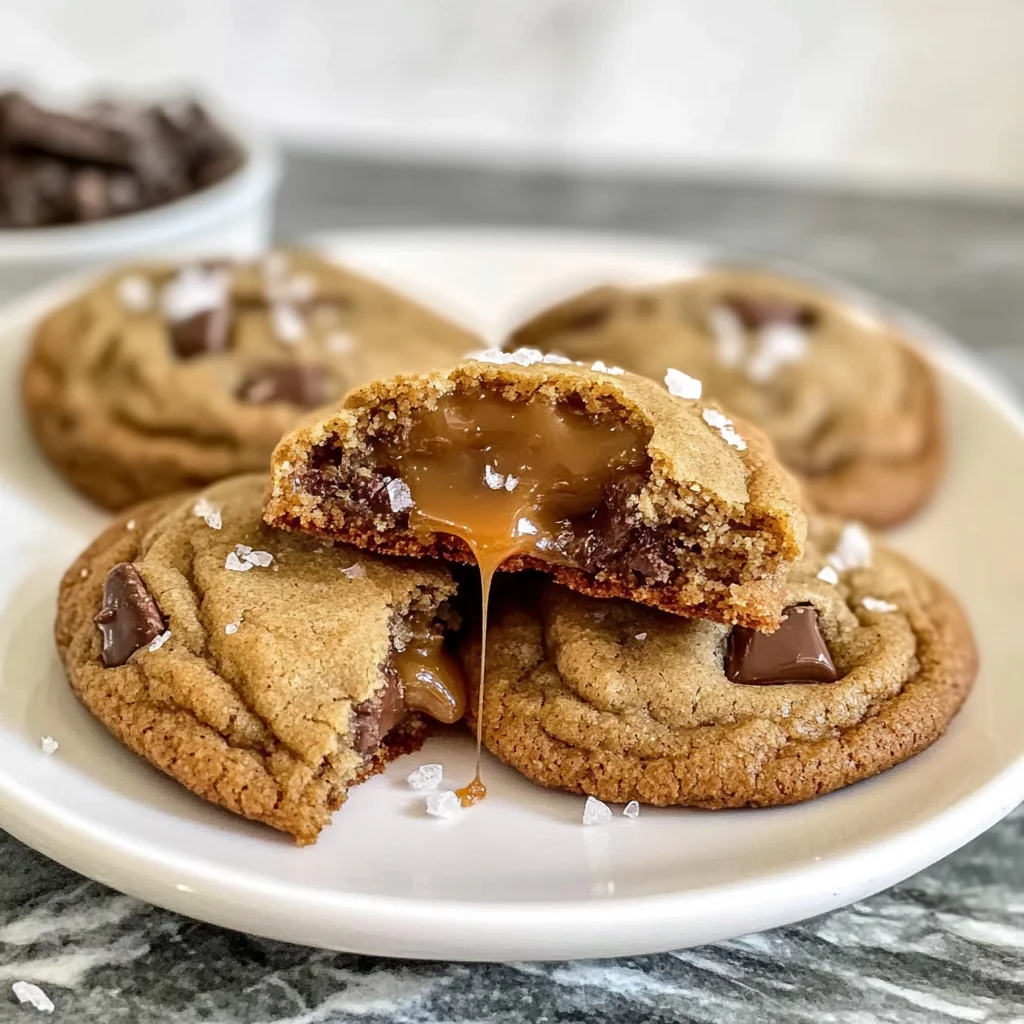
There’s a magical moment when you pull a batch of cookies out of the oven, and the warm, intoxicating aroma envelopes the room. It’s an experience that transcends mere baking; it’s a celebration of flavors and textures, a dance between sweet and salty that brings joy to your heart. Today, I want to share with you my absolute favorite cookie recipe: Salted Caramel Mocha Cookies. These cookies are not only utterly delicious but also wonderfully comforting — they have this rich, gooey caramel center that melts in your mouth, complemented perfectly by the deep, dark notes of coffee and chocolate. Each bite is like a warm hug on a chilly day, making them an experience you won’t soon forget.
What makes these Salted Caramel Mocha Cookies so special is their ability to evoke nostalgia while simultaneously introducing something new and exciting. The combination of salted caramel with mocha flavor isn’t just about taste; it’s a celebration of contrast — the sweetness of caramel meets the boldness of coffee in perfect harmony. Perfect for gatherings, cozy evenings with loved ones, or simply indulging yourself after a long day, these cookies are sure to become a cherished part of your dessert repertoire. Trust me when I say that once you make these cookies, you’ll find it hard to resist making them again and again.
Salted Caramel Mocha Cookies: A Sweet Symphony of Flavor
I’m so excited to guide you through making these incredible cookies! It’s not just about following the recipe; it’s about savoring every step and falling in love with the process. So let’s gather our ingredients and embark on this delightful culinary journey together!
Ingredients:
As we dive into creating our Salted Caramel Mocha Cookies, let’s take a moment to appreciate each ingredient’s role in crafting this masterpiece. Every component matters deeply, providing unique flavors and textures that come together in beautiful harmony.
- 2 sticks (1 cup) salted butter – The foundation of our cookies begins with butter. By using salted butter, we not only add richness but also enhance the flavor profile throughout the cookie. As the butter melts during baking, it creates those deliciously crisp edges while keeping the centers soft and chewy. Ensure your butter is at room temperature for optimal creaming; if it’s too cold or melted, you won’t achieve that perfect texture we’re after.
- 1 1/4 cups packed dark brown sugar – This is where the magic truly begins! Dark brown sugar adds depth with its molasses undertones, contributing to both flavor and moisture in our dough. The packing ensures we get every bit of sweetness needed for that gooey texture we adore in cookies. If you’re out of dark brown sugar, you can substitute it with light brown sugar mixed with a tablespoon of molasses for a similar effect.
- 1/4 cup granulated sugar – While brown sugar brings moisture and flavor complexity, granulated sugar helps create those lovely crisp edges we crave. It’s essential for balancing sweetness without overpowering our other flavors. Plus, it helps give structure to our cookies as they bake.
- 1 large egg plus 1 egg yolk – Eggs are crucial here! They provide both structure and moisture while also helping bind all our ingredients together beautifully. The extra yolk enhances richness and contributes to that chewy center we desire in every bite.
- 1 tablespoon vanilla extract – Ahh, vanilla! This humble ingredient has an extraordinary ability to elevate any dessert by adding warmth and complexity. Choose high-quality vanilla extract; trust me—it will make all the difference in flavor!
- 2 1/4 cups all-purpose flour – Flour acts as the backbone of our cookie dough; it’s what gives our cookies structure without being too dense or tough. Always measure your flour correctly by spooning it into your measuring cup and leveling it off—this ensures your cookies turn out perfectly every time.
- 2 tablespoons instant coffee granules – Here comes the mocha! Instant coffee not only infuses these cookies with that rich coffee flavor but also enhances the chocolate notes from our chunks later on. If you’re not keen on instant coffee, feel free to use finely ground espresso powder for an even deeper flavor.
- 1 teaspoon baking soda – Baking soda acts as our leavening agent here—it’s essential for achieving those lovely puffy cookie shapes while still maintaining chewiness in texture. Make sure your baking soda is fresh; old leavening agents can lead to flat cookies!
- 1/2 teaspoon salt – A pinch of salt might seem trivial—but it’s critical! It balances sweetness while enhancing all other flavors within the cookie dough itself.
- 1 cup caramel bits – These little morsels are pure heaven! When they melt during baking, they create pockets of gooey goodness that contrast beautifully against our mocha base. If you can’t find caramel bits at your local store, feel free to chop up some caramels instead—they work just as well!
- 3/4 cup Nestlé Semi-Sweet Chocolate Chunks – Ahh chocolate—my favorite part! Semi-sweet chocolate adds richness without being overly sweet, striking that perfect balance amidst all flavors present in our cookie dough. Look for high-quality chocolate chunks for maximum impact!
- Coarse sea salt for sprinkling – Lastly—don’t forget this non-negotiable step! A sprinkle of coarse sea salt just before serving elevates these cookies from delicious to downright extraordinary—creating that irresistible contrast between sweet caramel and savory saltiness!
Equipment You’ll Need:
Before we start mixing and baking away, let’s gather some essential tools that will make this experience smoother and more enjoyable—we want everything at hand so nothing stands between us and those heavenly cookies!
- Mixing Bowls – A good set of mixing bowls is vital for combining ingredients without spilling everywhere! Opt for glass or stainless steel bowls as they are durable and easy to clean afterward—plus they handle heat well if you’re melting ingredients like butter!
- Electric Mixer – An electric mixer is an absolute game-changer when it comes to creaming butter with sugars evenly—this process ensures airy textures throughout baked goods by incorporating air into their mixture effectively!
- Cookie Scoop (Medium Size) – This handy tool allows us to portion out uniform cookie dough balls effortlessly—ensuring even baking times across each batch while helping achieve those perfect round shapes we desire.
- Parchment Paper or Silicone Baking Mat – Using either parchment paper or silicone mats on your baking sheets prevents sticking while allowing even distribution during cooking! Trust me—you’ll thank yourself later when cleanup becomes significantly easier too!
- Baking Sheet(s) – A sturdy baking sheet will help distribute heat evenly across your cookies as they bake—ensuring consistent browning results throughout each cookie batch produced.
Now that we’ve gathered all our ingredients along with necessary equipment let’s dive right into preparing those irresistible Salted Caramel Mocha Cookies!
Step 1: The Magic Begins with Brown Butter
First things first: let’s preheat that oven to 350 degrees F (175 degrees C). While that’s warming up—a step often overlooked but oh-so-important—let’s melt our butter in a saucepan over medium heat until it begins foaming gently around its edges. As you whisk constantly (and I mean constantly!), you’ll notice beautiful golden flecks forming at the bottom—that’s where all those nutty aromas come from! This process known as browning transforms ordinary melted butter into liquid gold full-bodied flavor which will add depth throughout our dough later on—it truly makes all the difference here! Once you’ve achieved those gorgeous brown bits (they should smell fragrant), remove it from heat immediately—not letting it go too far can turn this heavenly concoction bitter fast—and transfer it into a large mixing bowl where we’ll allow cooling briefly before proceeding further down this delectable path toward cookie bliss.
Step 2: Whisking Together Our Dry Ingredients
While waiting patiently for that sumptuous browned butter mixture cool down slightly (don’t rush this step—it really matters!), grab yourself another bowl—a medium-sized one will do nicely—and whisk together flour alongside instant coffee granules first followed by adding baking soda along with salt afterward until everything’s well combined evenly throughout—this creates an even layer foundation later once mixed together ensuring no clumps remain hiding away somewhere unexpected during cooking time! Each element plays such crucial roles within their respective realms—from thickening agents via flour-to-fuel-like capabilities found within coffee granules creating rich flavors interwoven throughout dough itself—all working harmoniously together toward one shared goal: deliciousness!
Step 3: Creaming Butter & Sugars
Once cooled slightly but still warm enough (trust me—you want warmth here!) pour your beautifully browned butter into an electric mixer bowl along with both types of sugars—we’re aiming for creamy perfection afterall! Start mixing slowly at first before gradually increasing speed over about three minutes until light fluffy clouds emerge filling space around us—the transformation happening here is nothing short than magical because this process known as creaming incorporates air creating airy textures inside baked goods giving rise later when combined properly ensuring chewy centers every time without fail thereafter! Next step? Let’s add in one whole egg followed closely behind by one extra yolk paired alongside luscious vanilla extract—we’re layering flavors now folks capturing richness alongside delightful scents wafting through kitchen inviting everyone closer toward what lies ahead…
Step 4: Uniting Wet & Dry Ingredients
Now comes perhaps my favorite moment—the merging process where everything comes together seamlessly into harmonious unity creating something breathtakingly satisfying indeed! Gently fold dry ingredients mixture into wet until just combined using low speed on mixer giving time necessary allowing no excess gluten formation occurring preventing unwanted toughness among final product outcome…remember though—not too much mixing here folks—we don’t want rubbery results instead instead aim toward gentle embrace blending thoroughly without losing sight original visions held dear since beginning… finally adding caramel bits alongside chunks chocolate stirring carefully avoiding breakage bringing forth delightful surprises awaiting discovery once baked properly—we’re almost there now people—can you smell them already?!
Oh my goodness—the anticipation builds as we prepare ourselves for what comes next…
Step 5: Bringing the Ingredients Together
Now that your butter has been transformed into a rich, nutty liquid gold, it’s time to bring all those beautiful ingredients together. In a large mixing bowl, using an electric mixer, beat together the browned butter and both sugars—your dark brown sugar and granulated sugar—until the mixture is light and fluffy. This will take about 3 to 5 minutes, and trust me when I say that this step is absolutely paramount for achieving that melt-in-your-mouth texture. The sugars should dissolve completely, creating a creamy base that’s ready to welcome the eggs. As you mix, you’ll notice the aroma of the butter mingling with the sweetness of the sugars; it’s intoxicating!
Once you’ve reached that lovely fluffy state, add in one large egg along with an additional egg yolk and your tablespoon of vanilla extract. Why add an extra yolk? Well, my friends, it significantly enhances the richness and moisture of your cookies. This little trick is a game changer! Beat these ingredients together until they’re just combined—don’t overdo it here; we want to keep that lightness in our batter. After this step, you’ll have a glossy mixture that feels like a warm hug—a true testament to how incredible these Salted Caramel Mocha Cookies are going to be.
Step 6: Dry Ingredients Unite
Now comes the moment where we incorporate our dry ingredients into this luscious mix. In a separate bowl, whisk together your all-purpose flour, instant coffee granules (which give these cookies their delightful mocha kick), baking soda, and salt. The coffee granules are non-negotiable here; they intensify the chocolate flavor while providing that unmistakable coffee essence without overwhelming your palate. Once these dry ingredients are harmoniously blended together, it’s time to fold them into our wet mixture.
With your electric mixer set on low speed—trust me on this; we don’t want flour clouds flying everywhere—gradually add your dry mixture into the wet one. Mix just until everything is combined; overmixing can lead to tough cookies due to gluten development. You want your dough to be soft and slightly sticky but still manageable. And oh boy, once you see those flecks of coffee speckled throughout this dough, you’ll know you’re onto something truly extraordinary! Remember to scrape down the sides of your mixing bowl at least once during this process; every inch matters!
Step 7: Sweetening with Caramel and Chocolate
It’s time for the pièce de résistance! Gently fold in those gooey caramel bits and semi-sweet chocolate chunks using a spatula or wooden spoon. I can hardly contain my excitement at this stage because adding these elements brings out a beautiful contrast in flavors and textures; the smooth chocolate melds perfectly with the chewy caramel pieces. Make sure they’re evenly distributed throughout your dough because every bite deserves that perfect balance of sweet and salty goodness.
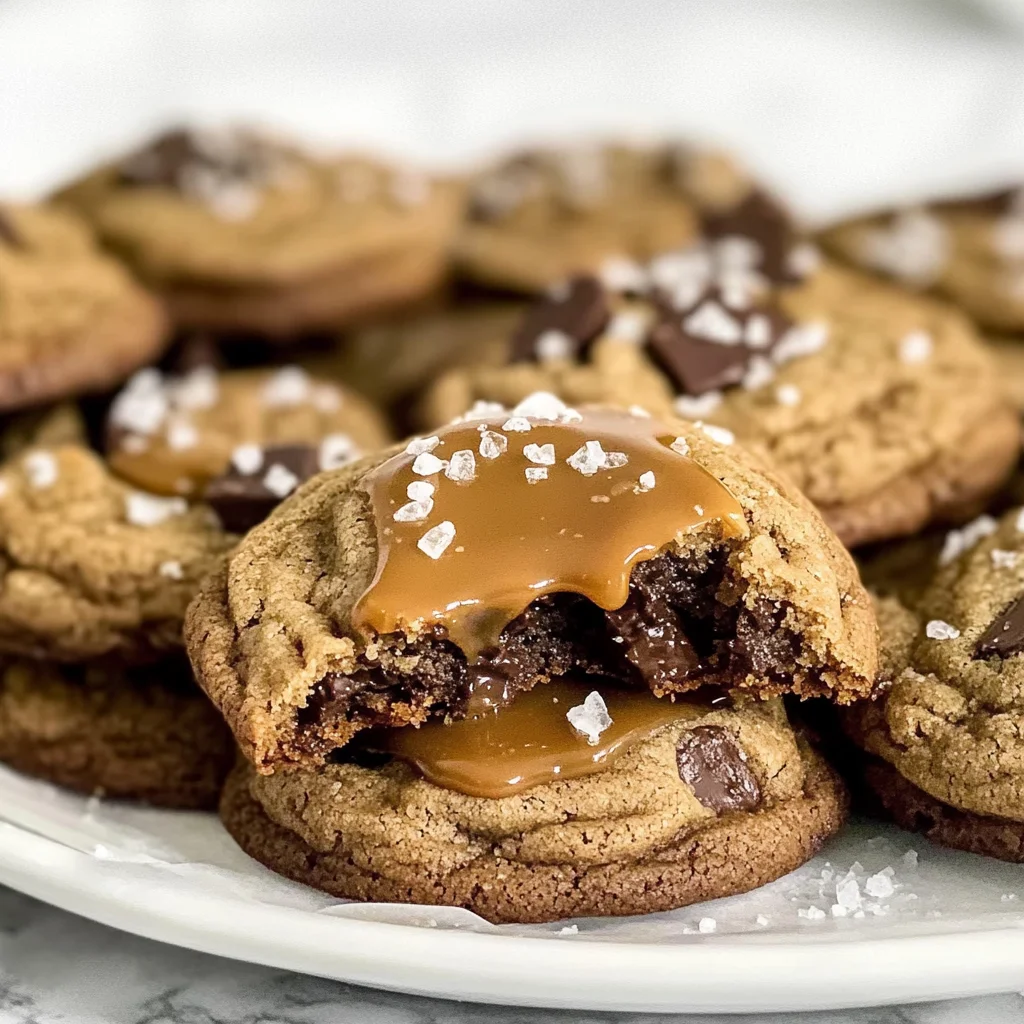
As you stir gently but firmly, take a moment to appreciate how luscious this cookie dough looks—a true symphony of flavors waiting to come alive in your oven! Keep in mind that while it might be tempting to dive right in with a spoon (I won’t judge if you do!), resist the urge for just a bit longer—these cookies will be worth every second of anticipation. Trust me when I say that when they emerge from the oven with their warm caramel oozing out and decadent chocolate melting in every crevice, you’ll find yourself grinning from ear to ear.
Step 8: Shaping Your Masterpieces
Now comes another crucial step: shaping your cookies! Using a medium cookie scoop (approximately 1.5 tablespoons), portion out rounded balls of dough onto a cookie sheet lined with parchment paper, leaving enough space between each cookie for them to spread as they bake—about 2 inches apart should do nicely. This part is not only fun but essential for ensuring even cooking; overcrowding can lead to unevenly baked cookies or worse yet—some might end up raw in the middle!
Once you’ve shaped all your cookies on the tray, don’t rush this step! A gentle tap on each ball before baking will help flatten them slightly and promote an even bake while still keeping some height—perfect for creating chewy edges with soft centers! Preheat your oven to 350 degrees F if you haven’t done so already (it’s non-negotiable for proper baking). When ready, slide those trays into the oven and set a timer for about 10 minutes.
Keep an eye on them; you’re looking for just golden edges while maintaining that soft center—the visual cue is key here! Oven variances can happen; if yours runs hot or cool, adjust accordingly by checking them at around 8 minutes just in case.
Conclusion:
As we wrap up our delightful journey through making Salted Caramel Mocha Cookies together, I can’t help but feel giddy with excitement about all the sweet possibilities that await you! This recipe encapsulates everything I adore about baking: it’s accessible yet extraordinary, simple yet sophisticated. The combination of rich mocha flavor intertwined with gooey caramel elevates these cookies beyond mere sweets—they become an experience. You’ll find that each bite offers an enticing symphony of flavors, with every chew revealing hints of chocolatey goodness and that perfect sprinkle of sea salt reminding your taste buds just how special these creations truly are.
These Salted Caramel Mocha Cookies are an absolute must-try because they’re not just about taste; they embody joy in their creation process too! Imagine gathering around your kitchen counter, laughter echoing as you mix batter and share stories while waiting for that heavenly aroma to fill your home. They’re perfect for cozy gatherings with friends over coffee or as indulgent gifts during holidays—everyone will appreciate such a thoughtful treat! And when you pull those golden-brown delights from the oven? The sight alone is enough to make hearts skip a beat!
For serving suggestions that will make your heart sing: imagine savoring one alongside your favorite cup of coffee or tea after dinner—the warmth complements the rich flavors beautifully. If you’re looking for an afternoon pick-me-up, pair one with ice-cold milk and relish the contrast between coolness and warmth. And for those moments when only sheer decadence will do? Try sandwiching two warm cookies around a scoop of vanilla ice cream; it creates an utterly intoxicating dessert experience that’s sure to impress anyone lucky enough to share it with you!
Feeling adventurous? This recipe is wonderfully adaptable! You could swap out dark chocolate chunks for white chocolate or even add some chopped nuts for extra texture! Want more caramel? Drizzle some additional melted caramel on top after baking—it’s non-negotiable deliciousness! Each variation opens new doors to flavor profiles waiting to be explored. So go ahead—embrace your creativity in the kitchen! I wholeheartedly invite you to try this recipe, share your own twist on it, and connect with me through your experiences—I can’t wait to hear how these cookies bring joy into your home!
Salted Caramel Mocha Cookies
Indulge in the delightful experience of baking Salted Caramel Mocha Cookies, where gooey caramel meets rich mocha flavors for a truly unforgettable treat. These cookies are the perfect combination of sweet and salty, featuring a soft center that melts in your mouth, complemented by chocolate chunks and a sprinkle of sea salt. Ideal for cozy evenings or gatherings with friends, this recipe is sure to become a staple in your dessert repertoire. With simple ingredients and straightforward instructions, you’ll enjoy every moment of creating these delectable treats. So preheat your oven and get ready to delight your taste buds!
- Prep Time: 20 minutes
- Cook Time: 10 minutes
- Total Time: 30 minutes
- Yield: Approximately 24 cookies 1x
- Category: Dessert
- Method: Baking
- Cuisine: American
Ingredients
- 1 cup salted butter (softened)
- 1 1/4 cups packed dark brown sugar
- 1/4 cup granulated sugar
- 1 large egg + 1 egg yolk
- 1 tablespoon vanilla extract
- 2 1/4 cups all-purpose flour
- 2 tablespoons instant coffee granules
- 1 teaspoon baking soda
- 1/2 teaspoon salt
- 1 cup caramel bits
- 3/4 cup semi-sweet chocolate chunks
- Coarse sea salt (for sprinkling)
Instructions
- Preheat your oven to 350°F (175°C). Line baking sheets with parchment paper.
- In a saucepan over medium heat, melt the butter until browned and fragrant. Let it cool slightly.
- In a mixing bowl, combine the cooled brown butter with dark brown sugar and granulated sugar; mix until light and fluffy.
- Beat in the egg, egg yolk, and vanilla extract until well combined.
- In another bowl, whisk together flour, instant coffee granules, baking soda, and salt.
- Gradually fold dry ingredients into the wet mixture until just combined.
- Gently stir in caramel bits and chocolate chunks.
- Using a cookie scoop, portion dough onto prepared baking sheets about two inches apart.
- Bake for approximately 10 minutes or until edges are golden but centers remain soft.
- Sprinkle with coarse sea salt while still warm and allow to cool on wire racks.
Nutrition
- Serving Size: 1 cookie (30g)
- Calories: 150
- Sugar: 10g
- Sodium: 90mg
- Fat: 7g
- Saturated Fat: 4g
- Unsaturated Fat: 3g
- Trans Fat: 0g
- Carbohydrates: 21g
- Fiber: <1g
- Protein: 2g
- Cholesterol: 25mg