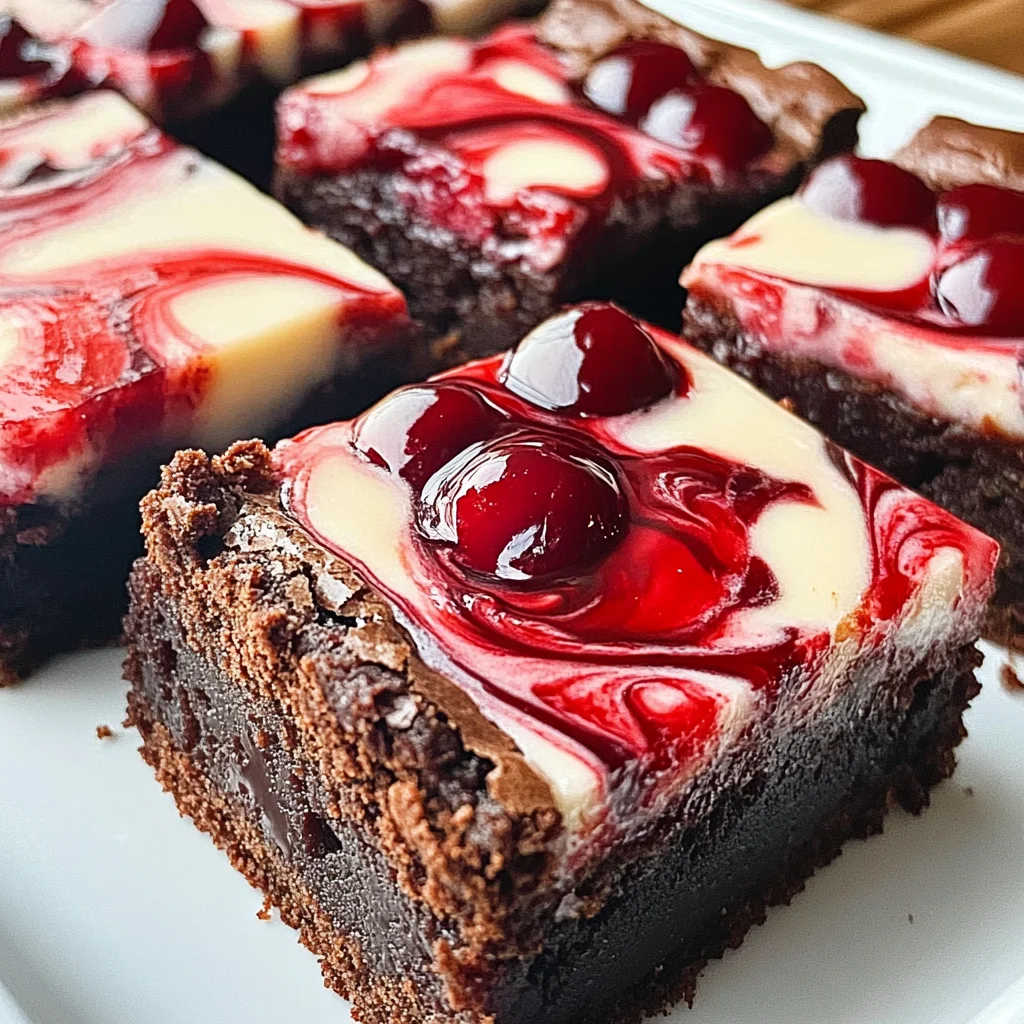
Chocolate Cherry Cheesecake Brownies
There’s something profoundly satisfying about the moment you lift a forkful of dessert to your lips, and the rich, velvety layers of Chocolate Cherry Cheesecake Brownies melt effortlessly in your mouth. The first bite is an experience, a harmonious blend of flavors that speaks to the heart; it’s like a warm embrace on a chilly day or a sweet memory wrapped in chocolate and cherries. These brownies are not just another dessert; they’re an invitation to indulge in life’s sweetest moments, bringing together the comforting nostalgia of homemade treats with the delightful surprise of creamy cheesecake and juicy cherry goodness. When I make these brownies, it’s not just about baking; it’s about creating joy, sharing love, and igniting smiles.
As we dive into this recipe for Chocolate Cherry Cheesecake Brownies, let’s take a moment to appreciate how this delightful combination has become a favorite for those special gatherings and cozy nights at home. Imagine serving these decadent squares at your next family get-together or enjoying them during a movie night with friends. The contrast between the chewy brownie base and the luscious cream cheese layer topped with sweet cherries creates a texture and flavor profile that is absolutely divine. It’s no wonder that these brownies have become synonymous with celebration—whether it’s a birthday party or simply a Tuesday that deserves some sweetness.
Chocolate Cherry Cheesecake Brownies: A Delightful Indulgence
Get ready for a treat that transcends ordinary brownies! These Chocolate Cherry Cheesecake Brownies combine the rich fudginess of classic brownies with the creamy tang of cheesecake, all adorned with vibrant cherry pie filling. Trust me when I say you’ll want to keep this recipe close at hand because once your loved ones taste these beauties, they’ll be begging for seconds!
Ingredients:
Before we embark on this sweet culinary journey together, let’s gather our ingredients. Each component plays an essential role in crafting these delectable brownies, ensuring every bite is filled with joy.
- 1 box brownie mix (eggs, water, and oil per the box instructions). This boxed mix serves as our quick foundation for creating rich and chewy brownies without all the hassle of measuring out each ingredient from scratch. The convenience it offers allows us to focus on enhancing its flavor rather than getting bogged down in details. Look for one that uses high-quality cocoa so that you can enjoy those deep chocolate notes that will pair beautifully with our cheesecake layer.
- 6 oz cream cheese (softened at room temperature). Cream cheese adds that luscious creaminess we crave in desserts! Softening it before mixing is absolutely paramount; if it’s cold straight from the fridge, blending it will be challenging, leading to lumps instead of smooth deliciousness. When you achieve that fluffy texture by creaming it well with sugar and vanilla, you’ll create an utterly intoxicating filling that elevates your brownies from good to extraordinary!
- 1 can cherry pie filling. This ingredient brings both sweetness and a hint of tartness to our brownies—it’s like nature’s candy! The bright red cherries offer not only visual appeal but also an exciting burst of flavor amidst the rich chocolate backdrop. If you want to get adventurous or seasonal, feel free to substitute fresh cherries when they’re in season; just pit and slice them for an equally delightful twist!
- 1/3 cup sugar. Sugar does more than just sweeten; it helps balance out acidity from the cream cheese while contributing to that beautiful texture we want in our cheesecake layer. When mixed properly with cream cheese and vanilla, sugar helps create air pockets that leave us with a light yet satisfying filling—a true dessert lover’s dream!
- 1 teaspoon vanilla. Ahh, vanilla—the magic ingredient! It enhances every other flavor present in this recipe and creates warmth within each bite. Always opt for pure vanilla extract over imitation if possible; its depth of flavor is non-negotiable when crafting something so special.
Equipment You’ll Need:
Having the right tools makes all the difference when whipping up these delightful Chocolate Cherry Cheesecake Brownies! While they may not be ingredients, trust me when I say these pieces of equipment are essential partners in our baking adventure.
- Mixing bowl – A sturdy mixing bowl is vital for combining both your brownie mix ingredients and your cheesecake layer seamlessly. Choose one large enough to accommodate all the ingredients without spilling—trust me; nobody enjoys cleaning up batter splatters!
- Hand mixer or stand mixer – While you could mix everything by hand if you’re feeling particularly ambitious (and have strong arms!), using an electric mixer will save time and ensure perfect incorporation of air into your cream cheese mixture. This process is crucial for achieving that fluffy texture we desire.
- Baking dish (9×13 inches recommended) – A quality baking dish ensures even cooking throughout your brownies while providing enough space for all those delicious layers! Non-stick options work wonders here since they help prevent any potential sticking issues.
- Spatula – A spatula is key for spreading out both the brownie batter evenly across the bottom of the dish as well as dolloping on our sensational cheesecake layer above; it also helps fold ingredients gently without deflating any air we’ve worked hard to incorporate!
Now that we’re all set up with our ingredients and tools ready at hand let’s dive into preparing these blissful Chocolate Cherry Cheesecake Brownies—the anticipation is building!
Step 1: Preheat Your Oven
The first step is always crucial: preheating your oven to 350°F (175°C). This process allows your brownies to bake evenly right from the start—a non-negotiable step if you’re aiming for fudgy perfection! While waiting for those temperatures to rise, take this time to gather your thoughts and perhaps daydream about how incredible these treats will taste once they’re done baking—trust me on this!
Step 2: Create That Fluffy Cream Cheese Mixture
Using either your hand mixer or stand mixer (both work great), combine softened cream cheese with sugar and vanilla until light and fluffy—this usually takes about 2–3 minutes on medium speed! Don’t rush this step; allowing air into the mixture creates lovely pockets that lend themselves beautifully when layered atop our brownie base later on. You want it looking smooth yet still thick enough so it doesn’t run off as soon as we dollop it onto our batter!
Step 3: Prepare Your Brownie Mix
Next up, follow those delightful instructions on your boxed brownie mix! Typically involving eggs, water (or milk), plus oil—remember good quality matters here too—measure everything precisely according to package guidelines while making sure not to overmix after combining wet ingredients into dry ones. This helps maintain moisture—we’re aiming for chewy goodness here rather than cake-like dryness!
Step 4: Layering Begins!
With both mixtures prepped beautifully now comes one of my favorite parts: layering! Pour half (or more) of your brownie batter into a greased or lined baking dish first—this acts as our foundation before we add dollops upon dollops of cheesecake magic followed by enticing cherry pie filling right above them! Use back-of-a-spoon swirls or even popsicle sticks if need be—to create those stunning marbled patterns throughout—it visually tantalizes before anyone even takes their first bite!
As we continue through each step together towards an end result bursting with flavors galore…let’s keep going until every last detail shines through brilliantly—we’re almost there!
Chocolate Cherry Cheesecake Brownies: A Delicious Journey
Let’s dive back into the delightful process of creating these Chocolate Cherry Cheesecake Brownies that will not only satisfy your sweet tooth but also bring a smile to everyone who tries them. Each step is infused with love, passion, and just a hint of magic, as we transform simple ingredients into a truly extraordinary dessert.
Step 5: Dolloping Creamy Bliss
Now that you’ve prepared your brownie mix to perfection, it’s time for the star of the show—the cream cheese mixture! Grab your dollop spoon, and let’s get creative. Carefully scoop generous spoonfuls of that fluffy cream cheese concoction and evenly distribute it all over the top of your brownie batter. The beauty of this step lies in its simplicity; you are creating pockets of creamy goodness that will melt into the brownies as they bake. This melding is crucial because it adds an irresistible tanginess that beautifully balances the rich chocolate flavor.
As you dollop, don’t worry about being too precise; think of it as an abstract painting—every swirl and dollop will create a unique masterpiece! Just imagine the moment when these brownies come out of the oven, their tops dotted with creamy white swirls against a dark chocolate canvas. Trust me, this visual contrast is just the beginning of the joy waiting for you.
Step 6: Cherry on Top
Next comes the cherry pie filling, which adds a burst of fruity flavor and stunning color to our brownies. Take your can of cherry pie filling, and using a spoon or small ladle, drop dollops across the surface, creating delightful little red mounds atop the cream cheese layer. This step is not just about aesthetics; those cherries contribute moisture and sweetness that harmonizes beautifully with the richness of chocolate and cheesecake.
As you place each cherry dollop, allow yourself to savor this moment; picture how those juicy cherries will soften during baking, infusing their flavor throughout every bite. The interplay between the tart cherries and creamy cheesecake filling is utterly intoxicating! If cherries aren’t your jam (pun intended), feel free to switch things up with another fruit like blueberries or raspberries—each option has its own unique charm!
Step 7: The Art of Swirling
Now that we have our layers in place, it’s time to create that beautiful swirl effect—this is where artistry meets technique! Using the back of a spoon or even a popsicle stick (yes, I’m all about improvisation in the kitchen!), gently press down into both the cream cheese mixture and cherry filling before swirling them together into the brownie batter beneath. This motion should be gentle; think more like coaxing rather than stirring vigorously.
The goal here is to achieve a marbled effect without completely blending everything into one uniform color—it’s about creating visual intrigue while still allowing each element to shine through individually. Why does this matter? Because each bite will yield different tastes and textures: you’ll experience bursts of creamy cheesecake alongside velvety chocolate and chewy cherries. Don’t rush this step; take your time to enjoy it!
Step 8: Baking Your Perfect Brownies
With everything swirled together beautifully, it’s finally time to pop these beauties into your preheated oven at 350°F (175°C). Set your timer for about 30-35 minutes but remember: ovens can be tricky little creatures! Visual cues will be your best friends here. You’ll know they’re done when they puff slightly in the middle and form a slight crust along the edges—a sign they’re cooking through but still remain fudgy in texture.
To test for doneness without sacrificing any deliciousness, insert a toothpick into the center; if it comes out with moist crumbs clinging to it rather than wet batter, you’re golden! It’s important not to overbake—nothing ruins that rich brownie experience quite like dryness. If you’re unsure whether they’re done, err on the side of underbaking slightly; you can always let them set up more as they cool.
Final Touches: Letting Them Rest
Ahh, I know this part is tough—the anticipation can feel unbearable! But trust me when I say allowing your Chocolate Cherry Cheesecake Brownies to cool completely in their pan before cutting into them is absolutely paramount. Not only does this help them firm up for cleaner cuts (no one wants a messy brownie square!), but it also allows all those incredible flavors to marry together harmoniously.
Let them rest at room temperature for at least 20-30 minutes after pulling them from the oven—if you can resist slicing into them right away! You’ll be rewarded with each piece holding its shape while still being wonderfully gooey on the inside. Patience here transforms these brownies from simply good to profoundly satisfying.
And there you have it—your journey through crafting Chocolate Cherry Cheesecake Brownies has reached its delicious conclusion! Each bite promises an explosion of flavors that dances on your palate, making every moment spent in preparation totally worth it. Enjoy sharing these treats with loved ones or savoring them solo—you’ll find happiness in every decadent morsel!
Storage and Enjoyment Tips for Your Chocolate Cherry Cheesecake Brownies
Now that your Chocolate Cherry Cheesecake Brownies are baked to perfection, it’s time to dive into the deliciousness! Trust me, these treats won’t last long once you share them with family and friends, but if by some miracle you have leftovers, I’ve got you covered on how to store them just right. The rich, creamy layers of cheesecake intertwined with luscious cherries and decadent chocolate create a taste experience that’s not just good—it’s utterly unforgettable. So let’s talk about keeping this joy alive a little longer!
Storing Leftover Chocolate Cherry Cheesecake Brownies
To ensure your brownies stay as delightful as the moment they came out of the oven, I recommend storing them in an airtight container at room temperature. This helps retain their rich moisture and keeps that dreamy texture intact. If you’ve managed to save any for later—which is a feat in itself—they’ll be great for about 3 to 5 days. If you want to extend their delicious life even further, consider placing a slice of bread in the container with them; this clever trick helps maintain moisture while keeping your brownies soft and chewy. After a day or two, you may notice subtle changes in texture, but the flavor remains deeply satisfying and indulgent. When you’re ready to enjoy one (or several!), simply pull them out of their cozy home and let them come to room temperature before savoring each gooey bite.
Freezing for Later
If you think your culinary masterpiece won’t vanish entirely within a few days, freezing is a wonderful option for those moments when cravings strike unexpectedly! To freeze your Chocolate Cherry Cheesecake Brownies properly, make sure they are completely cooled down first. Then, slice them into individual portions—this makes it easy to grab just what you need without thawing the entire batch! Wrap each brownie tightly in plastic wrap and place them in a freezer-safe bag or container. They’ll stay fresh for up to three months nestled away in your freezer. When you’re ready for a treat, simply take one out and let it thaw at room temperature or pop it in the microwave for a quick warm-up. It’s like unearthing treasure from your freezer—how exciting is that? This convenience really brings joy into those busy days when you need something sweet and comforting.
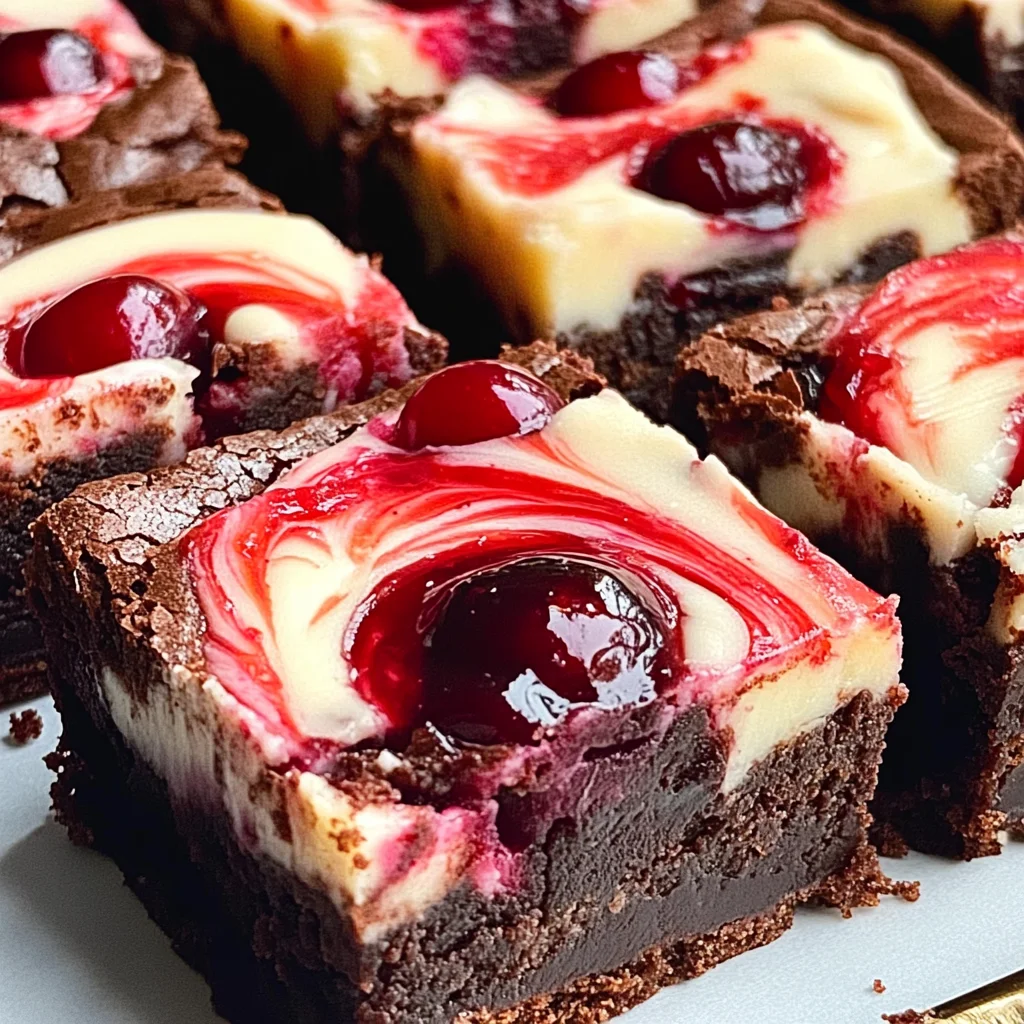
Chocolate Cherry Cheesecake Brownies
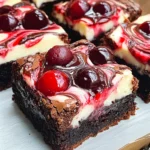
Indulge in the heavenly delight of Chocolate Cherry Cheesecake Brownies, where fudgy brownies meet a creamy cheesecake layer and luscious cherry pie filling. This irresistible treat is perfect for gatherings or cozy nights in, combining the richness of chocolate with the sweet-tartness of cherries. Each bite delivers a satisfying blend of textures and flavors that will leave your taste buds dancing. Whether served warm or at room temperature, these brownies are sure to become a favorite, inviting smiles and joy from everyone who tries them.
- Prep Time: 15 minutes
- Cook Time: 35 minutes
- Total Time: 50 minutes
- Yield: Approximately 12 servings 1x
- Category: Dessert
- Method: Baking
- Cuisine: American
Ingredients
- 1 box brownie mix (requires eggs, water, and oil according to package instructions)
- 6 oz cream cheese (softened)
- 1 can cherry pie filling
- 1/3 cup sugar
- 1 teaspoon vanilla extract
Instructions
- Preheat your oven to 350°F (175°C).
- In a mixing bowl, combine softened cream cheese, sugar, and vanilla extract using a hand mixer until light and fluffy.
- Prepare the brownie mix according to package instructions.
- Pour half of the brownie batter into a greased 9×13-inch baking dish.
- Dollop the cream cheese mixture over the brownie batter evenly.
- Spoon cherry pie filling on top of the cream cheese layer.
- Using a spoon or popsicle stick, swirl the layers gently for a marbled effect.
- Bake for 30-35 minutes, or until set; check doneness with a toothpick.
- Allow cooling completely before cutting into squares.
Nutrition
- Serving Size: 1 serving
- Calories: 210
- Sugar: 18g
- Sodium: 150mg
- Fat: 10g
- Saturated Fat: 4g
- Unsaturated Fat: 5g
- Trans Fat: 0g
- Carbohydrates: 30g
- Fiber: 1g
- Protein: 3g
- Cholesterol: 20mg