London Fog Cookies
There’s something truly enchanting about the aroma of freshly baked cookies wafting through the air, isn’t there? It evokes memories of cozy afternoons spent in warm kitchens, laughter shared over cups of tea, and the sweet anticipation that fills the heart when you know a delicious treat is on its way. Today, I’m thrilled to share a recipe that captures all of that magic and more: London Fog Cookies. These cookies are not just any ordinary dessert; they’re a delightful homage to the beloved London Fog tea, infused with the soothing flavors of Earl Grey and delicate lavender. Each bite offers a symphony of sensations—soft, chewy centers kissed with buttery sweetness and tender edges that melt in your mouth. Trust me when I say, these cookies are an experience worth savoring.
As we embark on this culinary journey together, prepare yourself for the exquisite union of flavors that awaits. With each ingredient carefully chosen for its unique contribution, you’ll find that baking these cookies is as rewarding as enjoying them. The Earl Grey tea lends its aromatic charm while the culinary lavender adds a floral note that’s simply intoxicating. And let’s not forget the crowning glory: a silky lavender cream cheese frosting that wraps each cookie in a luscious embrace. Whether you’re hosting friends for tea or simply indulging in some well-deserved self-care, these London Fog Cookies are bound to become a cherished part of your dessert repertoire. So grab your apron, and let’s make some magic happen in the kitchen!
London Fog Cookies: A Delightful Tea-Time Treat
Let’s dive into this delightful recipe! These London Fog Cookies are perfect for any occasion—be it a cozy afternoon with your favorite book or a gathering with loved ones. They embody everything wonderful about comfort food while maintaining an air of sophistication thanks to their tea-inspired flavor profile. Just imagine pairing these cookies with a steaming cup of Earl Grey or chamomile—pure bliss!
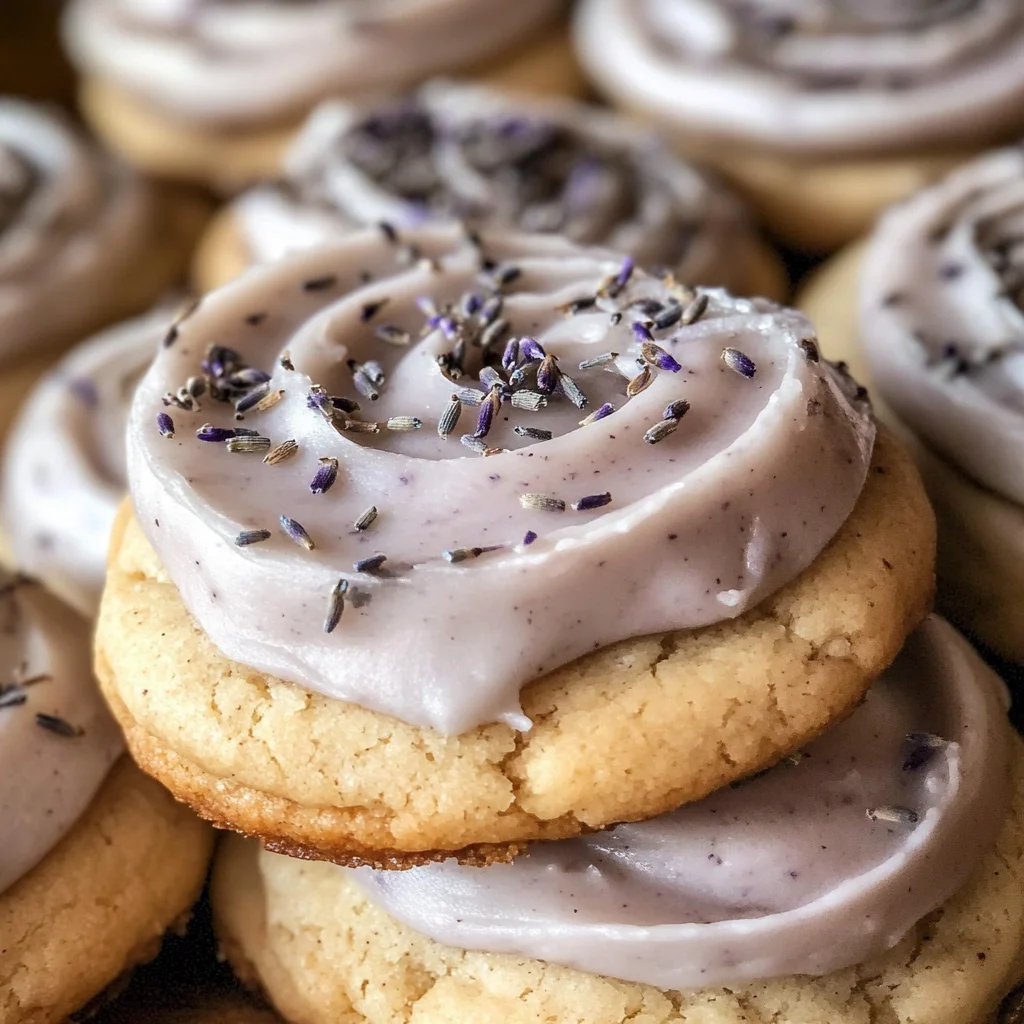
Ingredients:
As we gather our ingredients, think of each one as an essential note in the beautiful melody we’re about to create together. Each component plays its part in achieving those soft, chewy textures and vibrant flavors that make these London Fog Cookies truly extraordinary.
- 3 tbsp (12 g) Earl Grey tea: This is where our flavor journey begins! The Earl Grey tea brings not only its characteristic bergamot essence but also depth and warmth to our cookies. When selecting your tea, opt for high-quality loose leaves if possible; they infuse more flavor than pre-packaged bags. You’ll want to crush them slightly before adding them into the mix to help release those delightful oils and aromas.
- 2 3/4 cups (344 g) all-purpose flour, spooned and leveled: Flour acts as the backbone of our cookie dough—it provides structure while allowing those lovely chewy centers to form. Spoon and level it correctly; too much flour can lead to dry cookies! Look for finely milled flour for optimal texture; it blends seamlessly with other ingredients.
- 1/2 tsp baking powder: This leavening agent is crucial for creating those softly risen edges we adore in cookies. It reacts with moisture and heat during baking to produce carbon dioxide bubbles which help lift our dough without making it cakey. Make sure your baking powder is fresh—check the expiration date if you haven’t used it in awhile!
- 1/2 tsp baking soda: Similar to baking powder, baking soda helps our cookies rise but also contributes to browning due to its alkaline nature. This means you’ll get those gorgeous golden edges that look as good as they taste! Always use it alongside an acidic ingredient (like butter) for optimal results.
- 1/2 tsp salt: Never underestimate salt—it enhances all flavors and balances sweetness beautifully here. It rounds out our cookie’s character by bringing out the richness of butter and sugar while complementing the floral notes from our Earl Grey tea.
- 1 cup (200 g) granulated white sugar: This sugar not only sweetens our cookies but also helps achieve that lovely crispness on the outside while keeping them soft inside. Use fine granulated sugar; coarser sugar won’t dissolve properly and could affect texture.
- 1 cup (227 g) unsalted butter, softened: Butter is absolute liquid gold in cookie-making! It lends flavor and moisture while aiding in creating that desirable texture we crave—think soft centers with tender edges. Always bring it to room temperature before using so it creams beautifully with sugar; this step is crucial for lightness!
- 1 egg, at room temperature: Eggs bind our ingredients together while adding richness and moisture to our dough. Using room temperature eggs ensures they blend more evenly into your mixture—cold eggs can shock melted butter and create lumps!
- 2 tsp vanilla bean paste: Ahh, vanilla—the classic flavor enhancer! Vanilla bean paste has tiny flecks of real vanilla beans which add both visual appeal and deep flavor complexity compared to extract alone. If you can’t find paste, use pure vanilla extract instead—but trust me on this one; vanilla bean paste takes these cookies over-the-top delicious!
- 1/2 cup (100 g) granulated white sugar (for rolling): This sugar adds an extra layer of sweetness on top—a delightful crunch before biting into those pillowy centers! It not only looks beautiful but also enhances texture.
- 1/2 tbsp culinary lavender: Just a touch elevates everything here! Culinary lavender brings floral notes reminiscent of English gardens—truly enchanting! Make sure it’s suitable for cooking; non-food grade lavender can be toxic.
- 4 oz (113 g) cream cheese: Our frosting’s star player! Cream cheese provides tanginess that cuts through sweetness beautifully while creating a creamy texture that’s hard to resist! Always let it soften before mixing so you achieve that silky smooth consistency.
- 1/4 cup (56 g) unsalted butter, softened: Like its counterpart above, butter adds richness and creaminess here too! Again, ensure it’s at room temperature so it blends seamlessly into your frosting.
- 1 cup (130 g) powdered sugar: This sugar gives us sweetness without any graininess since it’s finely ground—perfect for whipping up smooth frostings! Sift before using if clumps form; no one wants lumps ruining their beautiful frosting!
- 1/2 tbsp culinary lavender: Yes—we’re using this again because why not double down on deliciousness? Infusing our frosting with lavender makes every bite utterly intoxicating as well!
- 1 tsp vanilla bean paste: Because what’s frosting without vanilla? It ties all components together harmoniously.
- Purple food coloring (optional): Add just a hint if you’re feeling whimsical or want to delight guests visually—even though these cookies are stunning enough as-is!
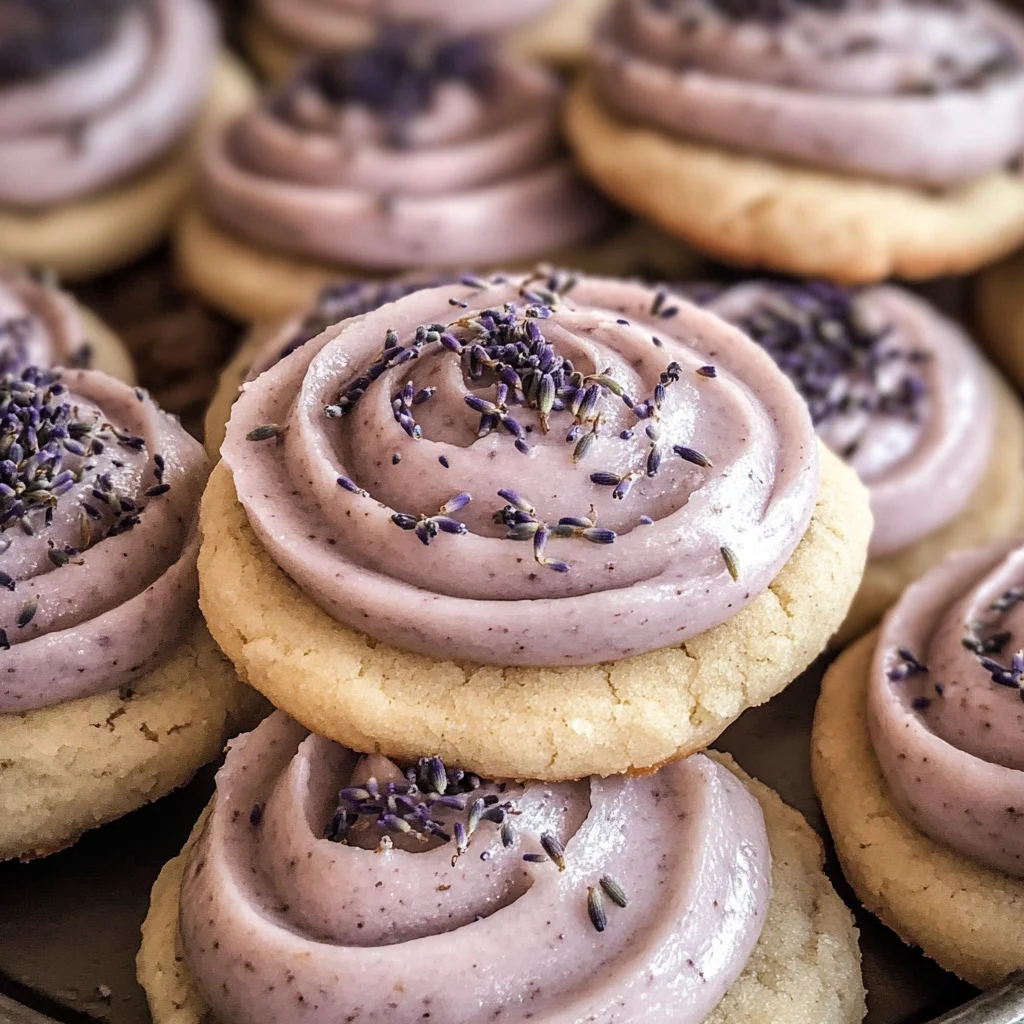
Equipment You’ll Need:
Before we dive into baking bliss, let’s gather some essential tools that will make your experience smoother and more enjoyable. Having the right equipment on hand can transform what could be a stressful endeavor into something magical!
- Mixing bowls – You’ll need various sizes for different stages of preparation; larger bowls allow ample space for mixing dry ingredients together without spilling over while smaller ones can hold wet components brilliantly until combined.
- Stand mixer or hand mixer – While you could mix by hand (and I applaud anyone who does!), using a stand or hand mixer saves time—and who doesn’t love saving time? A stand mixer allows for hands-free creaming whereas a hand mixer gives you control over mixing speed.
- Measuring cups & spoons – Precision matters when baking; accurate measurements yield consistent results every time! Invest in quality stainless steel or glass measuring tools—they last longer than plastic counterparts!
- Baking sheets lined with parchment paper or silicone mats – These prevent sticking while ensuring even heat distribution resulting in perfectly baked bottoms—a non-negotiable step!
With all our ingredients prepped and equipment ready at hand, we are now poised to create something truly special together—let’s move on to preparing our London Fog Cookies!
Step 1: Infusing Flavor into Your Dough
First things first! We need to infuse our cookie dough with those glorious Earl Grey flavors we adore so much. Start by brewing your Earl Grey tea; steep 3 tablespoons in about 6 tablespoons of hot water until fragrant—about 5 minutes should do nicely! Let it cool completely before incorporating into your dough later on—it mustn’t be too hot when added or else it’ll affect consistency adversely during mixing process!
While waiting for our brew time complete away from heat source—you can sift together flour,baking powder,baking soda,and salt within another bowl until well-combined—this helps distribute ingredients evenly throughout mixture later ensuring consistent rise across baked batches.This step may seem tedious but trust me—it pays off big-time come final product stage where we want every bite singing harmoniously!
Step 2: Creaming Butter & Sugar
Now comes one of my favorite stages—the creaming method which creates air pockets within dough yielding soft fluffy cookies post-bake! In your mixing bowl fitted onto stand mixer (or holding handheld version steady), add softened unsalted butter along with granulated sugars( both regular + additional portion meant specifically rolling). Beat on medium-high speed until mixture turns pale yellow fluffy texture forms —roughly about 3 minutes should suffice here—don’t rush this step because building air volume now translates directly into lighter crumb later down line.A quick note though: scrape sides halfway through process ensuring everything gets incorporated evenly without leaving any stubborn leftover clumps behind hiding near bottom corners where no one sees them!
Step 3: Adding Eggs & Vanilla
Once you’ve achieved this light airy mix sensation—it’s time introduce egg&vanilla goodness next . Crack egg straight into bowl followed by pouring desired amount vanilla bean paste atop surface then continue beating gently until fully blended throughout mixture appearing unified once again . You may observe slight curdling effect occurring initially after adding egg but fret not dear friend—that’s perfectly normal since cold egg meets warm buttery environment causing temporary separation —just keep mixing until everything comes back together nicely again leaving behind no traces left behind whatsoever like magic spell pulled off right there within kitchen walls itself !
Step 4: Incorporating Dry Ingredients
Now it’s time integrate dry ingredients back into moist batter we’ve been working tirelessly towards achieving thus far.Lowering speed down low—you don’t want flour clouds erupting around kitchen area unless surprise guests show up wanting join party happening now—I suggest gradually pouring sifted mixture from earlier slowly whilst continuing mixing till just incorporated without overdoing it causing toughened end results later down line.I promise you ,it’s important NOT TO OVERMIX AT THIS STAGE because gluten development occurs anytime dough handled excessively which leads towards dense/unpleasant textures instead .Also keep an eye out checking consistency here too –dough should appear thick yet slightly sticky reminding us fondly how cookie loves hugging hands tightly whenever shaping happens soon thereafter…
Stay tuned as we continue unrolling further steps towards completing these delightful London Fog Cookies—your senses will thank you immensely after indulging upon creation birthed from heart-filled moments shared today between us both !
Step 5: Infusing the Magic of Earl Grey and Lavender
Now, let’s dive into the heart of our London Fog Cookies, where we infuse them with the enchanting flavors of Earl Grey tea and lavender. Begin by grating your Earl Grey tea leaves—approximately three tablespoons should do the trick. You can use a mortar and pestle or even the back of a spoon to gently crush the leaves to release their aromatic oils. This step is absolutely crucial because it helps to draw out those beautiful, fragrant notes that will elevate your cookies from delightful to utterly extraordinary. Remember, it’s not just about adding flavor; it’s about creating an experience! The gentle citrus notes of bergamot paired with floral lavender creates a symphony of flavors that will captivate anyone who takes a bite.
Next, in a mixing bowl, combine your all-purpose flour (2 3/4 cups), baking powder (1/2 teaspoon), baking soda (1/2 teaspoon), and salt (1/2 teaspoon) together with your crushed Earl Grey tea leaves. Whisk them together well until they’re fully incorporated; this ensures an even distribution of both flavor and leavening agents throughout your cookie dough. Trust me on this—when you whisk these dry ingredients, you’re not just mixing; you’re creating a foundation for success. The air you incorporate here is paramount, as it contributes to the delicate texture we’re aiming for. Set this fragrant mixture aside for a moment as we prepare our wet ingredients.
Step 6: Creaming Together Butter and Sugar
With our dry ingredients patiently waiting, it’s time to bring some richness into our cookies by creaming together the unsalted butter and granulated sugar. In a large mixing bowl—or using a stand mixer if you have one—add one cup (227 grams) of softened unsalted butter along with one cup (200 grams) of granulated white sugar. Now, set your mixer at medium speed and let it work its magic for about 3-5 minutes until you achieve that light, fluffy texture we all adore. This step is non-negotiable! Aerating the butter and sugar not only enhances the structure but also contributes to that melt-in-your-mouth quality that makes these cookies so special.
As you cream them together, take note of how they transform—the color lightens as air is incorporated, and you’ll see it become soft and fluffy. It should look almost like whipped cream when done! Don’t rush through this process; give it the time it deserves. Once fluffy, add in your room-temperature egg and two teaspoons of vanilla bean paste. The egg acts as an emulsifier here, helping bind everything together while providing moisture—crucial for that chewy texture we’re after. Continue mixing until combined; you want everything beautifully incorporated before moving on to the next phase.
Step 7: Marrying Wet and Dry Ingredients
Now comes one of my favorite moments in baking—the merging of wet and dry ingredients! Slowly introduce your flour mixture into the creamy butter-sugar concoction by adding it in two or three increments. Use a spatula or wooden spoon to fold them together gently rather than mixing vigorously; this ensures you maintain that lovely airy structure we’ve built so far. As you fold, watch how the flour begins to disappear into that luscious batter—it’s like watching magic happen right before your eyes!
You might notice the dough becoming slightly thick; that’s perfectly normal! But here’s where patience pays off: don’t overmix at this stage; doing so can lead to tough cookies instead of soft ones. Instead, mix until just combined—we want those little pockets of melted bliss! And if you see any streaks of flour peeking through? That’s okay! A few lumps are fine as long as there aren’t any dry patches left behind. This balance between handling gently yet thoroughly is what will yield those pillowy centers we crave.
Step 8: Chilling – The Key to Texture Perfection
Once you’ve beautifully mixed everything together into a cohesive dough, it’s time for perhaps one of the most critical steps: chilling your dough! Trust me on this—it might feel like a waiting game, but allowing your dough to chill in the refrigerator for at least 30 minutes (up to an hour if you’re patient!) is absolutely paramount for achieving that desirable texture in your cookies. Why chill? Well, cold dough spreads less during baking which means you’ll be rewarded with softer centers and tender edges instead of flat pancakes!
While you’re waiting patiently—and I promise it will be worth every second—consider preparing your baking sheets lined with parchment paper or silicone mats for ease later on. When you’re ready to scoop out those cookie mounds after chilling, take out your dough from the fridge and use either a cookie scoop or two spoons to form balls about two tablespoons in size. These little rounds are going to puff up beautifully during baking! Just remember not to overcrowd them on your sheet; leaving enough space allows hot air to circulate evenly around each cookie.
Next Major Phase – Baking Your Perfect London Fog Cookies
Alright friends, we’re nearly there! It’s time for our final flourish—the moment we’ve all been waiting for: baking these delectable London Fog Cookies until they’re golden brown perfection!
Step 9: Baking to Golden Perfection
Preheat your oven to 350°F (175°C) while you finish shaping those delightful cookie mounds on your prepared sheets—arranging them about 2 inches apart is ideal since they’ll spread slightly while baking. Slide those trays into the oven once it’s reached temperature and set a timer for 9 minutes; yes, just 9 minutes! You want them slightly underbaked when they first come out because they’ll continue cooking on the hot tray as they cool down—a technique known as carryover cooking.
Keep an eye on them during those last couple of minutes; they should start turning golden around the edges while remaining soft in the center—that’s exactly what we’re aiming for! The aroma wafting through your kitchen at this point? Utterly intoxicating! Be sure not to wait too long before removing them from the oven—you want them chewy yet set enough so they hold their shape beautifully when cooled.
After pulling them from the oven, allow these beauties to rest on their baking sheets for about 5 minutes before transferring them onto wire racks to cool completely. This resting period allows any residual heat from the tray to finish cooking them without drying out their interiors—resulting in those luxuriously chewy centers you’ve been dreaming about!
Conclusion:
As we wrap up this delightful journey through creating London Fog Cookies, I can’t help but feel excited about all the memories waiting to be made with each bite. The blend of Earl Grey tea and fragrant lavender creates a truly extraordinary experience that transforms an ordinary cookie into something magical. With their soft centers and tender edges topped off with luscious lavender cream cheese frosting, these cookies are more than just treats; they’re moments of joy shared over steaming cups of tea or served at celebrations that bring loved ones together.
This recipe is undoubtedly a must-try—not only for its incredible flavors but also for the sheer joy of baking it! It’s accessible enough for novice bakers yet sophisticated enough to impress even seasoned pastry chefs. Picture yourself pulling these cookies from the oven, golden edges beckoning you closer while that enchanting aroma fills your kitchen—it’s enough to make anyone weak at the knees! Whether you’re hosting an afternoon tea party, celebrating a special occasion, or simply indulging in a cozy evening at home, these cookies are sure to shine.
For serving suggestions, imagine savoring one alongside your favorite herbal tea—the warmth enveloping you while the cookie melts delightfully in your mouth. For an afternoon pick-me-up, why not pair it with a rich cup of coffee? And if you’re feeling indulgent—ahh—serve them warm with a scoop of vanilla non-dairy ice cream drizzled with honey; it’s absolutely delectable! Each pairing enhances those delicate notes of lavender and Earl Grey while creating new experiences every time.
Feeling adventurous? This recipe is wonderfully adaptable! You could experiment by adding white chocolate chips for extra sweetness or swap out some flour for almond meal to create nutty undertones that complement the floral notes beautifully. If you’re in the mood for something citrusy, a hint of lemon zest can elevate those flavors even further! There’s so much room for creativity here—so don’t hesitate to make it your own. I invite you to dive into this baking adventure and share your personal touch—I can’t wait to hear how yours turn out!
London Fog Cookies

Indulge in the enchanting flavors of London Fog Cookies, a delightful fusion of Earl Grey tea and fragrant lavender. These cookies are soft and chewy with a buttery sweetness, making them perfect for cozy afternoons or elegant gatherings. Each bite transports you to a soothing tea party, where the floral notes of lavender harmonize with the citrusy bergamot essence of Earl Grey. Topped with a silky lavender cream cheese frosting, these cookies not only taste incredible but also look stunning on any dessert table. Whether enjoyed alone with a warm cup of tea or shared with loved ones, these cookies are bound to become a cherished favorite in your baking repertoire.
- Prep Time: 20 minutes
- Cook Time: 9 minutes
- Total Time: 29 minutes
- Yield: Approximately 24 cookies 1x
- Category: Dessert
- Method: Baking
- Cuisine: British
Ingredients
- 3 tbsp Earl Grey tea
- 2 3/4 cups all-purpose flour
- 1/2 tsp baking powder
- 1/2 tsp baking soda
- 1/2 tsp salt
- 1 cup granulated white sugar
- 1 cup unsalted butter, softened
- 1 egg, at room temperature
- 2 tsp vanilla bean paste
- 1/2 cup granulated white sugar (for rolling)
- 1/2 tbsp culinary lavender
- 4 oz cream cheese
- 1/4 cup unsalted butter, softened
- 1 cup powdered sugar
- 1/2 tbsp culinary lavender
- 1 tsp vanilla bean paste
- Purple food coloring (optional)
Instructions
- Preheat oven to 350°F (175°C). Brew 3 tbsp Earl Grey tea in 6 tbsp hot water; let cool.
- In a bowl, whisk together 2 3/4 cups flour, 1/2 tsp baking powder, 1/2 tsp baking soda, and 1/2 tsp salt.
- In another bowl, cream together 1 cup softened butter and 1 cup granulated sugar until fluffy. Add egg and vanilla; mix until combined.
- Gradually add dry ingredients to wet mixture; mix until just combined.
- Fold in 1/2 tbsp culinary lavender. Chill dough for at least 30 minutes.
- Scoop dough onto lined baking sheets, spacing them apart. Bake for 9 minutes or until edges are golden.
- Allow to cool on pans for 5 minutes before transferring to wire racks.
Nutrition
- Serving Size: 1 cookie (30g)
- Calories: 150
- Sugar: 10g
- Sodium: 70mg
- Fat: 7g
- Saturated Fat: 4g
- Unsaturated Fat: 3g
- Trans Fat: 0g
- Carbohydrates: 20g
- Fiber: <1g
- Protein: 2g
- Cholesterol: 25mg