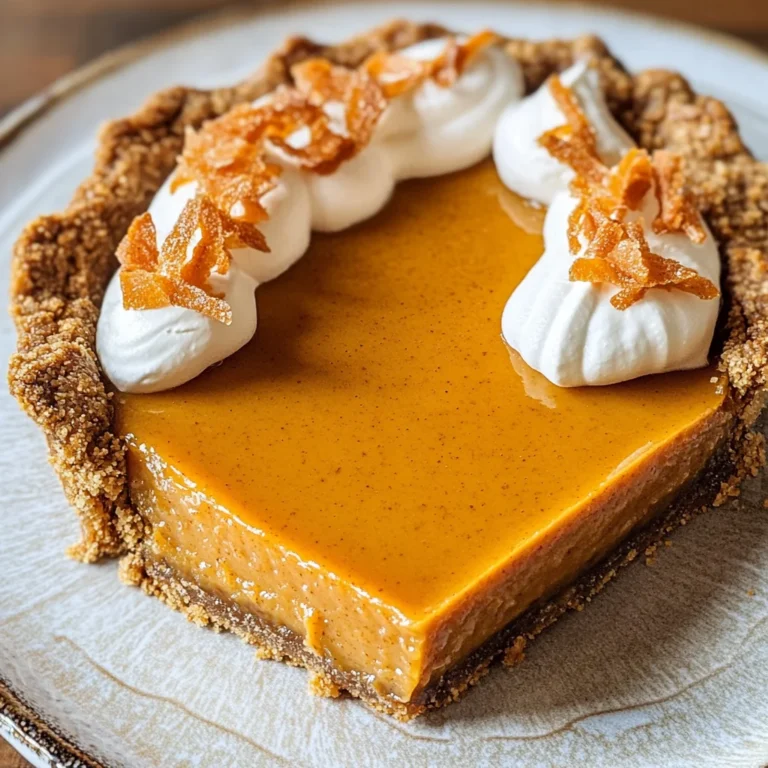
Iced Oatmeal Cookies Recipe
There’s something undeniably heartwarming about baking cookies, especially when the scent fills your home and brings back memories of laughter, love, and cherished moments. Iced oatmeal cookies, with their delightful balance of crispiness and chewiness, are more than just a simple treat; they are a bridge connecting generations. Picture this: kids rushing in from school, cheeks flushed from the cool air, eyes lighting up as they catch a whiff of those sweet, spiced delights straight from the oven. As you dip each cookie into that luscious vanilla glaze—oh my goodness!—it’s like icing on the cake (or should I say cookie?). This Iced Oatmeal Cookies Recipe is not just about satisfying a sweet tooth; it’s about creating experiences that linger long after the last crumb has disappeared.
What makes these cookies so special? Perhaps it’s the nostalgic crunch of oats mingling with warm spices like cinnamon and nutmeg that transport you to simpler times or the creamy glaze that adds a touch of elegance to an otherwise humble cookie. Oatmeal cookies have long been beloved for their hearty texture and comforting flavors; they’re versatile enough to be enjoyed at any time of day. Whether you’re serving them at a family gathering or enjoying them during a quiet moment with your favorite book, these cookies are sure to bring joy. Trust me on this one: once you’ve tasted them fresh out of the oven, you’ll understand why they hold such a special place in my heart!
Iced Oatmeal Cookies Recipe: A Nostalgic Delight
These iced oatmeal cookies are an easy recipe that brings joy with every bite. Perfect for sharing with friends or savoring solo, this treat is bound to become a cherished favorite in your home.
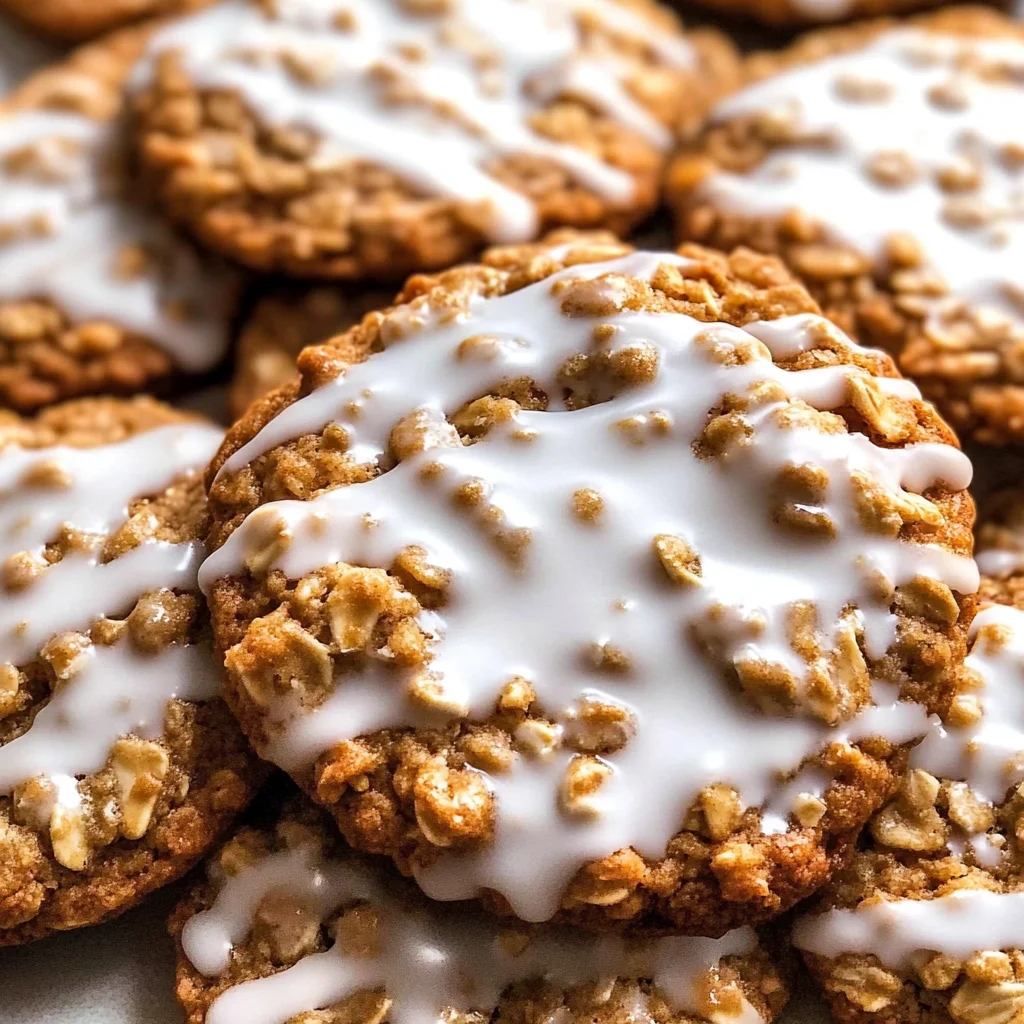
Ingredients:
Before we dive into the baking magic, let’s take a moment to appreciate our ingredients. Each one plays its part in creating these delightful Iced Oatmeal Cookies.
- 3/4 cup shortening. Shortening is vital for achieving that perfect balance between crispness and chewiness; it helps create tender cookies by preventing gluten formation. Look for high-quality vegetable shortening—it should be smooth and creamy without any off-putting scents. If you’re seeking a healthier alternative, coconut oil can work beautifully here too!
- 1 cup packed brown sugar. Ah, brown sugar—a key player in our recipe that brings both moisture and depth of flavor thanks to its molasses content. It gives our cookies a lovely caramel undertone while ensuring they stay soft even after cooling down. Remember to pack it tightly into your measuring cup for accurate results!
- 1/2 cup sugar. Granulated sugar is essential not just for sweetness but also for achieving that golden-brown color as the cookies bake. It contributes to the crispy edges that contrast beautifully with the chewy center we’re aiming for in this recipe.
- 1/4 cup water. Water might seem like an unusual addition, but it acts as a binding agent here—helping dissolve some sugars and providing moisture throughout baking. It ensures your dough is neither too dry nor too wet; trust me when I say its addition is non-negotiable!
- 1 teaspoon vanilla extract. Vanilla is like the secret handshake between all ingredients; it enhances their flavors while adding its own sweet aroma. Always use pure vanilla extract if possible—its rich flavor will elevate your iced oatmeal cookies to extraordinary levels.
- 1 cup all-purpose flour. Flour serves as the backbone of our cookie dough; it provides structure while absorbing moisture during baking. When measuring flour, spoon it into your measuring cup rather than scooping directly from the bag—this prevents packing down and ensures light, fluffy cookies.
- 1 teaspoon baking soda. This leavening agent does wonders in helping our cookies rise slightly as they bake, creating those delightful airy pockets within each bite. It’s important not to skip this step; without it, you’ll end up with dense biscuits instead of glorious treats!
- 1/4 teaspoon salt. Salt may seem trivial but don’t underestimate its role—it enhances every other flavor present in our cookies! A tiny pinch goes a long way toward balancing sweetness with savory notes.
- 1/4 teaspoon nutmeg. Nutmeg adds warmth and complexity—a hint of spice that makes these iced oatmeal cookies feel cozy and inviting! Just be careful not to overdo it; nutmeg can easily overpower if used excessively.
- 3/4 teaspoon cinnamon. Cinnamon is another spice hero here! Its familiar scent evokes feelings of comfort and home; combined with oats, it creates an utterly intoxicating experience as they bake together—just wait until you smell it wafting through your kitchen!
- 2 cups oats (quick cooking or old-fashioned). Oats provide texture and heartiness; they make these cookies feel substantial while delivering fiber goodness too! Quick oats will blend seamlessly into the dough while old-fashioned oats give more chewiness—use whichever you prefer!
- 4 tablespoons milk (or non-dairy alternative). Milk adds richness to our glaze while helping achieve that delightful consistency we want when dipping our cooled cookies! Feel free to substitute almond milk or oat milk if desired—no need for dairy here!
- 2 cups powdered sugar (sifted). Powdered sugar creates that dreamy glaze we’ll dip our cookies into later on—it’s essential for achieving smoothness without any lumps ruining our beautiful finish! Sifting ensures easy blending with other ingredients for optimal results.
- Water (as needed). Water will help adjust the consistency of our glaze—you want it thick enough to coat but thin enough so it doesn’t clump up when dipped! Just remember: add only one teaspoon at a time until you achieve perfection.
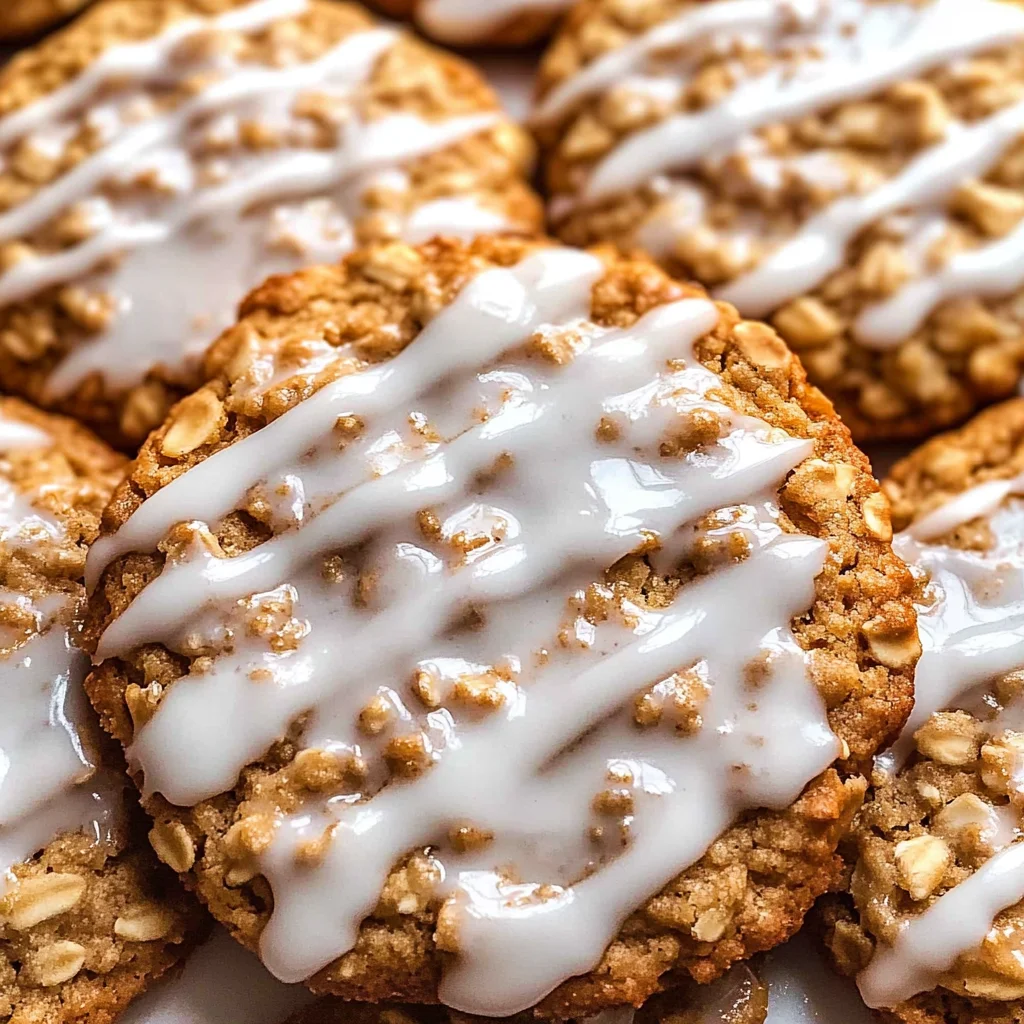
Equipment You’ll Need:
Having the right tools at hand makes all the difference in ensuring smooth sailing when preparing these delectable iced oatmeal cookies! While they aren’t ingredients, these essential pieces will help you create something truly wonderful.
- **Mixing bowls – A good set of mixing bowls is crucial for combining ingredients effectively without spilling everywhere! I recommend having various sizes available—one large bowl is perfect for creaming butter and sugars together while smaller ones work great for dry ingredients or glazes.
- **Electric mixer – An electric mixer streamlines creaming together shortening and sugars until light & fluffy—this process helps incorporate air into your dough which leads to better texture overall! Hand mixers work fine too if preferred!
- **Cookie scoop – Using a medium cookie scoop ensures uniformity across all your cookie sizes which promotes even baking throughout each batch—it’ll save time compared to using two spoons or trying by eye alone!
- **Baking sheets – A sturdy set of baking sheets is essential—they conduct heat evenly resulting in perfectly baked goods every time! Lining them with parchment paper helps prevent sticking & makes cleanup easier afterward too!
Preparing the Iced Oatmeal Cookies Recipe
Step 1: Creaming Together Shortening and Sugars
Let’s kick things off by creaming together our shortening and sugars until we achieve that coveted light-and-fluffy texture—a critical first step in this Iced Oatmeal Cookies Recipe! Begin by placing your softened shortening in one of those trusty mixing bowls along with both brown sugar and granulated sugar. Now comes the fun part: grab your electric mixer (or whisk) and start blending on medium speed until everything looks pale yellow and fluffy—this should take about three minutes or so depending on how powerful your mixer is! Don’t rush this step; allowing ample time ensures proper incorporation of air which translates into lighter textures once baked.
As you’re creaming away, keep an eye out for visual cues—the mixture should change from looking grainy to smooth as everything blends together harmoniously before you add anything else! If you notice any lumps remaining after several minutes have passed by then give them extra attention until no signs remain—the goal here isn’t just aesthetics but functional harmony amongst all ingredients involved later down line when mixed further!
Step 2: Adding Water & Vanilla
Now it’s time for us to introduce water alongside vanilla extract into our delightful concoction—the liquid gold needed here brings moisture back into play after reducing solid fats initially added earlier on during creaming stage above! Pour both measured amounts directly over whipped mixture then continue mixing slowly until thoroughly combined without splattering everywhere (trust me on this!). The addition seems simple yet plays an important role because balanced hydration helps maintain desired moistness throughout entire cookie batch preventing dryness post-bake—which can happen easily if forgotten about altogether!
Step 3: Mixing Dry Ingredients
In another bowl (or simply off to one side), combine flour along with baking soda & salt plus lovely spices like nutmeg & cinnamon mentioned earlier onto dry ingredient list earlier above… This process known as “dry sifting” allows even distribution among particles ensuring no clumps form later when incorporated alongside wet components previously created thus far during preparation stage today—we wouldn’t want uneven flavors now would we? Gradually add this mixture right into previous bowl holding wet mixture little by little stirring carefully at first till fully integrated while avoiding excessive over-mixing which could lead gluten formation resulting toughened final product instead of tender crumb desired outcome here today folks!!
Step 4: Folding In Oats
With dry ingredients now successfully merged together within unified batter mass created beforehand earlier today let’s shift gears now towards folding oats gently through entire mix provided thus far ensuring everyone gets equal chance within final batch being baked shortly thereafter! Use spatula (or wooden spoon) making sure not overly vigorous movements disturb delicate structure already built-up previously—it’s crucial we retain air pockets formed earlier upon creaming phase because they’ll expand wonderfully upon heating causing those signature chewy centers distinguished throughout classic oatmeal cookie recipes worldwide!!
The anticipation builds as we prepare ourselves next towards dropping dollops onto greased sheets readying ourselves towards heavenly aromas soon filling kitchens everywhere once ovens reach proper temperatures ahead shortly thereafter!!
Stay tuned as we bake these beauties next…
Creating Your Iced Oatmeal Cookies: The Next Steps
Let’s dive into the magic of baking these delightful iced oatmeal cookies! It’s truly a joy to watch these ingredients transform into something that not only looks beautiful but also tastes extraordinary. So grab your apron and let’s continue this delicious journey together!
Step 5: Crafting the Creamy Glaze
While your cookies are cooling down, it’s time to whip up that luscious glaze that will crown our cookies with a gorgeous finish. In a medium-sized mixing bowl, combine 4 tablespoons of milk with 2 cups of sifted powdered sugar. Sifting is crucial here because it breaks up any lumps in the sugar, ensuring a silky-smooth glaze that glides onto your cookies like a gentle caress. Now, here comes the fun part! Start stirring the mixture until it’s well combined; you want it to be thick yet pourable. This is where you’ll also add water, but do so gradually—just a teaspoon at a time—until you reach that perfect consistency. The glaze should be thick enough to coat the back of a spoon but thin enough that it runs smoothly off your fingers when you dip a cookie into it. Trust me on this: patience is key here! If you rush this step and make it too watery, your beautiful icing will simply run off your cookies, leaving them bare and sad.
Step 6: Dipping Your Cookies in Sweetness
Now that we have our glaze ready and waiting, it’s time for the pièce de résistance: dipping those glorious cookies! Gently take each cooled cookie and dip the top into the glaze, allowing just enough icing to cover its surface without overwhelming it. As you lift the cookie out, let any excess glaze drip back into the bowl; this step is vital because it prevents puddles from forming on top of your cookies. You want that smooth finish—almost like a delicate icing ruffle! If you’re feeling adventurous (and I promise you will), try sprinkling some colorful edible glitter or finely chopped nuts over the glazed tops while they’re still wet; this adds not only visual appeal but an extra layer of texture and flavor too!
Step 7: Allowing Time for Perfection
After you’ve dipped all your cookies in their sweet bath of vanilla goodness, place them on a wire rack or parchment-lined tray to allow them to set properly. This may seem like an inconsequential step, but letting the glaze harden transforms our delightful treats from mere cookies into something truly extraordinary. The cooling allows the icing to firm up nicely and creates that signature snap when you bite into them—you’ll hear it too, creating an auditory cue of deliciousness! This usually takes about 20-30 minutes, so resist the urge to nibble just yet; I know it’s tempting! Instead, take this time to clean up your kitchen or perhaps brew yourself a nice cup of tea or coffee; those flavors will complement those iced oatmeal cookies beautifully!
Step 8: Baking Your Perfect Iced Oatmeal Cookies
Now comes my favorite part—the baking! Preheat your oven to 350°F (175°C) while you prepare your baking sheets by greasing them lightly or lining them with parchment paper for easy removal later on. Using a medium cookie scoop (about 1-2 tablespoons), drop dollops of dough onto your prepared baking sheets with about two inches between each mound; this allows for spreading as they bake and ensures they don’t end up sticking together—nobody wants an accidental cookie sandwich! Bake these beauties for 10-12 minutes, carefully watching for that golden-brown hue around the edges while keeping an eye on their centers—they should look slightly underbaked at first glance since they will continue cooking on the sheet after removal. When they’re done, allow them to rest for about two minutes on the baking sheet before transferring them to wire racks; this resting period is absolutely paramount as it allows them to set slightly while maintaining their chewy center.
Conclusion:
As we wrap up this culinary journey together through my beloved iced oatmeal cookies recipe, I can’t help but feel a rush of excitement! This delightful recipe brings forth not just flavors but also memories of laughter-filled afternoons spent with family and friends over cups of milk and chatter about our days. The combination of creamy vanilla icing cascading over those perfectly baked cookies creates such an irresistible allure that it’s hard to resist having just one more—each bite is truly extraordinary! The crispy edges paired with chewy oats create a symphony of textures that dance on your palate like no other.
Why is this recipe a must-try? Well beyond their delectable taste lies the sheer joy found in creating these treats. They’re versatile enough to serve at family gatherings or potlucks yet simple enough to whip up on a quiet Sunday afternoon when all you need is something warm from the oven. Just imagine pulling them out while they’re still slightly warm; the sweet scent fills your kitchen as everyone rushes over with eager eyes and open mouths ready to indulge—a scene that never fails to bring smiles all around!
Now let’s talk pairings because what’s better than enjoying these delicious cookies with complementary flavors? Imagine savoring one alongside a steaming cup of chai tea—the spices mingling perfectly with the sweetness of your cookie creates an utterly intoxicating experience. Or perhaps you’d prefer one with fresh fruit slices—think juicy strawberries or crisp apples—that contrast so beautifully with the creamy icing. For an afternoon pick-me-up during those long workdays, dunking one into coffee transforms your break into pure bliss!
Feeling adventurous? This recipe is wonderfully adaptable! You could swap out some oats for shredded coconut for an island twist or add dried fruits like cranberries or apricots for bursts of tart sweetness that elevate each bite even further. Trust me when I say that whatever variation you choose will only enhance this already remarkable foundation! So why not give it a go? Bake these iced oatmeal cookies today and share your creations—I can’t wait to hear how they turn out!
Iced Oatmeal Cookies

Indulge in the nostalgic joy of our Iced Oatmeal Cookies, a delightful treat that balances crispiness and chewiness with a creamy vanilla glaze. These cookies evoke warm memories of bustling kitchens filled with laughter, making them perfect for gatherings or quiet moments at home. The comforting blend of oats and warm spices creates a texture you’ll love, while the luscious glaze adds an elegant touch. Whether shared with friends or enjoyed solo, these cookies are sure to bring happiness to your day.
- Prep Time: 15 minutes
- Cook Time: 12 minutes
- Total Time: 27 minutes
- Yield: Approximately 24 cookies 1x
- Category: Dessert
- Method: Baking
- Cuisine: American
Ingredients
- 3/4 cup shortening
- 1 cup packed brown sugar
- 1/2 cup granulated sugar
- 1/4 cup water
- 1 teaspoon vanilla extract
- 1 cup all-purpose flour
- 1 teaspoon baking soda
- 1/4 teaspoon salt
- 1/4 teaspoon nutmeg
- 3/4 teaspoon cinnamon
- 2 cups oats (quick cooking or old-fashioned)
- 4 tablespoons milk (or non-dairy alternative)
- 2 cups powdered sugar (sifted)
Instructions
- Preheat oven to 350°F (175°C) and prepare baking sheets.
- Cream together shortening, brown sugar, and granulated sugar until light and fluffy.
- Mix in water and vanilla extract until combined.
- In a separate bowl, whisk together flour, baking soda, salt, nutmeg, and cinnamon.
- Gradually add dry ingredients to wet mixture and mix until just combined.
- Fold in oats gently.
- Drop tablespoon-sized scoops of dough onto prepared baking sheets; leave space between each cookie.
- Bake for 10-12 minutes until edges are golden but centers look slightly underbaked.
- Cool on wire racks before glazing.
- For glaze, combine milk and powdered sugar; adjust consistency with water if needed. Dip cooled cookies in glaze and allow to set.
Nutrition
- Serving Size: 1 serving
- Calories: 130
- Sugar: 10g
- Sodium: 45mg
- Fat: 5g
- Saturated Fat: 1g
- Unsaturated Fat: 3g
- Trans Fat: 0g
- Carbohydrates: 20g
- Fiber: 1g
- Protein: 2g
- Cholesterol: 0mg