Classic Apple Pie Recipe
There’s something profoundly comforting about the aroma of freshly baked apple pie wafting through the house. It’s more than just a dessert; it’s a heartfelt embrace, a slice of nostalgia that transports us to sun-drenched orchards and family gatherings. The moment you take that first bite, you’re greeted with a symphony of flavors: the sweetness of tender apples mingling with warm spices, all cradled in a flaky crust that shatters beautifully with every forkful. This Classic Apple Pie Recipe is not just a dish; it’s an experience steeped in tradition and love, one that beckons you to gather around the table and share life’s moments with those you cherish.
As we embark on this culinary journey together, I promise you’ll find joy in the little things—the way the apples glisten as they caramelize, how the spices bloom in the warmth of the oven, and that magical moment when you finally slice into your creation. You might wonder why I choose specific apple varieties like Macoun or Honeycrisp for this recipe. Trust me, each variety contributes its unique sweetness and tartness, creating a perfect balance that is simply irresistible. So, let’s dive into this cherished recipe and make some memories!
Classic Apple Pie Recipe: A Slice of Home
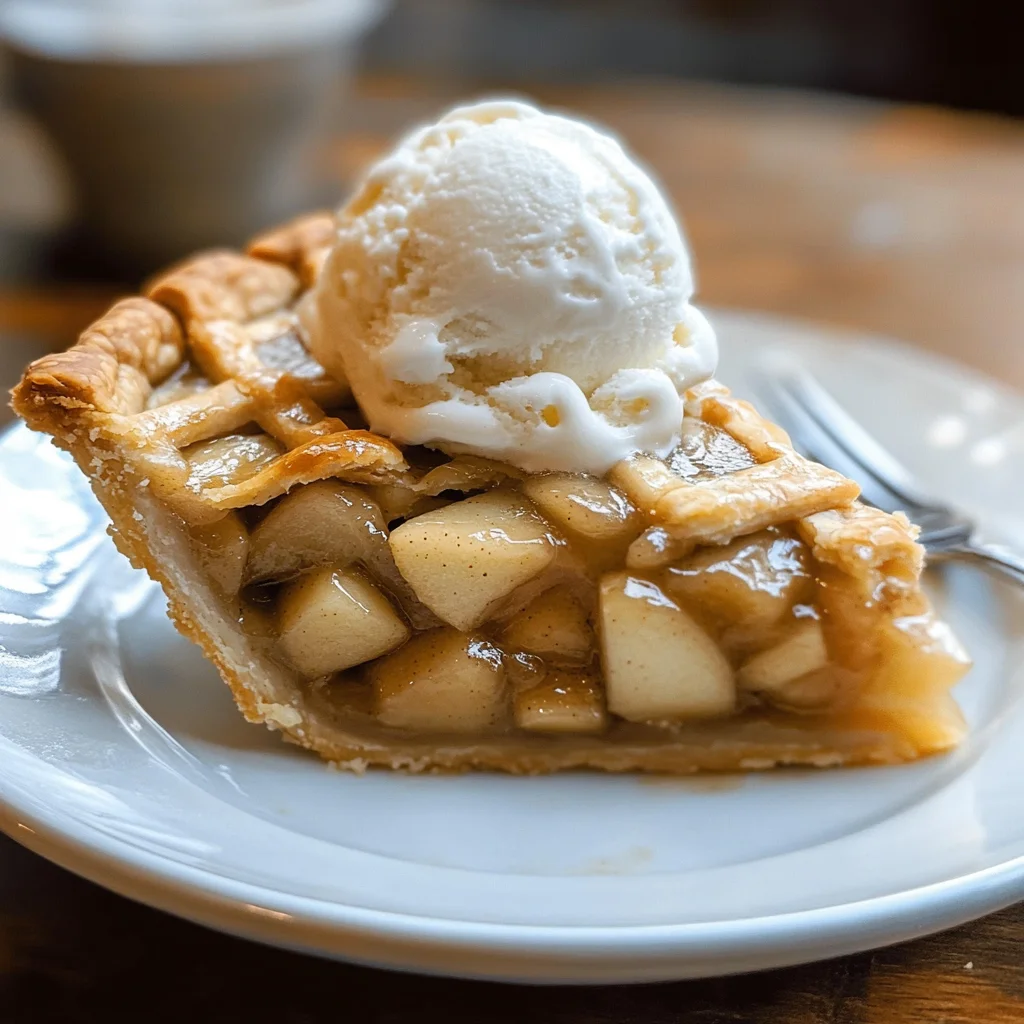
This Classic Apple Pie Recipe is my go-to for every fall gathering and holiday dinner. It’s incredibly easy to whip up yet yields results that make it feel like you’ve slaved away for hours—an absolute win-win! Picture this: golden-brown crust, perfectly spiced filling, and maybe even a scoop of creamy vanilla ice cream melting on top. Just thinking about it makes my heart flutter!
Ingredients:
Before we get started on crafting this delightful pie, let’s talk about the ingredients that will come together to create this masterpiece. Each component plays a vital role in achieving that perfect blend of flavors and textures.
- 3 pounds apples (Macoun, Honeycrisp or Cortland are my favorites). Choosing the right apples is absolutely paramount for this classic dish. Macoun apples bring a lovely sweetness with just enough tartness to keep things interesting; Honeycrisp offers an addictive crunch; while Cortland apples maintain their shape beautifully during baking. When picking your apples at the store or market, look for firm fruit with vibrant coloring—this ensures they’re fresh and full of flavor. Feel free to mix these varieties for a more complex taste!
- 1/2 cup brown sugar (light or dark). Brown sugar is essential here because it adds depth and moisture to our filling. The molasses content lends a rich caramel note that enhances the natural sweetness of the apples while helping to create that luscious syrupy filling we all adore. If you’re out of brown sugar, you can substitute it with an equal amount of granulated sugar mixed with a touch of molasses.
- 1/2 cup granulated sugar. While brown sugar brings richness, granulated sugar provides pure sweetness without overshadowing the delicate flavor of our apples. It helps balance out any tartness from our chosen apple varieties so every bite tastes harmonious.
- 2 teaspoons vanilla extract. Vanilla extract is like magic fairy dust—it elevates everything! It adds warmth and complexity to your pie filling, making those sweet notes sing even louder. Always opt for pure vanilla extract over imitation for authenticity; trust me—it’s worth it!
- ⅓ cup all-purpose flour. This unassuming ingredient acts as our thickening agent—absorbing excess juices from our juicy apple filling, ensuring we don’t end up with an overly soggy crust! Plus, it helps bind everything together nicely without altering those beautiful apple flavors.
- 1 teaspoon salt. Salt might seem counterintuitive in desserts but hear me out: it enhances all the other flavors present in your pie! Just a pinch brings out sweetness while providing balance—think of it as nature’s way of making everything taste better.
- 2 teaspoons ground cinnamon. Ahh… cinnamon! This spice is synonymous with cozy baking moments and autumn days spent picking apples at local farms. It infuses our filling with warmth and nostalgia while complementing the natural sweetness of our apples beautifully.
- 1 teaspoon ground nutmeg. Just like cinnamon, nutmeg brings another layer of warmth and earthiness to our pie’s flavor profile. It’s aromatic yet subtle enough not to overpower but rather enhance that beloved apple essence.
- ½ teaspoon allspice. Though often overlooked, allspice deserves its place here! With notes reminiscent of clove and nutmeg combined, it adds remarkable depth to our flavor palette—it’s like adding secret sauce to your favorite dish!
- 2 tablespoons unsalted butter (cut into cubes). Butter enriches both flavor and texture in any baked good—here it serves as little nuggets melted between those delicious apple slices as they bake away into blissful perfection.
- 9-inch double pie crust (homemade or store-bought). Whether you decide to make your own crust (which I highly recommend!) or use store-bought for convenience doesn’t detract from how wonderful this pie will be; just ensure it’s sturdy enough to hold up under all those luscious fillings!
- Egg wash (1 tablespoon milk + 1 egg). An egg wash gives your pie that gorgeous golden finish once baked—it’s what transforms the crust from dull to dazzling! Plus, brushing some milk adds an extra sheen that’ll have everyone swooning when they see your creation.
- 1 tablespoon turbinado sugar (optional). For an added crunch on top along with caramelized sweetness – sprinkling turbinado sugar over your pie before baking will do just that! If you don’t have any available don’t fret—it’ll still be delicious without!
- Vanilla ice cream (for serving). A scoop (or two!) atop warm slices creates an indulgent contrast that’s simply irresistible—a delightful way to celebrate this timeless dessert!
Equipment You’ll Need:
Having the right tools can truly transform your baking experience into something delightful rather than daunting! Let’s gather some essential partners in crime that’ll help make this pie come alive:
- **Mixing bowls – These are indispensable for combining ingredients seamlessly! Look for sturdy bowls that won’t tip over easily when whisking or mixing vigorously; glass works wonderfully since you can see what’s going on inside too!
- **Pie plate – Ideally made from glass or ceramic which allows heat distribution evenly so your crust bakes perfectly golden without burning edges too soon!
- **Rolling pin – This trusty tool makes rolling out dough smooth as silk—you want one that’s comfortable in hand but also substantial enough not flex too much during use!
- **Sharp knife – A good chef’s knife will help cut through apple skin effortlessly while ensuring uniform slices so everything cooks evenly—a crucial aspect when baking pies!
- **Pastry brush – This little tool is fantastic when applying egg washes onto crusts or brushing off excess flour—you want those finished edges looking pristine after baking!
These tools may not be ingredients, but they’re vital allies in creating something wonderful together—a beautiful Classic Apple Pie Recipe awaits us!
Preparing the Classic Apple Pie Recipe
Step 1: The Heartfelt Prep Work
To begin crafting this Classic Apple Pie Recipe, start by prepping your apples—the heart and soul of our dessert! Begin by peeling them gently; there’s something cathartic about watching those skins curl away from each fruit—it’s as if you’re unveiling their hidden potential. Next comes coring them; remove those tough centers so only sweet flesh remains ready for slicing into ¼ inch pieces. Once sliced thinly yet uniformly across all pieces, toss them in a large mixing bowl alongside granulated sugar, brown sugar, vanilla extract salt & spices—and allow them time together by resting covered at room temperature for 30 minutes up until an hour if possible! Why let them rest? Well…this step allows juices released during tossing mingle harmoniously creating flavors deeper than before while ensuring every slice gets its fair share goodness before entering our glorious pie crust later on.
Step 2: Craft That Beautiful Crust
Now let’s roll out that bottom crust—it deserves love too! Dust flour generously over your work surface—it prevents sticking while ensuring smooth rolling action when needed most! Gently roll out chilled dough into roughly twelve inches circle thickness approximately ⅛ inch thick using even pressure throughout rolling process avoiding uneven spots where cracks may form later on during baking phase making sure edges remain intact always easier said than done—but trust me on this one: patience pays off immensely here! Once rolled thinly enough drape carefully over rolling pin transferring directly onto prepared nine-inch pie plate easing dough gently down avoiding stretching which could lead cracking later—a relaxing process if approached mindfully allowing every detail flourish naturally instead rushing through steps realizing how important freshness really matters here either way refrigerate filled plate until ready assemble filling next part needing utmost care…
Step 3: Capture Those Juices
As we move forward assembling our masterpiece let’s not forget about capturing essence locked within those beautiful fruits awaiting transformation into gooey syrupy goodness once baked properly too long gone unnoticed often overlooked however crucial process nonetheless involves draining excess liquid released earlier after tossing plus cooking briefly until reduced volume occurs resulting concentrated flavor left behind only adds richness alongside texture quite different from ordinary apple pies found stores nowadays simmer small saucepan set medium-low heat patiently stirring occasionally until bubbly appearance occurs approximately ten-fifteen minutes total depending upon moisture content among selected varieties used remembering attention span matters immensely here even more so keep watch closely lest things turn sticky quickly now set aside reserved liquid cool slightly before pouring over prepared apple slices once cooled slightly…
Step 4: Build Your Filling
Now comes time fill prepared crust generously layered filled up high because who doesn’t love generous portions? Toss lightly coated floured apple slices allowing every piece get evenly distributed beneath surface level ensuring ultimately consistent results after baking although tempting shortcut avoid skipping steps leads disappointment later when cutting through slices becomes challenging instead enjoy artistry unfolding before eyes knowing satisfaction awaits ahead patience truly rewarded here simply pour cooked reserved liquid drizzled atop carefully covering entire surface area distributing evenly across beforehand sealed edges protects against leaking messes formed during cooking processes best practices followed throughout journey ensures successful outcomes ever delivered straight onto tables filled laughter shared memories made cherished forever more importantly than anything else remember enjoy each moment spent creating magic kitchen bringing people together again let excitement build anticipation rise as preparation continues onward…
Stay tuned as we continue exploring further steps leading towards glorious final reveal involving fluted edge sealing techniques layering intricate designs above below mesmerizing aromas wafting through air promising delights await guests alike indulging senses deep-rooted connections formed generations past…
Step 5: Crafting the Perfect Top Crust
Now that your pie is filled with those beautifully spiced apples, it’s time to roll out the top crust, which is truly where the magic happens. On a well-floured surface, take your chilled dough and roll it out into a 9-inch circle. I can’t stress enough how important it is to keep that surface dusted with flour. This prevents the dough from sticking and ensures you can easily maneuver it without tearing—which would be heartbreaking after all your hard work! As you roll, think about how this crust will cradle that sweet apple filling, creating layers of flavor and texture that make every bite a delight.
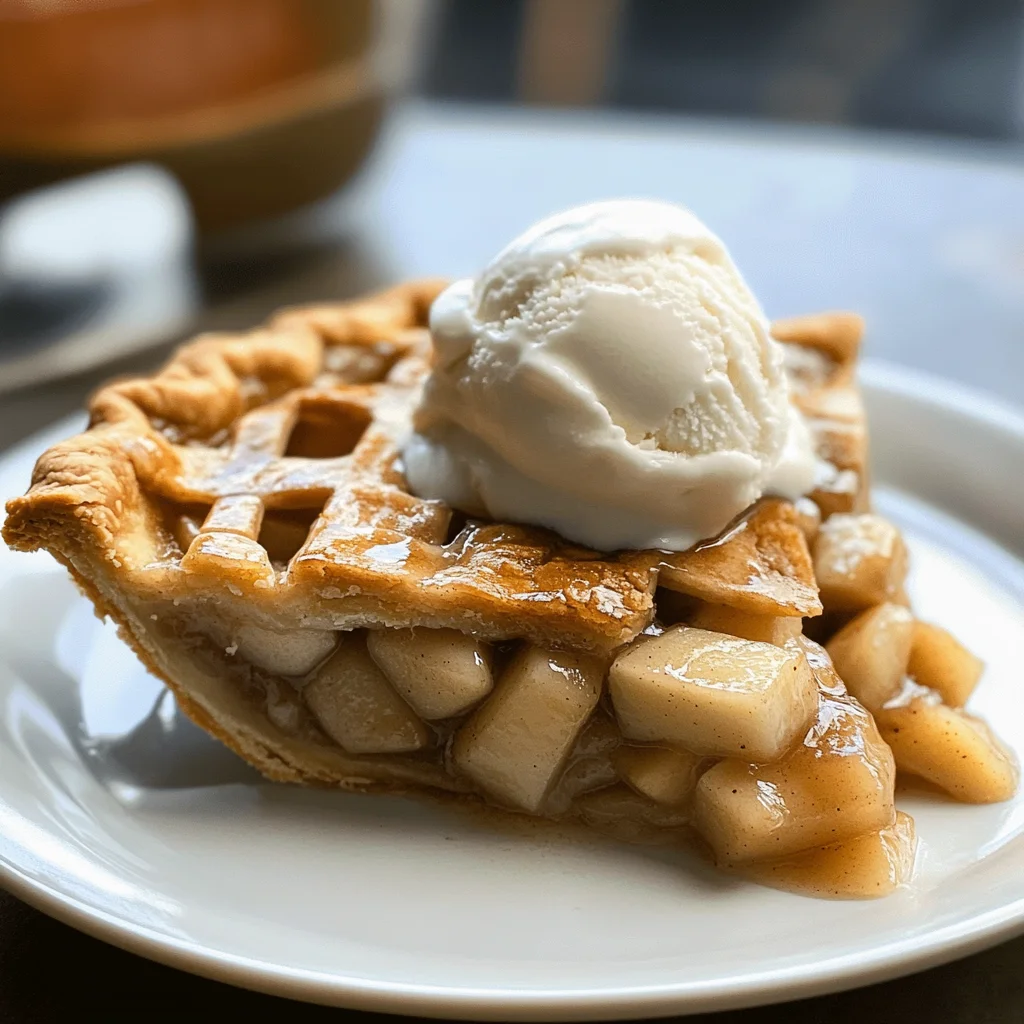
If you’ve chosen the lattice design (which I highly recommend for both aesthetics and added crispness), cut the dough into about ten strips, each roughly one inch wide. Lay five strips over the pie in one direction, then gently fold back every other strip before layering another strip horizontally across. Unfold those strips back over the new strip, creating that charming woven effect. This technique not only looks stunning but allows steam to escape while baking, ensuring your pie doesn’t become soggy—a common pitfall that can ruin your dessert dreams! If you prefer a classic full top crust, simply drape your rolled-out dough over the filling, trim any excess to leave about a half-inch overhang, and remember to vent it by cutting a few slits in the top. This is crucial as it lets hot air escape during baking and helps keep your pie from bursting at the seams.
Step 6: Sealing with Love
Now comes one of my favorite parts—sealing your pie! This step isn’t just about looks; it’s about ensuring all those luscious juices stay nestled within their flaky embrace during baking. To achieve a beautiful fluted edge, place your index finger on the rim of the pie plate while pointing outward and pinch the dough between your forefinger and thumb around your index finger. Repeat this all around the perimeter for an elegant finish that speaks of homemade love. Alternatively, if you’re feeling less ambitious or want a rustic vibe, using a fork to press down along the edges works wonders too!
After sealing up that beauty, let’s give it some chill time—a non-negotiable step! Pop your pie into the freezer for about 15 minutes. Why freeze? It helps firm up the fat in your crust again after handling so much; this will result in an even flakier texture once baked. Trust me when I say patience pays off! While you wait, preheat your oven to 375°F (that warm embrace is coming soon!) and prepare yourself for an aromatic experience like no other.
Step 7: Brushing on Glory
With your oven preheating like an inviting hug and your pie chilled to perfection, it’s time to apply an egg wash—an essential step for achieving that gorgeous golden sheen we all crave in our pies. In a small bowl, whisk together one egg with a tablespoon of milk until well combined; this mixture will help create that rich color and glossy finish on top of your pie. With a pastry brush (or even just a spoon if you don’t have one handy), gently brush this mixture over the entire surface of your top crust and along the edges where it meets the plate.
If you’re feeling adventurous (and why wouldn’t you be?), sprinkle some turbinado sugar over the top before slipping it into the oven—the crystals will add a delightful crunch and sparkle as they caramelize during baking. Now place your pie on a baking sheet lined with parchment paper or a pastry mat; this is absolutely paramount because it catches any drips from bubbling juices while also making cleanup a breeze later on. You wouldn’t want all that lovely filling to get lost in your oven’s depths!
Step 8: The Art of Baking Your Classic Apple Pie
Feel that excitement? It’s almost time! Pop that gorgeous creation into your preheated oven and set the timer for 60 minutes. As it bakes, keep an eye on its transformation—after about 40 minutes, watch for signs of golden brown goodness beginning to envelop its edges. If you notice it browning too quickly (and we don’t want burnt edges!), feel free to cover them lightly with strips of foil; this way, we can protect our masterpiece while still allowing it to cook through.
During these final moments in the oven—oh my goodness—the aroma wafting through your home will be nothing short of intoxicating! It’s truly one of life’s simple pleasures when warm spices blend together with sweet apples to create what feels like liquid gold in scent form. When you reach that hour mark, check for doneness by looking for bubbling juices emanating from those charming vents on top; they should be lively yet not overflowing—this indicates everything inside has cooked perfectly!
Final Touches: Cooling Down Before Slicing Up
Once baked to golden perfection, carefully remove the pie from the oven and place it on a cooling rack—a vital step that allows steam to escape while preventing sogginess at the bottom crust—a common pitfall if you’re too eager! Allowing it to cool completely for four hours may feel like an eternity (I know!), but trust me when I say this time is essential for letting those flavors meld beautifully as well as ensuring that utterly satisfying slice holds its shape when cut.
When slicing into this labor of love at last—oh my heart swells just thinking about it! Each piece reveals tender apples dancing amidst spice-laden sweetness encased in buttery perfection—all begging to be topped with glorious vanilla ice cream which melts into every crevice creating an utterly divine experience! So gather around friends or family because this Classic Apple Pie Recipe deserves sharing—and I promise you they’ll fall head over heels just as I did each time I make it! Enjoy each slice slowly; savor every moment because cooking is not just about food—it’s about love shared around tables filled with laughter and memories waiting to be made!
Storage and Enjoyment Tips for Your Classic Apple Pie Recipe
Ah, the moment has finally arrived — your kitchen is filled with the intoxicating aroma of baked apples and warm spices, and your Classic Apple Pie is ready to be devoured! But before you dive in, let’s chat about how to preserve this sweet treasure for future enjoyment. After all, while the first slice is always the most exhilarating, there’s something wonderfully comforting about knowing you have a slice waiting for you in the fridge or freezer, just when that craving hits.
Storing Leftover Classic Apple Pie Recipe
To keep your beloved pie fresh, I recommend slicing it into generous wedges and placing them in an airtight container. If you don’t have one on hand, simply cover the pie with plastic wrap or aluminum foil; however, using a container will help maintain that delicious crust’s crispness. Stored this way in the refrigerator, your Classic Apple Pie can last up to four days. Now here’s a little pro tip: if you want to keep your pie tasting as fresh as possible, consider placing a slice of bread inside the container with your pie. The bread absorbs moisture and helps keep the crust from becoming soggy — I promise you’ll thank me later! When you’re ready to savor another slice, just pop it into the microwave or reheat it gently in the oven at 350°F until warmed through. Trust me when I say that even after a few days, every bite will still be profoundly satisfying!
Freezing Components for Later
Feeling like preparing a batch of pies ahead of time? Freezing your Classic Apple Pie is an absolutely fantastic option! To do this properly, make sure to wrap your unbaked pie tightly in plastic wrap and then place it in a sturdy freezer-safe bag or container to prevent freezer burn. If done correctly, it can last up to three months without losing its delightful flavor. When you’re ready to bake it straight from frozen, simply remove it from the freezer, brush it with egg wash (this step is non-negotiable!), sprinkle on some turbinado sugar if you’d like that extra crunch, and pop it into a preheated oven at 375°F for about 60-75 minutes — just keep an eye on that golden crust! The convenience of having homemade apple pie on standby is truly extraordinary; imagine pulling out a special treat whenever friends drop by or when you’re hit by a sudden craving for nostalgia.
Now you see why preserving this classic dessert not only keeps those lovely flavors intact but also adds an element of surprise and joy to your kitchen adventures!
Classic Apple Pie Recipe
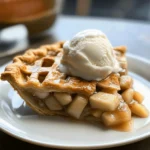
Indulge in this Classic Apple Pie Recipe made with warm spices and tender apples. Bake one today for heartfelt moments around the table!
- Prep Time: 30 minutes
- Cook Time: 60 minutes
- Total Time: 1 hour 30 minutes
- Yield: Serves approximately 8 slices 1x
- Category: Dessert
- Method: Baking
- Cuisine: American
Ingredients
- 3 pounds apples (Macoun, Honeycrisp, or Cortland)
- 1/2 cup brown sugar
- 1/2 cup granulated sugar
- 2 teaspoons vanilla extract
- 1/3 cup all-purpose flour
- 1 teaspoon salt
- 2 teaspoons ground cinnamon
- 1 teaspoon ground nutmeg
- 1/2 teaspoon allspice
- 2 tablespoons unsalted butter (cut into cubes)
- 9-inch double pie crust (homemade or store-bought)
- Egg wash (1 tablespoon milk + 1 egg)
- 1 tablespoon turbinado sugar (optional)
Instructions
- Preheat your oven to 375°F.
- Peel and core the apples, then slice them into ¼ inch pieces. In a large bowl, combine apples with brown sugar, granulated sugar, vanilla extract, flour, salt, and spices. Let rest for 30 minutes.
- Roll out the bottom pie crust and fit it into a pie plate. Fill it with the apple mixture and dot with butter.
- Roll out the top crust or create a lattice design. Seal the edges and brush with egg wash before sprinkling with turbinado sugar if desired.
- Bake for about 60 minutes until golden brown and bubbling.
- Allow to cool for at least four hours before slicing.
Nutrition
- Serving Size: 1 slice
- Calories: 280
- Sugar: 22g
- Sodium: 150mg
- Fat: 12g
- Saturated Fat: 7g
- Unsaturated Fat: 4g
- Trans Fat: 0g
- Carbohydrates: 41g
- Fiber: 3g
- Protein: 2g
- Cholesterol: 40mg