Red, White, and Blue Cake Balls
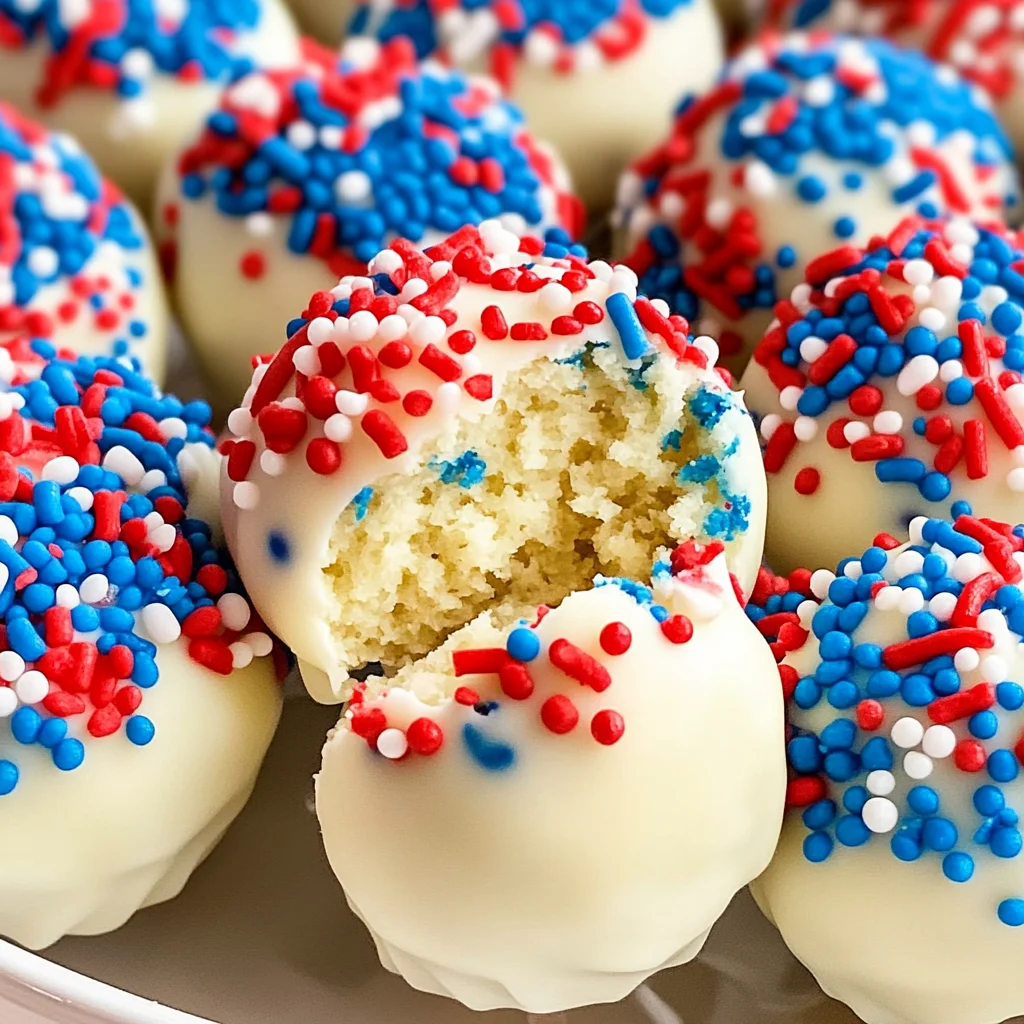
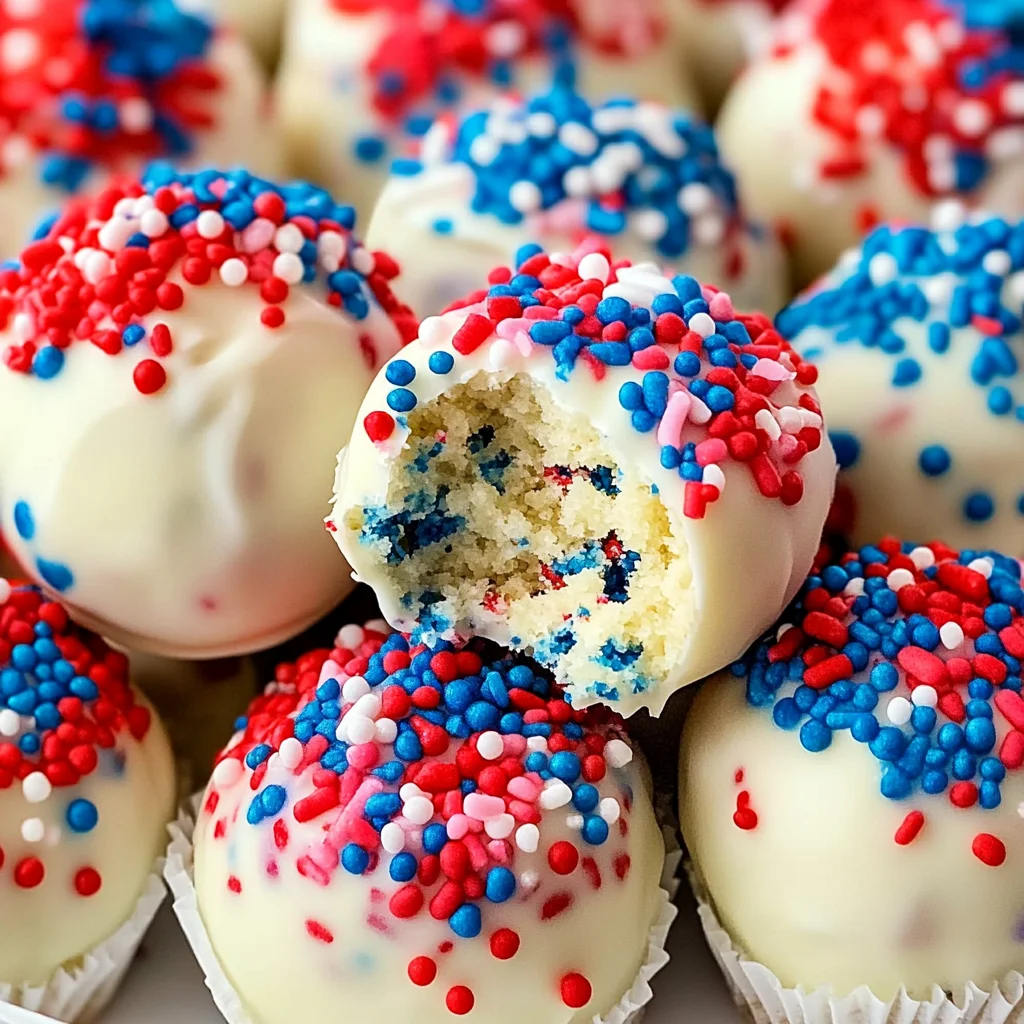
There’s something truly magical about desserts that bring people together, isn’t there? They have this incredible power to evoke memories, spark joy, and create moments that you cherish for years to come. My heart races with excitement just thinking about these Red, White, and Blue Cake Balls! Not only are they visually stunning—an enchanting triad of colors that dances on your plate—but they also encapsulate the essence of celebration. Imagine biting into these little spheres of joy, where the sweet crumbles of cake blend harmoniously with the creamy richness of cream cheese, all enveloped in a luscious coat of white chocolate. The crunch of sprinkles adds that festive flair that beckons you to indulge a little more—trust me, you’ll want to!
These delightful cake balls are perfect for gatherings like the 4th of July or Memorial Day. They embody everything we love about summer celebrations: vibrant colors, playful textures, and a taste that feels like a warm hug from a cherished friend. Each bite is not just dessert; it’s an experience filled with nostalgia and happiness. I promise you; making these cake balls will become a cherished tradition in your home as they have in mine. So grab your apron because we’re about to embark on a delicious journey together!
Red, White, and Blue Cake Balls: A Celebration in Every Bite
Welcome to the world of Red, White, and Blue Cake Balls! These adorable morsels are not only simple to whip up but also provide an opportunity for creativity and fun in the kitchen. Picture yourself crafting these colorful delights as friends gather around, sharing laughter and stories about their favorite holiday memories. The beauty of this recipe lies not just in its flavors but in the joy it brings to any occasion.
Ingredients:
As we prepare to dive into our baking adventure, let me introduce you to each ingredient we’ll be using today—each one plays a vital role in creating those irresistible Red, White, and Blue Cake Balls.
- 1 (15.25 ounce) white cake mix, plus ingredients on box needed to make it. This is our base—the canvas upon which our vibrant colors will shine! Using a box mix saves time without sacrificing flavor; it’s designed for consistent results that yield fluffy cakes every time. If you’re feeling particularly adventurous or want to control every aspect of your creation, you can opt for a homemade white cake recipe instead.
- Red and blue food coloring. These tiny bottles hold the secret to transforming our plain cake batter into a patriotic masterpiece! Food coloring allows us to achieve those vibrant hues without altering the flavor—a crucial factor in ensuring each ball is not just pretty but delicious too. When adding coloring, start with just a few drops; you can always add more until you reach that perfect shade reminiscent of fireworks bursting against a summer sky.
- 1 (8 ounce) block cream cheese, softened to room temperature. This ingredient is absolutely paramount for achieving that dreamy creaminess inside our cake balls! Cream cheese adds moisture and richness while balancing out the sweetness of the cake mix beautifully. Be sure it’s softened—this makes it easier to blend seamlessly with our crumbled cake later on.
- 1 (10 ounce) package white melting chocolate. Think of this as the silky cloak enveloping our delectable treats! Melting chocolate adds an irresistible layer that hardens as it cools, creating an appealing crunch when you take a bite. It’s important to choose high-quality melting chocolate so it melts smoothly without clumping—nobody wants lumps ruining their culinary creations!
- Red, white, and blue sprinkles. These playful toppings bring everything together with their confetti-like charm! Not only do they add visual appeal with their festive colors but they also offer delightful texture—a satisfying crunch that contrasts nicely with the smoothness of the chocolate coating. Feel free to get creative here; there are endless options available that can make your cake balls uniquely yours!
Equipment You’ll Need:
Before we roll up our sleeves and get started, let’s talk about some essential tools that will help us navigate this delightful baking process with ease and joy! Having the right equipment not only streamlines your efforts but also enhances your overall experience in the kitchen.
- Mixing bowls – A good set of mixing bowls is key for keeping our ingredients organized as we create each colorful layer. Choose bowls made from glass or stainless steel—they’re sturdy and easy to clean! You’ll need three bowls today so we can keep our colors separate while mixing them with cream cheese later on.
- Electric hand mixer – While it’s possible to mix by hand if you’re feeling strong (and patient!), an electric hand mixer makes whipping up that cream cheese so much easier! It ensures everything gets blended together smoothly without leaving any lumps behind—this is crucial for achieving those perfectly round cake balls later on.
- Baking pans – For this recipe, I recommend having three small baking pans ready (I used 8×8 ones). These allow us to bake each color separately while keeping things tidy and manageable. If you’re in a pinch or only have larger pans available, no worries—just adjust your baking time accordingly!
- Parchment paper – Line your baking trays with parchment paper before placing those adorable cake balls down; this non-stick surface ensures easy release after chilling and prevents any unwanted messes from sticking during cleanup.
Now that we’ve gathered all our ingredients and equipment let’s dive into preparing these scrumptious Red, White, and Blue Cake Balls!
Step 1: Preheat & Prepare Your Pans
First things first: let’s get our oven preheating at 350°F (or whatever temperature your box mix suggests). This step is essential because starting with an adequately heated oven ensures even baking so our cakes rise beautifully without becoming dense or gummy inside—nobody wants dry cake balls! While that’s happening, lightly grease your three small baking pans; this helps prevent any sticking when it’s time to remove those gorgeous layers once baked.
Step 2: Mixing Our Batter
In a large mixing bowl (the biggest one you’ve got!), combine the white cake mix with all necessary ingredients listed on its package until well mixed—don’t rush this step! It’s crucial because proper mixing incorporates air into your batter which leads us toward those light fluffy textures we crave in baked goods. Once combined thoroughly—you want no dry patches left behind—we’ll move on to separating this beautiful mixture into three smaller bowls for coloring.
Step 3: Color Your Cake
Now comes one of my favorite parts—the magic moment when we transform plain batter into something visually stunning! Take one bowl’s worth of batter as-is (this will be our white layer), leaving it untouched while adding red food coloring into another bowl until you’ve reached your desired shade of crimson happiness—it should resemble ripe strawberries ready for picking! In yet another bowl add blue food coloring similarly until you’ve achieved that perfect ocean-blue hue reminiscent of clear skies above fireworks displays at nightfall.
Step 4: Bake & Cool
With all three batters prepared in their colorful glory now comes time for baking! Pour each colored batter into its respective greased pan evenly so they can rise beautifully during their short bake time—about 14-16 minutes should do depending upon how hot your oven runs (so keep an eye on them!). You’ll know they’re done when inserting a toothpick comes out clean; trust me—you don’t want undercooked centers ruining these gems later on! Once baked through completely remove pans from oven carefully allowing them enough cooling time before diving right into crumbling them up!
With every step taken so far leading us closer toward deliciousness ahead—I can’t wait for you all to experience how wonderfully satisfying making these Red, White & Blue Cake Balls truly is! Stay tuned as we continue crafting sweetness together…
Step 5: Cool Those Layers to Perfection
Once you’ve pulled your beautifully baked cake layers from the oven, it’s time for a crucial step that often gets overlooked: cooling. This part is absolutely paramount because if you skip it, you risk having a mushy mess when you try to crumble the cakes. As tempting as it may be to dive in immediately, I promise you that letting these layers cool completely on a wire rack is essential. The air circulation around the cakes helps them firm up and allows excess moisture to escape, which means you’ll have the perfect texture for rolling into those delightful cake balls. So, let your cakes rest and cool for about 30 minutes. You want them to be completely cool to the touch—no warm spots here! Trust me on this; the last thing you want is warm cake batter mixing into your cream cheese.
While they’re cooling, take a moment to breathe in the sweet aroma wafting through your kitchen. It’s like a hug for your senses, isn’t it? This is also a great opportunity to clean up any mess you might have made during baking, so you’re ready for the next steps without feeling rushed or overwhelmed.
Step 6: Crumble Time – Unleashing Your Cake’s Potential
Now comes one of my favorite parts: crumbling the cooled cake into tiny morsels of happiness! I can already hear the excitement bubbling as we move forward. In separate bowls, gently break up each layer of cake with your hands until they resemble fine crumbs. Be sure to do this gently; we want soft crumbs that will easily meld with the cream cheese—not chunks of cake that won’t bind together later. The act of crumbling is not just about breaking things apart; it’s about releasing all those lovely flavors and textures that will later form our scrumptious little bites.
As you crumble each cake layer, notice how each color has its own unique scent and character—it’s like creating a vibrant mosaic of flavors! This step is integral because it ensures even distribution of flavor and moisture when we combine it with the cream cheese later on. Aim for uniformity in size; this way, each cake ball will have that perfect bite-sized experience when we roll them later.
Step 7: Whipping Up Creamy Bliss
With our beautiful layers crumbled and waiting patiently, let’s turn our attention to the star ingredient that will bind everything together: cream cheese! Using an electric mixer on medium-high speed (if you’re using one), beat that softened block of cream cheese until it’s incredibly smooth and creamy—aim for about 2-3 minutes. This step is where magic happens! When properly whipped, cream cheese transforms from a dense block into something light and airy—a luscious base that will carry all those wonderful flavors from our cake.
Why do we whip? It’s simple: incorporating air makes it easier to mix with the crumbled cake while ensuring every bite is rich and velvety. Once your cream cheese reaches that silky consistency, divide it evenly among your three bowls of crumbled cake. It’s crucial to ensure each bowl gets an equal share so every color retains its integrity while also blending harmoniously into our final product. If using an electric mixer, make sure to clean off any residual color between batches—nobody wants unexpected tie-dye surprises when mixing!
Step 8: Mixing It All Together – The Art of Binding
Now comes the moment where everything comes together in a beautiful union of flavors! Begin by taking one bowl at a time and gently mix the crumbled cake with its respective portion of cream cheese until fully incorporated. You can use either a spoon or your hands for this part; however, I find using my hands gives me more control over texture—the warmth from your fingers helps blend everything seamlessly together.
As you mix, pay attention to how everything starts coming together; it should form a cohesive dough-like consistency but still maintain some texture from the crumbles—that’s what gives these cake balls their delightful chewiness! If you find that it feels too dry or crumbly while mixing, don’t hesitate to add a touch more cream cheese—it’s important not to rush this process as proper binding will ensure well-formed balls that hold their shape beautifully later on. Remember, patience here pays off!
Once each mixture reaches that ideal consistency—smooth yet textured—you can set them aside while preparing for shaping those adorable little spheres of joy.
And there you have it—the utterly charming Red, White, and Blue Cake Balls, ready to steal hearts at any gathering or festive occasion! Keep these gems refrigerated until you’re ready to serve—they’re always best cold—and prepare yourself for compliments galore as friends marvel at both their beauty and incredible taste! Enjoy every delectable bite knowing you’ve created something truly extraordinary from scratch!
Storage and Enjoyment Tips for Your Red, White, and Blue Cake Balls
Now that you’ve crafted these delightful Red, White, and Blue Cake Balls, it’s time to revel in the joy of sharing them with friends and family! Whether you’re celebrating a holiday or simply indulging in a sweet treat on a sunny afternoon, these cake balls are a festive addition to any gathering. But what happens if you have some leftovers? Don’t fret! Storing these gems properly can keep their flavor and texture intact for your future enjoyment.
Storing Leftover Red, White, and Blue Cake Balls
To ensure your Red, White, and Blue Cake Balls maintain their scrumptiousness, I recommend placing them in an airtight container that is lined with parchment paper. This simple step helps absorb any excess moisture while allowing the flavors to meld beautifully. When stored correctly in the refrigerator, they can last up to a week—though I doubt they’ll last that long once your friends get wind of them! If you want to keep them fresher even longer, consider adding a slice of bread into the container; it works wonders for keeping baked goods moist. After storage, you’ll find that the cake balls retain their rich flavors and delightful texture—almost as if they were just made! For serving, there’s no need to reheat; simply pull them out of the fridge and enjoy them chilled—trust me; the creamy cream cheese filling is utterly refreshing.
Freezing for Later
If you want to prepare ahead of time or have some extras from your celebration (if that’s even possible!), freezing these cake balls is an excellent option. To freeze them properly, arrange the cake balls on a baking sheet lined with parchment paper, then place the sheet in the freezer until they’re solid. Once frozen, transfer them into a freezer-safe bag or container for optimal storage. They can be kept frozen for up to three months! When you’re ready to enjoy them again, simply take out however many you desire and let them thaw in the fridge for a few hours—no need to worry about losing any flavor or texture during this process. This convenient option allows you to savor those festive flavors anytime you crave something sweet without all the fuss!
Red, White, and Blue Cake Balls

Celebrate any occasion with delicious Red, White, and Blue Cake Balls! Easy to make and full of flavor—try this fun treat today!
- Prep Time: 30 minutes
- Cook Time: 15 minutes
- Total Time: 45 minutes
- Yield: Approximately 24 servings 1x
- Category: Dessert
- Method: Baking
- Cuisine: American
Ingredients
- 1 (15.25 ounce) white cake mix
- Red and blue food coloring
- 1 (8 ounce) block cream cheese, softened
- 1 (10 ounce) package white melting chocolate
- Red, white, and blue sprinkles
Instructions
- Preheat oven to 350°F. Grease three small baking pans.
- Prepare the white cake mix according to package instructions.
- Divide batter into three bowls: leave one plain, color one red and the other blue using food coloring.
- Pour each colored batter into separate pans and bake for 14-16 minutes or until a toothpick comes out clean.
- Allow cakes to cool completely on wire racks.
- Crumble each cooled cake layer into fine crumbs in separate bowls.
- Beat softened cream cheese until smooth; divide among crumbled cakes and mix until well combined.
- Roll mixture into 1-inch balls and chill in the refrigerator for about an hour.
- Melt the white chocolate in short intervals until smooth.
- Dip each chilled cake ball into melted chocolate, allowing excess to drip off before placing them back on parchment paper.
- Decorate with sprinkles while the chocolate is still wet and let set in the fridge.
Nutrition
- Serving Size: 1 serving
- Calories: 150
- Sugar: 14g
- Sodium: 50mg
- Fat: 8g
- Saturated Fat: 4g
- Unsaturated Fat: 4g
- Trans Fat: 0g
- Carbohydrates: 18g
- Fiber: 0g
- Protein: 2g
- Cholesterol: 10mg