Chickpea Chocolate Cookies
Introduction
There’s something truly magical about cookies, isn’t there? They have this extraordinary ability to transform a simple moment into a memory. Imagine the aroma wafting through your home, filling every corner with warmth and sweetness, as you prepare a batch of Chickpea Chocolate Cookies. This recipe is so much more than just a delightful treat; it’s an experience that bridges tradition and innovation, combining wholesome ingredients into something utterly intoxicating. Each bite is a perfect balance of chewy texture and rich chocolate flavor, providing not only comfort but also nourishment. As you take that first nibble, you’ll discover the profound satisfaction of knowing you’re indulging in something healthy yet decadent—yes, it’s possible!
These cookies are not just any ordinary dessert; they are a testament to how we can create deliciousness without compromising our values or health goals. I promise you, these Chickpea Chocolate Cookies will become a staple in your kitchen. Whether you’re looking for a quick breakfast option or a guilt-free dessert to share with friends, these cookies fit the bill perfectly. With their unique blend of chickpeas and cacao, they redefine what it means to enjoy a cookie—offering both joy and nutrition in each bite.
Chickpea Chocolate Cookies: The Nutty Sweetness You’ve Been Craving
Welcome to the world of Chickpea Chocolate Cookies! This recipe has been one of my go-to favorites for years now, and I can’t wait to share it with you. These cookies are everything you want from a classic treat while being completely oil-free, dairy-free, gluten-free, and refined sugar-free! Yes, you heard that right! It feels almost like sorcery how healthy ingredients can come together to create such rich flavors. Trust me when I say that these cookies will surprise you with their delightful taste and chewy texture!
Let’s embark on this mouthwatering journey together where chickpeas meet chocolate! You might be wondering how beans could possibly fit into your sweet treat repertoire; well, my friend, they add protein and fiber while keeping things wonderfully moist. So grab your apron and let’s dive into the magic of baking!

Ingredients
As we begin our culinary adventure with these Chickpea Chocolate Cookies, let’s take a moment to appreciate each ingredient that makes this creation possible. Each component plays its own unique role in bringing flavors together and contributing to the final masterpiece.
- 1 1/2 cups chickpeas (or 15 oz can, drained and rinsed). Chickpeas are often celebrated for their versatility in savory dishes but wait until you see their potential in sweets! They serve as the base of our cookies, offering essential protein and fiber that help keep us full longer. When blended smoothly in our food processor, they provide that perfect chewy texture we crave in cookies. Be sure to rinse them well if using canned chickpeas; this helps remove any excess sodium or preservatives—just think of it as giving them a little spa treatment before they join the party!
- 1 cup peanut butter. Ahh, peanut butter—the liquid gold of baking! It brings creaminess and depth of flavor that complements the chocolate beautifully while binding all our ingredients together like best friends at a reunion! Opt for natural peanut butter here; look for varieties with only peanuts (and maybe salt) on the label—no added sugars or oils are necessary. The richness of peanut butter not only satisfies cravings but also adds healthy fats that make each bite indulgent.
- 1/3 cup coconut sugar. This ingredient is an absolute game changer—it has such a lovely caramel-like flavor that pairs beautifully with chocolate! Coconut sugar is less processed than regular sugar and contains trace minerals—so there’s an added bonus! When using it in this recipe, it provides just enough sweetness without overwhelming our other flavors. If you’re ever unsure about coconut sugar’s availability in your pantry or local store, feel free to substitute it with brown sugar for similar results.
- 2 tablespoons monk fruit and erythritol sweetener (or more coconut sugar). This sweetener duo is fantastic because they bring sweetness without calories—perfect for those watching their intake! Monk fruit extract is naturally derived from monk fruit itself—a small green gourd—and erythritol adds bulk without affecting blood sugar levels significantly. If you’re not familiar with them yet, don’t worry; they blend seamlessly into the dough and won’t compromise texture or taste.
- 2 tablespoons water. Water may seem unassuming here but trust me—it acts as an essential binding agent when blending our ingredients together! It’s crucial for achieving that smooth consistency we desire when processing all those flavors into one cohesive dough.
- 1/4 cup cacao powder. Here comes the star player—the cacao powder! This rich ingredient brings intense chocolatey goodness without any added sugars found in traditional cocoa powders. It lends depth to our cookies while enhancing their overall flavor profile—it truly elevates these treats from simple snacks to decadent desserts!
- 1/2 teaspoon baking soda. A pinch of baking soda is crucial; it acts as our leavening agent here! This allows our cookies to rise slightly during baking while creating that wonderfully chewy texture we’re after. Make sure your baking soda is fresh; old soda won’t provide the same lift!
- 1 teaspoon vanilla extract. Vanilla plays an important supporting role by adding warmth and complexity—it rounds out all those bold flavors beautifully! Quality matters here; opt for pure vanilla extract over imitation varieties whenever possible—trust me on this one!
- 1/4 teaspoon sea salt. Don’t skip out on salt—it enhances sweetness by balancing flavors beautifully! Just a pinch goes a long way towards making everything pop!
- 1/4 cup unsweetened shredded coconut. Lastly but certainly not least—we have shredded coconut which adds texture along with subtle sweetness throughout each cookie! Plus its nutty aroma mingles perfectly with cacao making every bite memorable!
Equipment You’ll Need
Before we get started on our cookie-making adventure, let’s gather some essential tools to ensure everything goes smoothly in our kitchen symphony! While these might not be ingredients, having the right equipment makes all the difference between chaos and culinary delight.
- Food Processor: This tool is absolutely paramount for creating our cookie dough effortlessly! A powerful food processor will blend all those chickpeas into silky perfection while mixing in all other ingredients seamlessly—no lumps allowed here! If you don’t have one handy though, don’t fret; an immersion blender can work too if you’re willing to put in some elbow grease.
- Baking Sheet: A sturdy baking sheet lined with parchment paper or silicone mat ensures even cooking while preventing sticking—the last thing we want after all this hard work is broken cookies stuck to pans! Plus lining makes cleanup super easy afterward!
- Fork: Believe it or not—a simple fork becomes an important tool during shaping time! We’ll use it later on to flatten those adorable cookie balls gently while leaving behind charming imprints.
- Measuring Cups & Spoons: Precision matters when baking—that’s why you’ll want reliable measuring cups & spoons on hand throughout this process! Consistency ensures each batch tastes just as marvelous as the last one—the key secret here is accuracy!
Now that we’ve gathered everything needed for success let’s dive into preparing those irresistible Chickpea Chocolate Cookies!
Preparing the Chickpea Chocolate Cookies
Step 1: Preheat Your Oven
First things first—let’s get that oven preheating at 350 degrees Fahrenheit (about 175 degrees Celsius). Preheating isn’t just about turning up the heat; it’s crucial because starting off at an appropriate temperature helps achieve even cooking right from the beginning—a non-negotiable step if we want perfectly baked cookies instead of gooey blobs! While your oven warms up (and your kitchen fills with anticipation!), take this time to line your baking sheet with parchment paper or place down a silicone mat—it sets us up nicely for success by preventing sticking later on.
Step 2: Combine Ingredients
Now onto one of my favorite parts—the blending process! Toss those rinsed chickpeas directly into your food processor along with peanut butter (ahh!), coconut sugar, monk fruit sweetener (or additional coconut sugar), water, cacao powder (the soul), baking soda (let it rise!), vanilla extract (warmth alert!), sea salt (balance), and lastly—the shredded coconut—a delightful addition indeed! Begin processing everything until you achieve an incredibly smooth dough devoid of any chunky bits—think creamy bliss rather than chunky soup here folks! Take your time blending thoroughly because this step sets us up beautifully for luscious bites ahead—we want no surprises lurking within our dough!
Step 3: Incorporate Shredded Coconut
After achieving that silky-smooth consistency earlier—now comes perhaps my favorite part—the addition of shredded coconut which creates delightful little pockets throughout each cookie when baked perfectly golden brown later on!! Simply add it into your already blended mixture then pulse gently using either mix mode or low setting until incorporated evenly throughout—that’s what we’re aiming for after all—a symphony of textures waiting inside every chewy morsel!!
Step 4: Shape Those Cookie Balls
Once fully combined—it’s time for some fun—shaping those adorable little dough balls!! Using clean hands scoop out equal portions (about two tablespoons) creating roughly fifteen delightful mounds ready-to-bake goodness!!! Place them onto prepared tray ensuring enough space between each mound since they’ll spread out slightly during cooking process ahead—don’t crowd them too much now—they need their personal space too!! Then grab your trusty fork again gently flattening each mound down forming a cute little X pattern atop—they deserve some decoration don’t they!?
Now let’s get ready for baking magic next…
Step 5: Forming the Perfect Cookie Balls
Once you’ve processed your dough into a smooth, luscious mixture, it’s time to transform it into delightful little cookie balls. This step is where the magic truly begins! Using your hands, scoop out about two tablespoons of the dough and gently roll it into a ball—aim for about 15 of these beauties in total. The texture should be slightly sticky but still hold together nicely; if it feels too wet, that’s perfectly okay! Just know that those chickpeas are working their wonders to create a chewy texture that’s simply unparalleled.
When placing them on your prepared baking sheet, give each one a bit of space—about two inches apart will do! This spacing is crucial because cookies need room to spread and develop that lovely golden crust around the edges while remaining delightfully soft in the center. Now, use a fork to gently press down on each ball, creating a slight indentation and an X mark on top. Not only does this give them that classic cookie look, but it also helps them bake evenly. Trust me on this: taking the time to shape them lovingly will pay off in both aesthetics and texture!
Step 6: The Baking Ritual
With your cookie balls all lined up and looking absolutely charming, it’s time to slide them into your preheated oven at 350 degrees. Bake these little gems for about 12-15 minutes. As they bake, you’ll begin to experience an utterly intoxicating aroma wafting through your kitchen—a rich blend of cacao mingling with peanut butter and sweet coconut—that’s when you know you’re onto something special!
Keep an eye on them during this critical phase; you want to see the edges set while the centers might still appear slightly soft. This contrast is what creates that perfect chewy bite we all crave! If they start to puff up too much or seem overly dry at the edges, they may need just a minute less in the oven. Remember, patience is key here—allowing them to bake just right will ensure each bite is profoundly satisfying. They’re transforming from cookie dough into glorious morsels of joy!
Step 7: Cooling Down for Cookie Perfection
Once you pull those cookies out of the oven, resist the urge to dive right in—even though I know it’s hard! Allow them to cool on the baking sheet for at least 10 minutes before transferring them to a wire rack or plate. Why? Well, during this cooling period, they’ll firm up beautifully while retaining that delightful chewiness we love so much. This step is non-negotiable; if you rush it and try to move them too soon, you might end up with crumbled cookies instead of glorious rounds of joy.
As they cool, take a moment to appreciate their transformation from humble chickpeas into chocolatey treasures! You might notice some gentle cracking on top; this is completely normal and adds character—think of it as nature’s signature! The texture will continue developing as they rest; they’ll become firmer yet remain wonderfully soft inside.
Step 8: The Grand Finale – Enjoying Your Cookies!
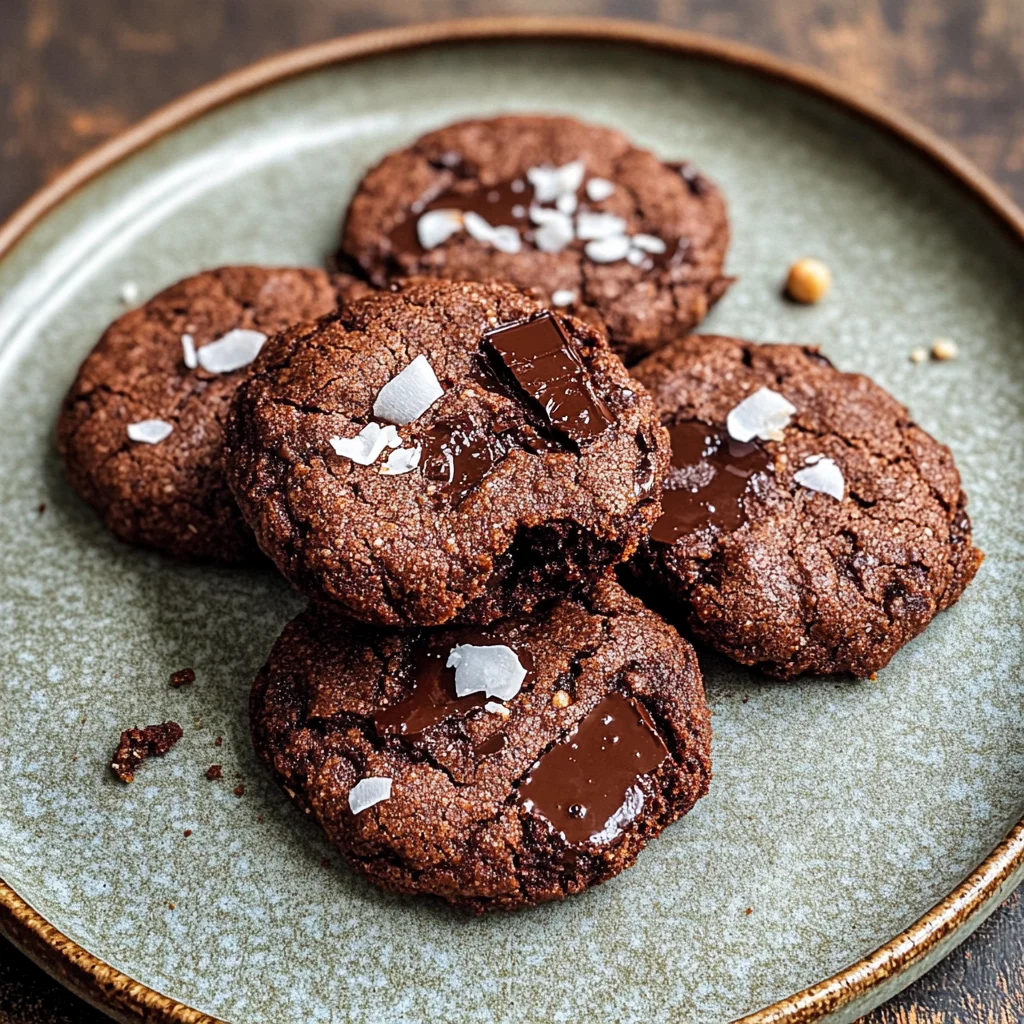
Now comes one of my favorite parts—the moment we’ve all been waiting for: tasting these heavenly Chickpea Chocolate Cookies! Once cooled adequately (though I wouldn’t blame you if you snuck one early!), grab one and take a moment to observe its appearance—the glossy surface from the cacao combined with specks of coconut gives each cookie its unique charm. When you take a bite, allow yourself to fully experience that symphony of flavors—the nutty richness from the peanut butter harmonizing perfectly with the sweetness from coconut sugar and monk fruit sweetener.
And remember that these cookies aren’t just dessert; they can serve as an energizing breakfast treat or an afternoon snack that won’t weigh you down! Store any leftovers (if there are any!) in an airtight container at room temperature for optimal freshness—though I promise they won’t last long once friends and family get wind of these delectable delights! Each bite not only satisfies a sweet craving but also brings along those nutritious benefits from chickpeas—fiber and protein galore!
Conclusion:
As we wrap up our delicious journey through making these Chickpea Chocolate Cookies, I can’t help but feel excited about what you’ve just created! From the moment those ingredients danced together in your food processor to when those cookies began transforming into golden delights in your oven, every step has been infused with love and care. What truly sets this recipe apart is how it harmoniously combines wholesome ingredients with decadent flavors; chickpeas lend a satisfying chewiness while cacao adds that rich chocolatey depth we all crave. It’s this symphony of flavors and textures that makes each bite profoundly satisfying and utterly extraordinary.
But beyond just taste, this recipe is an absolute must-try because of the joy it brings in its creation. Imagine gathering around with friends or family, each person eagerly awaiting their turn to indulge in these treats fresh from the oven. They shine on any occasion—be it a cozy afternoon snack or a thoughtful addition to a potluck dessert table where everyone marvels at how something so healthy can be so delicious! Picture pulling them from the oven: golden edges beckoning you closer while the heavenly aroma wraps around you like a warm hug.
Now let’s talk pairings because enjoying these cookies is just as delightful when complemented by other treats! Imagine savoring one alongside a steaming cup of herbal tea or coffee, where each bite pulls together warmth and richness perfectly. For an afternoon pick-me-up, try pairing them with fresh fruit like sliced strawberries or even some creamy avocado toast on the side—it’s an unexpected twist that’ll leave your taste buds dancing! And if you’re feeling adventurous? Crumble some cookies over coconut yogurt for breakfast; it’s such a decadent way to start your day!
Feeling adventurous? This recipe is wonderfully adaptable! You could mix in dark chocolate chips or even swap out peanut butter for almond butter if you’re looking for something different—every variation adds its own unique flair while still keeping those beloved chewy textures intact. Want more sweetness? You could fold in some dried fruit like cranberries or chopped nuts for added crunch and flavor complexity! I encourage you to explore these possibilities and make this recipe your own; share your creations with friends and family—they’ll love being part of your culinary adventures! So gather those ingredients again soon, whip up another batch of these delightful Chickpea Chocolate Cookies, and savor every last crumb!
Chickpea Chocolate Cookies

Indulge in delightful Chickpea Chocolate Cookies that are healthy and delicious! Bake a batch today and discover this guilt-free treat!
- Prep Time: 10 minutes
- Cook Time: 15 minutes
- Total Time: 25 minutes
- Yield: Approximately 15 cookies 1x
- Category: Dessert
- Method: Baking
- Cuisine: Vegan
Ingredients
- 1 1/2 cups chickpeas (drained and rinsed)
- 1 cup natural peanut butter
- 1/3 cup coconut sugar
- 2 tablespoons monk fruit and erythritol sweetener (or more coconut sugar)
- 2 tablespoons water
- 1/4 cup cacao powder
- 1/2 teaspoon baking soda
- 1 teaspoon vanilla extract
- 1/4 teaspoon sea salt
- 1/4 cup unsweetened shredded coconut
Instructions
- Preheat your oven to 350°F (175°C) and line a baking sheet with parchment paper.
- In a food processor, combine chickpeas, peanut butter, coconut sugar, monk fruit sweetener (or coconut sugar), water, cacao powder, baking soda, vanilla extract, sea salt, and shredded coconut. Blend until smooth.
- Scoop out approximately two tablespoons of dough per cookie and roll into balls. Place on the prepared baking sheet about two inches apart.
- Gently flatten each ball with a fork to create an X pattern on top.
- Bake for 12-15 minutes until edges are set but centers remain soft.
- Allow cookies to cool on the baking sheet for at least 10 minutes before transferring to a wire rack.
Nutrition
- Serving Size: 1 cookie (30g)
- Calories: 90
- Sugar: 6g
- Sodium: 50mg
- Fat: 4g
- Saturated Fat: 0.5g
- Unsaturated Fat: 3g
- Trans Fat: 0g
- Carbohydrates: 11g
- Fiber: 2g
- Protein: 3g
- Cholesterol: 0mg