Dutch Apple Pie Recipe (Apple Crumb Pie)
The Heartfelt Symphony of Dutch Apple Pie
There’s something utterly magical about the aroma of a Dutch apple pie wafting through your home, isn’t there? It’s as if the very essence of comfort and nostalgia comes alive in that moment. Imagine the sound of the buttery crust crumbling under your fork, the sweet and tart symphony of Granny Smith apples mingling effortlessly with warm cinnamon, all wrapped up in a delightful crumb topping that makes each bite a celebration. This Dutch Apple Pie Recipe (Apple Crumb Pie) is not just another dessert; it’s an experience steeped in love, tradition, and a hint of innovation. As you embark on this culinary journey, you’re not just baking; you’re creating memories, inviting family and friends to gather around the table, sharing stories and laughter over slices of this heavenly pie.
Every time I bake this pie, I’m reminded of those crisp autumn days spent at my grandmother’s kitchen table, where she’d teach me the art of pie-making with her gentle hands guiding mine. The warmth of her smile was as comforting as the rich flavors we were crafting together. This recipe embodies that spirit—it’s perfect for holidays like Thanksgiving or cozy Sunday dinners when you want to impress but also keep things simple and heartfelt. Trust me; once you’ve tasted this pie, it will become a cherished staple in your home as well.
Dutch Apple Pie Recipe (Apple Crumb Pie): A Comforting Classic
Welcome to my cozy corner of the internet! Today, I’m excited to share with you my beloved Dutch Apple Pie Recipe (Apple Crumb Pie). This recipe is everything you adore about traditional apple pie but with an irresistible crumb topping that takes it to another level of deliciousness. Whether you’re celebrating a special occasion or simply craving something sweet, this pie is sure to become one of your favorites!
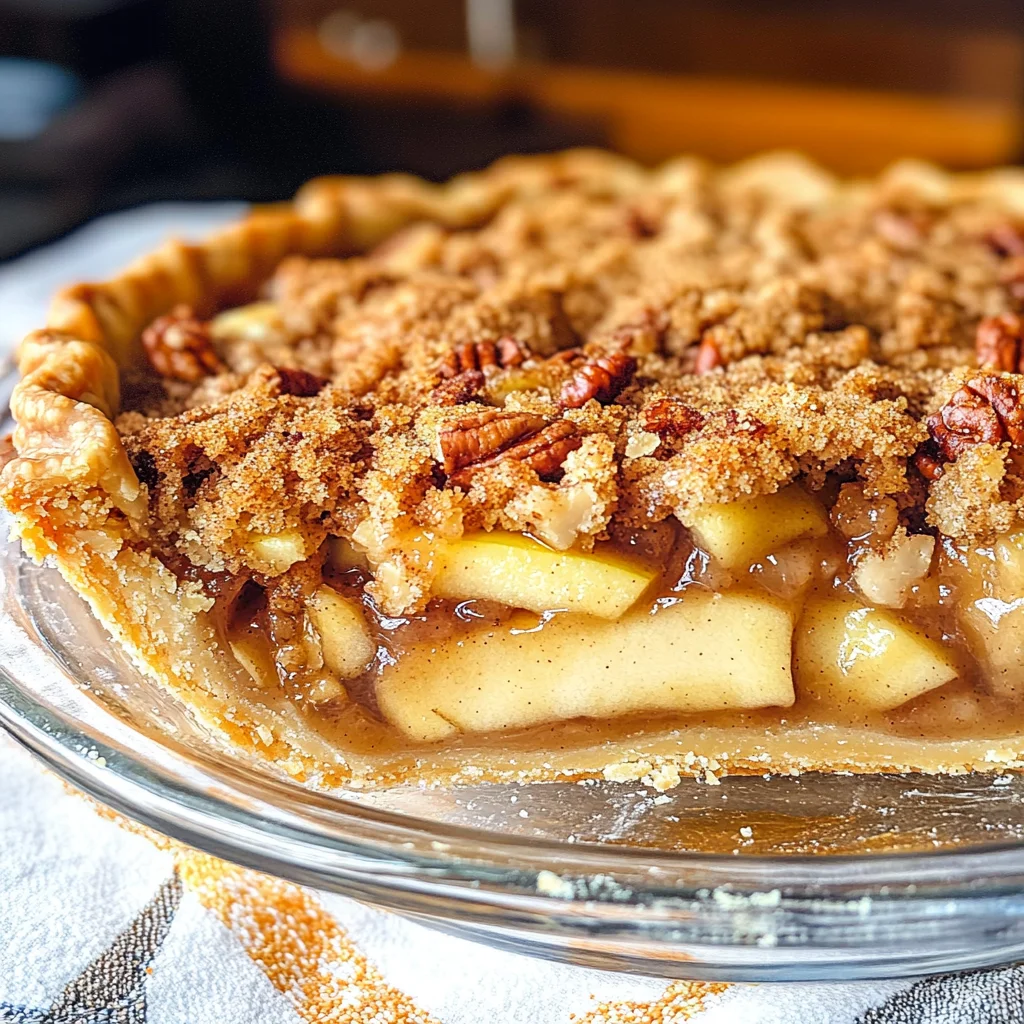
Ingredients:
As we begin our delicious endeavor into making this delightful Dutch apple pie, let’s take a moment to appreciate each ingredient. Each one plays a crucial role in weaving together a tapestry of flavor that will leave everyone longing for seconds.
- 1 pie crust (1/2 of our pie dough recipe): The foundation of any great pie starts with its crust—think of it as the warm embrace that holds all those wonderful apple flavors together. Homemade crust is always preferred because it allows you to control both texture and flavor; flaky yet sturdy enough to hold the filling without becoming soggy. If you’re short on time or prefer convenience, don’t hesitate to use a store-bought crust—just make sure it’s high quality for the best results.
- 2 1/4 lbs Granny Smith apples (6 medium apples): These green beauties are essential for their tartness which balances beautifully against the sweetness from our sugars later on. They hold their shape wonderfully during baking, ensuring every slice has perfect apple texture. When selecting apples, look for firmness and vibrant color—dull or soft apples won’t provide that satisfying crunch we love.
- 1 tsp cinnamon: Ahh… cinnamon—the warm hug in spice form! It brings warmth and depth to our filling and complements the natural sweetness of the apples perfectly. It’s amazing how just a teaspoon can transform ordinary ingredients into something extraordinary; trust me, don’t skip this!
- 8 Tbsp unsalted butter: Butter adds richness and flavor while helping create that golden brown crust we all dream about. Using unsalted butter gives you control over the salt levels in your dish—a non-negotiable in baking! Make sure your butter is softened to room temperature for easy incorporation into both crust and crumb topping.
- 3 Tbsp all-purpose flour: Flour acts as a thickening agent for our apple filling while also adding structure to our crumb topping. It helps absorb excess juices released from the apples during baking so that we end up with a perfectly set filling rather than a soupy mess.
- 1/4 cup water: Water may seem like just an afterthought here, but it serves an important purpose by helping dissolve sugar and create that luscious sauce coating our apples before they meet their flaky crust.
- 1 cup granulated sugar: Sugar is essential for balancing flavors in your filling while caramelizing slightly during baking to create that beautiful golden hue on top. If you’re looking for alternative sweeteners due to dietary preferences or needs, feel free to experiment with coconut sugar or maple syrup—just keep in mind these will alter flavor profiles subtly.
- 1 cup all-purpose flour: This additional flour works harmoniously with other dry ingredients in our crumb topping mixture—it absorbs moisture while contributing texture so each bite feels satisfying without being overly dense or dry.
- 1/4 cup packed brown sugar: With its rich molasses undertones, brown sugar adds depth and complexity that’s simply irresistible! It pairs wonderfully with cinnamon too—like they were made for each other!
- 2 Tbsp granulated sugar: This will add extra sweetness along with browning effects when sprinkled on top before baking; it creates an even more delightful textural contrast against crispy crumbs below!
- 1/4 tsp cinnamon: A little extra sprinkle never hurt anyone! Adding more cinnamon into our crumb topping elevates those warm autumnal notes throughout every part of your pie experience.
- 1/4 tsp salt: Salt enhances flavors across all dishes—it brings out sweetness while balancing acidity from our apples—a tiny pinch here does wonders!
- 8 Tbsp unsalted butter at room temperature: We need butter again! This time it’s crucial since we’ll be using these soft pats in making our crumb topping—that buttery goodness will melt into flour mixture creating lovely pea-sized crumbs when mixed properly!
- 1/2 cup chopped pecans: These crunchy beauties add both texture and nutty flavor contrast against softer apple filling—we’re aiming for dimension here folks! If nuts aren’t your thing or someone has allergies present substitutes like oats instead which work nicely too!
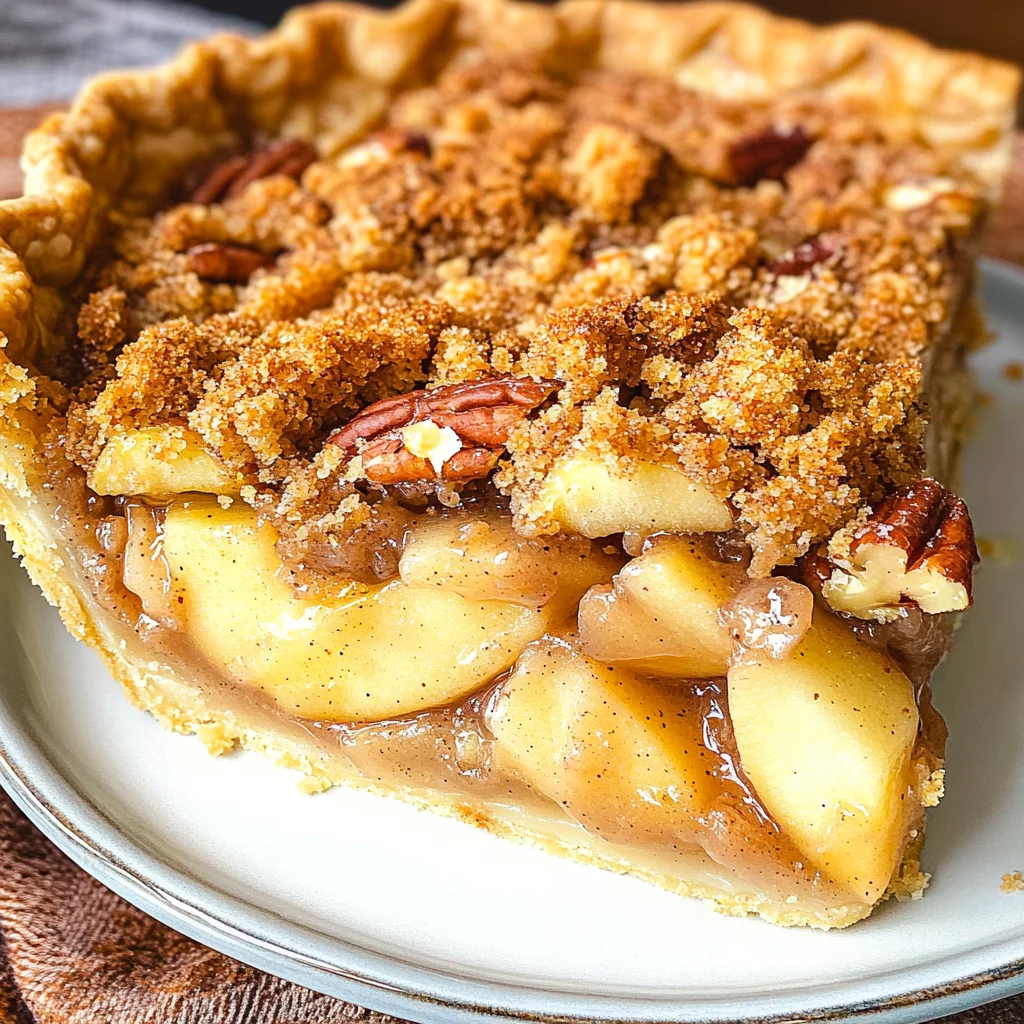
Equipment You’ll Need:
Before diving into mixing ingredients together, let’s ensure you’ve got all the right tools at hand! Having quality equipment makes not only prepping easier but also ensures smooth sailing throughout your entire baking journey.
- 9-inch pie pan: A good-quality glass or ceramic pie pan is ideal here since it helps distribute heat evenly allowing crusts/baking times remain consistent so no burnt edges go unnoticed! You can even use aluminum pans; however keep an eye out as they conduct heat differently causing possible adjustments needed during cooking time.
- Rolling pin: An essential tool when rolling out dough evenly—this piece helps create thin layers effortlessly so no areas become too thick resulting uneven cooking later down line!
- Mixing bowls: You’ll need several bowls ranging from small ones for mixing dry ingredients together up larger sizes where we combine everything before pouring into prepared crust later on—you’ll thank yourself later when keeping organized through each stage avoids chaos!
- Whisk: A whisk is perfect for combining dry mixtures including those sticky sauces—it creates airiness which leads us towards fluffier textures overall within dishes—a must-have item indeed!
- Measuring cups/spoons: Accurate measurements are vital when baking since even slight deviations could lead disastrous results especially regarding ratios involved—grab those standard measuring tools ensuring precision throughout process!
Now that we’ve gathered everything necessary let’s get ready roll up our sleeves & dive deep into preparing this scrumptious Dutch Apple Pie Recipe (Apple Crumb Pie)!
Step 1: Preheat Your Oven
First things first—preheat your oven! Set it to 375˚F (190˚C) with one rack positioned on bottom shelf while maintaining another rack within center. Why preheating matters? Well dear friend, starting off at correct temperature allows baked goods develop optimal textures forming golden exteriors alongside proper cooking insides giving us ideal outcomes every single time! While waiting patiently try picturing how heavenly aroma fills kitchen moments down road—it’s worth every second spent waiting I assure you!
Step 2: Roll Out Your Pie Dough
Once your oven reaches that perfect heat level it’s time we focus on preparing crust itself! Take chilled dough straight from refrigerator placing onto lightly floured surface before gently rolling out using rolling pin until achieving desired diameter size around 12”. Trust me—take care here; uneven thickness may lead uneven cooking leading some parts burnt while others remain raw inside which ruins otherwise perfect dessert experience altogether! Once rolled transfer carefully over into well-greased nine-inch pan tucking edges neatly—all extra bits should be crimped around edges forming lovely pattern enhancing appearance whilst keeping moisture inside secure from escaping during bake-time ahead!
Step 3: Prepare Those Apples
With crust now snugly fitted within pan let’s turn attention towards star players—the Granny Smith apples waiting eagerly beside us! Begin peeling them thoroughly followed by coring then slicing thinly approx quarter inch thick ensuring uniformity throughout slices enabling even cooking later down line too—it’s truly amazing how presentation affects perception when tasting deliciousness afterward isn’t it? Now toss those freshly cut pieces directly into mixing bowl along side teaspoonfuls cinnamon stirring gently until every surface coated leaving behind heavenly fragrance tickling senses inviting anticipation growing stronger by minute…
Step 4: Create That Irresistible Sauce
Now comes one my favorite parts—the sauce bringing everything together harmoniously creating luscious pool enveloping those juicy apple slices awaiting their fate nestled comfortably inside buttery shell below whilst bubbling away joyfully during bake-time ahead too! Melt unsalted butter within medium saucepan set over medium heat letting liquid gold develop richness texture alongside whisking three tablespoons flour creating roux-like consistency which thickens beautifully after simmering briefly before introducing water alongside granulated sugar stirring constantly until boiling occurs followed closely reducing flame simmer gently whilst still whisking frequently preventing clumps forming unwanted lumps ruining otherwise silky smooth finish desired ultimately leading us toward ultimate victory once served warmed straight from oven fresh fragrant cooling kitchen beckoning guests nearby…
And there you have it dear friend—the beginning steps leading up toward building something truly extraordinary filled heartwarming moments shared loved ones around tables gathering sharing laughs tales lives intertwined through flavors enjoyed savoring bites… Stay tuned as we delve deeper next round finishing off these final touches transforming ordinary ingredients into culinary masterpiece destined delight taste buds everywhere!
Step 5: Crafting the Irresistible Crumb Topping
Now, let’s dive into one of the most exciting parts of this Dutch Apple Pie Recipe—the crumb topping! This is where we transform simple ingredients into a texture that makes your heart sing. Start by gathering your dry ingredients: that’s the 1 cup of all-purpose flour, the 1/4 cup packed brown sugar, the 2 tablespoons of granulated sugar, the 1/4 teaspoon of cinnamon, and the 1/4 teaspoon of salt. Mixing these together is crucial because it ensures that every bit of flavor is evenly distributed throughout your topping. You want each crumb to be a little explosion of warmth and sweetness when you bite into it!
Once you’ve combined those dry elements in a large mixing bowl, it’s time to introduce the butter—this is where things get fun! Cut in your room-temperature butter (8 tablespoons) with your fingers or a pastry cutter until it resembles pea-sized crumbs. Trust me on this: using your hands adds a personal touch and allows you to feel the texture as it develops. You’re not just combining ingredients; you’re creating a buttery, golden mixture that will become delightfully crispy in the oven. Don’t rush this step; take a moment to enjoy the tactile nature of cooking! It’s almost meditative.
Finally, fold in those chopped pecans for an added layer of crunch and flavor. The nuts will toast beautifully as they bake, contributing both aroma and richness to your pie. Spread this crumb topping evenly over the apples in your pie dish, making sure every inch is covered—this creates that irresistible contrast between soft apples and crunchy topping.
Step 6: Baking Your Perfect Dutch Apple Pie
Now comes the moment we’ve all been waiting for—baking our creation! Preheat your oven to 375˚F if you haven’t done so already; this temperature is key for achieving that perfect golden crust while allowing the filling to bubble up beautifully. When you place your pie on the middle rack, ensure there’s another rack on the bottom with a sheet of foil underneath it to catch any drips from bubbling juices—it’s absolutely paramount to keep your oven clean during this delicious endeavor!
As your pie bakes for about 50-60 minutes (I find 55 minutes yields perfection), keep an eye on it—you’ll start smelling an utterly intoxicating aroma wafting through your kitchen. What should you look out for? The filling should be bubbling up through the crumb topping, while that beautiful golden color forms on top. If at any point it seems like the topping is browning too quickly (we don’t want burnt bits here!), place a sheet of foil loosely over just the top to shield it from direct heat while allowing everything else to continue cooking.
During this time, I encourage you to be patient! The magic happening inside that oven transforms those humble ingredients into something profoundly satisfying. When done correctly, every slice will reveal tender apples enveloped in a sweet embrace beneath a crisp, crumbly layer.
Step 7: Cooling—A Crucial Step
Once you’ve successfully baked your pie to golden perfection, resist the urge to dig right in! I know how tempting it can be when you’re greeted with such mouthwatering aromas and a stunning visual feast before you. However, letting your pie cool for at least one hour is non-negotiable if you want clean slices that hold their shape. Cooling allows those juices to thicken slightly as they settle—a kind of gentle rest after their tumultuous journey in the heat.
During this cooling phase, you’ll notice how flavors meld and deepen. That little bit of patience now pays off big time when everyone gathers around for dessert! Slice too soon, and you’ll have delicious apple goo instead of lovely wedges; trust me on this one! So take this time to sip on some tea or coffee while basking in anticipation—you’ve earned it!
Step 8: Serving Your Masterpiece
After what feels like an eternity (but really was just an hour), it’s finally time for serving! As you slice into your pie, admire how beautifully structured each piece stands tall—this is what we worked so hard for! Serve warm or at room temperature; either way works beautifully but warming each slice gently in the microwave brings back that fresh-from-the-oven experience.
Consider pairing each slice with a dollop of whipped cream or perhaps even a scoop of dairy-free vanilla ice cream—both options elevate this dessert into something truly extraordinary. As you watch friends and family take their first bites, cherish those moments when their eyes light up with delight; it’s pure joy wrapped up in every mouthful.
This Dutch Apple Pie Recipe (Apple Crumb Pie) isn’t merely food; it’s an invitation to gather around tables filled with laughter and love. With its irresistible aroma wafting through homes during holidays or cozy gatherings alike, may this recipe become as beloved in your household as it has been in mine over many cherished years! Happy baking!
Storage and Enjoyment Tips for Your Dutch Apple Pie Recipe (Apple Crumb Pie)
Now that your kitchen is filled with the irresistible aroma of fresh-baked goodness, it’s time to dig in and savor every bite of your warm Dutch Apple Pie! However, if you find yourself with leftovers (which I truly hope you do, because they are a delight!), knowing how to store this treasure will ensure you can enjoy that sweet, spiced symphony of flavors even longer. The key to keeping your pie fresh lies in the right container and storage method. I recommend using an airtight container or wrapping the pie tightly with plastic wrap before placing it in the refrigerator. This way, it will stay fresh for about three to four days. If you want to maintain that delectable crumb topping’s crispness, consider placing a slice of bread inside the container; it works wonders to absorb any excess moisture while still allowing your pie to shine. Trust me when I say that even after a few days, each slice retains its delightful essence—you’ll still taste that buttery crust melded perfectly with the tender apple filling!
Storing Leftover Dutch Apple Pie Recipe (Apple Crumb Pie)
To preserve every last crumb of this delicious Dutch Apple Pie, make sure you store it correctly. After it has cooled completely, transfer the leftovers into an airtight container or tightly wrap the pie in plastic wrap or aluminum foil. An important tip is to keep it in the refrigerator where it can last for up to four days without losing its charm. Now, if you’re like me and can’t resist a slice of pie at any time, here’s a little secret: after refrigerating your leftovers, try reheating individual slices in the microwave for just a few seconds—this revives that intoxicating warmth and aroma as if it were just pulled from the oven! You might also pop it in a preheated oven at 350°F for about 10-15 minutes for that perfect crispness returning to the crumb topping. I promise you; each bite will remind you of those cozy moments spent baking this delight!
Freezing Dutch Apple Pie Recipe (Apple Crumb Pie) for Later
If you’re thinking ahead and want to save some of this heavenly pie for later enjoyment, freezing is an excellent option! Once your Dutch Apple Pie has completely cooled down, wrap it tightly in several layers of plastic wrap followed by aluminum foil to prevent freezer burn. This way, it can be stored in the freezer for up to three months—an ideal solution for unexpected guests or those lazy dessert cravings! When you’re ready to indulge again, simply remove it from the freezer and let it thaw overnight in the fridge or at room temperature for a few hours before serving. There’s something profoundly satisfying about having a slice of homemade pie waiting for you; it’s like having a piece of love on standby! Plus, knowing you’ve got dessert ready at a moment’s notice makes life feel just a bit sweeter.
Dutch Apple Pie Recipe (Apple Crumb Pie)
Indulge in the comforting warmth of homemade Dutch Apple Pie, a delightful dessert that combines tart Granny Smith apples with a sweet crumb topping. The buttery crust cradles a gooey apple filling infused with cinnamon, creating an irresistible treat perfect for any occasion. Whether it’s a family gathering, holiday celebration, or cozy night in, this recipe is bound to become a cherished favorite.
- Prep Time: 30 minutes
- Cook Time: 60 minutes
- Total Time: 1 hour 30 minutes
- Yield: Serves approximately 8 slices 1x
- Category: Dessert
- Method: Baking
- Cuisine: Dutch
Ingredients
- 1 pie crust (homemade or store-bought)
- 2 1/4 lbs Granny Smith apples (about 6 medium apples)
- 1 tsp cinnamon
- 8 Tbsp unsalted butter (softened)
- 3 Tbsp all-purpose flour
- 1/4 cup water
- 1 cup granulated sugar
- 1 cup all-purpose flour (for crumb topping)
- 1/4 cup packed brown sugar
- 2 Tbsp granulated sugar (for topping)
- 1/4 tsp cinnamon (for topping)
- 1/4 tsp salt
- 8 Tbsp unsalted butter (for crumb topping)
- 1/2 cup chopped pecans (optional)
Instructions
- Preheat your oven to 375˚F (190˚C).
- Roll out your pie crust and fit it into a greased 9-inch pie pan.
- Peel and slice the Granny Smith apples, mixing them with cinnamon in a bowl.
- In a saucepan, melt unsalted butter and whisk in flour to create a roux. Gradually add water and granulated sugar, stirring until boiling.
- Pour the mixture over the apples and toss to coat before transferring to the pie crust.
- For the crumb topping, mix together flour, brown sugar, granulated sugar, cinnamon, and salt in a bowl. Cut in softened butter until crumbly; fold in pecans if desired.
- Spread the crumb topping over the apple filling evenly.
- Bake for about 50-60 minutes until golden brown and bubbly; cover loosely with foil if browning too fast.
- Allow cooling for at least one hour before serving.
Nutrition
- Serving Size: 1 slice - approximately 120g
- Calories: 290
- Sugar: 25g
- Sodium: 180mg
- Fat: 13g
- Saturated Fat: 8g
- Unsaturated Fat: 4g
- Trans Fat: 0g
- Carbohydrates: 43g
- Fiber: 3g
- Protein: 2g
- Cholesterol: 30mg