Canning Lemonade (& Lemonade Concentrate)
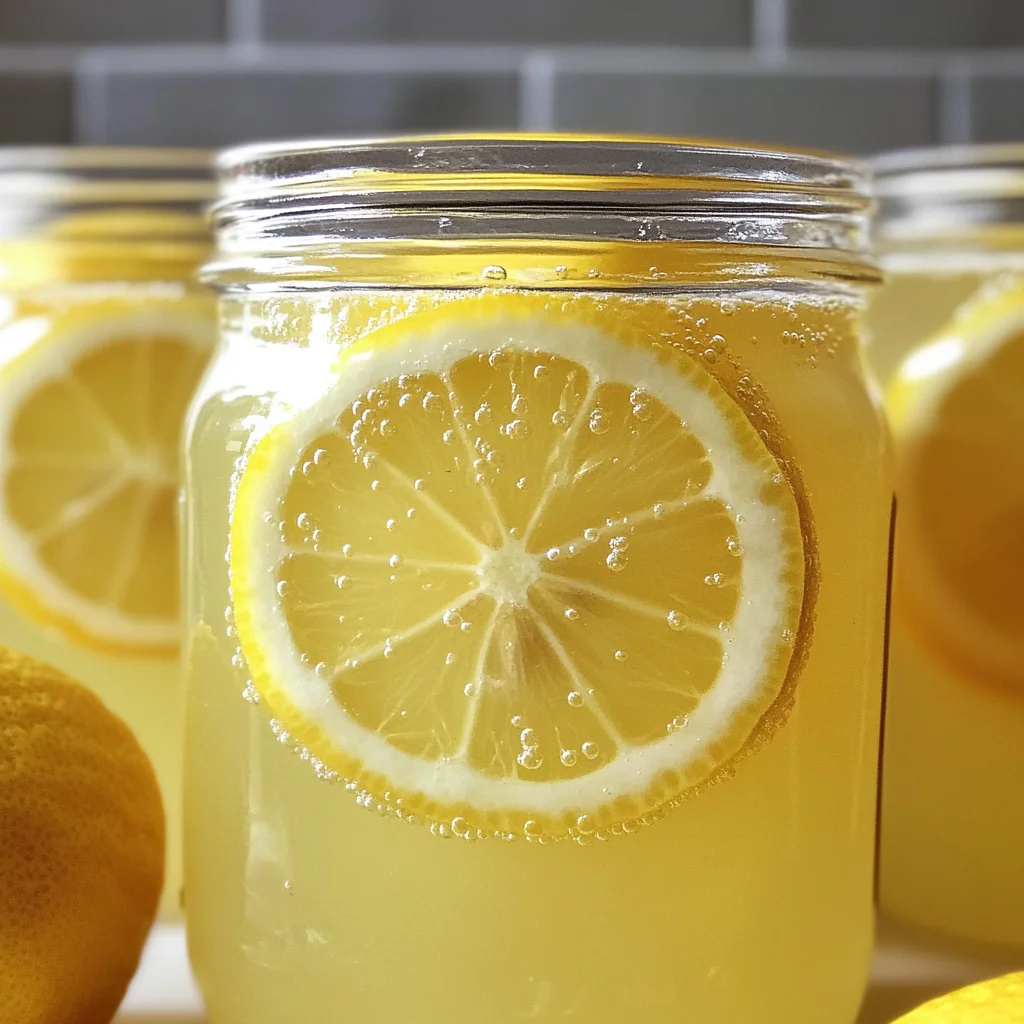
There’s something truly magical about the bright, zesty aroma of fresh lemons wafting through your kitchen. The very act of canning lemonade—and especially creating a concentrated version—feels like a loving embrace from summer itself, preserving its warmth and vivacity to be enjoyed long after the last sunbeam fades. Imagine the first sip of that chilled, homemade lemonade on a sweltering afternoon; it’s not just a drink but rather a moment of pure bliss, a refreshing escape that dances on your palate. Canning lemonade (& lemonade concentrate) is more than just preparing a beverage; it’s about capturing the essence of joy, nostalgia, and tradition in every jar. From the tangy burst of lemon juice to the sweet caress of sugar, this recipe brings together simple ingredients to create something utterly intoxicating.
As you embark on this culinary journey, I promise you’ll find that canning lemonade is an experience steeped in love and creativity. Whether you’re reminiscing about family gatherings or simply seeking a delightful refreshment for your next picnic, this recipe serves as a bridge between tradition and innovation. It invites you to take part in a time-honored practice while allowing your personal touch to shine through. Each jar you fill becomes a little treasure trove, waiting to be shared with friends and family, sparking conversations and creating memories that linger long after the last drop has been savored.
Canning Lemonade (& Lemonade Concentrate): A Summer Staple
This delightful recipe is your ticket to enjoying summer’s bounty year-round! The beauty of canning lemonade lies not only in its vibrant flavor but also in its simplicity. You’ll find that with just a few straightforward ingredients and some basic techniques, you can transform fresh lemons into liquid gold stored right on your pantry shelf. So let’s roll up our sleeves and dive into making this refreshing treat!
Ingredients:
Before we gather our ingredients, let’s take a moment to appreciate what each one brings to our delicious concoction. Canning lemonade is all about balance—between sweetness and tartness—and every ingredient plays its part beautifully.
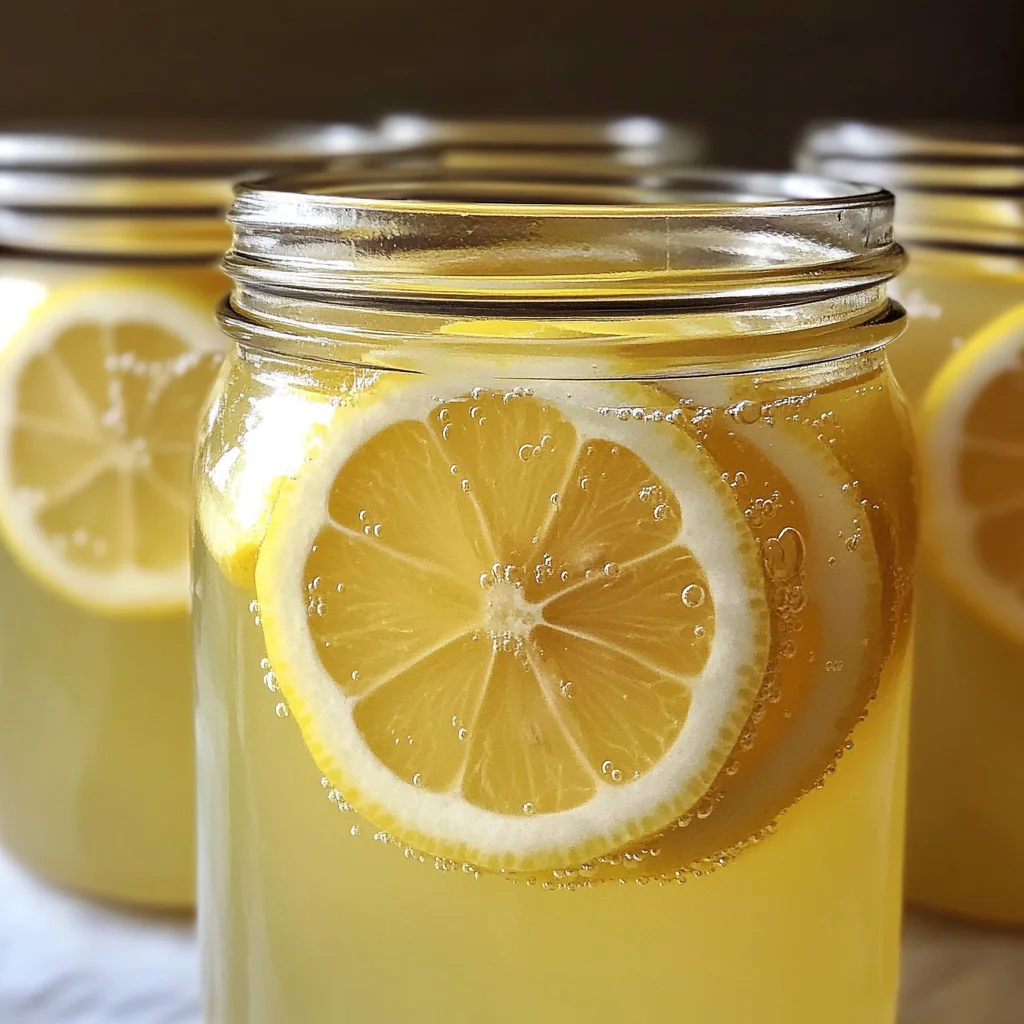
- 1 cup lemon juice (from 4 to 5 lemons). Freshly squeezed lemon juice is absolutely paramount for achieving that authentic zingy flavor that makes homemade lemonade so special. When selecting lemons, look for ones that are heavy for their size; they will yield more juice! If you’re lucky enough to have access to organic lemons, I wholeheartedly encourage using them—there’s something profoundly satisfying about knowing you’re working with fruit free from harsh chemicals. Plus, when you juice these beauties yourself, you’re not just adding flavor; you’re infusing your drink with love!
- 1 cup sugar. Sugar serves as the sweet counterpart to the tartness of our lemon juice, creating that perfect harmony we all crave in lemonade. This ingredient isn’t merely about sweetness; it helps balance flavors while enhancing the overall experience. I recommend using granulated sugar because it dissolves easily and provides that classic taste we associate with summertime drinks. For those looking for alternatives, feel free to experiment with natural sweeteners like agave nectar or honey—just remember these may alter the flavor profile slightly!
- 6 cups water. Water acts as the canvas upon which our masterpiece is painted; it dilutes our concentrated mixture into a refreshing drink ready for sipping! When canning lemonade concentrate instead of the full beverage, this water helps ensure you have flexibility when serving. The quality of water matters too; filtered water often tastes better than tap because it lacks chlorine or other impurities that could interfere with your final product’s clarity and taste.
Now that we’ve gathered our star players for this delightful performance, let’s move on to how we bring everything together.
Equipment You’ll Need:
Having the right tools at your disposal makes all the difference in ensuring a smooth and enjoyable cooking experience—and trust me when I say they’re essential partners in creating something wonderful!
- Water bath canner: This piece of equipment is crucial for safely preserving our lemonade by applying heat through boiling water processing. It allows for even heat distribution around jars ensuring safe sealing while preventing any risk of spoilage.
- Canning jars (half-pints or pints): These jars are where all your hard work will culminate! Choose high-quality glass jars specifically designed for canning—these are thicker than regular jars and engineered to withstand extreme temperatures during processing.
- Canning lids: Lids are non-negotiable when it comes to preserving food safely! Opt for two-part lids which consist of a flat lid with an inner sealing compound and a metal band; they ensure an airtight seal once processed properly.
- Canning jar lifter: This handy tool makes removing hot jars from boiling water much safer and easier! It grips jars firmly without risking burns or spills—a must-have when dealing with hot liquids.
- Funnel: A wide-mouth funnel simplifies pouring liquids into jars without making a mess—a small tool but one that will save you time cleaning up afterward!
Now that we have our ingredients and tools lined up like eager participants in this culinary dance, let’s jump into preparing our exceptional Canning Lemonade (& Lemonade Concentrate).
Step 1: Preparing Your Kitchen
First things first—let’s get organized! Begin by preparing your water bath canner along with your jars and lids before diving into any mixing or cooking steps. This preparation sets the stage for success as you’ll want everything within arm’s reach when you’re ready to pour that luscious mixture into jars. Fill your canner halfway with water and bring it to a gentle boil; while that’s heating up, inspect your jars for any cracks or chips—this ensures they won’t break during processing. As someone who has had their fair share of mishaps due to unpreparedness—I assure you; don’t rush this step! Taking time now will save you headaches later on!
Step 2: Zesting Your Lemons
If you’re feeling adventurous (and trust me—you should!), zest those beautiful lemons into sugar before juicing them! Simply use a microplane grater or zester to remove only the yellow outer layer—this zest holds concentrated oils bursting with flavor that’ll enhance your final product tremendously! Once you’ve grated away enough zest (about 2 tablespoons tops), mix it thoroughly into one cup of sugar before letting it sit for an hour or so—this allows those oils to infuse their essence into the sugar beautifully! Keep in mind though: zesting isn’t strictly necessary if you’re pressed for time—but oh boy does it add an extra dimension worth considering!
Step 3: Juicing Your Lemons
Now comes perhaps one of my favorite parts—the juicing! Grab those beautiful lemons you’ve chosen (preferably organic), slice them in half lengthwise, and give them some good ol’ squeezing action until you’ve collected at least one cup of fresh lemon juice—filtering out any seeds or pulp along the way! To make this process even smoother (and more efficient), consider using a citrus press—or even better—a reamer which extracts every last drop effortlessly! After juicing away merrily, be sure to measure precisely since each juicy lemon varies slightly in output.
Step 4: Mixing It All Together
Once you’ve got all those lovely flavors extracted—from both zest-infused sugar and freshly squeezed juice—it’s time for magic moments where science meets culinary artistry! Gently warm together your measured lemon juice combined with dissolved sugar over low heat until reaching approximately 190°F (but don’t boil!). Warming helps dissolve any remaining sugar granules while also coaxing flavors from both components—trust me on this step—it transforms ordinary ingredients into sheer delight as they meld together harmoniously over gentle heat.
Stay tuned as we continue crafting this sublime beverage by ladling hot mixtures into prepared jars next…
Step 5: A Gentle Heat to Release Liquid Gold
Now that you’ve prepared your luscious lemon juice and sugar mixture, it’s time to apply some gentle heat. This step is crucial because warming the mixture helps dissolve the sugar fully, creating a beautifully harmonious blend that will dance on your taste buds. Place your saucepan over medium-low heat—trust me, patience is key here! You want to warm the mixture until it reaches around 190°F (that’s just shy of boiling). Don’t be tempted to crank up the heat; rapid boiling can lead to syrupy lumps instead of the smooth liquid gold you’re aiming for.
As you stir gently, notice how the aroma of fresh lemons fills your kitchen, wrapping you in a warm hug of citrus goodness. This moment is not just about cooking; it’s about coaxing out those vibrant flavors and allowing them to mingle and deepen. Keep an eye on your thermometer, as this step will set the foundation for your finished product. If you see small bubbles beginning to form around the edges of the pan but not rolling boiling, you’re in the perfect zone. Once you hit that sweet spot of 190°F, remove it from the heat immediately. This is where magic happens—your lemonade concentrate is almost ready!
Step 6: Jarring Up Your Liquid Sunshine
With your delightful mixture at the right temperature, it’s time to ladle this sunshine into prepared canning jars. Using a funnel will help prevent any mess—trust me, you want every drop in that jar! As you fill each jar, be mindful to leave about 1/4 inch of headspace at the top. This space is non-negotiable; it allows for expansion during processing and ensures a good seal when cooling. Sealing is critical for preserving freshness and preventing spoilage down the line.
Once filled, take a moment to wipe down the rims of each jar with a clean cloth or paper towel; this little detail ensures nothing obstructs a proper seal when attaching the two-part canning lids. Now comes the fun part! Securely fasten each lid until it’s finger-tight—not too loose but not overly tight either. The jars need air to escape during processing, so finding that balance is key! Lay out your jars carefully in your water bath canner; they should fit snugly without touching each other. Remember, this step isn’t just about putting them in hot water; it’s about nurturing every jar into its perfect state.
Step 7: Processing for Perfection
Next up is processing your jars in the water bath canner—a vital step that ensures safety by eliminating bacteria and sealing them tightly for long-term storage. Bring your pot back to a rolling boil and set your timer for precisely 10 minutes if you’re below 1,000 feet in elevation; adjustments may be necessary if you’re at higher altitudes (consult local guidelines). This duration allows flavors to meld beautifully while ensuring everything inside those jars is perfectly pasteurized.
As you watch your jars bob gently in their bubbly bath, take a moment to appreciate what you’ve created—a beautiful symphony of flavors that will soon grace your pantry shelves! After processing time has elapsed, turn off the heat but don’t rush this next part; leave those jars soaking for an additional 5 minutes in hot water. This cooling period is absolutely paramount as it helps prevent any sudden temperature changes which could result in cracked jars or compromised seals.
Using a canning jar lifter (your trusty sidekick!), carefully lift each jar out of the water bath and place them on a clean towel on your counter to cool completely. The sound of those lids popping as they seal is music to my ears—it’s like hearing nature’s applause for your hard work!
Step 8: The Waiting Game – Checking Your Seals
Now comes one of my favorite moments—the waiting game! Allow those jars to cool undisturbed on the counter for at least 12 hours before checking their seals. During this time, take a breath and let yourself revel in what you’ve accomplished—homemade canned lemonade that will brighten even the dreariest of days! After waiting patiently (I promise it’ll be worth it), check each jar by pressing down in the center of each lid; if it pops back up, that’s an indication it’s unsealed—don’t worry! Store any unsealed jars in the fridge for immediate use while properly sealed jars can confidently reside in your pantry.
Once you’ve confirmed all seals are secure (it feels like opening gifts on Christmas morning!), label them with dates so you’ll know exactly when they were made… although I doubt you’ll forget after all this joy! Properly canned lemonade can last up to a year if stored correctly—although I suspect they’ll be devoured long before then! Just remember once opened, they’re best stored in refrigeration.
Conclusion:
As we wrap up our journey through the delightful process of canning lemonade (& lemonade concentrate), I can’t help but feel excited about sharing this cherished recipe with you. It’s more than just a collection of ingredients; it’s about creating memories around laughter-filled picnics or refreshing sips on sunny days. The harmonious blend of tart lemon juice meeting sweet sugar creates a symphony of flavors that transforms any ordinary moment into something extraordinary. As you pop open each jar throughout the year, may it remind you of those bright summer days when life was meant for sipping lemonade!
This recipe is truly a must-try—not only for its vibrant taste but also for the sheer joy that comes from making it. The simple act of squeezing lemons and stirring together these ingredients can transport you back in time, evoking memories of family barbecues or lazy afternoons spent in good company. Picture yourself at a garden party, serving friends freshly poured glasses brimming with ice-cold lemonade while they marvel at how you’ve captured summer in a jar. It’s these experiences that elevate this recipe beyond mere refreshment; they create connections and foster joy.
To serve your homemade lemonade in style, imagine savoring one with delicate cucumber slices floating atop—a refreshing combination that enhances both flavor and presentation. For an afternoon pick-me-up, try mixing it with sparkling water over ice—a bubbly delight that dances on your tongue and uplifts your spirits instantly! And if you’re seeking something truly decadent after dinner, consider drizzling some over vanilla sorbet—the tartness perfectly complements the creamy sweetness, offering an indulgence that’s hard to resist.
Feeling adventurous? This recipe is wonderfully adaptable—think about infusing your lemonade with fragrant herbs like mint or basil for an unexpected twist that will tantalize your taste buds! You could even experiment with different citrus fruits like limes or oranges; each variation brings its own charm while still maintaining that beloved essence we adore. I invite you to dive into this culinary adventure—try it out, make it yours, share your creations with loved ones, and let’s connect over our passion for food! Your kitchen awaits its next great masterpiece!
Canning Lemonade (& Lemonade Concentrate)
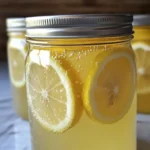
Canning lemonade (& lemonade concentrate) captures the essence of summer in every jar, allowing you to enjoy the bright and zesty flavors of fresh lemons year-round. This refreshing beverage is not just a thirst quencher; it’s a delightful memory-maker, perfect for family gatherings or picnics. With a perfect balance of tart lemon juice and sweet sugar, this easy DIY recipe transforms simple ingredients into a vibrant drink that will transport you to sunlit days with each sip. Plus, the canning process ensures that this homemade goodness can be stored and enjoyed whenever you crave a taste of sunshine.
- Prep Time: 30 minutes
- Cook Time: 15 minutes
- Total Time: 45 minutes
- Yield: Approximately 6 servings (3 cups total) 1x
- Category: Beverage
- Method: Canning
- Cuisine: American
Ingredients
- 1 cup freshly squeezed lemon juice (from 4 to 5 lemons)
- 1 cup granulated sugar
- 6 cups filtered water
Instructions
- Prepare your kitchen by setting up a water bath canner filled halfway with water and bringing it to a gentle boil.
- Zest two tablespoons of lemon peel into sugar and let sit for an hour to infuse flavor.
- Juice the lemons until you have one cup of fresh lemon juice, straining out any seeds.
- In a saucepan, combine the lemon juice and sugar mixture, warming over low heat until the sugar dissolves completely (around 190°F).
- Ladle the hot mixture into sterilized canning jars, leaving 1/4 inch headspace. Wipe jar rims clean.
- Secure lids finger-tight and place jars in boiling water for 10 minutes (adjust for altitude).
- Allow jars to cool undisturbed for at least 12 hours before checking seals.
Nutrition
- Serving Size: 1/2 cup (120ml)
- Calories: 100
- Sugar: 25g
- Sodium: 0mg
- Fat: 0g
- Saturated Fat: 0g
- Unsaturated Fat: 0g
- Trans Fat: 0g
- Carbohydrates: 25g
- Fiber: 0g
- Protein: <1g
- Cholesterol: 0mg