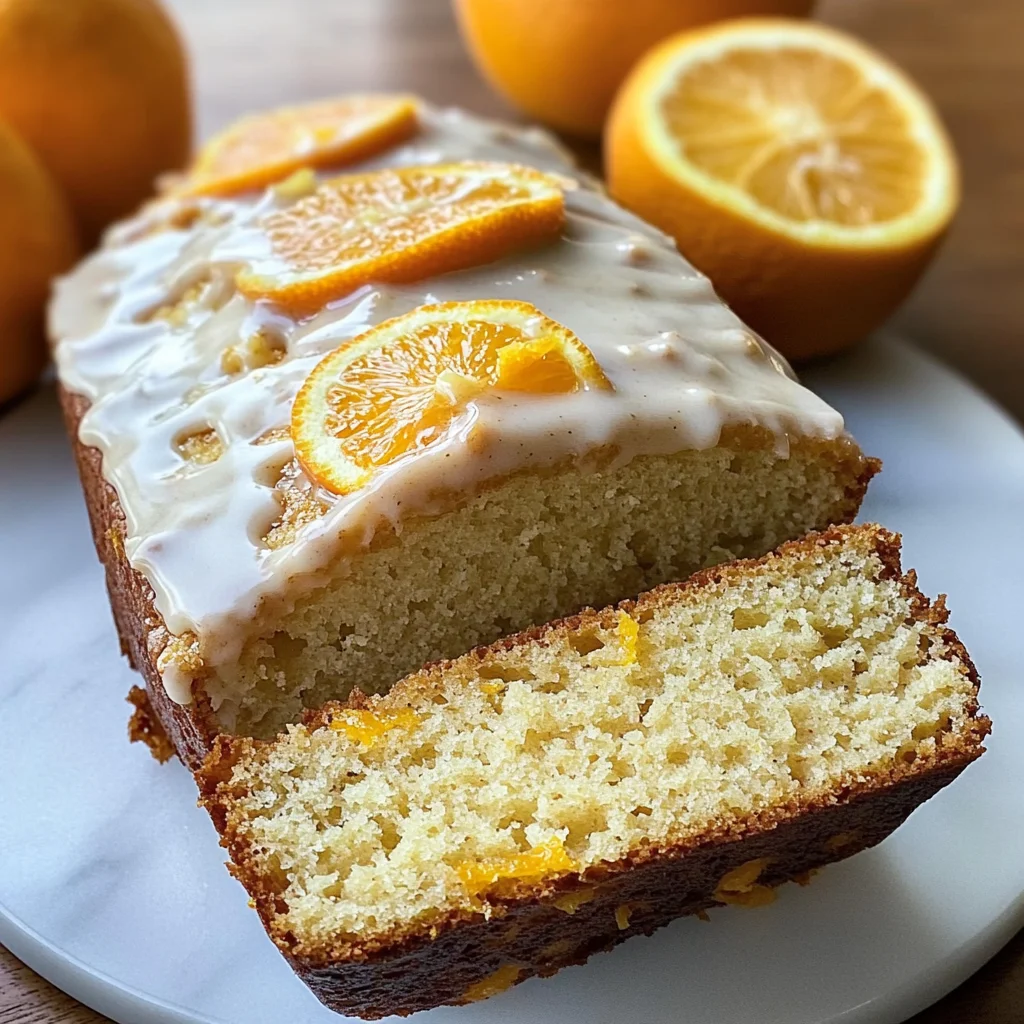
Gluten-Free Orange Cardamom Bread
There’s something utterly magical about the aroma of freshly baked bread wafting through your home, isn’t there? It’s more than just a scent; it’s a comforting embrace, a warm hug that wraps around you and pulls you into a moment of pure joy. As I sit here, writing this recipe for Gluten-Free Orange Cardamom Bread, I can already imagine the golden, crusty exterior giving way to the moist, tender crumb inside. The vibrant notes of orange and the exotic warmth of cardamom dance together in a beautiful symphony of flavors that will transport you to far-off lands with every bite. This is not just bread; it’s an experience that speaks to the heart and soul of holiday gatherings, cozy brunches, and moments spent with loved ones.
This recipe has been passed down through generations in my family, each one adding their unique twist while still holding on to its essence. It beautifully balances tradition with innovation—after all, who says gluten-free baking can’t be absolutely delicious? By using simple yet wholesome ingredients like yogurt and refined coconut oil, we create a loaf that is not only gluten-free but also incredibly moist and flavorful. And let me tell you about that zesty orange cardamom icing! It’s the final touch that makes this bread truly extraordinary. So grab your apron and let’s embark on this culinary adventure together!
Gluten-Free Orange Cardamom Bread: A Citrus Delight for Every Occasion
If you’re looking for a delightful centerpiece for your holiday table or simply want to treat yourself during brunch, this Gluten-Free Orange Cardamom Bread is your answer! Each slice is infused with refreshing citrus notes and a hint of spice that brightens even the gloomiest of days. The texture is nothing short of cake-like—light yet satisfying—making it perfect for dessert or paired alongside a cup of tea or coffee. You’ll find yourself reaching for just one more slice!
Ingredients:
Every great recipe begins with quality ingredients, and this one is no exception! Let’s take a moment to appreciate each component that makes this Gluten-Free Orange Cardamom Bread not just good but downright sensational.
- 2 large eggs: Eggs are the unsung heroes in baking; they provide structure, moisture, and richness to our bread. When beaten until frothy, as we will do in this recipe, they help introduce air into the batter, ensuring our loaf rises beautifully. Always opt for fresh eggs—they have a better flavor and contribute significantly to the overall texture.
- 3/4 cup sugar: This isn’t just sweetening our bread; sugar plays multiple roles by enhancing flavor and contributing to browning through caramelization as it bakes. For those watching their sugar intake, feel free to substitute with coconut sugar or another sweetener of choice—it will still yield delicious results!
- 1/2 cup yogurt: Yogurt is my secret weapon in baking; it adds moisture while also providing acidity that interacts wonderfully with baking soda and powder. This reaction helps create lightness in our bread. Opt for dairy-free yogurt if you prefer—coconut yogurt works beautifully here.
- 1/4 cup refined coconut oil, melted: Coconut oil lends a subtle richness without overpowering other flavors. Make sure it’s refined so it doesn’t impart too strong a coconut taste; we want the orange and cardamom to shine! If you’re in need of alternatives, vegetable oil or even melted butter can work well.
- 1/4 cup orange juice, freshly squeezed (around 2 medium-sized navel oranges): Freshly squeezed juice elevates this loaf to new heights! The natural sweetness from ripe oranges adds complexity while keeping everything bright and zesty. Avoid bottled juice if possible; fresh oranges give depth that can’t be replicated.
- 1 teaspoon vanilla extract: Vanilla extract rounds out the flavors beautifully—it adds warmth that harmonizes perfectly with our spices. Choose pure vanilla extract over imitation; you’ll notice such a difference in quality.
- Finely grated zest of 1 orange: Zest is where all the intense flavor lies! Grating the outer layer releases essential oils packed with citrus aroma—this ingredient will infuse our bread with its signature brightness.
- 1¼ cup (170g) gluten-free flour (Bob’s Red Mill 1 to 1 Gluten-Free Baking Flour): A quality gluten-free flour blend ensures our bread has the right structure without any grittiness. Bob’s Red Mill is an excellent choice because it contains xanthan gum which mimics gluten’s elasticity—a non-negotiable when baking gluten-free!
- 1/2 cup (50g) almond flour: Almond flour adds moisture and richness thanks to its fat content while also contributing a slightly nutty flavor. If you’re nut-free, feel free to swap it out with additional gluten-free flour.
- 1 teaspoon ground cardamom: Ahh… cardamom—the star spice here! Its warm notes add an exotic flair reminiscent of cozy chai lattes or aromatic bakeries in far-off places. If you’ve never used cardamom before, trust me; it takes this bread from ordinary to extraordinary!
- 2 teaspoons baking powder: This leavening agent gives our bread lift—it reacts with liquid ingredients to produce carbon dioxide bubbles during baking which lightens texture.
- 1/2 teaspoon baking soda: Similar to baking powder but requires acidity (like our yogurt) to activate—it ensures our bread doesn’t fall flat!
- 1/2 teaspoon salt: Salt enhances every flavor present in your dish; it’s crucial for balance! Don’t omit it; otherwise, your lovely flavors may taste dull.
- 1 cup powdered sugar: The base for our luscious glaze! Powdered sugar dissolves easily into liquids creating smooth finishes—perfect for drizzling over baked goods without graininess interrupting your enjoyment!
- 2 tablespoons fresh orange juice, plus additional zest as noted above: More juice means more flavor! This time we’re using it specifically for our glaze—a little acidity cuts through sweetness making each bite heavenly.
- Pinch ground cardamom: Just like before—this tiny amount elevates our glaze by adding aromatic warmth that ties everything together beautifully!
Step 1: Prepping Your Oven & Pan
First things first—we need to set ourselves up for success by preheating our oven to 350°F (175°C). Preheating ensures that when you place your batter inside, it bakes evenly right from the start rather than languishing in an unheated space where it may become dense or undercooked. Now grab your trusty loaf pan (either 9×5 or 8×4 inches) and grease it generously with coconut oil or non-stick spray—this step prevents any sticky situations later on when you’re trying to remove your glorious creation from its confines!
Step 2: Whipping Up Those Eggs
In either a large mixing bowl or using your Kitchen Aid mixer fitted with the whisk attachment—as I absolutely love doing—add those two large eggs we’ve set aside earlier. Beat them at medium speed until they’re frothy—about 1-2 minutes should do it! This process not only introduces air but also helps emulsify everything else we’ll be adding shortly.
Step 3: Mixing In The Wet Ingredients
Once your eggs are frothy (and oh-so-vibrant!), it’s time to invite in all those wonderful wet ingredients we’ve measured out. Add in sugar followed by yogurt, melted coconut oil (make sure it’s not hot!), fresh orange juice along with its fragrant zest—and don’t forget that lovely splash of vanilla extract too! Mix everything at medium speed until combined—this should take about 30 seconds max! Trust me on this part—the combination creates such an enticing aroma already!
Step 4: Combining Dry Ingredients
Now comes my favorite part—the magic happens when we bring together dry ingredients into this mix! At low speed (trust me—you want low here!), slowly add in gluten-free flour blend along with almond flour while tossing in baking powder, soda cardamom spice mixture along side salt too! Beat until everything is just combined—over-mixing could lead us astray hence don’t rush through this step! You’ll know you’ve hit perfection when no visible dry flour remains but don’t fret too much if small lumps linger—they’ll bake away beautifully!
Equipment You’ll Need:
Before we dive deeper into assembling our masterpiece loaf—the right tools make all the difference between good-baking experiences versus “what went wrong?” moments! Investing time choosing quality equipment pays off immensely during preparation stages leading up towards success later on.
- Mixing bowl or stand mixer: Whether you choose hands-on mixing via bowl method or opt for convenience found within stand mixers like Kitchen Aid—you’ll want something sturdy enough not only hold ingredients but also allow ample room stirring action required throughout blending processes ahead.
- Loaf pan: A reliable loaf pan designed specifically hold batter securely during rise times will ensure even cooking throughout entire batch rather than sporadic clumping around edges due uneven heat distribution found within many regular pans sold elsewhere locally.
- Whisk: A sturdy whisk helps introduce air quickly into mixtures resulting fluffy textures desired especially when working eggs initially before incorporating further ingredients alongside them later down line during assembly stages!
With these key pieces gathered together—you’re one step closer towards embarking upon creating something truly delightful within kitchen space around us today!
Step 5: Pouring In the Love
Now that your batter is ready, it’s time to transform this beautiful mixture into something truly magical. Carefully pour the batter into your prepared loaf pan, ensuring it spreads evenly. It’s important to give it a gentle shake or tap on the counter; this helps eliminate any air bubbles that may have formed during mixing, which can create an uneven texture in your bread. Trust me when I say that a smooth surface leads to a beautifully rising loaf! As you watch the batter settle, take a moment to inhale deeply—this is where the vibrant scents of orange and cardamom start to waft through your kitchen, promising a delightful experience ahead.
Baking this bread is akin to inviting warmth into your home. Slide the loaf pan into your preheated oven (which should be at 350°F), and let it work its magic for about 40-45 minutes. The key here is patience—don’t rush this step! As it bakes, you’ll notice the top turning a lovely golden brown, and your kitchen will be filled with a symphony of aromas that make your heart swell with joy. To test for doneness, insert a toothpick into the center after about 40 minutes; if it comes out clean or with just a few crumbs clinging to it, you’re golden! If not, give it another couple of minutes—every oven has its quirks, so keep an eye on it.
Step 6: The Crucial Cooling Period
Once that glorious loaf has finally reached peak golden perfection, remove it from the oven and let it rest in the pan for about 10 minutes. This resting period is crucial—it allows the bread to finish cooking slightly from residual heat while also making it easier to remove from the pan without crumbling apart. After those precious moments have passed, gently tip the loaf out onto a wire rack—this step requires tenderness as you want to avoid breaking that delicate crust you’ve worked hard on creating.
Letting your Gluten-Free Orange Cardamom Bread cool completely for around two hours might feel like an eternity, but trust me on this one: it’s absolutely non-negotiable! Cooling allows moisture within the bread to redistribute evenly, resulting in a texture that’s both moist and tender rather than gummy or overly dense. Plus, as it cools down, those intoxicating flavors continue to develop even further. It’s like letting fine wine breathe; good things come to those who wait!
Step 7: Whipping Up Irresistible Glaze
While your bread cools down in all its glory, let’s turn our attention to crafting that dreamy orange cardamom icing that will elevate this loaf from delicious to utterly extraordinary. In a small bowl, whisk together one cup of powdered sugar with two tablespoons of fresh orange juice and half a teaspoon of vanilla extract until you achieve a smooth consistency. You want this glaze thin enough to drizzle but not so runny that it disappears into oblivion when poured over your bread—aim for something akin to thick honey.
But wait—there’s more! To really capture that essence of cardamom we’ve infused throughout our bread, add in just a pinch of ground cardamom and an extra teaspoon of finely grated orange zest. This isn’t just about flavor; each ingredient plays its part in creating layers upon layers of taste sensations. When you pour this liquid gold over your cooled loaf, just imagine how all those bright citrus notes will dance together—a celebration on every bite! Once everything is mixed well and looks gloriously glossy (and trust me—you’ll want to taste test!), set it aside for just a moment while we prepare for the final act.
Step 8: A Grand Finale
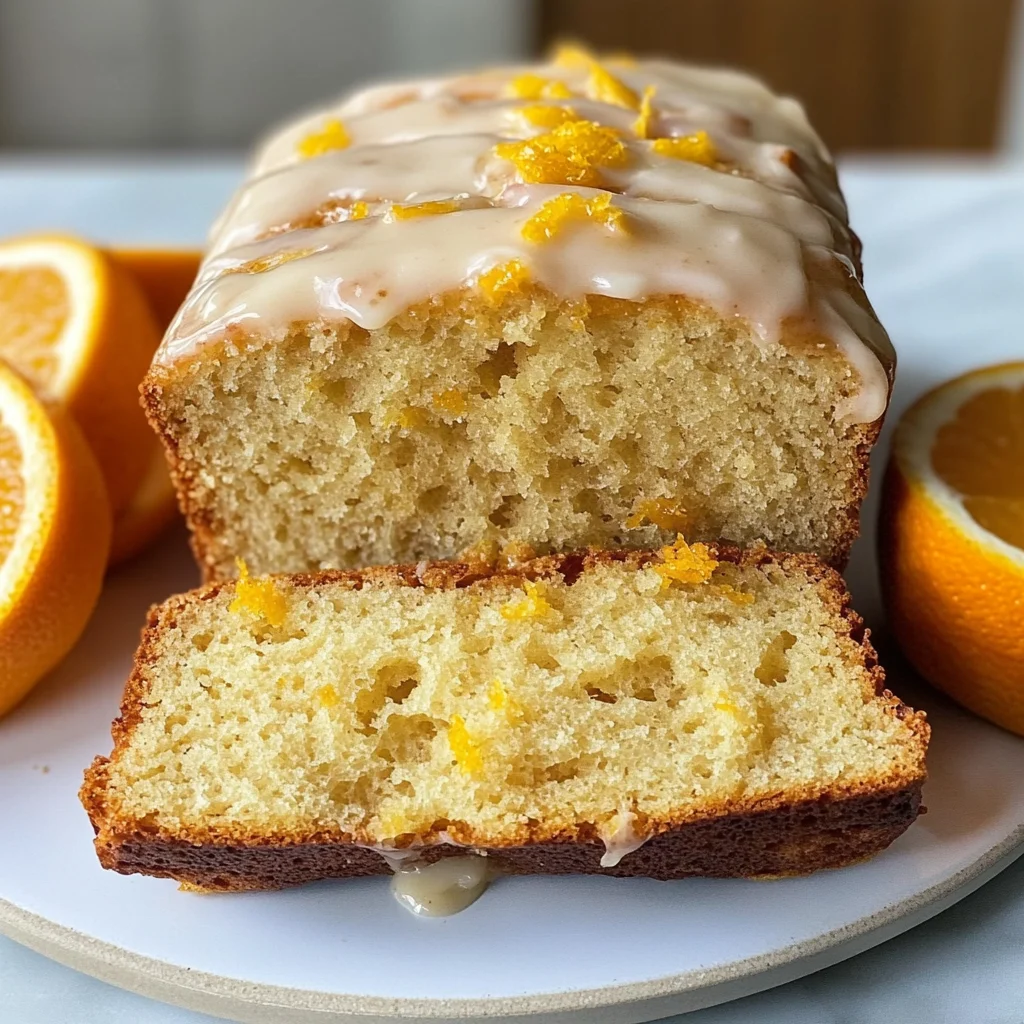
Now we arrive at perhaps my favorite part—the drizzling! It’s time to bring our creation full circle by pouring that luscious glaze over our perfectly cooled loaf. Gently spoon or pour the icing onto the center of the bread; then let gravity do its job by allowing it to cascade down the sides like sweet waterfalls. This presentation is not merely decorative; those pockets of glaze will meld beautifully with each slice you cut later on, enhancing every mouthful with bursts of sweetness.
When you’re done glazing (and maybe sneaking another taste), allow this masterpiece to sit for about 10-15 minutes so the glaze can set just enough without losing that delightful shine. This final touch is essential because as tempting as it may be right now, slicing into warm bread coated in wet glaze could lead to messy results—not ideal when you want those perfect slices for sharing! So practice patience here; I promise you’ll appreciate every moment spent waiting when you finally slice into that moist interior adorned with shimmering icing.
Conclusion:
As we wrap up our journey through this delightful recipe for Gluten-Free Orange Cardamom Bread, I can’t help but feel excited about all the warmth and flavor we’ve created together! From the moment I first mixed those vibrant ingredients—eggs dancing with sugar and the intoxicating scent of cardamom filling my kitchen—I knew this loaf would not only be delicious but also bring joy and comfort to anyone who has the pleasure of tasting it. The marriage of zesty orange and fragrant cardamom creates an utterly extraordinary flavor profile that transcends ordinary baking; it’s like a cozy hug in every slice.
This recipe is an absolute must-try—not solely because of its exquisite taste but also because of the sheer joy that comes from making it. Picture yourself measuring out those wholesome ingredients while your kitchen fills with mouthwatering aromas as it bakes away. Whether you’re serving it at brunch alongside steaming cups of coffee or offering slices as an afternoon snack during holiday gatherings, this bread shines on any occasion! The anticipation builds as you pull it from the oven, golden-brown and gleaming—it’s hard not to smile at such simple pleasures.
When it comes to serving suggestions, oh my goodness, where do I begin? Imagine savoring one warm slice with a smear of creamy almond butter on top—pure bliss! Or perhaps enjoy it alongside a vibrant fruit salad for breakfast; the combination will brighten up even the gloomiest mornings. For an afternoon pick-me-up, pair it with a steaming cup of herbal tea, allowing every bite to melt away your stress while indulging in its citrusy sweetness.
Feeling adventurous? This recipe is wonderfully adaptable! Why not try swapping out orange zest for lemon or adding chopped nuts like pistachios for extra crunch? You could also incorporate dried cranberries or apricots for bursts of fruity sweetness throughout! Whatever direction you choose to take, I wholeheartedly encourage you to experiment—after all, cooking is about infusing your personality into each dish. So go ahead—try this gluten-free delight today, share your experiences with me in the comments below, and let’s keep spreading love through baking together!
Gluten-Free Orange Cardamom Bread
Indulge in the delightful flavors of our Gluten-Free Orange Cardamom Bread—an aromatic treat that’s both moist and bursting with citrus goodness. Crafted with simple, wholesome ingredients like yogurt and coconut oil, this bread exudes warmth and joy with every bite. The enchanting combination of zesty orange and fragrant cardamom elevates it from ordinary to extraordinary, making it the perfect centerpiece for any occasion. Whether enjoyed at a cozy brunch or as a festive dessert, this gluten-free delight is sure to impress your family and friends. Experience the magic of baking with this easy-to-follow recipe!
- Prep Time: 15 minutes
- Cook Time: 45 minutes
- Total Time: 1 hour
- Yield: Approximately 12 servings 1x
- Category: Dessert
- Method: Baking
- Cuisine: American
Ingredients
- 2 large eggs
- 3/4 cup sugar
- 1/2 cup yogurt (dairy-free optional)
- 1/4 cup refined coconut oil, melted
- 1/4 cup fresh orange juice
- Finely grated zest of 1 orange
- 1¼ cup gluten-free flour
- 1/2 cup almond flour (or additional gluten-free flour)
- 1 teaspoon ground cardamom
- 2 teaspoons baking powder
- 1/2 teaspoon baking soda
- Pinch of salt
Instructions
- Preheat your oven to 350°F (175°C) and grease a loaf pan.
- In a mixing bowl, beat eggs until frothy. Add sugar, yogurt, melted coconut oil, orange juice, vanilla extract, and zest; mix until combined.
- Slowly incorporate gluten-free flour blend, almond flour, baking powder, baking soda, ground cardamom, and salt at low speed until just mixed.
- Pour batter into the prepared loaf pan and smooth the top.
- Bake for 40-45 minutes or until a toothpick inserted comes out clean. Let cool in the pan for 10 minutes before transferring to a wire rack.
Nutrition
- Serving Size: 1 slice
- Calories: 180
- Sugar: 8g
- Sodium: 120mg
- Fat: 6g
- Saturated Fat: 5g
- Unsaturated Fat: 1g
- Trans Fat: 0g
- Carbohydrates: 29g
- Fiber: 2g
- Protein: 3g
- Cholesterol: 70mg