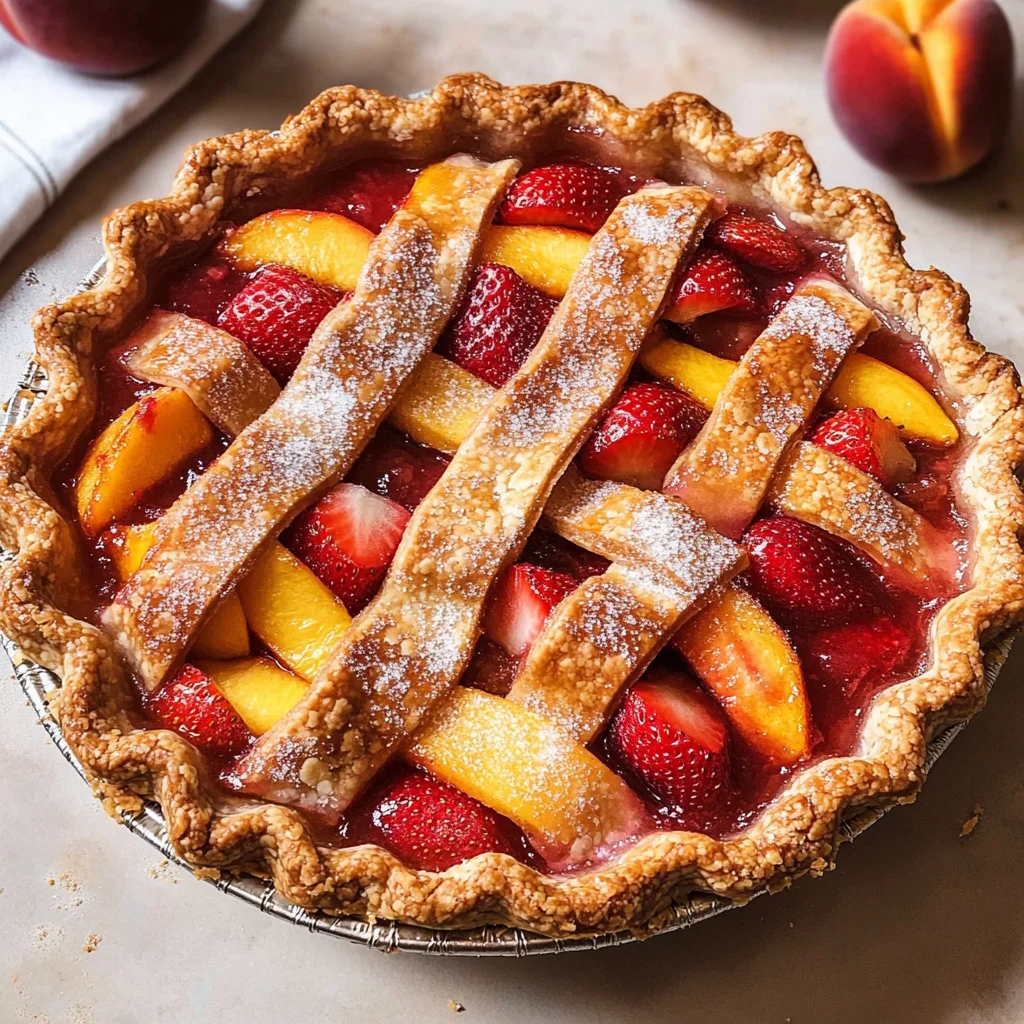
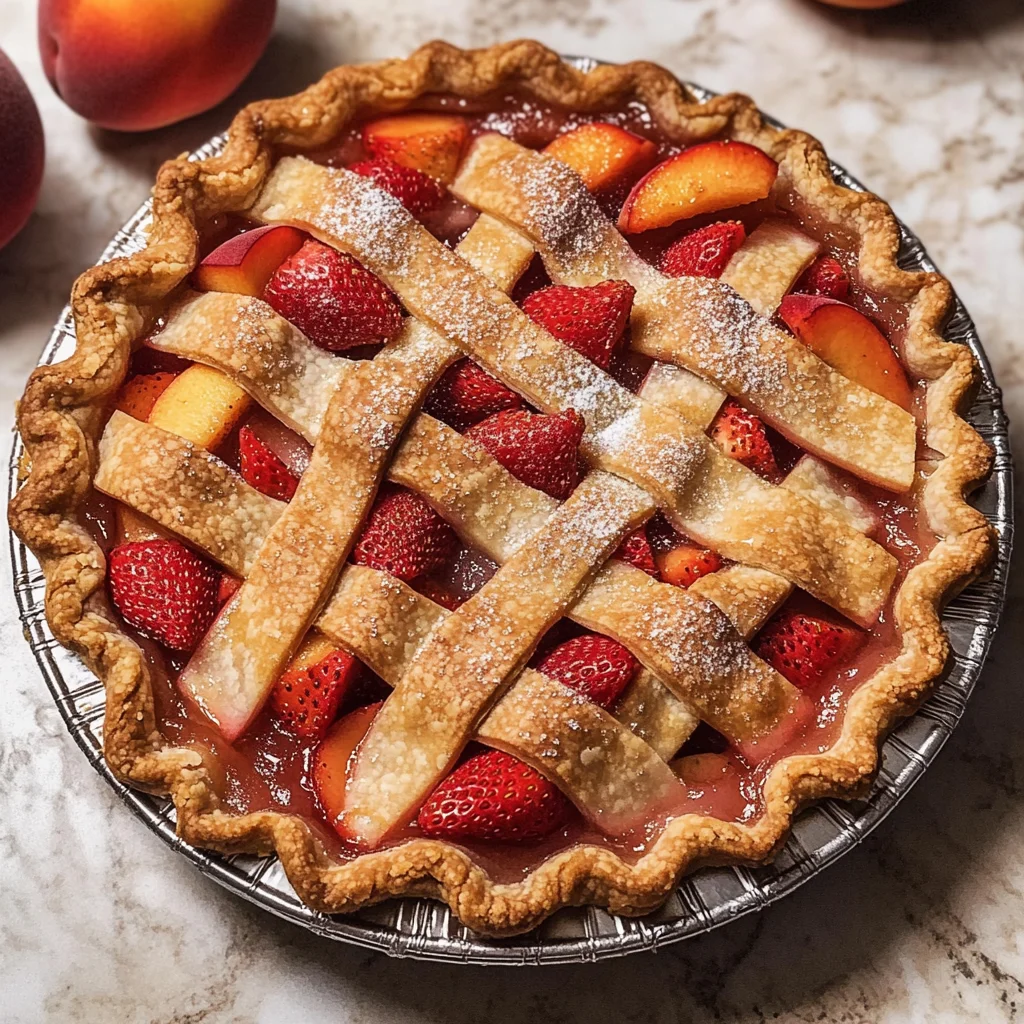
Brown Butter Strawberry Peach Pie
There’s something utterly magical about baking a pie, isn’t there? The way the aroma of warm fruit and butter wafts through the air, wrapping around you like a cozy embrace, is simply unparalleled. This Brown Butter Strawberry Peach Pie is more than just a dessert; it’s a heartfelt expression of summer’s bounty, a celebration of juicy strawberries and luscious peaches, all lovingly encased in a rich, nutty brown butter crust. Picture yourself slicing into this golden treasure; the filling bubbles with excitement as it spills over, inviting you to take that first bite. It’s sweet and tart, perfectly balanced with the buttery goodness of the crust—a symphony of flavors that sings summertime joy! Trust me when I say this recipe will become a cherished part of your culinary repertoire.
As we embark on this journey together to create the ultimate Brown Butter Strawberry Peach Pie, let’s take a moment to appreciate its roots. Pies have long been a staple in American kitchens, symbolizing warmth, comfort, and togetherness. The combination of strawberries and peaches brings forth an irresistible contrast—tartness meeting sweetness in every forkful. This pie is perfect for family gatherings or summer barbecues but can also transform an ordinary weekday evening into something extraordinary. My friends often tell me that there’s something profoundly satisfying about sharing homemade pie; each slice tells a story of love and labor. So grab your apron and let’s create something truly special!
Brown Butter Strawberry Peach Pie: A Summer Delight Like No Other
This delightful pie captures the essence of summer with its vibrant fruit filling and tantalizing crust.
Ingredients:
Now that you’re feeling inspired, let’s dive into our ingredient list! Each element plays a crucial role in crafting this breathtaking pie, so I encourage you to pay close attention.
- 1 cup cold unsalted butter. The star of our crust! Using cold unsalted butter helps achieve that flaky texture we all adore. Cold butter creates little pockets as it melts during baking, resulting in layers that are divinely tender yet crisp. Unsalted is key here because it allows us to control the saltiness—plus, we’ll be adding our own salt later for balance.
- 2 ⅔ cups + 1 tbsp all-purpose flour (see notes below for measuring). Flour serves as the backbone of our crust. It provides structure and stability while allowing us to create that desired flaky texture. When measuring flour, it’s essential not to pack it down; instead, use the spoon-and-level method to ensure accuracy—too much flour can lead to a dense crust.
- 3/4 teaspoon fine sea salt. Salt enhances flavor and balances sweetness beautifully. It’s like magic—just a hint elevates all components of our pie without making it taste salty at all! Make sure to use fine sea salt for even distribution within the dough.
- 1/2 cup water. This will help bind our crust together while keeping it moist enough to roll out easily. Ice-cold water is essential here; it prevents the butter from melting before we bake and ensures flakiness.
- 1 tbsp apple cider or white vinegar. Adding vinegar may seem unusual but trust me—it helps tenderize the dough by inhibiting gluten formation while amplifying flavor depth subtly.
- 1 whole egg (whisked). The egg acts as our binding agent for the crust while also providing richness and color once baked. Whisk it thoroughly before incorporating; this ensures an even distribution throughout the dough.
- 3 cups fresh sliced peaches. Fresh peaches are absolute gems in this recipe! Their juicy sweetness shines through when baked, creating an incredibly aromatic filling that screams summer bliss! Look for ripe but firm peaches—they should yield slightly when pressed but not feel mushy.
- 3 cups fresh strawberries (hulled and quartered). Strawberries add brightness with their lovely tartness that complements peaches perfectly! Choose berries that smell fragrant—this usually indicates ripeness—and avoid any with bruises or mold.
- ¼ cup granulated sugar. Sugar sweetens our fruit filling beautifully while also helping create that glossy finish once baked—it’s a simple yet vital component for balancing flavors!
- ¼ cup + 1 tbsp cornstarch. Cornstarch acts as a thickening agent for our filling; it absorbs moisture released from fruits during baking without altering flavor significantly! This ensures we avoid soupy pies—a common pitfall!
- 1 tbsp lemon juice & 1 tsp lemon zest: Citrus brightness cuts through sweetness while enhancing overall flavor complexity; both elements are non-negotiable here!
- ¼ tsp fine sea salt (again). Just like before, this boosts flavors across your entire filling—don’t skip out on it!
- 2-3 tbsp Turbinado sugar (optional): If you’re feeling fancy, sprinkle some Turbinado sugar atop your pie before baking! Its coarse texture caramelizes beautifully during cooking for an extra crunch on top—how delightful!
Equipment You’ll Need:
Having the right tools makes all the difference in creating your Brown Butter Strawberry Peach Pie! These essential partners will support you throughout this delicious endeavor.
- Mixing bowls: A set of mixing bowls in various sizes is invaluable for keeping ingredients organized as you prepare your filling and crust separately.
- Pastry cutter or food processor: For making your brown butter crust effortlessly smooth and flaky; if using a pastry cutter requires some elbow grease but gives you complete control over texture!
- Rolling pin: Essential for rolling out your dough evenly—the goal is uniform thickness without tearing or overworking!
- 9-inch pie dish: Opt for glass or ceramic if possible—they provide even heat distribution for consistent baking results while allowing visual cues on doneness!
- Baking sheet: Place underneath your pie dish to catch any drips during baking—a must-have unless you’re prepared to scrub spilled juices from your oven later!
Preparing the Brown Butter Strawberry Peach Pie
Step 1: Browning Your Butter
To begin creating that mesmerizing brown butter flavor which elevates our pie crust from ordinary to extraordinary, let’s first melt our unsalted butter in a medium saucepan over medium heat until completely melted. Stir occasionally with a wooden spoon or silicone spatula—it might take about 5 minutes before you notice subtle bubbling sounds turning into sizzling whispers as water evaporates away! Keep an eye on it because things can change quickly here—the moment you see tiny brown specks forming at the bottom along with a nutty aroma wafting through your kitchen…that’s when magic happens! Once browned but not burnt (think hazelnut!), remove from heat immediately so it doesn’t continue cooking further; transfer immediately into another bowl to stop cooking process altogether—it should cool slightly before being incorporated into dough later on!
Step 2: Making Your Crust
In another large mixing bowl combine measured flour (remember those precise measurements?), fine sea salt—and cooled brown butter mixture once it’s reached room temperature—to avoid melting other ingredients prematurely! Mix gently using either fingers or pastry cutter until crumbly resembling wet sand consistency where no visible chunks remain intact—that means we’re well on our way toward creating those much-coveted layers within crust when baked later on! Gradually add ice-cold water mixed with vinegar one tablespoon at-a-time until dough comes together (it shouldn’t stick too much). Don’t rush this step; patience pays off here since overworking leads to tough results later down line which we want none of!
Step 3: Chilling Your Dough
Once you’ve formed your beautiful dough ball shape wrap tightly in plastic wrap then refrigerate at least 30 minutes up-to two hours—this crucial step allows gluten strands relax ensuring tenderness post-bake plus provides easier rolling experience upon return after chilling period ends so don’t skip out here friends! While waiting why not wash those gorgeous strawberries & peaches? It’s always helpful prepping everything beforehand especially if entertaining guests—they’ll be amazed watching how smooth everything flows when served warm!
Step 4: Prepping Fruit Filling
With fresh fruits now washed & sliced appropriately start combining them inside large mixing bowl along with granulated sugar (to draw moisture), cornstarch (for thickening), lemon juice/zest plus pinch salt at last moment just prior stirring gently ensuring even coating throughout each piece then set aside letting juices marinate together while preparing next steps ahead…this time should allow flavors meld beautifully enriching end result immensely trust me on this front!
Baking Your Perfect Brown Butter Strawberry Peach Pie
Now comes perhaps one of my favorite moments—the baking phase when all our hard work transforms into something divine! Slide your assembled pie onto a middle rack in that preheated oven and let magic unfold over approximately 55-70 minutes; keep an eye on things as they cook away! Baking time may vary based on individual ovens—what’s important here is watching for visual cues like bubbling juices peeking through those slits or golden-brown edges forming around crusts.
The aroma wafting through your kitchen during these moments? Oh dear friend—you won’t believe how intoxicatingly delightful it becomes! It’s almost impossible not to sneak peeks every so often; doing so only builds anticipation further as scents swirl around us like whispers promising sweet satisfaction ahead.
Halfway through baking time (around minute 30), take note: if edges begin browning too quickly while centers still look pale—simply cover them with strips of aluminum foil until remaining baking time passes. This simple technique protects against over-browning while allowing everything else below also cooks through perfectly!
When finished baking arrives after what seems like eternity filled with aromas dancing nearby… Remove pie from oven carefully using mitts (trust me—you don’t want burnt hands!) Allow cooling completely at room temperature before diving in—that chill helps ensure slices hold shape better than warm gooey messes would otherwise offer!
Step 9: The Finishing Touch
And there we have it—the grand finale awaits as we serve our Brown Butter Strawberry Peach Pie alongside scoops upon scoops of creamy vanilla ice cream—or perhaps whipped coconut cream if you’re feeling adventurous! This addition brings contrasting temperatures together harmoniously while enhancing flavors beyond comprehension… I mean who doesn’t love melty goodness mingling amid bright fruity notes?
As you slice into this masterpiece revealing vivid fruit nestled within flaky layers beneath delicate sheen created by browning butter magic… Pause momentarily—you deserve this moment—to appreciate just how far you’ve come through every stage leading us here today!
So gather ’round friends and family alike because nothing beats sharing homemade desserts made from love—and trust me when I say they’ll absolutely adore every delectable bite waiting patiently ahead! Enjoy summer’s bounty encapsulated perfectly within each slice served warm or chilled straight from fridge leftovers days later—I promise it’ll only get better as flavors deepen further still!
In conclusion my dear friend… indulge wholeheartedly knowing each spoonful carries memories crafted lovingly shared amongst loved ones forevermore—because that’s what makes cooking truly exceptional after all… Happy baking everyone!
Storage and Enjoyment Tips for Your Brown Butter Strawberry Peach Pie
Now that your kitchen is filled with the heavenly aroma of baked brown butter goodness, and your pie has emerged from the oven looking absolutely glorious, it’s time to revel in the joy of enjoying this masterpiece! I can hardly contain my excitement as I imagine you slicing into that golden crust, revealing the luscious layers of juicy strawberries and peaches. But what happens if you have leftovers? Fear not! Let’s talk about how to keep that delightful pie fresh and fabulous for future enjoyment.
Storing Leftover Brown Butter Strawberry Peach Pie
To ensure your Brown Butter Strawberry Peach Pie remains as tempting as the moment it was pulled from the oven, proper storage is essential. Allow it to cool completely before storing; this helps maintain that lovely texture. Transfer any leftover pie slices into an airtight container or cover it tightly with plastic wrap. If you place it in the fridge, it will stay delicious for up to five days—though trust me, it may not last that long because it’s simply irresistible! To keep the crust crisp and prevent sogginess, consider placing a slice of bread in with your pie; this little trick absorbs excess moisture while keeping everything tasty. When you’re ready to indulge again, simply reheat individual slices in a warm oven for about 10-15 minutes until warmed through, allowing those flavors to awaken anew!
Freezing Brown Butter Strawberry Peach Pie for Later
If you’ve found yourself with a surplus of pie or want to prepare ahead for a special occasion, freezing is an excellent option! To freeze your delightful creation properly, wrap individual slices tightly in plastic wrap or aluminum foil and then place them inside a freezer-safe bag or container. You can enjoy your pie frozen for up to three months without compromising its flavor or texture. When you’re ready to enjoy a slice (or two!), simply transfer them from the freezer to the refrigerator overnight to thaw gently or pop them directly into a preheated oven at 350°F (175°C) for about 20-25 minutes. This way, you’ll savor that warm, comforting symphony of flavors just like when it was freshly baked! Isn’t it wonderful how you can extend this treat’s life while maintaining its deliciousness?
Brown Butter Strawberry Peach Pie

Brown Butter Strawberry Peach Pie is a summer sensation that beautifully combines the sweetness of ripe strawberries and peaches with the rich, nutty flavor of brown butter in a flaky crust. This delightful dessert captures the essence of warm sunlit days and joyful gatherings, making it perfect for family barbecues or cozy evenings at home. Each slice reveals bubbling fruit nestled within a buttery embrace, inviting you to savor every bite. Whether served warm with a scoop of vanilla ice cream or enjoyed chilled, this pie will be an unforgettable addition to your seasonal repertoire.
- Prep Time: 30 minutes
- Cook Time: 60 minutes
- Total Time: 1 hour 30 minutes
- Yield: Makes approximately 8 servings 1x
- Category: Dessert
- Method: Baking
- Cuisine: American
Ingredients
- 1 cup cold unsalted butter
- 2 ⅔ cups + 1 tbsp all-purpose flour
- 3/4 teaspoon fine sea salt
- 1/2 cup ice-cold water
- 1 tbsp apple cider vinegar
- 3 cups fresh sliced peaches
- 3 cups fresh quartered strawberries
- ¼ cup granulated sugar
- ¼ cup + 1 tbsp cornstarch
- 1 tbsp lemon juice and zest
Instructions
- To make the crust, melt the cold unsalted butter in a saucepan until browned, then let it cool slightly.
- In a bowl, mix flour, sea salt, and the cooled brown butter until crumbly. Gradually add ice-cold water mixed with vinegar until dough forms.
- Wrap the dough in plastic wrap and refrigerate for at least an hour.
- For the filling, combine sliced peaches and strawberries with sugar, cornstarch, lemon juice, and zest in a bowl; let sit for about 20 minutes.
- Roll out one dough disc into a circle and place it in a pie dish. Pour in the fruit filling.
- Roll out the second dough disc and cover the filling; seal edges and cut slits for steam to escape.
- Bake at 400°F (205°C) for about 55-70 minutes or until golden brown.
Nutrition
- Serving Size: 1 serving
- Calories: 320
- Sugar: 18g
- Sodium: 150mg
- Fat: 16g
- Saturated Fat: 10g
- Unsaturated Fat: 5g
- Trans Fat: 0g
- Carbohydrates: 43g
- Fiber: 2g
- Protein: 3g
- Cholesterol: 30mg