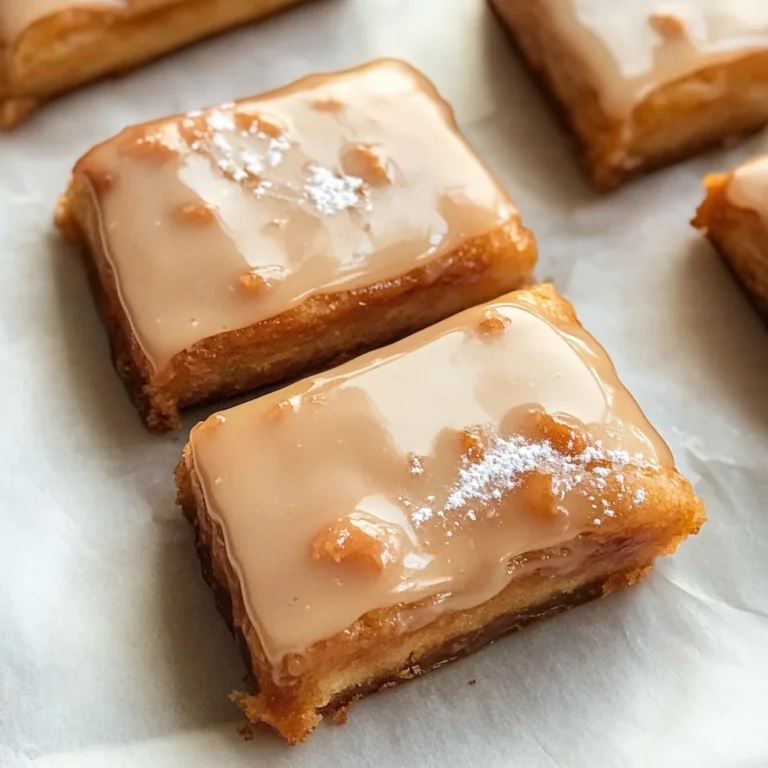
Apricot Shortbread Bars Recipe
There’s something utterly magical about baking, isn’t there? The way the whole house fills with warm, buttery aromas that wrap around you like a cozy blanket, transporting you to fond memories and moments of joy. And when it comes to my beloved Apricot Shortbread Bars Recipe, it’s not just about the finished product; it’s about the journey—the aromas wafting through your kitchen, the thrill of combining simple ingredients into something extraordinary. With every chop of the dried apricots and every crumble of the buttery crust, you’re crafting a little slice of happiness that can brighten anyone’s day. I promise you, this recipe is more than just a dessert; it’s a heartfelt hug in bar form that brings comfort and satisfaction with every bite.
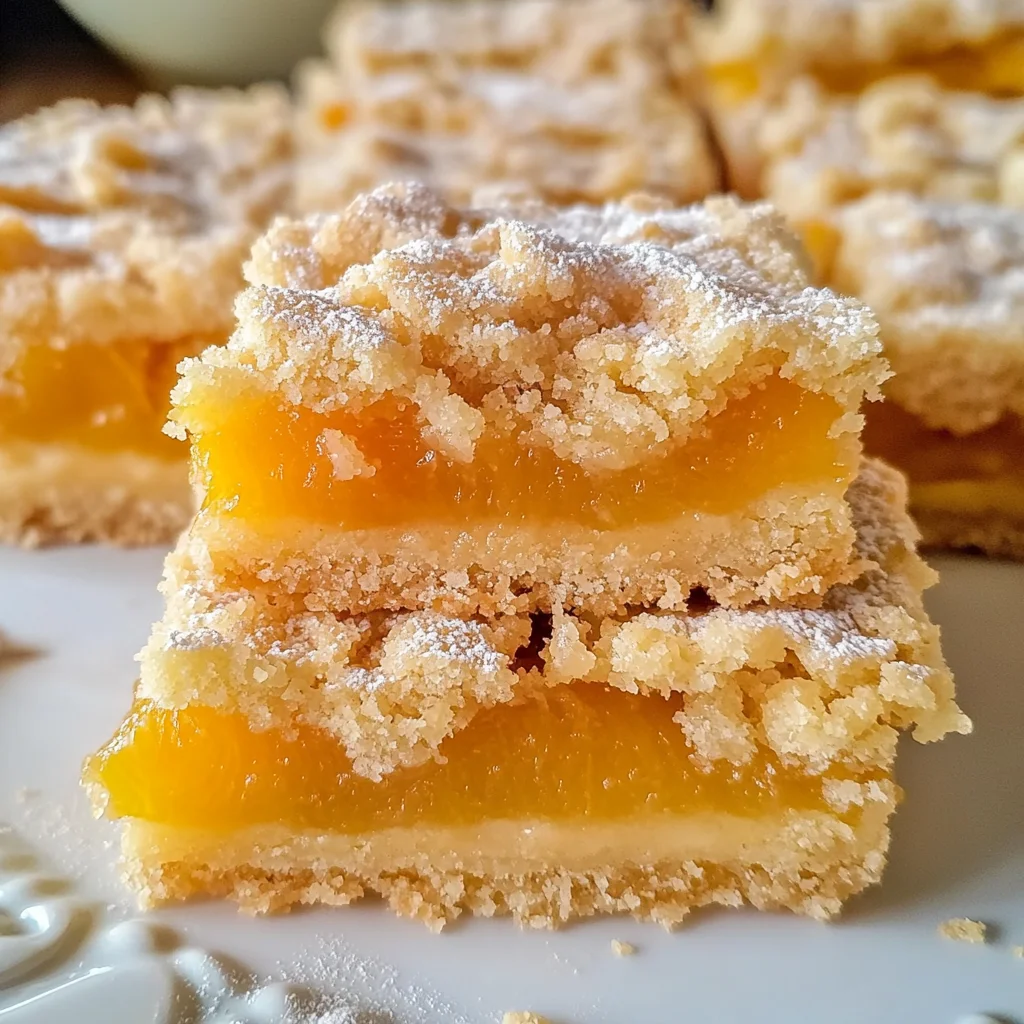
As you embark on this culinary adventure with me, get ready for an experience that pays homage to both tradition and innovation. These Apricot Shortbread Bars have a delightful balance of textures—the crispness of the shortbread crust meets the luscious, tangy-sweet apricot filling—creating an absolute symphony of flavors. What truly makes these bars shine is their versatility; they’re perfect for a casual afternoon treat, an elegant dessert at gatherings, or even a delightful addition to lunchboxes. Each time I share them with friends or family, I see eyes light up in delight as they take their first bite—it’s these precious moments that make cooking such a deeply rewarding experience.
Apricot Shortbread Bars Recipe: A Sweet Symphony of Flavor
This recipe for Apricot Shortbread Bars is one that I hold dear to my heart. It beautifully intertwines sweet and tart flavors with a perfectly crumbly texture that is simply irresistible. Trust me on this one; once you’ve made these bars, you’ll find yourself returning to them again and again. So gather your ingredients and let’s dive into this delightful creation together!
Ingredients:
As we set out on this baking journey together, let’s take a moment to appreciate each ingredient we’ll be using. Every component plays a pivotal role in crafting these delicious bars.
- 3 cups (360g) all-purpose flour. This is the backbone of our shortbread crust! All-purpose flour provides structure and stability while allowing our bars to maintain that delicate crumbly texture we adore. When selecting flour, look for brands that have been finely milled; they’ll yield better results in texture. You can also substitute half with whole wheat flour for a nuttier flavor—just keep in mind it may alter the texture slightly.
- 1 cup (200g) granulated sugar. Sugar does more than just add sweetness; it contributes to both flavor enhancement and texture development in our bars. When mixed with butter during creaming (which we’ll do shortly), sugar helps create air pockets that make our crust light and tender. If you’re watching your sugar intake or prefer alternatives, coconut sugar can be used instead—but expect a slight change in color and flavor.
- 1 teaspoon baking powder. This little powerhouse ensures our crust has just the right lift! Baking powder introduces carbon dioxide during baking, helping create those lovely pockets within our shortbread that lead to a tender bite rather than something overly dense or heavy.
- 1/2 teaspoon salt. Don’t overlook salt; it acts as a flavor enhancer! A pinch of salt balances out sweetness beautifully while bringing out all those complex tastes from our ingredients—it’s like magic in your mouth! Use fine sea salt for even distribution throughout the dough.
- 1 1/2 cups (340g or 3 sticks) unsalted butter, cold and cut into small cubes. Butter is essential here—it adds richness and creates that melt-in-your-mouth sensation we crave in shortbread. Using unsalted butter allows us to control the salt level (which we’ve already added). Cold butter is crucial because it forms flaky layers within the dough when baked—so resist the temptation to soften it!
- 1 large egg, lightly beaten. Eggs provide moisture and binding properties while enriching flavor; they help bring everything together seamlessly! Ensure your egg is at room temperature before mixing it into the dough—this helps emulsify better with the fat from our butter.
- 1 teaspoon vanilla extract. This aromatic ingredient elevates flavors significantly; think of it as adding depth to our shortbread base! Opt for pure vanilla extract over imitation for an authentic taste experience—your taste buds will thank you!
- 2 cups (about 350-400g) dried apricots, roughly chopped. The star ingredient! Dried apricots bring sweetness balanced by a gentle tartness that adds brightness amidst all this buttery goodness—we want pieces that are moist but not overly sticky or tough since we’ll cook them down later into filling.
- 1 1/2 cups water. Water will help rehydrate our dried apricots during cooking—this step is vital to ensure they soften beautifully before melding into our filling mixture.
- 1/2 cup (100g) granulated sugar (adjust according to apricot sweetness). This additional sugar helps sweeten our cooked apricots without overwhelming their natural flavor profile—it can be adjusted depending on whether your dried fruits are naturally sweeter or more tart.
- 2 tablespoons fresh lemon juice. Lemon juice adds brightness and acidity—a key player in balancing flavors! It cuts through some richness while enhancing those lovely fruity notes from our filling.
- 1/4 teaspoon almond extract (optional but highly recommended). Almond extract lends an exquisite depth of flavor that complements apricots wonderfully—it enhances their innate nuttiness without overpowering them!
- Pinch of salt for seasoning—the final touch that ties everything together!
With all these beautiful ingredients gathered around us, we’re well on our way to creating something truly special!
Equipment You’ll Need:
Having the right tools makes all the difference when embarking on any culinary adventure—and baking is no exception! While these items may not be ingredients themselves, think of them as essential partners in creating something wonderful together.
- 9×13 inch baking pan – A classic choice for making bars like ours! The size is perfect for evenly distributing heat while providing ample room for your delicious creation without crowding it too much during baking.
- Medium saucepan – This trusty vessel will help us cook down those dried apricots into a luscious filling full of flavor! Choose one with thick sides for even heat distribution—that way nothing burns while we simmer away!
- Mixing bowls – Having several sizes at hand allows flexibility whether you’re whisking dry ingredients together or combining wet ones separately before mixing them in!
- Pastry blender or food processor – For cutting cold butter into flour until crumbly perfection is achieved! Using either tool saves time but gives similar results—choose whichever feels best for you!
- Whisk & spatula – Essential tools for integrating ingredients smoothly without lumps remaining behind—these two will ensure everything blends seamlessly together!
Now that we have all our equipment ready alongside those lovely ingredients waiting patiently…let’s dive deeper into making these Apricot Shortbread Bars come alive!
Step 1: Crafting Your Delightful Apricot Filling
In a medium saucepan over medium heat, combine those chopped dried apricots with water and sugar—watch as they begin to meld together beautifully! Bring everything up to a gentle simmer while stirring occasionally so nothing sticks or burns along the bottom—a bit like coaxing hidden flavors out into daylight! Once simmering away happily alongside each other, reduce heat low enough where bubbling slows down but still continues steadily—this allows ample time for those apricots’ natural sugars releasing their sweetness without turning mushy too soon! Cover your pan now (but don’t forget about stirring occasionally!), letting them cook down gently anywhere from 15–20 minutes until tenderized fully with most liquids absorbed—a beautiful transformation indeed!
Once they’ve reached desired tenderness remove from heat; stir in fresh lemon juice alongside almond extract if using plus pinch salt—it adds extra layers making everything sing harmoniously together! Now allow this filling mixture time cooling slightly before transferring elsewhere—they’re heavenly fragrant already but give yourself permission—for smoother consistency consider pulsing through immersion blender briefly if desired—not everyone likes chunks after all—or leave as-is depending on preferences here too!
Step 2: Preparing Our Buttery Crust
Preheat your oven now at 375°F (190°C)—let’s get things warmed up nicely so we can bake soon enough! While waiting prepare your trusty baking pan by greasing lightly plus dusting some flour across its surface—that way nothing sticks later during removal process post-baking which would be tragic indeed since we want clean edges always right? In another large mixing bowl grab some whisk action going whilst combining all-purpose flour alongside granulated sugar plus baking powder together followed by added pinch salt—you’re setting foundations strong here ensuring excellent rise later too!
Once combined properly add chilled cubed butter directly into mixture next—the key here lies within gently cutting butter using pastry blender until resembling coarse crumbs appear with pea-sized pieces remaining intact still here—you know what I mean don’t ya? If opting food processor avoid over-pulsing lest get pancake batter instead—aim less than ten seconds max depending model used overall then mix lightly beating egg alongside vanilla separately within small bowl before incorporating both egg mixture plus forkfuls dry crumbs together slowly till cohesive dough starts forming nicely…remember don’t rush this step either folks patience yields rewards always especially when creating something so divine later ahead!
Step 3: Assembling Our Bars
Now it’s time to reserve about 1½–2 cups worth from shortbread dough aside—this will become crumble topping later on top glorious apricot layer below after all! With remaining portion press evenly across bottom prepared pan firmly as possible using fingers/measuring cup base until smooth surface achieved—we need solid foundation supporting future layers stacked above trust me there’s method behind madness here folks… Next spread cooled yet velvety smooth apricot filling generously atop pressed crust leaving approximately quarter-inch border around edges if possible—it’ll help prevent overflow during bake phase plus gives visual appeal once sliced post-cooling period completed afterward!
Step 4: Crumbling & Baking Away!
Now comes crumbling reserved shortbread dough evenly across layered apricot heaven below—we want balance here folks between crusty topping contrasted against luscious fruitiness underneath so sprinkle lovingly throughout ensuring coverage remains consistent without too many gaps present… Place entire pan inside preheated oven awaiting sweet transformation unfolds over next thirty-five minutes maximum turning golden brown color overall watch closely edges become lightly browned while bubbly goodness emerges visible through sides too—it’s pure bliss seeing progress unfold step-by-step isn’t it?
Stay tuned because soon enough we’ll conclude final steps leading us closer towards tasting success achieved via patience cultivation alongside love put forth throughout entire process being witnessed firsthand…
Step 5: Letting the Flavors Marry – Cooling is Crucial
Once your Apricot Shortbread Bars are emerging from the oven, it’s essential to give them a chance to cool completely. I cannot stress this enough: patience is key here! If you try to cut into these delightful bars while they’re still warm, you’ll be met with a crumbling mess instead of those beautiful squares or rectangles that are so satisfying to serve and share. The cooling process allows the filling to set beautifully, melding the flavors of the apricots and lemon juice into a luscious, cohesive unit that practically melts in your mouth. You want that filling to have time to thicken slightly as it cools, creating a texture that’s both gooey yet stable enough to hold its shape when you finally slice into those golden beauties.
This cooling phase typically takes about 2-3 hours at room temperature, although if you’re eager (and I totally get that!), you can pop them into the refrigerator after an hour of cooling on the counter. Just remember: if you rush this step, you risk losing that perfect balance between crust and filling. The shortbread needs time to firm up too! You’re looking for a uniform texture where the crust feels sturdy enough to support the weight of that apricot filling but still has that melt-in-your-mouth quality when you take a bite. So resist the temptation; this moment will pay off in flavor and presentation!
Step 6: Slicing with Love – The Art of Cutting
Now comes one of my favorite parts of making these bars – slicing them into perfect portions! Once your Apricot Shortbread Bars have cooled completely (remember, patience!), it’s time to cut them into squares or bars. If you’ve used parchment paper, gently lift them out using the overhang; this makes for such an easy transfer! Place them on a cutting board and grab a sharp knife. Here’s a pro tip: if you chill your bars slightly in the refrigerator for about 15-20 minutes before cutting, you’ll end up with cleaner cuts! This is because cold shortbread tends to firm up even more, making it much easier to slice through without disturbing the delicate interior.
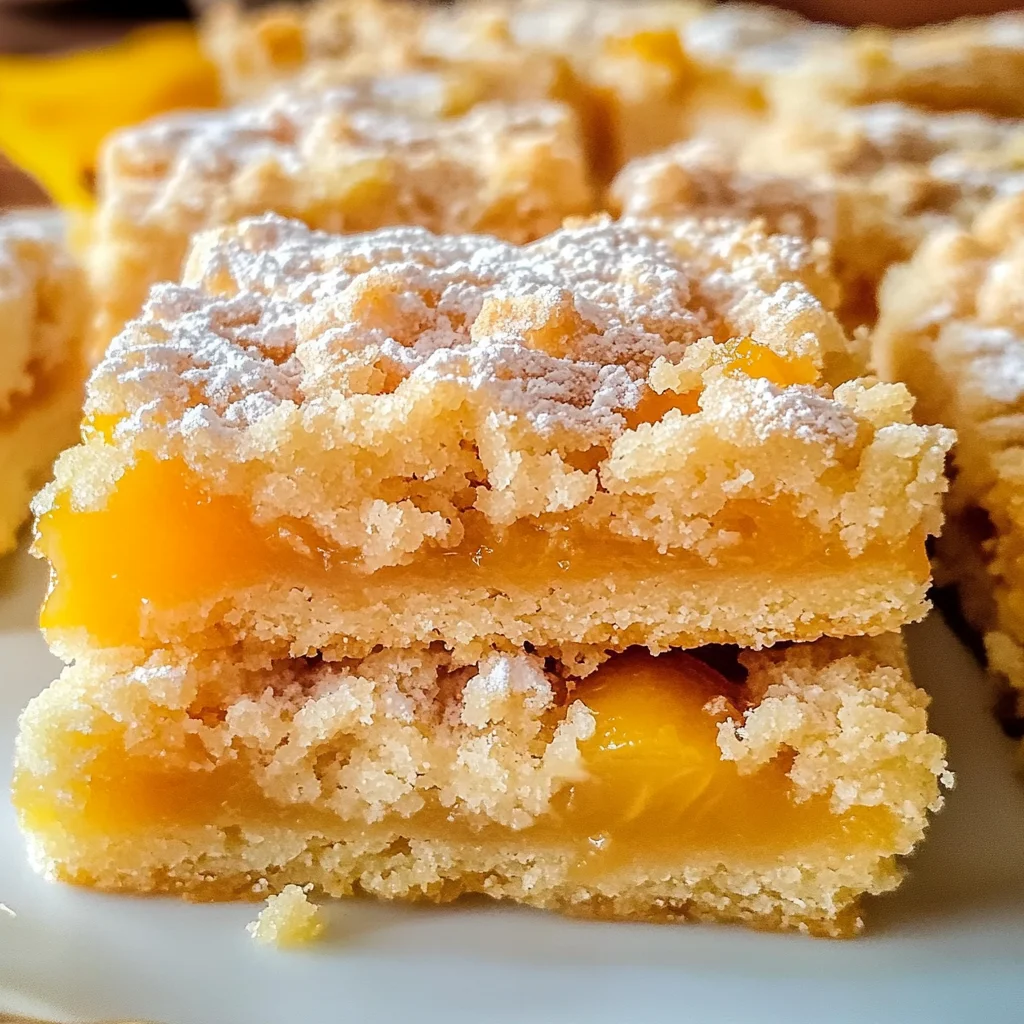
As you cut, wipe your knife clean between each slice; this small step ensures that each piece looks as beautiful as it tastes without smudges or remnants from prior cuts marring their surfaces. Aim for even-sized portions – after all, we want everyone enjoying these delicious treats equally! And don’t forget to admire your handiwork; those vibrant apricot hues peeking through the golden-brown crust are simply stunning.
Step 7: The Finishing Touch – Presentation Matters
Now that your Apricot Shortbread Bars are beautifully sliced, it’s time for presentation! I always believe that we eat with our eyes first, don’t you? Arrange these delectable squares on a lovely platter or cake stand; perhaps sprinkle some powdered sugar on top for an elegant touch. This not only adds visual appeal but also an extra hint of sweetness that complements the tartness of the apricots beautifully. You could even garnish with thin slices of fresh lemon or a few sprigs of mint for that burst of color and freshness.
As you serve these bars to family and friends, take a moment to relish their reactions. There’s something profoundly satisfying about watching someone take their first bite—seeing their eyes light up as they taste those layers of buttery shortbread and sweet-tart apricot filling is simply priceless! Trust me on this; sharing food is one of life’s greatest joys, and these bars will undoubtedly spark happiness at any gathering.
Step 8: Storing Your Treasures – Keeping Them Fresh
Once you’ve served up your Apricot Shortbread Bars (if there are any left!), it’s important to store them properly so they remain just as delightful as they were fresh out of the oven. To do this effectively, place any uneaten bars in an airtight container lined with parchment paper between layers. This keeps moisture at bay while preventing them from sticking together—nobody wants a messy storage situation!
These bars can typically last about five days at room temperature if stored correctly; however, if you’d like them to last longer (and who wouldn’t?), consider freezing them! Simply wrap each bar individually in plastic wrap followed by aluminum foil or place them in a freezer-safe container. They can be frozen for up to three months without losing their delightful texture or flavor. When you’re ready for another taste sensation, simply thaw them overnight in the fridge or let them sit at room temperature for an hour before indulging once more!
Conclusion:
As we wrap up our delightful journey through this Apricot Shortbread Bars recipe, I can’t help but feel a wave of excitement wash over me! Each step we’ve taken together has brought us closer not only to creating something delicious but also to embracing the beautiful simplicity of baking. These bars are truly extraordinary; the harmony between the crumbly shortbread base and the sweet-tart apricot filling creates a symphony of flavors that dances on your palate. It’s moments like these that remind me why I fell in love with cooking in the first place—the ability to create joy through something so simple yet profound.
This recipe is an absolute must-try not just because it’s delicious but also because it embodies warmth and joy—qualities that make any kitchen feel like home. Whether it’s a cozy afternoon gathering with friends or a simple family dessert after dinner, these bars shine brightly on any occasion. Picture yourself pulling them from the oven, golden-brown and bubbling ever-so-slightly; it’s hard not to feel giddy at such a sight! The moment you take that first bite, I promise you’ll be swept away by not just flavor but also nostalgia—a reminder of sunny days filled with laughter.
Imagine savoring one alongside a cup of fragrant herbal tea for an afternoon pick-me-up, or perhaps pairing it with vanilla ice cream for a truly decadent experience after dinner. They can also shine at potlucks or bake sales—you know those events where everyone gathers around food? These bars will have people coming back for seconds! And if you’re feeling adventurous, why not enjoy one topped with whipped coconut cream sprinkled with toasted almonds? Or perhaps drizzle some dark chocolate over the top for an indulgent twist?
Feeling adventurous? This recipe is wonderfully adaptable! You could swap out apricots for dried peaches or even cherries if you’re seeking something new—each fruit brings its own unique flair that enhances the overall experience beautifully. You might even experiment with adding spices like cinnamon or nutmeg into the shortbread dough for an autumnal touch that warms your soul during chilly evenings. Whatever path you choose, I encourage you to dive into this culinary adventure wholeheartedly! Share your experiences with me—I can’t wait to hear how your own baking journey unfolds!
Apricot Shortbread Bars
Indulge in the delightful experience of making Apricot Shortbread Bars, where a buttery, crumbly crust meets a sweet-tart apricot filling. These bars are not just a treat; they bring joy and warmth to every occasion. Perfect for gatherings, casual afternoons, or even lunchboxes, these irresistible squares promise to brighten anyone’s day. The combination of textures and flavors creates a symphony that will have your friends and family coming back for more. Get ready to create a heartwarming dessert that’s sure to become a staple in your baking repertoire!
- Prep Time: 20 minutes
- Cook Time: 35 minutes
- Total Time: 55 minutes
- Yield: About 16 servings 1x
- Category: Dessert
- Method: Baking
- Cuisine: American
Ingredients
- 3 cups all-purpose flour
- 1 cup granulated sugar
- 1 teaspoon baking powder
- 1/2 teaspoon salt
- 1 1/2 cups unsalted butter (cold, cubed)
- 1 large egg (lightly beaten)
- 1 teaspoon vanilla extract
- 2 cups dried apricots (chopped)
- 1/2 cup granulated sugar (for filling)
- 2 tablespoons fresh lemon juice
Instructions
- Preheat oven to 375°F (190°C). Grease and flour a 9×13 inch baking pan.
- In a medium saucepan, combine chopped apricots with water and sugar. Simmer on low heat for about 15–20 minutes until tender.
- In a large bowl, mix flour, sugar, baking powder, and salt. Cut in cold butter until crumbly.
- Add egg and vanilla; mix until combined.
- Reserve some dough for topping. Press remaining dough into the bottom of the prepared pan.
- Spread the cooled apricot mixture over the crust and crumble reserved dough on top.
- Bake for 35 minutes or until golden brown; let cool completely before slicing.
Nutrition
- Serving Size: 1 bar (45g)
- Calories: 220
- Sugar: 14g
- Sodium: 135mg
- Fat: 12g
- Saturated Fat: 7g
- Unsaturated Fat: 4g
- Trans Fat: 0g
- Carbohydrates: 25g
- Fiber: 1g
- Protein: 2g
- Cholesterol: 30mg