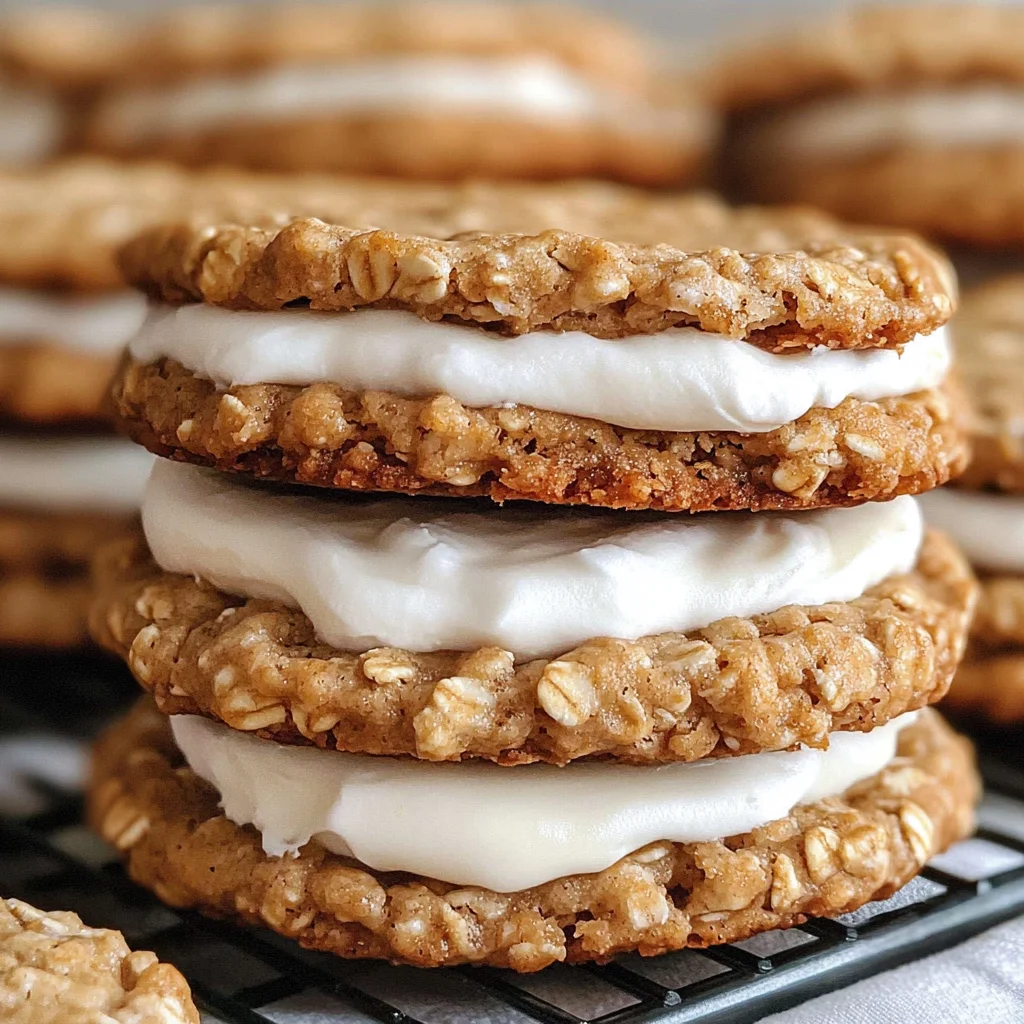
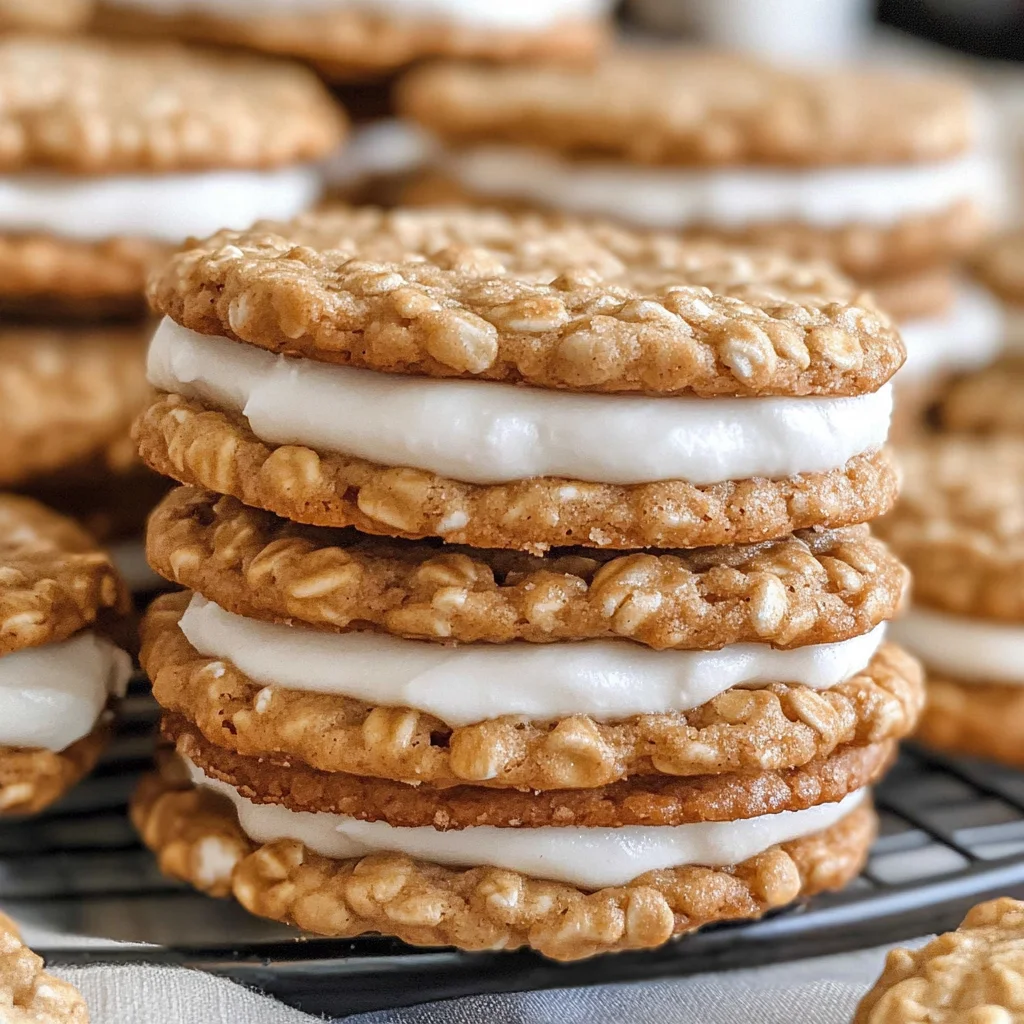
Oatmeal Cream Pies
There’s something truly magical about the act of baking, isn’t there? It’s more than simply combining ingredients; it’s a journey that transforms simple items into something extraordinary. As I sit here contemplating my latest creation—Oatmeal Cream Pies—I’m reminded of the laughter and warmth shared over sweet treats with family and friends. The rich aroma of molasses and vanilla wafting through the kitchen wraps around you like a cozy hug, inviting you to dive into a world where nostalgia meets innovation. These Oatmeal Cream Pies are not just cookies; they are a celebration of comfort, joy, and those cherished moments that linger long after the last crumb has been savored.
What makes these pies even more delightful is their ability to bridge generations. You see, every time I bake them, I think of my grandmother’s kitchen filled with chatter, love, and the irresistible scent of baked goods. This dessert captures that essence perfectly—a soft and chewy oatmeal cookie cradling a luscious vegan marshmallow frosting that dances on your taste buds. Trust me when I say that whether you’re sharing them with kids or adults, these treats evoke smiles and spark joy in every bite. So let’s roll up our sleeves and embark on this delicious adventure together!
Oatmeal Cream Pies: A Sweet Journey Back in Time
Today, we’re diving deep into a recipe that feels like a warm embrace from childhood—the Oatmeal Cream Pie. With every bite, you’ll experience the delightful balance of chewy oats mingled with creamy sweetness that brings back fond memories for many of us. These pies are not just desserts; they are an invitation to slow down and savor life’s little pleasures. As we blend textures and flavors, you’ll find yourself transported back to simpler times when snacks were made with love in kitchens across America.
Ingredients:
As we prepare to create these Oatmeal Cream Pies together, it’s important to take a moment to appreciate each ingredient’s unique role in this delightful recipe. Every item contributes not only flavor but also texture and structure to our cookies.
- 3 cups oats (quick oats or old-fashioned). Oats are the heart of our cookies, providing that signature chewiness we crave. Quick oats will create a finer texture while still delivering on flavor; old-fashioned oats offer a heartier bite that’s equally satisfying. Whichever you choose, make sure they are fresh—old oats can lose their vibrant flavor over time—and don’t hesitate to experiment a bit! They work beautifully alongside spices and sweeteners, making your cookies rich and comforting.
- 1⅔ cups all-purpose flour. This is the backbone of our cookies, providing structure while keeping them tender. I always opt for unbleached flour for its slightly nuttier flavor profile—it’s subtle but adds depth to your baked goods! When measuring flour, be gentle; scooping too forcefully can lead to denser cookies than intended. Sifting it before mixing can also help aerate it if you prefer that extra fluffiness.
- 1 teaspoon ground cinnamon. Ah, cinnamon—the beloved spice that elevates both sweet and savory dishes alike! It adds warmth and complexity to our cream pies while harmonizing beautifully with the natural sweetness of oats and sugars. Using fresh ground cinnamon makes all the difference; it imparts an aromatic quality that’s utterly intoxicating as it bakes.
- ½ teaspoon baking soda. This little powerhouse acts as our leavening agent! It helps our cookies rise gently in the oven while contributing to their lovely golden-brown color. Remember: baking soda needs acid (like molasses) to activate properly in your batter—it’s all about balance in baking!
- ½ teaspoon salt. A pinch of salt is non-negotiable in dessert recipes—it enhances sweetness and intensifies flavors overall! Using fine sea salt allows for even distribution throughout your batter without overwhelming any single component.
- 1 cup unsalted butter (softened but still cool). Butter is crucial for achieving that classic cookie texture we adore—rich yet light! Softening it slightly ensures easy creaming with sugar while maintaining its structure so our cookies don’t spread too much during baking. European-style butter works wonders here if you want an extra layer of richness!
- 1⅓ cup brown sugar, lightly packed (dark brown preferred). Brown sugar contributes moisture due to its molasses content—perfect for creating those soft centers! Dark brown sugar has more molasses than light brown sugar, adding deeper caramel notes which I personally love for this recipe.
- ½ cup granulated sugar. While brown sugar provides moisture and depth, granulated sugar offers crispness along with sweetness! Together they create an ideal balance when mixed to perfection during creaming.
- 2 large eggs. Eggs do double duty—they bind our ingredients together while providing moisture necessary for chewy texture inside each pie! Always use eggs at room temperature for best results—they incorporate better into batters!
- 1½ tablespoons unsulphured molasses. This adds distinct flavor notes reminiscent of gingerbread; it also enhances moisture content while giving our cookies their characteristic chewiness! Ensure you’re using unsulphured variety—it’s cleaner tasting without unwanted bitterness.
- 1½ teaspoons pure vanilla extract. Vanilla is the magical touch that rounds out our flavors beautifully—it’s like a warm hug from grandma! Always choose pure vanilla extract over imitation for authenticity in taste; trust me on this one!
- 12 tablespoons unsalted butter (softened to cool room temperature) for frosting purposes is essential here since we want creamy consistency without being overly runny or stiff when spreading onto cookies later!
- 1½ cups vegan marshmallow creme gives us dreamy creaminess reminiscent of childhood treats without any animal-derived gelatin involved! Its texture ensures perfect spreading consistency between those delicious oatmeal cookies once they’re cooled down nicely!
- 2 cups powdered sugar (sifted if lumpy) rounds off our frosting by adding sweetness alongside fluffiness—you want smoothness here ensuring every bite melts blissfully away!
- ¾ teaspoon pure vanilla extract again—for flavor enhancement within frosting itself since who doesn’t love more vanilla?
- Couple pinches salt balances out sweetness ensuring ultimate satisfaction when indulging into these creamy delights after dinner or snack time!
Equipment You’ll Need:
Before we dive into preparing these scrumptious Oatmeal Cream Pies, let’s gather our trusted kitchen companions—the equipment that will help us create magic together! Having the right tools makes all the difference as they streamline the process and ensure everything runs smoothly like a well-oiled machine.
- Mixing bowls – A set of various sizes will serve as your trusty vessels throughout this adventure—from mixing dry ingredients together in larger bowls to whisking wet components separately in smaller ones making organization key during baking sessions!
- Stand mixer or hand mixer – Investing in either option pays off tremendously here since creaming butter & sugars requires thorough mixing resulting into airy textures needed especially when crafting those delightful cookies! If opting for hand mixers instead keep patience close at hand as things might take longer but totally doable nonetheless!
- Cookie sheet/baking tray – Choose heavy-duty sheets lined with parchment paper which allows optimal heat circulation ensuring even cooking without sticking woes later down line; nobody wants unevenly browned edges ruining beautiful creations right?
- Spatula or wooden spoon – Your trusty companion helping combine mixtures seamlessly while scraping down sides preventing pesky clumps from forming—be sure it’s sturdy enough when tackling dense doughs like ours so no accidents occur midway through mixing!
Now you’ve got everything ready at hand—let’s move onto preparing those delectable Oatmeal Cream Pies that’ll have everyone asking for seconds!
Step 1: Creaming Butter & Sugars Together
Start by placing your softened butter into your mixing bowl—this process known as creaming involves beating together fats (butter) with sugars until lightened in color & fluffy texture forms allowing air pockets inside mixture leading up fluffy baked goods later down road! Using either stand mixer fitted paddle attachment or handheld device mix on medium speed until pale yellow shade emerges after approximately 2–3 minutes; trust me every second counts here don’t rush this step as patience rewards beautifully risen results post-baking stage too!
Step 2: Incorporating Eggs & Molasses
Once you’ve achieved fluffy perfection add eggs one at time ensuring each fully blends before introducing next addition followed by precious splash unsulphured molasses enhancing deep flavors enriching final outcome too—we want uniform consistency among all elements present so taking slow approach pays off immensely here whilst watching mixture thicken up enticingly!
Step 3: Mixing Dry Ingredients Separately
In another bowl combine your dry components including flour , oats , baking soda , ground cinnamon & salt whisking thoroughly until well integrated leaving no lumps behind—we’re building foundation upon which scrumptious cookie pies rest upon later hence why thoroughness remains paramount throughout entire process trust me you won’t regret spending extra minute ensuring everything evenly distributed beforehand!
Step 4: Combining Wet & Dry Ingredients
Now we get fun part where those two worlds collide gently folding dry mixture into wet concoction using spatula until just combined don’t overmix here otherwise gluten develops yielding tough result rather than desired tender bites instead—a few streaks remaining visible brings harmony among diverse textures enriching overall experience awaiting ahead inside oven shortly thereafter once arranged neatly onto prepared sheets spaced adequately apart allowing room expand during baking phase enjoy watching magic unfold before eyes transforming mere batter into glorious treats soon enough!
Let’s keep going through each step until we’ve turned these delightful components into something truly extraordinary together!
Step 5: Creaming the Butter and Sugars to Perfection
Now that we have our dry ingredients harmoniously blended, it’s time to create a delightful base for our cookies by creaming together the softened unsalted butter and the sugars. This step is an absolute game-changer, trust me on this! Start by placing your 1 cup of softened butter into a large mixing bowl. You want it to be soft enough that it yields under pressure but still cool to the touch; this will ensure that your cookies have the perfect chewy texture. Add in 1⅓ cups of lightly packed brown sugar, which brings depth and moisture, along with ½ cup of granulated sugar for a hint of sweetness.
Now, using an electric mixer or a sturdy whisk—whichever you prefer—beat these ingredients together at medium speed for about 2-3 minutes. You’ll know it’s ready when the mixture turns light and fluffy, almost like a cloud of sweet anticipation! The reason we cream butter and sugar is twofold: first, it introduces air into the mixture, which contributes to that delightful texture we crave in cookies. Second, the sugars dissolve into the butter, ensuring even sweetness throughout your dough. Just keep an eye out; you want to avoid over-creaming, as this can lead to denser cookies. Once you see that lovely pale color and airy consistency, it’s time to move on!
Step 6: Adding in Eggs and Flavors
Next up is where the magic truly begins—introducing our wet ingredients! With your creamy butter and sugar mixture ready, crack in two large eggs, making sure they’re at room temperature for optimal blending. This is important because room temperature eggs emulsify more effectively into the batter, creating a smoother mix with no lumps. Toss in 1½ tablespoons of unsulphured molasses—this adds not only moisture but also a rich caramel-like flavor that will deepen as they bake. And let’s not forget about 1½ teaspoons of pure vanilla extract; oh, how I adore vanilla! It adds a fragrant warmth that makes every bite feel like a warm hug.
With everything in the bowl now, beat on low speed until just combined—approximately 30 seconds should do the trick. You’ll want to watch for any remaining streaks of egg or molasses; everything should come together seamlessly without over-mixing. Over-mixing can lead to tough cookies due to gluten development from the flour—definitely not what we want! The aroma wafting through your kitchen will make you feel like you’re experiencing something truly extraordinary right now.
Step 7: Marrying Wet and Dry Ingredients
Now comes one of my favorite parts: introducing our dry ingredients into this velvety mixture! Gradually add your dry mix—a combination of 3 cups of oats, 1⅔ cups of all-purpose flour, 1 teaspoon ground cinnamon, ½ teaspoon baking soda, and ½ teaspoon salt—to the wet mixture. Choose a spatula or wooden spoon for this task; gently fold in those dry ingredients until just incorporated. You want to see remnants of flour disappearing but be careful not to overmix; this is crucial because we want our oatmeal cookies light and tender.
As you fold everything together, take a moment to appreciate how each ingredient plays its part—the oats adding chewiness will create those distinctive textures we cherish in oatmeal cream pies, while the cinnamon lends warmth that dances tantalizingly on your palate. Keep an eye out for pockets of flour or oats; if you spot any shy bits trying to hide away, gently coax them back into the fold but avoid vigorous stirring as much as possible! This step is all about patience; allow those flavors to meld lovingly together before moving forward.
Step 8: Chilling Out for Cookie Perfection
Once you’ve combined everything beautifully into a cohesive dough—a masterpiece if I do say so—you might be tempted to dive right into baking these beauties immediately. But hold on just a second! Here’s where chilling comes into play—a non-negotiable step that will elevate your Oatmeal Cream Pies significantly. Cover your mixing bowl with plastic wrap or transfer your dough onto parchment paper for easier handling later on, then place it in the refrigerator for at least 30 minutes, though I often recommend an hour if time allows.
Why chill? Well, during this cooling period, several incredible things happen! First off, chilling allows the fats in our dough to solidify slightly which helps prevent spreading while baking—this ensures our cookies maintain their lovely shape and thickness rather than flattening out into sad little pancakes. Additionally, resting gives time for flavors to develop further; trust me when I say these pies will only get better as they meld together during this crucial phase! So go ahead and use this time wisely—perhaps brew yourself a cup of tea or coffee while dreaming about all the joy these pies will bring!
Perfectly Baking Your Oatmeal Cream Pies
Now that we’ve prepared our dough with love and care—and allowed it some much-needed chill time—it’s finally time for us to bake these gorgeous treats! Preheat your oven to 350°F (175°C) while you retrieve that chilled cookie dough from its cool hiding spot.
Step 9: Scooping Cookies Like a Pro
Using either a cookie scoop or two tablespoons (the world is full of options!), drop generous mounds of dough onto lined baking sheets spaced about two inches apart from each other; remember—the cookies will spread slightly during baking! If you prefer those perfectly uniform shapes (and who doesn’t?), try rolling each mound gently between your palms before placing them down on the sheet. Each scoop should weigh around 2 tablespoons; however don’t stress too much over perfection here because what matters most is how delicious they’ll taste!
Bake them in your preheated oven for 10-12 minutes until they start turning golden around their edges while still maintaining softness in their centers—this balance is absolutely paramount! If they look slightly underbaked when you pull them out (which they probably will), don’t fret! Just let them rest on the pan for about five more minutes before transferring them onto wire racks—they’ll continue cooking from residual heat which creates that irresistible chewy center we’re after.
Step 10: Preparing Our Sweet Vegan Filling
While our delectable oatmeal cookies are cooling down and filling up your home with mouthwatering scents reminiscent of childhood memories at grandma’s house—or maybe even summer camp—I suggest getting started on our dreamy vegan marshmallow crème filling! In another mixing bowl (yes, let’s embrace those dishes!), combine 12 tablespoons of softened unsalted butter with 1½ cups of vegan marshmallow crème; oh my goodness, can we take just a moment here? This filling is pure bliss!
Using an electric mixer fitted with paddle attachments or simply beating vigorously with elbow grease if that’s what you’ve got available (we’ve all been there!), cream these two magical ingredients together until smooth and fluffy—about two minutes should do it! Then slowly sift in 2 cups of powdered sugar along with a pinch or two of salt (to balance all that sweetness) while continuously mixing until everything comes together luxuriously creamy. Finally stir in another splash of vanilla extract (¾ teaspoon) because why wouldn’t we? This step adds depth that makes biting into these pies utterly intoxicating.
Step 11: Assembling Your Oatmeal Cream Pies
Now comes possibly my favorite part—the assembly process—which transforms simple components into something truly extraordinary! As you gaze upon those golden-brown cookie rounds cooling patiently before you—and trust me when I say they are worth every ounce of anticipation—it’s time to pair them up like soulmates destined for one another. Take one cookie half and generously slather or pipe on that luscious marshmallow filling we’ve just created atop its flat side.
Don’t hold back here; remember there are no wrong amounts when it comes down to sweet indulgence! Grab another cookie half from its matching partner and gently press down until some filling peeks out from between both sides—that gooey goodness is what dreams are made of! Repeat this process until every last morsel has been transformed into delightful sandwich cookies ready for sharing—and trust me—you’ll want everyone around at this stage because nothing beats witnessing their reactions when they take their first bite!
Final Thoughts on Your Oatmeal Cream Pies
After assembling all those beautiful sandwich cookies filled with fluffy marshmallow goodness nestled between soft oatmeal rounds topped off by aromatic cinnamon notes wafting through your space—it’s finally time for everyone’s favorite part: diving right in! Serve these Oatmeal Cream Pies fresh immediately if you’re feeling adventurous—or allow them some quiet time covered at room temperature so flavors deepen further overnight (if they last long enough!).
I promise you: whether enjoyed freshly baked or after resting overnight—the combination remains profoundly satisfying every single time someone takes their first joyful bite wrapped up within nostalgia evoking memories from childhood treats shared among friends or family gatherings filled laughter around cozy kitchens filled with warmth… What could be more heartwarming than sharing such simple yet classic delights? So gather loved ones nearby because deliciousness awaits—and celebrate life with Oatmeal Cream Pies today!
Storage and Enjoyment Tips for Your Oatmeal Cream Pies
Now that you’ve created these delightful Oatmeal Cream Pies, it’s time to dig in and revel in the deliciousness! But before you go devouring every last bite, let’s talk about how to keep them fresh and scrumptious for those moments when you want a sweet treat later. These cookies are not just a one-time joy; they can be savored again and again if stored properly. Trust me, you’ll want to make the most of your baking adventure!
Storing Leftover Oatmeal Cream Pies
To keep your Oatmeal Cream Pies tasting as fresh as the day they were made, you’ll want to store them in an airtight container. This is absolutely paramount because it locks in moisture and flavor, preventing those beautiful cookies from drying out. If you have a large batch, you might consider layering them with parchment paper to avoid sticking – nobody likes a cookie mishap! They will stay delightful at room temperature for about 3-5 days. For an extra touch of magic, try adding a slice of bread into the container; this little trick helps maintain their soft texture by absorbing any excess moisture while keeping your pies wonderfully chewy. After storage, they might take on even more depth of flavor as the ingredients meld together; I promise you won’t regret letting them sit for a day or two. When you’re ready to enjoy them again, simply pull one out and let it come to room temperature or give it a quick zap in the microwave for about 10 seconds—just enough to warm it slightly and revive that creamy filling.
Freezing Oatmeal Cream Pies for Later
If you find yourself with extra Oatmeal Cream Pies (or if you’re just being smart about meal prep), freezing them is an excellent option! To do this properly, wrap each pie individually in plastic wrap or aluminum foil before placing them in a freezer-safe bag or container. This method ensures they’re well protected from freezer burn and keeps each pie tasting divine for up to three months! When you’re ready for a treat, simply remove however many you crave from the freezer and let them thaw at room temperature for about 30 minutes. Not only does this allow you to enjoy these treats at your leisure, but it also means you can have that nostalgic flavor ready whenever the craving strikes without any fuss. The convenience factor here is through the roof—I mean, who wouldn’t want homemade dessert at their fingertips?
Dessert
Oatmeal Cream Pies
Indulge in the nostalgia of Oatmeal Cream Pies, a delightful treat that bridges generations with every bite. These soft, chewy oatmeal cookies sandwich a luscious vegan marshmallow frosting that will transport you back to childhood memories. The rich aroma of baked oats and warm spices fills your kitchen, inviting everyone to gather around and share in the joy of homemade goodness. Perfect for school lunches, afternoon snacks, or cozy gatherings, these pies are not just desserts; they’re a celebration of comfort and happiness. Easy to make and even easier to enjoy, let’s embark on this delicious adventure together!
- Prep Time: 20 minutes
- Cook Time: 12 minutes
- Total Time: 32 minutes
- Yield: Approximately 12 servings 1x
- Category: Dessert
- Method: Baking
- Cuisine: American
Ingredients
- 3 cups oats (quick or old-fashioned)
- 1⅔ cups all-purpose flour
- 1 teaspoon ground cinnamon
- ½ teaspoon baking soda
- ½ teaspoon salt
- 1 cup unsalted butter (softened)
- 1⅓ cups brown sugar (lightly packed)
- ½ cup granulated sugar
- 2 large eggs
- 1½ tablespoons unsulphured molasses
- 1½ teaspoons pure vanilla extract
- 12 tablespoons unsalted butter (for frosting)
- 1½ cups vegan marshmallow crème
- 2 cups powdered sugar (sifted)
- ¾ teaspoon pure vanilla extract (for frosting)
Instructions
- 1. Preheat your oven to 350°F (175°C).
- 2. In a mixing bowl, cream together softened butter, brown sugar, and granulated sugar until light and fluffy.
- 3. Add eggs one at a time, mixing well after each addition. Stir in molasses and vanilla extract.
- 4. In another bowl, whisk together oats, flour, cinnamon, baking soda, and salt.
- 5. Gradually fold dry ingredients into the wet mixture until just combined.
- 6. Chill the dough for at least 30 minutes.
- 7. Scoop mounds of dough onto lined baking sheets about two inches apart.
- 8. Bake for 10-12 minutes until edges are golden but centers remain soft.
- 9. Allow cookies to cool completely before preparing the frosting.
- 10. For the frosting, cream together softened butter and marshmallow crème; gradually mix in powdered sugar and vanilla extract until smooth.
- 11. Assemble by spreading frosting on one cookie half and topping it with another.
Nutrition
- Serving Size: 1 serving
- Calories: 210
- Sugar: 14g
- Sodium: 90mg
- Fat: 9g
- Saturated Fat: 5g
- Unsaturated Fat: 3g
- Trans Fat: 0g
- Carbohydrates: 34g
- Fiber: 2g
- Protein: 2g
- Cholesterol: 30mg