4th of July Trifle
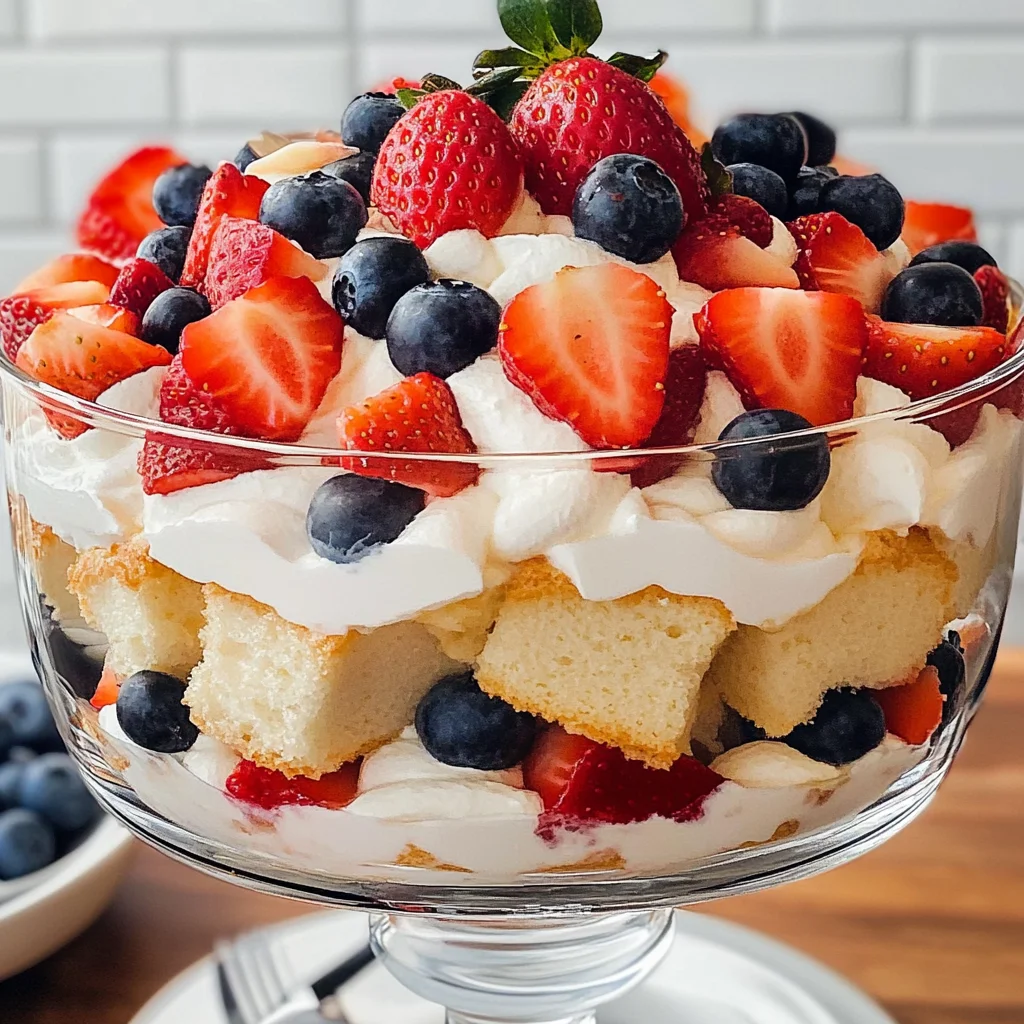
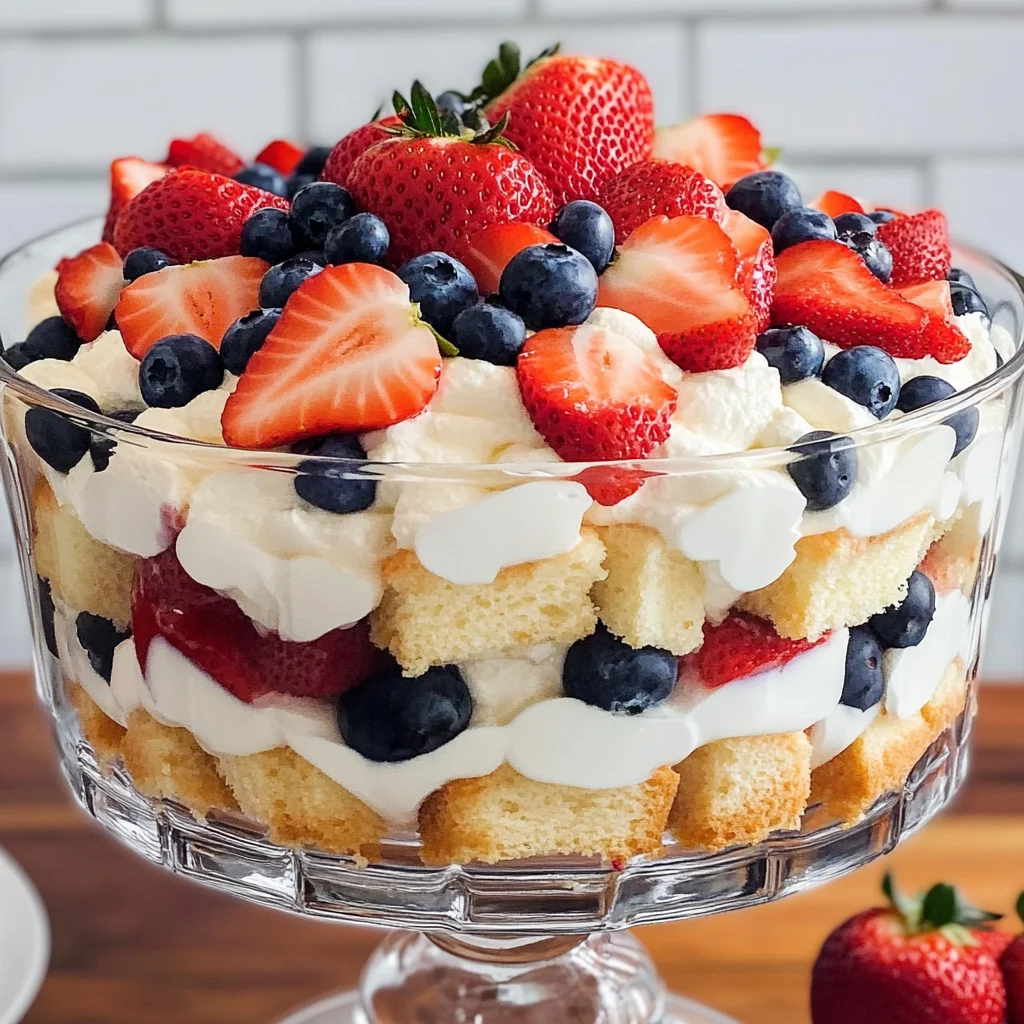
There’s something magical about desserts that bring people together, isn’t there? The way a sweet treat can spark joy and ignite memories is profound. That’s precisely what my 4th of July Trifle does—it transcends mere food and becomes an experience, a celebration of summer, freedom, and the moments we cherish with our loved ones. Picture this: layers of light angel food cake, luscious white chocolate pudding, and vibrant berries creating a stunning centerpiece that not only pleases the eye but also dances on your palate. Every bite is like a little explosion of flavors—sweet, creamy, and oh-so-refreshing—perfect for those warm summer gatherings. I promise you; this is more than just dessert; it’s a love letter to all the summer festivities.
This trifle embodies the spirit of American celebrations like Independence Day, Memorial Day, or Labor Day. Its iconic red, white, and blue colors aren’t just visually appealing; they evoke feelings of patriotism and camaraderie. As you prepare to serve this delightful creation at your next gathering, remember that it also tells a story—one of tradition blended with modern flavors. It’s about gathering around the table with friends and family, sharing laughter over stories from the past while creating new memories in the present. Trust me when I say that no one will be able to resist diving into this delicious masterpiece!
4th of July Trifle: A Festive Delight for Your Summer Celebrations
Let’s dive into this delightful recipe together! The 4th of July Trifle is not only incredibly easy to make but also brings forth layers upon layers of flavor that will have everyone coming back for seconds (or thirds!). With fresh strawberries and blueberries nestled between fluffy cake and creamy pudding, it’s as if summer itself has been captured in a bowl. It’s a beautiful way to celebrate our nation while indulging in something sweet and satisfying.
Ingredients:
As we embark on this culinary journey together, it’s essential to gather our ingredients mindfully. Each component plays a vital role in crafting this layered wonder that will surely become a staple at your celebrations.
- 6.8 ounces (two 3.4 ounce) instant white chocolate pudding: This silky pudding mix is the heart of our trifle—it creates an unbelievably creamy layer that melds beautifully with the other ingredients. Opt for Jello brand if you can; it has a superior taste that truly elevates the dish. When mixed with cold milk, it thickens into something utterly intoxicating—a luscious filling that pairs perfectly with the airy cake.
- 4 cups cold whole milk: Whole milk is crucial here because its richness enhances the creaminess of our pudding layer. Cold milk not only helps achieve the right consistency more quickly but also keeps everything refreshingly cool on those warm summer days when you want nothing more than to indulge without feeling weighed down.
- 14 ounces store-bought angel food cake (cut into 1-inch cubes): This cake is light as air, which is precisely why it works so well in our trifle—it absorbs moisture without becoming soggy! The subtle sweetness adds just enough flavor without overpowering the other components. Make sure you cut it into uniform cubes; this ensures every bite has that perfect balance of cake and cream.
- 16 ounces (two 8-ounce) containers thawed whipped topping: Whipped topping is like liquid gold in this recipe! It contributes to the overall fluffiness while adding sweetness and smoothness between all those lovely layers. Ensure it’s thawed before use; otherwise, you’ll end up with clumps instead of a beautiful spreadable topping.
- 32 ounces container fresh strawberries (washed, stems removed, sliced and pat dry): There’s nothing quite like fresh strawberries—they’re juicy and vibrant! For our trifle, they not only provide that classic red hue but also impart their sweet-tart flavor throughout each layer. Patting them dry after washing ensures we don’t introduce excess moisture that could make our trifle too soggy.
- 18 ounces container fresh blueberries (washed and dried): These little bursts of flavor are packed with antioxidants and add such depth to our dessert! Their deep blue color contrasts beautifully against the strawberries while their sweetness harmonizes perfectly with each layer. Similar to strawberries, make sure they’re completely dry before layering them in; nobody wants extra juice leaking out!
Equipment You’ll Need:
Before we jump into assembling our glorious trifle, let’s talk tools! Having the right equipment makes all the difference in crafting anything from simple recipes to elaborate masterpieces—and trust me when I say this dessert deserves your best effort!
- Trifle bowl: This beautiful vessel is key for showcasing your creation! A large glass trifle bowl allows everyone at your gathering to admire those stunning layers as they dig in—a feast for both the eyes and stomach. If you don’t have one on hand, any clear glass bowl will work just fine; just be sure it’s big enough to hold all those delightful ingredients.
- Mixing bowls: A couple of mixing bowls will come in handy for preparing your pudding and assembling layers without making too much fuss or mess in your kitchen space.
- Spatula: A flexible spatula is essential for smoothly spreading your whipped topping between layers—this ensures even coverage without tearing any delicate ingredients like cake or fruit.
- Measuring cups: Precision matters! Having measuring cups ready will help ensure accuracy when measuring out milk or other components—this small detail can significantly affect texture!
Now that we’ve gathered everything we need let’s dive into preparing this stunning 4th of July Trifle!
Step 1: Prepare Your Pudding Layer
Start by pouring 4 cups of cold whole milk into a large mixing bowl—watch as it swirls around invitingly! Then gently sprinkle in your instant white chocolate pudding mix while whisking continuously until thoroughly combined. This process allows air to be introduced into the mixture while ensuring no lumps form—a crucial step because lumpy pudding would ruin our beautiful layers later on! Once combined well (about two minutes), set aside to chill until it thickens up nicely—this should take about five minutes or so depending on room temperature.
Step 2: Build Your Cake Base
With your pudding chilling away happily, take your store-bought angel food cake and carefully cut it into 1-inch cubes using a serrated knife for clean cuts—this helps maintain structure during assembly while keeping everything consistent across layers! Now grab your trifle bowl (or whatever clear glass bowl you’re using) and create an even layer across the bottom with these fluffy cubes—a foundation so light yet flavorful!
Step 3: Layer That Creamy Pudding
Once you’ve laid down your first layer of angel food cake cubes like little clouds awaiting their toppings above them—it’s time to spoon half of that luscious white chocolate pudding over them generously! Use a spatula if needed to spread it evenly across those fluffy clouds below—it should look smooth yet inviting by now! Don’t rush this step; making sure each cube gets coated properly means every bite later will be utterly satisfying—trust me on this!
Step 4: Add Those Beautiful Berries
Now comes my favorite part—the berry decoration! Start by taking those gorgeous sliced strawberries you’ve prepared earlier—and line them along the edge of your trifle bowl like little soldiers standing guard over their sweet kingdom inside! Then sprinkle additional slices directly onto your pudding layer as well—this adds not only visual appeal but also gives everyone something berrylicious from top-to-bottom throughout every forkful they’ll enjoy later!
Stay tuned as we continue layering until we reach delicious perfection—but just know…you’ve already set yourself up for success with these steps alone!
Creating a Festive Masterpiece: Layering Your 4th of July Trifle
Step 5: A Berry Beautiful Base
Now that we have our first layer of creamy white chocolate pudding settled over the angel food cake, it’s time to add some vibrant strawberries! This step is where the artistry of your 4th of July Trifle truly begins. Take those luscious strawberries that you’ve washed and sliced; they should be bright red and glistening with freshness. Start by gently placing the sliced strawberries along the inner edge of your trifle bowl. This not only creates a stunning visual effect but also allows everyone to see those beautiful, juicy berries as soon as they gaze upon your dessert. The juxtaposition between the creamy pudding and the vivid strawberries will make hearts flutter!
Once you’ve arranged the strawberries around the sides, it’s time to fill in the center. Scatter a single layer of sliced strawberries over the pudding itself. Why do we do this? This method ensures that each spoonful you serve later has that delightful burst of strawberry flavor mingling with creaminess, enhancing every bite. Pay attention here—this layer contributes significantly to the overall flavor profile of your trifle, and using perfectly ripe strawberries is absolutely paramount. You want them sweet but not overly mushy; otherwise, they can release too much moisture into your trifle, which we want to avoid at all costs! Trust me on this—taking those extra moments to arrange your fruit beautifully sets the stage for a dessert that looks as wonderful as it tastes.
Step 6: A Touch of Blueberry Bliss
With our strawberries layered in, it’s time to introduce another star player: blueberries! These little gems bring not just their delightful sweetness but also an essential crunch and pop that complements the creaminess of our pudding and cake perfectly. After ensuring they’re thoroughly patted dry (this is crucial!), scatter a generous layer of blueberries over your strawberry-filled layer. The contrast between the red strawberries and blue blueberries is an absolute showstopper for any patriotic gathering! The vibrant colors are reminiscent of fireworks lighting up a summer sky—how fitting for Independence Day!
As you spread these berries evenly across, keep in mind that balance is key. You want each layer to feel abundant without overwhelming subsequent layers with moisture. When layering fruits in a trifle, consider their water content; blueberries tend to hold up well without making things soggy, especially when properly dried beforehand. This step is all about achieving harmony in flavors and textures—the creamy pudding below, followed by sweet strawberry slices, and now these little blue orbs bursting with juice create an experience that is truly extraordinary.
Step 7: Topping It Off with Whipped Goodness
At this point in our 4th of July Trifle journey, we’re ready to crown our creation with whipped topping! Grab one container of thawed whipped topping and spread it generously over your berry layer. Using an offset spatula or even the back of a spoon works wonders here—just let it glide across those berries like a soft cloud resting on top of a dreamy horizon. The whipped topping adds an airy lightness that contrasts beautifully with all those rich layers beneath it; it’s like giving your trifle a fluffy pillow on which to rest.
As you smooth out this layer, think about texture! You want it soft but substantial enough to hold its shape when you slice into it later on. Don’t rush this step; take a moment to admire how all those colors peek through this lovely whipped cream surface—it’s already looking like a festive masterpiece! Plus, layering whipped topping provides stability for the next round of layers while also acting as a barrier against excess moisture from fruits below so they remain fresh and vibrant until serving time.
Step 8: The Grand Finale—Repeat Those Layers!
Now comes one of my favorite parts—repeating those heavenly layers! This is where patience meets perfection; take your time to recreate the layering process you just did because we want every spoonful filled with deliciousness. Start by adding another layer of cake cubes over the whipped topping; make sure they’re distributed evenly across so every corner gets its fair share of cake goodness. Then follow with more white chocolate pudding; don’t be shy here! You want that smooth filling enveloping each piece while creating an enticing contrast against the fluffy topping.
Once again, let’s revisit our berry friends—toss on more sliced strawberries followed by another scattering of blueberries atop them! Each addition builds upon what was already there—a beautifully balanced mix waiting for eager taste buds at your gathering. Remember that visual aspect I mentioned earlier? Make sure each berry shines through before finishing off with another dollop of whipped topping from your second container. It should feel satisfying to spread this final layer smoothly across—it’s like icing on the cake but better because it’s so light & fluffy!
Conclusion:
As we wrap up our journey through crafting this magnificent 4th of July Trifle, I can’t help but feel a surge of excitement for you. This recipe isn’t just about layering ingredients; it’s about creating joyful moments shared with friends and family during those lovely summer gatherings. The sweet creaminess of the white chocolate pudding mingling effortlessly with those juicy strawberries and blueberries is truly extraordinary—it’s like capturing the essence of summer sunshine in every spoonful!
Why should you consider making this trifle a staple? Well, beyond its lush layers and vibrant colors that evoke patriotic spirit during celebrations like Independence Day or Labor Day, this dessert is wonderfully versatile. Whipping it up is not only easy but also incredibly rewarding. Imagine bringing out this eye-catching dessert to gasps of delight from your loved ones as it graces your table. Each layer tells its own story—the soft cake cradling velvety pudding; fresh fruit lending bursts of tartness—that creates an unforgettable experience worth savoring.
When serving your stunning creation, think about how delightful it would be alongside an ice-cold glass of lemonade or freshly brewed iced tea on a warm afternoon. Or perhaps pair it with some crunchy cookies for added texture—a delightful contrast that keeps everyone coming back for more! For an indulgent twist, imagine enjoying a piece while curled up with a good book or sharing slices under twinkling fairy lights at sunset.
Feeling adventurous? This recipe is wonderfully adaptable! You could swap out the white chocolate pudding for vanilla or even lemon-flavored pudding if you’re craving something zesty. Want to get creative? Try adding layers of crushed graham crackers for extra crunch or incorporate different seasonal fruits like peaches or raspberries when they’re ripe and ready! The possibilities are endless, and I invite you to explore them all while adding your personal touch. So roll up your sleeves and dive into this delightful endeavor—I can’t wait to hear how your trifle turns out!
4th of July Trifle
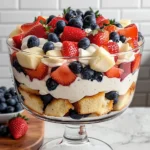
Celebrate summer with this vibrant 4th of July Trifle! This delightful dessert features layers of fluffy angel food cake, creamy white chocolate pudding, and a medley of fresh strawberries and blueberries, creating a stunning centerpiece for your holiday gatherings. Each spoonful offers a refreshing burst of flavor that perfectly embodies the spirit of summer and togetherness. Not only is it visually appealing with its red, white, and blue colors, but it also promises to be a crowd-pleaser at any festive occasion. Easy to prepare and sure to impress, this trifle is the ultimate way to sweeten your Independence Day celebrations!
- Prep Time: 30 minutes
- Cook Time: None
- Total Time: 0 hours
- Yield: Serves approximately 12 1x
- Category: Dessert
- Method: No-Bake
- Cuisine: American
Ingredients
- 6.8 ounces instant white chocolate pudding
- 4 cups cold whole milk
- 14 ounces store-bought angel food cake (cut into cubes)
- 16 ounces thawed whipped topping
- 32 ounces fresh strawberries (sliced)
- 18 ounces fresh blueberries (washed and dried)
Instructions
- In a large mixing bowl, whisk together 4 cups of cold whole milk and the instant white chocolate pudding mix until thickened (about 5 minutes). Set aside.
- Cut the angel food cake into 1-inch cubes and create an even layer in the bottom of a trifle bowl.
- Spoon half of the prepared pudding over the cake cubes, spreading it evenly.
- Arrange sliced strawberries along the inner edge of the bowl and sprinkle additional slices on top of the pudding layer.
- Add a layer of blueberries over the strawberries.
- Spread half of the thawed whipped topping over the berry layer.
- Repeat layers with remaining cake cubes, pudding, strawberries, blueberries, and topped with whipped topping.
- Refrigerate for at least one hour before serving.
Nutrition
- Serving Size: 1 cup (approximately 150g)
- Calories: 220
- Sugar: 22g
- Sodium: 150mg
- Fat: 7g
- Saturated Fat: 4g
- Unsaturated Fat: 2g
- Trans Fat: 0g
- Carbohydrates: 36g
- Fiber: 1g
- Protein: 3g
- Cholesterol: 20mg