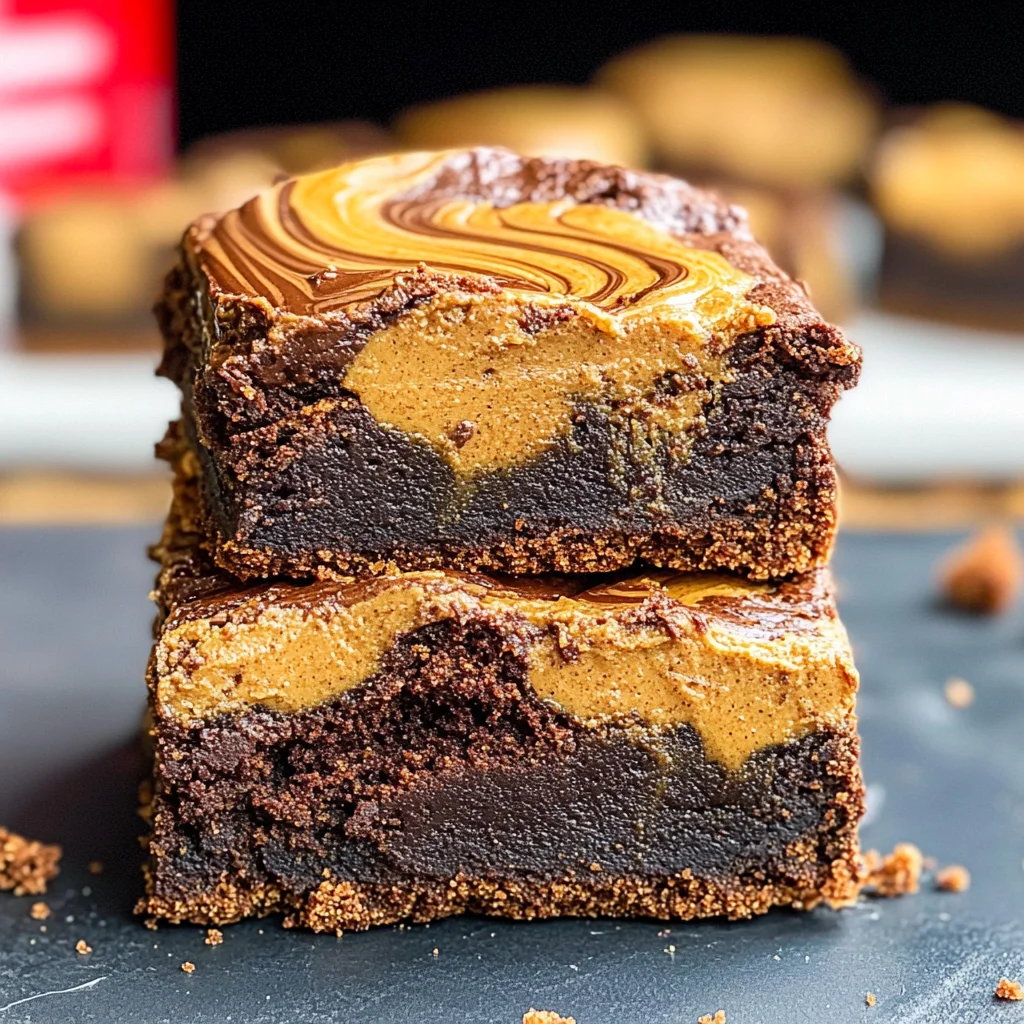
Biscoff Brownies
There’s something profoundly enchanting about the act of baking, don’t you think? It’s not just about mixing flour and sugar; it’s a journey that transforms simple ingredients into an experience that warms your heart and fills your home with delightful aromas. Today, I’m thrilled to share a recipe that has captivated my friends and family alike: Biscoff Brownies. These brownies are more than mere sweets; they’re a celebration of textures and flavors that dance together in perfect harmony. Imagine sinking your teeth into a fudgy, chocolatey morsel, where every bite is enriched by the comforting warmth of Biscoff cookies. This recipe is not just food; it’s love baked into every layer.
When I first stumbled upon this divine combination, it felt like finding a hidden treasure. The way the smooth cookie butter swirls through the rich brownie base creates an utterly intoxicating experience—one that invokes memories of cozy afternoons spent in the kitchen with loved ones. These Biscoff Brownies are perfect for any occasion, whether it’s a casual gathering or a special celebration. They embody both nostalgia and innovation, making them the ideal treat to share or savor quietly at home while curled up with your favorite book. I promise you, once you bake these, they will become a beloved staple in your culinary repertoire.
Biscoff Brownies: A Fudgy Delight with Cookie Butter Swirls
Allow me to take you on this delicious journey as we whip up some Biscoff Brownies together! The simplicity of this recipe belies the extraordinary flavor you’ll create, making it perfect for both novice bakers and seasoned pros alike. With the right ingredients and a sprinkle of love, you’ll be crafting these decadent brownies in no time!
Ingredients:
Let’s gather our essential building blocks for this heavenly creation! Each ingredient plays a pivotal role in achieving that fudgy texture and rich flavor profile we crave in brownies.
- 1 1/2 cups crushed Biscoff cookies – about 20 cookies (155g). Think of these as the foundation of our brownie masterpiece! Not only do they add an enchanting caramelized flavor, but they also provide the perfect crunch beneath our soft brownie layer. When selecting your cookies, make sure they’re fresh so that their unique spice notes really shine through. If you’re ever short on Biscoff cookies (though I can’t imagine why!), you can substitute them with another brand of speculoos cookies to keep that delightful flavor intact.
- 1/4 cup salted butter, melted and cooled (56g). This initial amount of butter is critical for forming our cookie crust; it binds those cookie crumbs beautifully while adding richness to our base. Make sure it’s cooled after melting because hot butter can cook your eggs prematurely if added too soon—a little patience here goes a long way!
- 2 large eggs, room temperature (112g). Eggs are non-negotiable in this recipe—they bind everything together and provide moisture that contributes to that coveted fudginess we all adore. Bringing them to room temperature ensures they incorporate seamlessly into the batter, promoting an even rise and texture throughout.
- 1/2 cup granulated sugar (100g). This classic sweetener not only enhances flavor but also plays a key role in achieving that chewy texture we love in brownies. It helps create those beautiful shiny tops as they bake—trust me when I say it’s worth using granulated sugar over other sweeteners for this particular recipe.
- 1/2 cup packed light brown sugar (100g). The brown sugar adds depth with its molasses undertones while keeping our brownies moist—a truly harmonious match with the chocolate flavors ahead! When measuring brown sugar, be sure to pack it tightly into your measuring cup for optimal sweetness.
- 1/2 cup salted butter, melted and cooled (113g). Here comes our second dose of butter—the magic ingredient that adds richness and moisture throughout the brownie batter itself! Again, let it cool before mixing; hot melted butter can lead to greasy brownies instead of the tender crumb we’re aiming for.
- 2 tsp vanilla extract or vanilla bean paste (8g). Vanilla is like the secret handshake between flavors—it enhances everything without stealing the spotlight! Choose high-quality vanilla extract or opt for vanilla bean paste if you want tiny flecks of vanilla specks throughout—both will add a lovely aromatic essence.
- 1/2 cup all-purpose flour (65g). Flour is our structural element; it provides stability while allowing our brownies to maintain their decadent chewiness without becoming too dry or crumbly—an absolute must-have! Be careful not to overmix once you add flour; we want just enough gluten development for structure without toughening up these beauties!
- 1/3 cup unsweetened baking cocoa (33g). Cocoa powder deepens the chocolate flavor while giving those gorgeous dark hues characteristic of rich brownies! Opt for unsweetened cocoa powder here—sweetened varieties can throw off our delicate balance of sugars already present.
- 1/4 tsp baking powder (>1g). While most brownie recipes skip this ingredient altogether, adding just a pinch helps give us that slight lift which translates into extra tenderness without compromising fudge-factor—it’s like giving them a gentle nudge toward perfection!
- 1/3 cup smooth Biscoff spread (80g). This is where we unleash pure bliss! The silky texture melds harmoniously with our brownie batter while adding layers of luscious flavor throughout each bite—yes please! Gently warming it before swirling ensures it’s easy to work with without losing its divine creaminess.
Equipment You’ll Need:
Before we dive into baking bliss, let’s ensure you have all your essential tools ready at hand! Having the right equipment not only makes your kitchen experience smoother but also sets you up for success as you embark on this delicious adventure.
- 8 x 8-inch baking pan – This pan size is perfect for creating thick brownies that ooze decadence from every corner! Make sure to line it with parchment paper so every last morsel comes out easily—and trust me when I say nothing feels better than lifting out perfectly square brownies!
- Mixing bowls – A couple of sturdy bowls are vital here; one for combining dry ingredients and another for wet ones helps keep things organized while ensuring thorough mixing without any messy cross-contamination!
- Hand or stand mixer – While whisking by hand can be therapeutic at times, using an electric mixer will save you energy when blending those eggs and sugars together until creamy excellence is achieved—it really does make a difference!
- Rubber spatula – This handy tool helps gently fold dry ingredients into wet ones without overworking them—a key technique when creating airy yet chewy brownies! Plus, it ensures no batter gets left behind stuck in corners.
Preparing the Biscoff Brownies
Step 1: Preheat & Prepare Your Pan
First things first: preheat your oven to 350°F (175°C) so it’s nice and hot by baking time—this ensures even cooking throughout each brownie square! While that’s happening, grab an 8 x 8-inch baking pan and line it with parchment paper—this step makes removing those gooey treats later on so much easier. Just press down firmly against all four sides so everything stays put as you pour in your delicious batter later!
Step 2: Create Your Cookie Crust
Now onto one of my favorite parts—the cookie crust! In a large mixing bowl, combine 1 ½ cups crushed Biscoff cookies with ¼ cup melted salted butter until thoroughly mixed—you want this mixture to resemble wet sand so it holds together nicely when pressed down into your prepared pan! Use either clean hands or the back end of a spoon to firmly press this mixture evenly across the bottom—don’t rush this step because an even layer equals consistent texture throughout each bite!
Step 3: Whisk Together Wet Ingredients
In another large bowl (see? We’re keeping things organized!), crack open those two large room-temperature eggs along with both types of sugar: granulated and light brown sugars—and whisk away using either your hand mixer or stand mixer set on medium speed until everything becomes creamy yet slightly lighter in color—about one minute would suffice here! The reason why we mix vigorously at this stage is simple: incorporating air gives us fluffy edges later on instead of dense centers which wouldn’t be nearly as satisfying!
Step 4: Add In Melted Butter & Vanilla
It’s time now to incorporate flavors by adding in our cooled melted butter alongside two teaspoons vanilla extract—or if feeling luxurious today—a drizzle from my favorite bottle of vanilla bean paste! Mix again until combined thoroughly—which should happen quickly since these ingredients blend beautifully together thanks largely due their liquid consistency—but do remember not too overmix here either since doing so could lead us astray from achieving ultimate fudgy goodness down below…
Now we’re well on our way towards creating something truly extraordinary—the next steps involve folding dry ingredients carefully but I’ll leave those details just around the corner…
Stay tuned as we continue crafting these indulgent Biscoff Brownies together—you won’t want miss out on how they come together next!
Step 5: Sifting for Success
Now, let’s get our dry ingredients ready! This step is not merely a formality; it’s an essential technique that will help us achieve that dreamy, fudgy texture we’re aiming for in our Biscoff Brownies. Grab your trusty sifter or fine mesh sieve—this tool is your best friend right now. Measure out 1/2 cup of all-purpose flour, 1/3 cup of unsweetened cocoa powder, and 1/4 teaspoon of baking powder. As you sift these ingredients together into the egg mixture, watch the cocoa powder fall like rich chocolate snowflakes over the creamy batter below. This is crucial because sifting helps to aerate the flour, breaking up any lumps and ensuring an even distribution of leavening agents, which in turn creates a wonderfully light texture amidst all that delicious fudginess.
You might be wondering, “Do I really need to do this?” Trust me on this—it’s absolutely paramount! If you skip this step, you risk ending up with little pockets of dry flour or bitter cocoa in your brownies, and we definitely don’t want that! Once everything is sifted together, take a rubber spatula and gently fold those dry ingredients into the wet mixture. Here’s where the magic happens: as you fold, you’ll see how the colors blend beautifully, forming a luscious batter that smells utterly intoxicating. Just remember: don’t rush this step! You want to be gentle and patient—folding too vigorously can deflate the air bubbles you’ve just created.
Step 6: The Art of Folding
Now that our ingredients are harmoniously combined, it’s time for one of my favorite parts—the folding technique. Gently lift the batter from the bottom of the bowl and bring it over itself, carefully incorporating everything without overmixing. This method helps maintain the airy texture while ensuring all ingredients are well-distributed. As you fold, take a moment to appreciate how everything comes together; it’s like watching a beautiful tapestry being woven!
This part is so important because if you mix too aggressively, you’ll lose that lovely tenderness we’re after. The result? Dense brownies that might taste good but lack that heavenly, melt-in-your-mouth quality we crave in Biscoff Brownies. Aim for about 20 folds; you’ll know you’re done when no streaks remain visible and your batter looks rich and glossy—a true sign of decadence ahead! Once everything is folded perfectly together, scoop your luscious brownie batter onto that glorious Biscoff crust we made earlier.
Step 7: Layering Your Brownie Dream
With our brownie batter poured over the prepared Biscoff crust—oh my goodness, I can already smell those sweet aromas wafting through my kitchen—we’re going to spread it into an even layer using either a spatula or the back of a large spoon. Take your time with this step; it’s not just about slapping down some batter! You want to create a smooth surface so every bite has an equal ratio of crust to brownie goodness—trust me on this one!
As you spread it out evenly, feel free to channel your inner artist—this is where creativity meets baking! Make sure to reach all corners of the pan so that every piece gets its fair share of deliciousness when they come out of the oven. Visual cues are essential here: if your batter settles nicely into place without any major gaps or holes, you’re doing it right! Once satisfied with your masterpiece, stand back for a moment and admire what you’ve created before moving on to the pièce de résistance—those remarkable swirls we’re about to add!
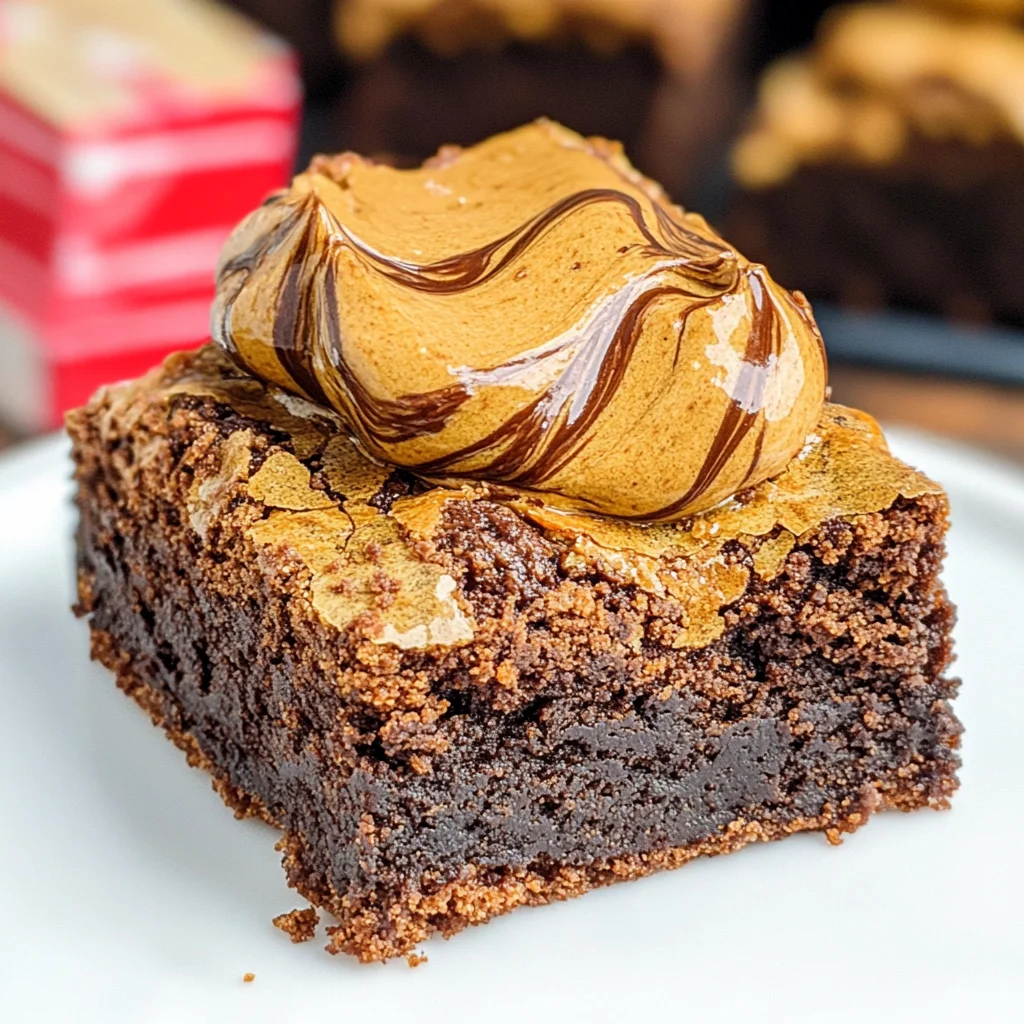
Step 8: Swirling in Sweetness
Now comes one of my absolute favorite parts—the swirling! Take 1/3 cup of smooth Biscoff cookie butter spread and pop it in the microwave for just 5-10 seconds until it becomes slightly warm and oozy—this will make it much easier to swirl through your brownie batter. Just imagine how wonderful this will taste; it’s like adding liquid gold directly into our already decadent creation! Use a spoon to drop dollops of this luscious spread across the top of your brownie batter.
Grab a butter knife now—you want a tool that’s both sturdy yet slim enough for precision work—and begin swirling gently through the brownie mixture with smooth motions. Picture yourself creating abstract art as you bring together those dreamy ribbons of Biscoff spread with your chocolatey batter below. Be mindful here; we’re not trying to fully incorporate it but rather create an enchanting marbled effect that promises pockets of cookie butter bliss in every bite.
Keep an eye on how deep you’re swirling—you want those gorgeous swirls visible on top while still keeping plenty of brownie goodness intact underneath. It’s truly transformative; what starts as simple brownie batter becomes something extraordinary with each delicate twist and turn.
Conclusion:
As we wrap up our journey through this delightful recipe for Biscoff Brownies, I hope you feel just as excited as I do about creating these decadent treats! There’s something truly extraordinary about how the rich chocolate flavor dances harmoniously with the caramel undertones of Biscoff cookies—it’s like an irresistible symphony of flavors playing right on your palate. Each bite offers that perfect balance of fudginess and crunch that elevates it beyond your average brownie experience; it’s a dessert that embodies both comfort and indulgence all at once.
Now why is this recipe a must-try? Well beyond its taste lies the joy of creating something so delectable from simple ingredients; it’s accessible enough for beginner bakers yet impressive enough to wow seasoned pros at gatherings or cozy nights spent indulging with loved ones. Picture yourself pulling these brownies from the oven—the golden swirls glistening atop their dark chocolaty base—and feeling an overwhelming joy wash over you as you cut into them. It’s not just about having dessert; it’s about making memories around shared laughter and stories over every sweet morsel.
Imagine savoring one with a scoop of vanilla ice cream melting into its warm surface or enjoying another alongside your afternoon coffee—each pairing enhances its already profound satisfaction! For an even more decadent experience, consider drizzling some extra Biscoff spread on top before serving; it’s like putting the cherry on top of your own sundae! The possibilities are endless when it comes to enjoying these brownies.
Feeling adventurous? This recipe is wonderfully adaptable—you could swap out some chocolate for white chocolate chips or mix in nuts for added crunch. Or perhaps try using different flavors of cookie spreads if you’re feeling daring! Each variation brings its unique twist while keeping those beloved Biscoff vibes intact. I invite you to get creative in your kitchen! Try this recipe today, share your experiences with me, and let’s celebrate our mutual love for baking together!
Biscoff Brownies
Biscoff Brownies are the ultimate indulgence, merging rich chocolate flavor with the irresistible caramel notes of Biscoff cookies. These fudgy delights feature a crunchy cookie crust and creamy Biscoff swirls, creating a decadent treat that will impress everyone at your next gathering or provide a cozy comfort during quiet evenings. With just a few simple ingredients and easy-to-follow steps, you’ll find that whipping up these brownies is not only satisfying but also incredibly rewarding. Perfect for both novice bakers and seasoned pros, this recipe promises to become a favorite in your dessert repertoire!
- Prep Time: 15 minutes
- Cook Time: 25 minutes
- Total Time: 40 minutes
- Yield: Approximately 16 brownies 1x
- Category: Dessert
- Method: Baking
- Cuisine: American
Ingredients
- 1 ½ cups crushed Biscoff cookies
- ½ cup granulated sugar
- ½ cup packed light brown sugar
- ½ cup salted butter (melted and cooled)
- 2 large eggs (room temperature)
- ½ cup all-purpose flour
- ⅓ cup unsweetened cocoa powder
- ¼ teaspoon baking powder
- ⅓ cup smooth Biscoff spread (warmed)
Instructions
- Preheat oven to 350°F (175°C) and line an 8 x 8-inch baking pan with parchment paper.
- In a bowl, mix crushed Biscoff cookies with melted butter until resembling wet sand. Press into the bottom of the prepared pan to form the crust.
- In another bowl, whisk together eggs and sugars until creamy. Mix in cooled melted butter and vanilla extract.
- Sift flour, cocoa powder, and baking powder into the wet mixture; fold gently until just combined.
- Pour brownie batter over the cookie crust and swirl warmed Biscoff spread on top with a knife.
- Bake for 22-25 minutes or until a toothpick comes out mostly clean with moist crumbs.
- Allow to cool completely before cutting into squares.
Nutrition
- Serving Size: 1 serving
- Calories: 220
- Sugar: 18g
- Sodium: 150mg
- Fat: 12g
- Saturated Fat: 7g
- Unsaturated Fat: 4g
- Trans Fat: 0g
- Carbohydrates: 26g
- Fiber: 1g
- Protein: 3g
- Cholesterol: 30mg