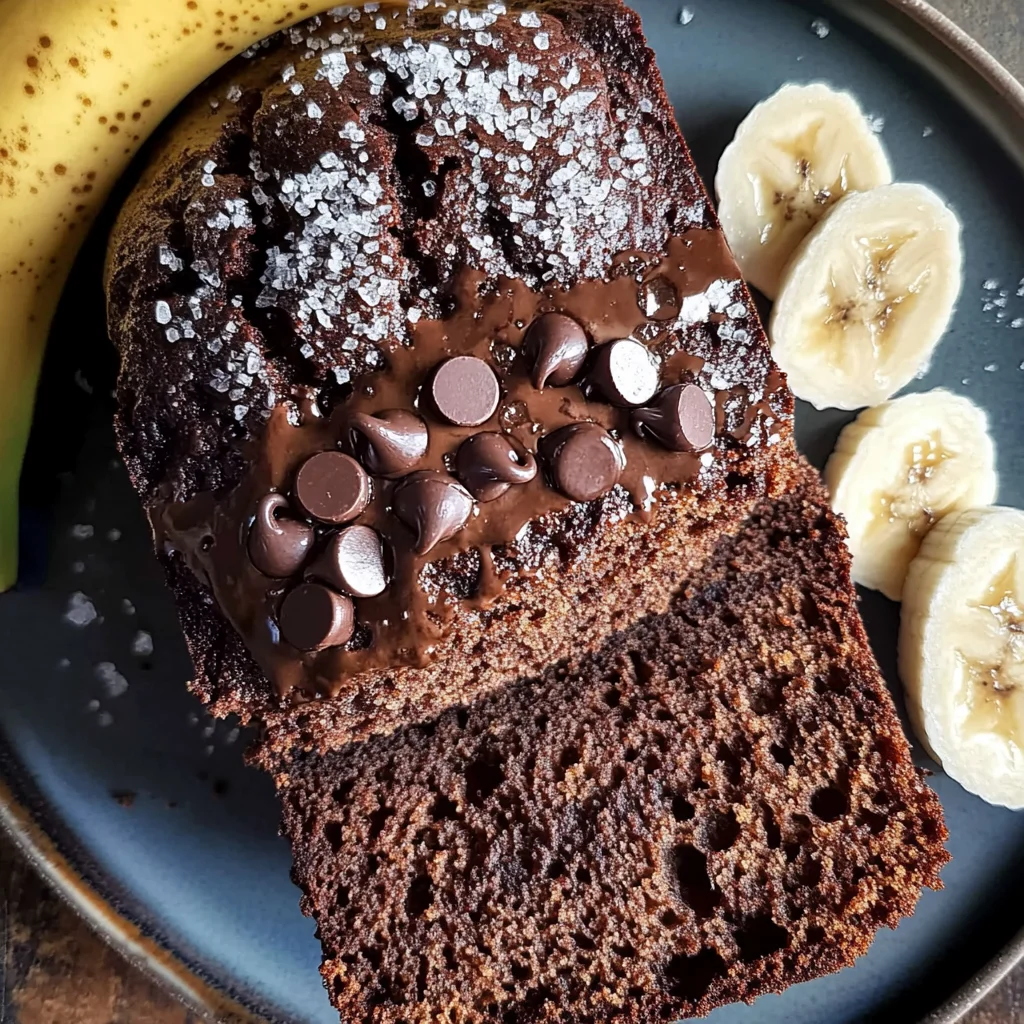
Chocolate Espresso Banana Bread
There’s something truly magical about the aroma of fresh-baked bread wafting through your home. It’s one of those heartwarming scents that invites memories to dance in your mind. Picture this: you’re greeted by the intoxicating scent of warm chocolate, mingled with a hint of espresso and the subtle sweetness of ripe bananas. This isn’t just any ordinary bread; it’s an experience, a comforting embrace on a chilly day, and I can hardly contain my excitement to share this Chocolate Espresso Banana Bread with you! Each slice is a delectable journey, where rich chocolate flavor meets the natural sweetness of bananas, promising a treat that feels like a hug in dessert form. Trust me when I say this recipe is more than just food; it’s a bridge between cherished family traditions and modern innovation.
I’ve always been captivated by how simple ingredients can come together to create something so profoundly satisfying. This Chocolate Espresso Banana Bread is perfect for those cozy afternoons when you want to indulge without the guilt. Maybe it’s a rainy Saturday morning, or perhaps you’re hosting friends for brunch—this delightful loaf fits effortlessly into any occasion. And let me tell you, it’s not just about taste; it’s about sharing love through baking, bringing people together around the table, and creating moments that linger long after the last crumb has been devoured.
Chocolate Espresso Banana Bread: A Decadent Delight
Get ready to embark on a culinary adventure with this Chocolate Espresso Banana Bread! It combines the rich depth of chocolate with the vibrant flavors of espresso and the comforting sweetness of bananas. The result? A loaf that is incredibly moist and utterly addictive! With every bite, you’ll taste the love that goes into crafting this delightful recipe—and I promise you, your friends and family will be begging for seconds!
Ingredients:
As we prepare to dive into this delicious recipe, let’s take a moment to appreciate each ingredient we’ll be using. Every single one plays an essential role in achieving that perfect balance of flavors and textures.
- 1 cup all-purpose flour. This is the foundation of our bread—it provides structure while keeping things light and airy. When choosing flour, look for high-quality all-purpose flour that doesn’t have added preservatives. It should feel soft to the touch; if it’s too coarse or gritty, try another brand. Sifting your flour before adding it can help aerate it further—this tiny step will make your banana bread even fluffier!
- ¼ cup cocoa powder. Ah, cocoa powder—the magical ingredient that transforms our humble loaf into a chocolate lover’s dream! Opt for unsweetened cocoa powder here; it’ll give us that deep, rich chocolate flavor without unnecessary sugar interfering with our other ingredients. Be sure to sift it as well if there are any lumps—no one wants a clump of bitter cocoa hiding in their delicious banana bread!
- 1 tsp baking soda. This little powerhouse is what helps our bread rise beautifully. Baking soda reacts with acidic ingredients (like our mashed bananas) to produce carbon dioxide gas during baking, creating those lovely air pockets we adore in quick breads. Make sure your baking soda is fresh—old baking soda won’t create enough lift.
- ½ tsp kosher salt. Salt may seem small and insignificant in sweet recipes, but trust me—it amplifies all those wonderful flavors around it! Kosher salt has larger crystals compared to table salt and dissolves easily into batters without leaving behind an overly salty taste.
- ½ tsp espresso powder. Now here comes the secret weapon! The espresso powder adds depth and intensity without overwhelming our banana bread with coffee flavor; instead, it enhances the chocolate beautifully—think of it as giving an extra boost to our symphony of flavors! If you’re not able to find espresso powder, finely ground coffee can work too; just remember it may alter the texture slightly.
- ½ cup olive oil. Instead of butter, we’re using olive oil for moisture here—it keeps our loaf wonderfully tender while adding a subtle fruity note that complements our chocolate perfectly. Make sure to use light olive oil rather than extra virgin for a milder flavor profile.
- ½ cup brown sugar + ½ cup granulated sugar. We’re using both types of sugar to achieve balanced sweetness along with moisture from brown sugar’s molasses content while granulated sugar helps create a nice crust on top! Light brown sugar works wonderfully here; feel free to substitute coconut sugar if you’re looking for something less refined.
- 2 eggs (room temp). Eggs play an important role as they bind everything together while providing richness—a non-negotiable component in achieving that desirable texture! Room-temperature eggs will incorporate better than cold ones from the fridge—so don’t skip this step!
- 1 tsp vanilla extract. The essence of vanilla brings warmth and complexity; it’s absolutely crucial in elevating flavors in baked goods! Go for pure vanilla extract instead of imitation—it makes all the difference!
- ½ cup sour cream. Adding sour cream gives our bread an incredible moisture boost while also contributing tanginess that balances out sweetness magnificently! If you happen not to have sour cream on hand, plain yogurt can be substituted seamlessly.
- 1 cup ripe bananas (mashed). Bananas are not just flavor contributors but also provide natural sweetness and moisture—crucial elements for our Chocolate Espresso Banana Bread’s success! Use very ripe bananas (the kind with lots of brown spots)—they’ll deliver maximum flavor!
- ½ cup dark chocolate chips + a few extra for the top & ½ cup semi-sweet chocolate chips + a few extra for the top. Here’s where we really indulge: using two types of chocolate creates layers upon layers of richness! Dusting them lightly with flour before folding them in helps prevent them from sinking during baking—this technique keeps those decadent morsels distributed evenly throughout each slice.
- 1 tbsp all-purpose flour (for dusting chocolate chips) – As mentioned above—a little dusting can work wonders by keeping those chocolates suspended within our batter instead of sinking straight down!
- ¼ banana (2 long thin slices off of a banana) & 1 tsp granulated sugar – These beautiful banana slices topped with sugar will add elegance on top while caramelizing slightly as they bake—it lends visual appeal alongside additional sweetness!
Equipment You’ll Need:
Having the right tools at your disposal makes cooking feel seamless and enjoyable! Let’s gather some essential partners who will assist us in creating this beautiful loaf.
- Mixing bowls – A good set of mixing bowls allows you ample space to combine ingredients effortlessly without worrying about spills or messes everywhere! Choose glass or sturdy plastic options—they’re easy to clean up afterward!
- Measuring cups & spoons – Precision matters when baking; accurate measurements ensure consistent results each time you make this Chocolate Espresso Banana Bread! Invest in quality measuring tools so every ingredient shines through perfectly.
- Electric mixer or whisk – While mixing by hand builds muscle tone (and patience!), using an electric mixer saves time while ensuring even blending—especially important when creaming sugars and oils together until light and fluffy!
- Rubber spatula – This versatile tool is ideal for scraping down sides during mixing—it ensures nothing goes unturned or overlooked as you fold in delicate ingredients like mashed bananas or chocolate chips.
- Loaf pan (9×5 inch) – A sturdy loaf pan guarantees even cooking throughout its surface area—my favorite choices are non-stick pans which release goodies easily after baking!
Preparing the Chocolate Espresso Banana Bread
Step 1: Prepping Your Oven & Loaf Pan
Before diving headfirst into mixing doughs full of delightful indulgence, let’s ensure everything is prepped correctly! Begin by preheating your oven to 350°F (175°C). This step is crucial because placing batter into an already heated oven helps achieve proper rising right from the start—a key factor for successful quick breads like ours! While waiting for temperatures inside your oven rise appropriately, grease your loaf pan generously with olive oil or line it with parchment paper so nothing sticks during baking—that would be tragic after all your hard work!
Step 2: Combining Dry Ingredients
In another mixing bowl, whisk together your dry ingredients: flour, cocoa powder, baking soda, kosher salt, espresso powder—all those beautiful powders coming together creates harmony before they meet their wet counterparts later on! Whisking also incorporates air into these components which contributes positively towards lifting properties once combined—never underestimate how much impact simple techniques have on end results! Set aside this bowl filled with dry goodness as we move forward…
Step 3: Creaming Sugars & Oil
In yet another bowl (yes—we’re getting quite messy here!), combine both sugars along with olive oil using either an electric mixer fitted with paddle attachment or whisk vigorously should you prefer some manual labor… Just remember though: cream until mixture appears light-colored fluffy consistency resembling clouds floating above gentle hillsides—the science behind this process lies within air incorporation due friction generated between fats/sugars during mixing which leads ultimately towards lofty results later down line during actual baking phase! Don’t rush past this vital step; patience pays off handsomely here indeed…
Step 4: Adding Eggs & Vanilla
Once you’ve achieved beautifully creamed sugars/oil combination resembling lovely clouds—we’ll nestle room-temperature eggs one at time alongside aromatic vanilla extract into sweet mix embracing each element thoroughly until incorporated completely resulting luscious liquid gold mixture awaiting further transformation ahead soon enough… Watching egg yolks blend seamlessly reminds me how interconnected flavors truly are—their union signifies unity amongst diverse tastes racing towards magical outcome awaiting us patiently just ahead…
As we continue through these steps together toward creating extraordinary Chocolate Espresso Banana Bread—I hope you’re feeling inspired already because I assure you… every moment spent preparing leads up towards delicious rewards awaiting right around corner waiting eagerly just beyond horizon!
Stay tuned as we keep going until we’ve perfected this heavenly creation—I promise it’ll be worth every bit effort involved along way… Happy Baking!
Step 5: The Art of Mixing – Uniting the Ingredients
Now, let’s dive into the mixing process, where the magic truly begins! In a large mixing bowl, combine your olive oil, brown sugar, and granulated sugar. This is where we create a beautiful emulsion; the oil will add moisture and richness while the sugars bring sweetness and flavor depth. Using a whisk or an electric mixer on medium speed, blend these ingredients until they are well combined and slightly frothy. This step is crucial because it incorporates air into your batter, which will give our Chocolate Espresso Banana Bread that delightful rise in the oven. You want to mix until everything is fully integrated but be careful not to overdo it—just enough to see that glossy mixture form.
Next, add in your room-temperature eggs one at a time. Trust me on this one: adding eggs at room temperature ensures they blend seamlessly into the batter, creating a cohesive texture. After each addition, whisk until fully incorporated before moving on to the next egg. Then stir in your vanilla extract; this fragrant addition will elevate the flavor profile of your bread to extraordinary levels. It’s during this blending phase that you want to take a moment to appreciate how wonderful your kitchen smells already—vanilla and sugar mingling together is like a warm hug! Finally, add in your mashed ripe bananas and sour cream. The bananas bring their natural sweetness and moisture while the sour cream adds a lovely tanginess that balances out the flavors beautifully. Stir gently until just combined—you want some banana chunks for texture, so don’t go overboard!
Step 6: Dry Meets Wet – A Harmonious Blend
With our wet ingredients perfectly united, it’s time to introduce our dry ingredients to the party! In another bowl, sift together your all-purpose flour, cocoa powder, baking soda, kosher salt, and espresso powder. Sifting is essential here; it lightens up your dry mixture by breaking up any clumps while also ensuring even distribution of cocoa and espresso powder throughout the batter. This step not only enhances texture but also prevents any bitterness from clumping together in places where you least expect it—no one wants an intense pocket of unsweetened cocoa ruining their chocolate experience!
Once sifted, gradually fold the dry mixture into the wet ingredients using a spatula or wooden spoon. Be gentle—this isn’t an aggressive task! Folding helps maintain that airy quality we created earlier while ensuring no dry pockets remain. The goal here is to get a gloriously velvety batter without over-mixing it; stop as soon as you can no longer see any flour streaks. At this point, you’ll notice how beautifully rich and dark your batter has become—this is where the chocolatey magic happens! And let’s not forget about those chocolate chips; toss them in with a tablespoon of flour to prevent them from sinking during baking (this little trick works wonders!). Gently fold them into your batter along with those precious banana slices we saved for garnish.
Step 7: Preparing Your Baking Vessel – Getting Ready for Transformation
Now that our batter is ready to shine, let’s prepare our baking pan! Grab a standard loaf pan (9×5 inches works wonders) and generously grease it with olive oil or line it with parchment paper for easy removal later on. I love using parchment because it allows for effortless lifting once baked—just imagine how satisfying it’ll feel pulling out that perfectly baked loaf without any crumbs left behind! If you’re using oil instead of parchment paper, make sure to coat every inch of those sides and bottom; this prevents sticking like a pro.
It’s time for one last flourish before we send our Chocolate Espresso Banana Bread off into its warm oven embrace! Pour half of your luscious batter into the prepared pan; this part’s essential because we want an even distribution when adding our garnishes. Lay down those thin banana slices right atop this layer followed by another sprinkle of granulated sugar—this creates an irresistible caramelized crust on top that contrasts beautifully with the soft inside as it bakes. Now pour in the remaining batter gently over these garnishes until everything feels snugly housed within that pan.
Step 8: Into The Oven – Baking Magic Unfolds
Preheat your oven to 350°F (175°C)—you want a consistent heat source ready when it’s time for baking magic! Once preheated, place your loaf pan in the center rack of your oven. Timing is key here; bake for about 55 minutes but start checking at around 50 minutes since ovens can vary quite significantly in temperature accuracy.
To test if it’s done without relying solely on time (which can be tricky!), insert a toothpick or knife into the center of your loaf—it should come out clean or with just a few moist crumbs clinging onto it but no wet batter—that’s what you’re aiming for! The aroma wafting throughout your kitchen will be utterly intoxicating at this point; rich notes of chocolate intertwined with coffee hints will tease you mercilessly as you wait patiently.
As you watch this transformation unfold through the oven window—the golden crust forming beautifully—you may notice slight cracks developing along its surface—this is completely normal and expected! Those cracks are just signs that it’s achieving that perfect dome shape while allowing steam to escape as it bakes away happily inside its warm cocoon.
When it’s finally done (and if you haven’t already), let this beauty cool in its pan for about 10-15 minutes before transferring it onto a wire rack—this cooling step allows residual steam to escape so you won’t end up with soggy bread later on. Plus, trust me when I say slicing into warm bread right out of the oven is one thing—but letting it cool just slightly gives those flavors time to settle down and harmonize brilliantly!
Conclusion:
As we wrap up our delightful journey through this recipe, I hope my excitement has sparked a flame within you to whip up your very own Chocolate Espresso Banana Bread! This isn’t just any ordinary banana bread; it’s an extraordinary blend of rich chocolate and aromatic espresso that dances on your palate. The subtle sweetness from ripe bananas complements the deep cocoa flavors while those luscious chocolate chips create pockets of pure bliss with every bite—it’s truly a symphony of flavors that elevates simple ingredients into something magnificent!
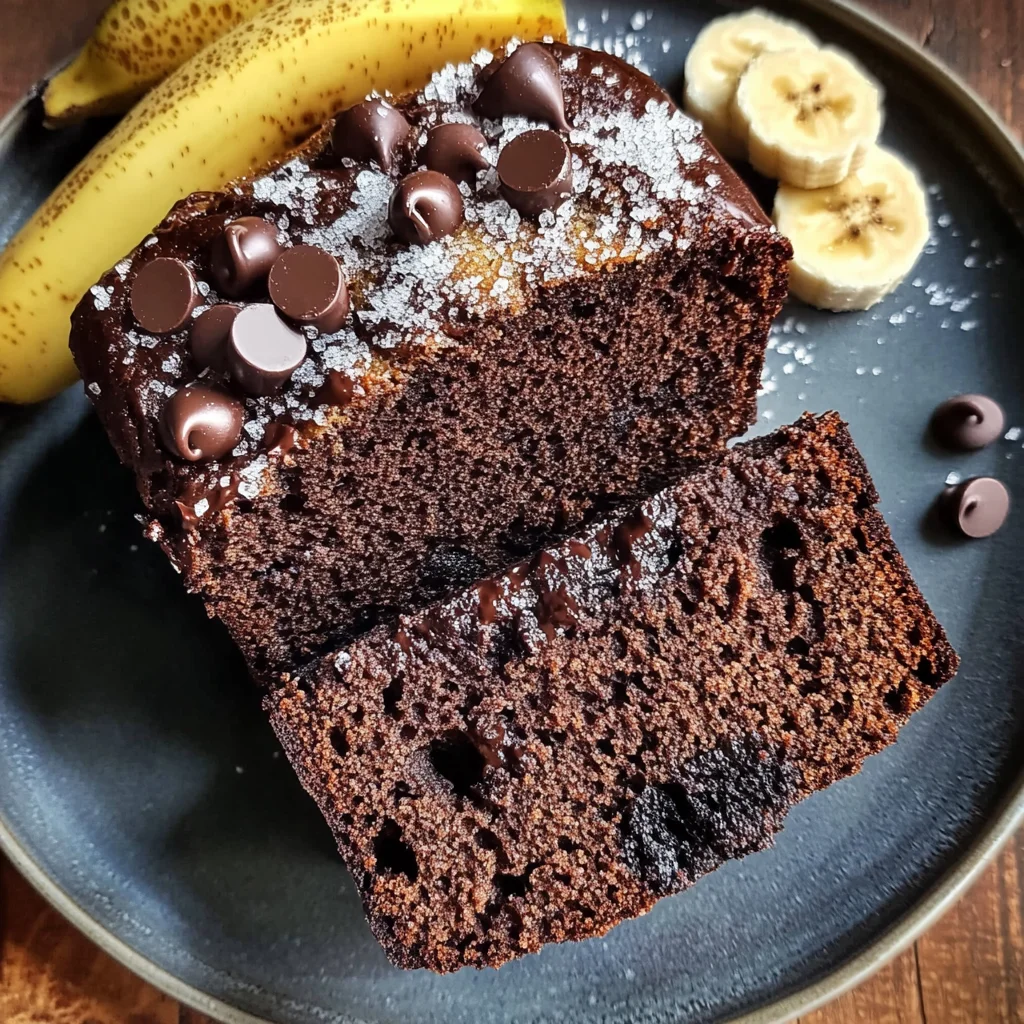
Why is this recipe a must-try? Well beyond its scrumptious taste, it’s an incredibly rewarding experience to create something so heartfelt and comforting right in your own kitchen. Whether it’s breakfast on a busy morning or a special dessert at a family gathering, this bread shines brightly on any occasion. Just picture yourself pulling this beauty out of the oven: golden-brown crust meeting that soft inner crumb, all while the kitchen fills with warmth and love—a moment worth celebrating!
When serving your decadent Chocolate Espresso Banana Bread, imagine savoring one warm slice alongside a steaming cup of coffee or tea for an afternoon pick-me-up that’s simply unmatched. For an even more indulgent experience, try topping it with whipped coconut cream or a drizzle of chocolate sauce—a true treat for any day! And don’t forget; pairing it with fresh berries adds a refreshing twist that balances all those rich flavors beautifully.
Feeling adventurous? This recipe is wonderfully adaptable! Want to play around with flavors? Substitute some of the cocoa powder with spices like cinnamon or nutmeg for warm undertones that will surprise and delight your taste buds! Or maybe swap out some of the dark chocolate chips for white chocolate ones—the contrast will be utterly extraordinary! The possibilities are endless—so go ahead and make this recipe your own. I can’t wait to hear about your creations; please share your experiences and thoughts because nothing brings me more joy than connecting over food!
Chocolate Espresso Banana Bread
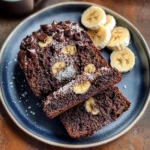
Indulge in the delightful flavors of our Chocolate Espresso Banana Bread! This moist and rich loaf combines the deep, satisfying notes of chocolate with the invigorating essence of espresso, all harmoniously blended with naturally sweet ripe bananas. Perfect for cozy mornings or as a comforting dessert, each slice is an experience that brings warmth and joy to any occasion. Whether enjoyed alone with a cup of coffee or shared among friends and family, this decadent bread promises to become a beloved staple in your baking repertoire. Let’s dive into this easy-to-follow recipe that guarantees delicious results every time!
- Prep Time: 15 minutes
- Cook Time: 55 minutes
- Total Time: 1 hour 10 minutes
- Yield: Approximately 10 servings 1x
- Category: Dessert
- Method: Baking
- Cuisine: American
Ingredients
- 1 cup all-purpose flour
- ¼ cup cocoa powder
- 1 tsp baking soda
- ½ tsp kosher salt
- ½ tsp espresso powder
- ½ cup olive oil
- ½ cup brown sugar
- ½ cup granulated sugar
- 2 eggs (room temperature)
- 1 tsp vanilla extract
- ½ cup sour cream
- 1 cup ripe bananas (mashed)
- ½ cup dark chocolate chips
- ½ cup semi-sweet chocolate chips
Instructions
- Preheat your oven to 350°F (175°C) and grease a 9×5 inch loaf pan with olive oil.
- In a mixing bowl, whisk together the flour, cocoa powder, baking soda, salt, and espresso powder.
- In another bowl, combine the olive oil, brown sugar, and granulated sugar until light and fluffy. Add eggs one at a time, mixing well after each addition. Stir in vanilla extract, mashed bananas, and sour cream.
- Gradually add the dry ingredients to the wet mixture until just combined. Gently fold in both types of chocolate chips.
- Pour half of the batter into the prepared pan, layer with banana slices topped with sugar, then add the remaining batter on top.
- Bake for approximately 55 minutes or until a toothpick inserted comes out clean. Let cool before slicing.
Nutrition
- Serving Size: 1 slice (70g)
- Calories: 210
- Sugar: 14g
- Sodium: 150mg
- Fat: 9g
- Saturated Fat: 1g
- Unsaturated Fat: 8g
- Trans Fat: 0g
- Carbohydrates: 30g
- Fiber: 2g
- Protein: 3g
- Cholesterol: 35mg