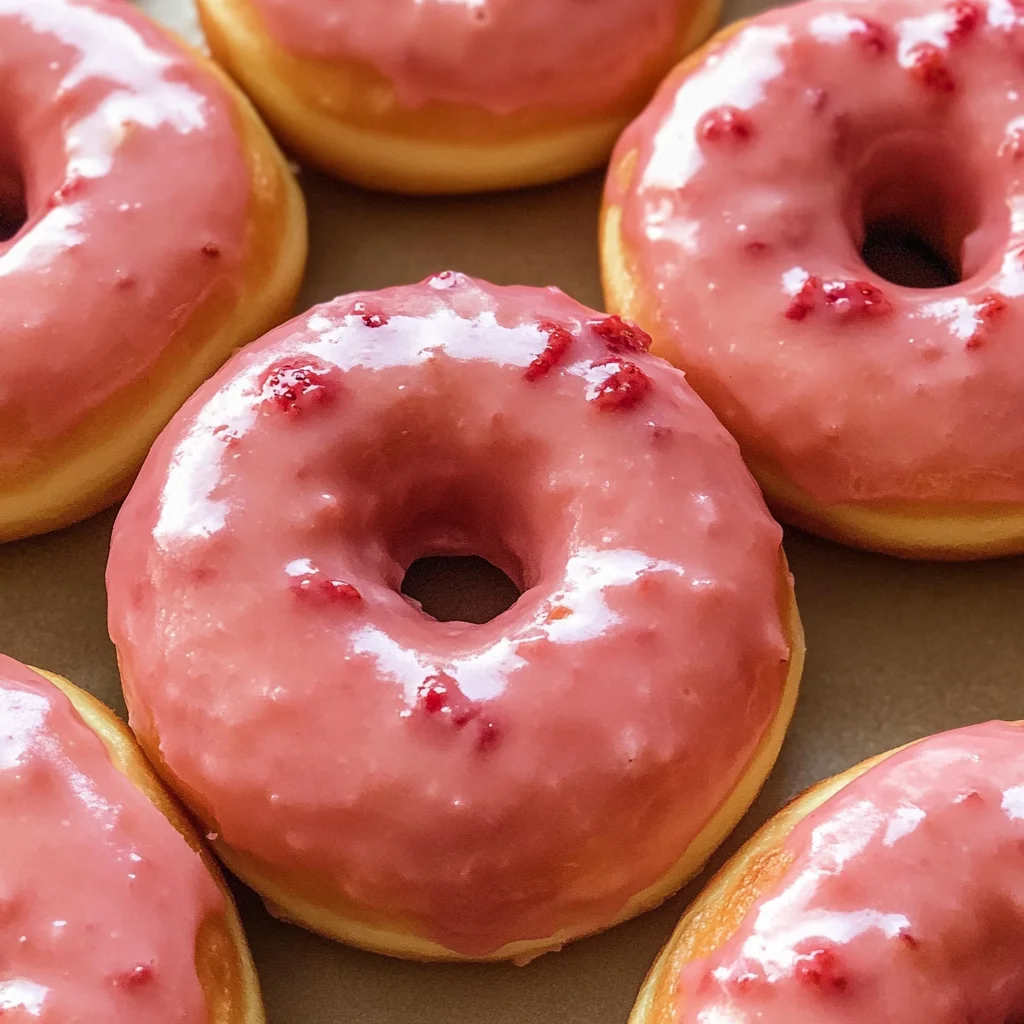
Strawberry Glazed Donuts
There’s something truly magical about the aroma of freshly baked donuts wafting through your home, isn’t there? It’s a scent that wraps around you like a warm hug, bringing comforting memories and an overwhelming sense of joy. These Strawberry Glazed Donuts are more than just a delightful treat; they’re an experience, a celebration of sweet strawberries and fluffy vanilla that dances on your palate. Imagine biting into one — the soft, airy texture giving way to a luscious glaze that’s kissed with the essence of ripe strawberries. I promise you, each bite is like a little piece of sunshine on your tongue, bursting with bright flavors that remind us of lazy summer mornings and joyful gatherings.
This recipe for Strawberry Glazed Donuts is incredibly easy to whip up at home and will make you feel like a true pastry chef! Whether you’re looking to impress guests at brunch or simply want to indulge in a homemade sweet treat, these donuts fit the bill perfectly. They’re made without any frying, which means less fuss and mess while still delivering all the nostalgia of classic donuts. Plus, the fresh strawberry glaze adds a beautiful pop of color and flavor that truly elevates these baked beauties. Trust me when I say, once you take your first bite, you’ll be swept away into donut bliss!
Ingredients:
As we embark on this delightful culinary journey together, it’s essential to gather all our ingredients because each one plays a vital role in crafting these Strawberry Glazed Donuts. Let’s dive into what makes each component special!
- 2 cups all-purpose flour. This is the foundation of our donuts, providing the structure we need for that perfect fluffy texture. When selecting flour, look for high-quality brands that don’t contain too much protein; otherwise, your donuts can become dense instead of light and airy. Sifting your flour before measuring can also help aerate it for an even fluffier result—don’t skip this step!
- 2 tsp baking powder. This leavening agent is absolutely paramount in giving our donuts their rise and fluffy texture. It reacts with moisture and heat to produce carbon dioxide bubbles that lift the batter as it bakes. Make sure to check the expiration date on your baking powder—if it’s past its prime, your donuts might not rise as beautifully!
- 1/2 tsp baking soda. Acting in tandem with the baking powder, baking soda helps balance acidity in our recipe (especially from ingredients like sour cream) while adding extra lift. The two together create a symphony of lightness in every bite! Again, ensure it’s fresh—baking soda doesn’t last forever.
- 1 tsp salt. Salt is often overlooked in sweet recipes but trust me when I say it’s crucial! It enhances all the other flavors and brings out their sweetness while balancing any potential bitterness from baking soda or baking powder.
- Pinch of nutmeg. Just a hint of nutmeg adds warmth and depth to our donuts without being overpowering. It whispers notes of spice that complement the sweetness beautifully—as if wrapping you in cozy comfort during chilly mornings.
- 2/3 cup white granulated sugar. This sugar not only sweetens our donuts but also helps create that tender crumb we all adore. When mixed with butter (in later steps), it creates air pockets that contribute to the fluffiness we desire. Ensure you’re using fine granulated sugar so it dissolves easily into our mixture.
- 2 large eggs (room temperature). Eggs are crucial for binding everything together while providing richness and moisture. Room temperature eggs blend more seamlessly into batters compared to cold ones straight from the fridge—it helps activate those leavening agents efficiently!
- 1/2 cup milk (room temperature). Milk introduces moisture but also contributes flavor and tenderness to our donuts; plus, it helps dissolve dry ingredients more effectively when everything is at room temperature.
- 1/2 cup sour cream (room temperature or Greek yogurt). This ingredient is my secret weapon! Sour cream gives these donuts an incredible moistness due to its fat content while also enhancing flavor with just enough tanginess to elevate them beyond ordinary treats.
- 4 TBSP unsalted butter (melted and cooled). Butter adds richness and flavor; melting it allows for better incorporation into our batter without leaving lumps behind—a non-negotiable step for achieving smoothness!
- 1 tsp pure vanilla extract. Vanilla acts like magic—transforming simple recipes into extraordinary ones with its warm aroma and deep flavor notes that fill every nook and cranny of our delicious creations.
- 1/2 cup strawberries (washed and quartered). Fresh strawberries bring vibrant flavor to both our batter and glaze! Choose ripe berries because they’ll provide natural sweetness along with juicy goodness—truly what makes these donuts so special.
- 2 cups powdered sugar. This is essential for creating that dreamy glaze we’ll drizzle over our warm donuts later on! Powdered sugar dissolves easily when mixed with liquid ingredients like milk—resulting in a smooth finish that’s irresistible.
- 1 TBSP milk. Just enough milk helps adjust the consistency of our glaze so it’s pourable yet thick enough to cling beautifully onto each donut without running off entirely; finding balance here is key!
Equipment You’ll Need:
Before diving headfirst into making our delightful Strawberry Glazed Donuts, let’s take a moment to gather some essential equipment—these tools are like trusty sidekicks ready to help transform ingredients into something wonderful!
- Donut pan: A non-stick donut pan is vital for shaping those perfect ring-shaped pastries! If you don’t have one yet, fear not—you can use muffin tins instead for delicious donut holes if that’s more your style.
- Mixing bowls: Having several mixing bowls at hand will make life easier as we combine wet ingredients separately from dry ones before bringing them together later on—the key to preventing lumps in your batter!
- Whisk or electric mixer: While whisking by hand has its charm (and gives great arm workouts!), using an electric mixer will save time when creaming butter and sugar together—plus it ensures everything blends perfectly without any effort.
- Spatula or wooden spoon: You’ll want a good spatula or sturdy wooden spoon for folding together batters gently; this prevents overmixing which can lead to denser donuts—a fate we want to avoid!
With everything gathered, let’s delve deeper into preparing those glorious Strawberry Glazed Donuts next!
Step 1: Prepping Your Ingredients
Before you start mixing anything, it’s crucial to have all your ingredients prepped correctly because this sets the stage for success! Begin by measuring out your flour carefully; remember—I always recommend spooning flour gently into your measuring cup instead of scooping directly from the bag as this can lead to packing down too much flour inadvertently resulting in dense doughnuts instead of light fluffy ones… not what we’re aiming for! Then move on towards measuring out other dry ingredients like baking powder, baking soda—don’t forget that pinch of nutmeg! Each measurement counts towards achieving harmony within your batter’s final flavor profile!
Step 2: Mixing Dry Ingredients
Once you’ve got everything measured out neatly into separate bowls—a lovely organized kitchen makes me happy—it’s time for combining those dry elements! In one large bowl sift together all-purpose flour along with baking powder, baking soda,salt,and nutmeg until well-blended—you should see no lumps remaining after this process as they could hinder rising capabilities later during baking time! Give them a good whisk so they intermingle nicely before setting aside while we focus on building flavors through wet mixtures next…
Step 3: Creaming Butter & Sugar
In another bowl (preferably larger), add melted butter followed by white granulated sugar then mix using either an electric mixer or whisk until light and fluffy—a beautiful creamy concoction forms here which will be pivotal later on when blending egg yolks into buttery goodness altogether creating wonderful textures within each bite.Watch closely as colors change slightly indicating air has been incorporated successfully—it usually takes about 3 minutes max if using electric mixers faster than doing by hand but trust me when I say worth every second spent watching transformation happen right before eyes…
Step 4: Incorporating Eggs & Dairy
Next comes one very important part: adding eggs followed by room temperature milk along with sour cream.Give them all plenty attention while blending until everything looks cohesive again.The reason room-temperature items work better here lies within creating smoother emulsions thus preventing curdling issues down line…we want silky textures throughout rather than chunky bits disrupting mouthfeel later after frying/baking times done properly too!
Now let me pause here because I know how exciting this process can be! But remember patience pays off immensely when crafting something delicious—for every luscious strawberry glazed donut awaits just ahead…
Step 5: A Whisking Wonder
Now that you have your dry ingredients beautifully combined, it’s time to move on to the wet ingredients. Grab a large mixing bowl and whisk together the eggs, sour cream (or Greek yogurt), milk, and melted butter. This step is profoundly satisfying as you watch these simple ingredients transform into a creamy, luscious mixture. The eggs will provide structure and stability, while the sour cream adds moisture and tenderness to our donuts, ensuring they are fluffy and light. I promise you, this combination is where the magic begins!
As you whisk, pay attention to the texture of your batter; it should be smooth and velvety. If you catch any lumps from the sour cream or yogurt, don’t fret! Just give it a little more love with your whisk until everything is harmoniously blended. Trust me on this—taking the time to ensure your wet ingredients are well mixed is absolutely paramount for achieving an even rise in your donuts. It’s all about creating that perfect balance between airy and moist, so let those arms work a bit!
Step 6: Marrying Flavors
Once your wet ingredients are perfectly blended, it’s time for them to meet their dry counterparts! Pour the wet mixture into the bowl containing your flour blend. Now, here’s a little tip that will elevate your baking game—use a spatula or wooden spoon rather than a whisk for this part. Gently fold the two mixtures together until just combined. This technique—known as ‘folding’—is essential because it minimizes gluten development, which can lead to tough donuts instead of the tender bites we’re after.
As you fold, keep an eye on the batter. You want to see a few streaks of flour remaining; overmixing can lead to dense donuts that lack that fluffy quality we all crave when biting into one of these strawberry glazed delights. It’s like giving your batter a warm hug—it should feel comforted but not overwhelmed! The dough will be thick yet slightly pourable; resist the urge to add more liquid at this stage unless it feels too dry (in which case just add a splash more milk).
Step 7: Filling Your Donut Pans
Now comes one of my favorite parts: filling those donut pans! Preheat your oven if you haven’t already—it should be set to 350°F (175°C). While it’s warming up, prepare your donut pans by greasing them generously with non-stick cooking spray or brushing them lightly with some melted butter to ensure easy release later on. This step is crucial because nobody wants to watch their precious creations stick stubbornly to the pan when they could be effortlessly gliding out like little puffy clouds.
Using a piping bag—or if you don’t have one handy, just a resealable plastic bag with one corner snipped off—fill each cavity about halfway full with the glorious batter you’ve just created. This is important because filling them too much can lead to overflowing donuts that lose their charming shape during baking. As you fill each mold, take a moment to appreciate how beautiful and glossy the batter looks—it really speaks volumes about what’s coming next! Aim for neatness here; it’ll make for even baking and stunning presentation.
Step 8: Baking Your Perfect Strawberry Glazed Donuts
With your filled pans ready, it’s finally time to bake! Slide those beauties into the preheated oven and set your timer for 10-12 minutes. As they bake, indulge in the intoxicating aroma wafting through your kitchen—there’s truly nothing like it! At around ten minutes in, start checking for doneness by gently pressing on the tops of the donuts; they should spring back slightly when done—a sure sign they’ve reached that perfect state of fluffiness.
Keep an eye on their color as well; they should take on a lovely golden hue without becoming overly browned on top—the goal here is that delightful balance between soft insides and slightly crisp edges. If you’re unsure, use a toothpick inserted into one of them; if it comes out clean or with just a few moist crumbs clinging to it, you’re good to go! Remember that every oven behaves differently; yours might run hotter or cooler than average, so adjust accordingly! Once ready, carefully remove them from the oven and allow them to cool in their pans for about 5 minutes before transferring them onto a wire rack—this helps maintain their delicate structure while cooling.
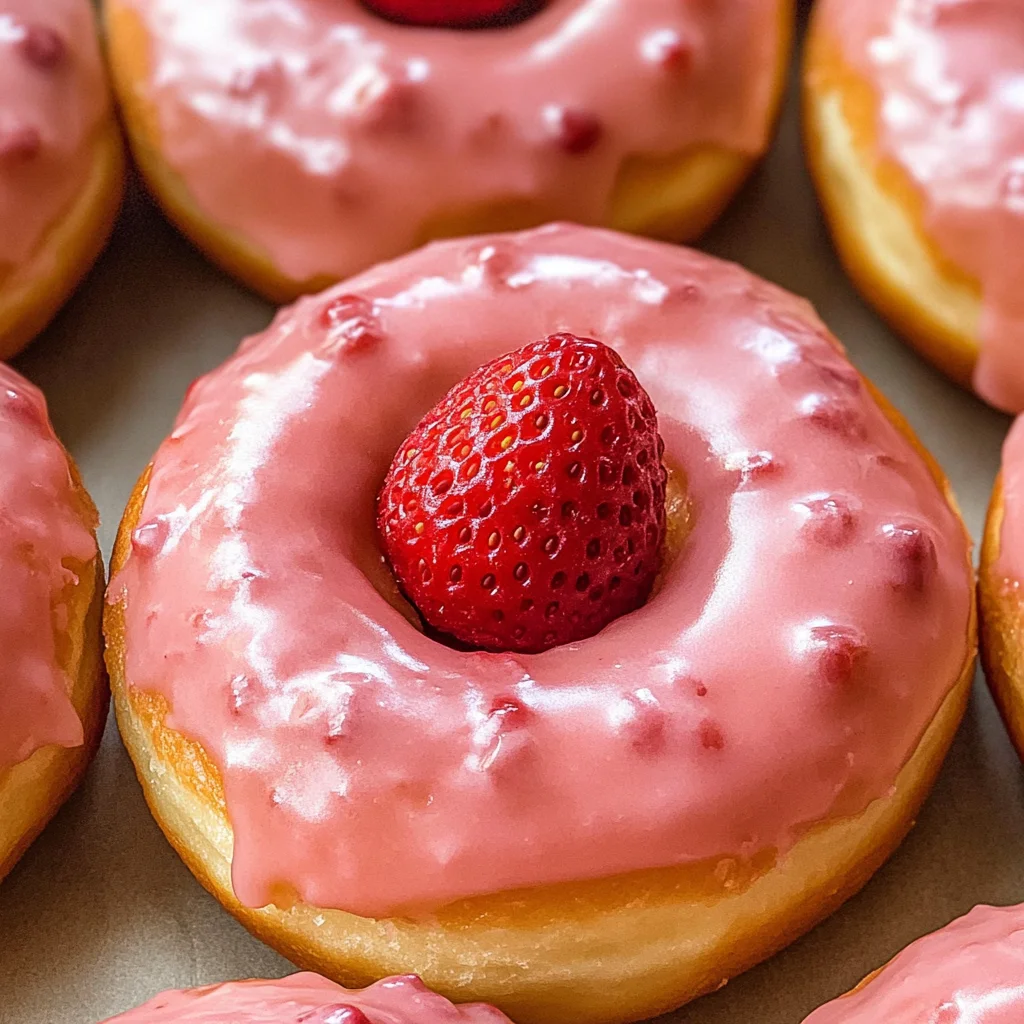
Final Touches: The Glorious Strawberry Glaze
Now that our donuts are cool enough to handle but still warm enough for glazing magic, let’s prepare that utterly divine strawberry glaze! In a separate bowl, combine powdered sugar, fresh strawberries, and a tablespoon of milk. Begin by mashing those strawberries with a fork or potato masher until they become juicy little gems bursting with flavor. The vibrant color and aroma will remind you of sunlit summer days—a truly extraordinary experience!
Once mashed, mix in your powdered sugar gradually while stirring vigorously until everything comes together into a silky glaze that’s smooth yet thick enough to cling lovingly onto each donut’s surface. If you find it’s too thick (which can happen depending on how juicy your strawberries are), add another splash of milk until you reach that perfect consistency—a drizzle test can help here! Dip each donut top into this heavenly concoction allowing excess glaze to drip off before placing them back onto the wire rack.
This step is absolutely essential because not only does it provide sweetness but also enhances each bite with fresh strawberry flavor! Allow these glazed beauties about 10 minutes for their glaze to set slightly before indulging—you want that sweet layer intact while enjoying every fluffy bite!
And there you have it—fluffy baked Strawberry Glazed Donuts that will leave everyone around you raving about how deliciously extraordinary they are! Serve these at breakfast gatherings or as an afternoon treat with tea—they’re bound to brighten anyone’s day!
Storage and Enjoyment Tips for Your Strawberry Glazed Donuts
Now that your kitchen is filled with the delightful aroma of freshly baked strawberry glazed donuts, it’s time to dig in and savor every fluffy bite! But wait—what if you have leftovers? Trust me, these heavenly treats can be enjoyed beyond just one sitting! With a little care, you can keep them fresh for days or even freeze some for a later date. Let’s explore how to store these beauties properly so that every bite remains as scrumptious as the first.
Storing Leftover Strawberry Glazed Donuts
To keep your strawberry glazed donuts at their best, the right storage method is absolutely paramount. Start by placing them in an airtight container; this will help lock in that moist, tender texture you’ve worked so hard to achieve. If you don’t have an airtight container handy, a zip-top bag works wonders too—just make sure to squeeze out as much air as possible before sealing. Ideally, you’ll want to store them at room temperature where they’ll stay fresh for about 2-3 days. For those who want to maintain their quality even longer, consider adding a slice of bread to the container; this little trick helps absorb excess moisture and keeps your donuts from drying out. When it comes to flavor after storage, you’ll find that they still pack a delightful punch—though the glaze may lose a bit of its shine, the taste remains utterly intoxicating! For serving suggestions, simply give them a quick pop in the microwave for about 10 seconds to bring back that warm comfort or enjoy them chilled for a refreshing treat.
Freezing Strawberry Glazed Donuts for Later
If you’re anything like me and love planning ahead, freezing your strawberry glazed donuts is such a fantastic option! To do this properly, allow your donuts to cool completely before sealing them up; this ensures you won’t trap any unwanted moisture inside. Wrap each donut individually in plastic wrap and then place them in a sturdy freezer bag or container—this double layer will protect against freezer burn. These delightful treats can be kept frozen for up to three months without losing their charm! When you’re ready to indulge again, simply take out as many as you’d like and let them thaw at room temperature for about 30 minutes or pop one straight into the microwave for about 15 seconds if you’re feeling impatient (trust me; I always do!). The convenience of having these sweet morsels ready whenever you need a pick-me-up is truly extraordinary—it’s like having homemade happiness waiting in your freezer!
Strawberry Glazed Donuts

Indulge in the delightful experience of homemade Strawberry Glazed Donuts, a perfect blend of fluffy vanilla goodness and vibrant strawberry flavor. These baked treats are not only easy to prepare but also bring the joy of fresh strawberries to your kitchen, reminiscent of sunny mornings and sweet gatherings. With a light texture and a luscious glaze made from ripe strawberries, each bite is like a burst of sunshine. Ideal for breakfast, brunch, or an afternoon snack, these donuts will have everyone smiling with delight. Treat yourself and your loved ones to this scrumptious recipe that captures the essence of summer in every bite!
- Prep Time: 15 minutes
- Cook Time: 12 minutes
- Total Time: 27 minutes
- Yield: Makes approximately 12 donuts 1x
- Category: Dessert
- Method: Baking
- Cuisine: American
Ingredients
- 2 cups all-purpose flour
- 2 tsp baking powder
- 1/2 tsp baking soda
- 1 tsp salt
- Pinch of nutmeg
- 2/3 cup granulated sugar
- 2 large eggs (room temperature)
- 1/2 cup milk (room temperature)
- 1/2 cup sour cream (or Greek yogurt, room temperature)
- 4 tbsp unsalted butter (melted and cooled)
- 1 tsp pure vanilla extract
- 1/2 cup fresh strawberries (washed and quartered)
- 2 cups powdered sugar
- 1 tbsp milk
Instructions
- Preheat your oven to 350°F (175°C) and grease a donut pan.
- In a bowl, sift together flour, baking powder, baking soda, salt, and nutmeg.
- In another bowl, cream together melted butter and sugar until light and fluffy.
- Add eggs one at a time, mixing well after each addition. Then mix in milk, sour cream, and vanilla until smooth.
- Gradually fold the dry ingredients into the wet mixture until just combined; do not overmix.
- Fill each donut cavity halfway with batter using a piping bag or zip-top bag.
- Bake for 10-12 minutes until golden brown and springy to touch. Cool in the pan for 5 minutes before transferring to a wire rack.
- For the glaze: Mash the strawberries in a bowl; gradually mix in powdered sugar and milk until smooth.
- Dip each warm donut top into the glaze and let it set on the wire rack.
Nutrition
- Serving Size: 1 donut (50g)
- Calories: 170
- Sugar: 20g
- Sodium: 150mg
- Fat: 6g
- Saturated Fat: 3g
- Unsaturated Fat: 3g
- Trans Fat: 0g
- Carbohydrates: 27g
- Fiber: <1g
- Protein: 2g
- Cholesterol: 30mg