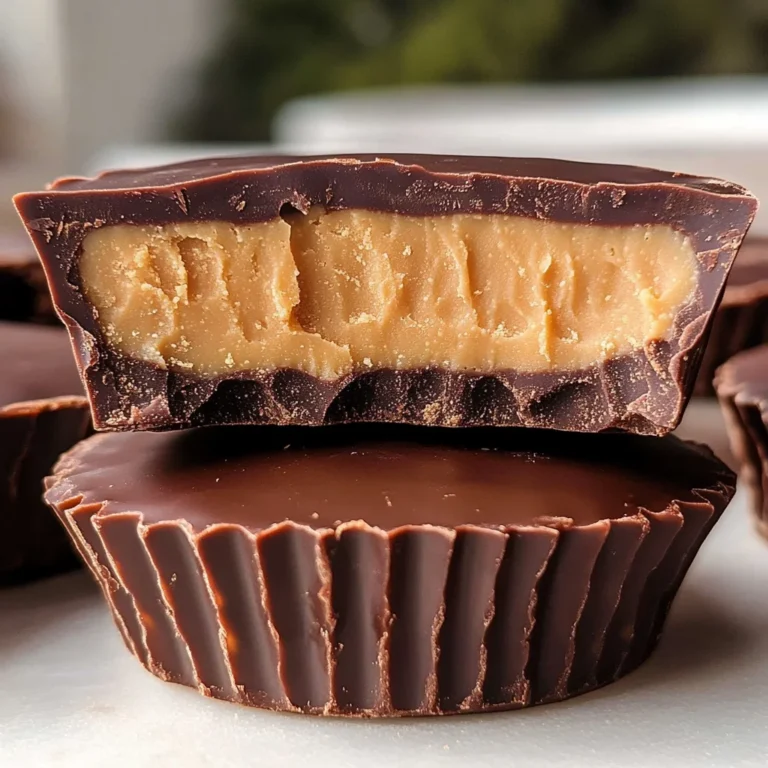
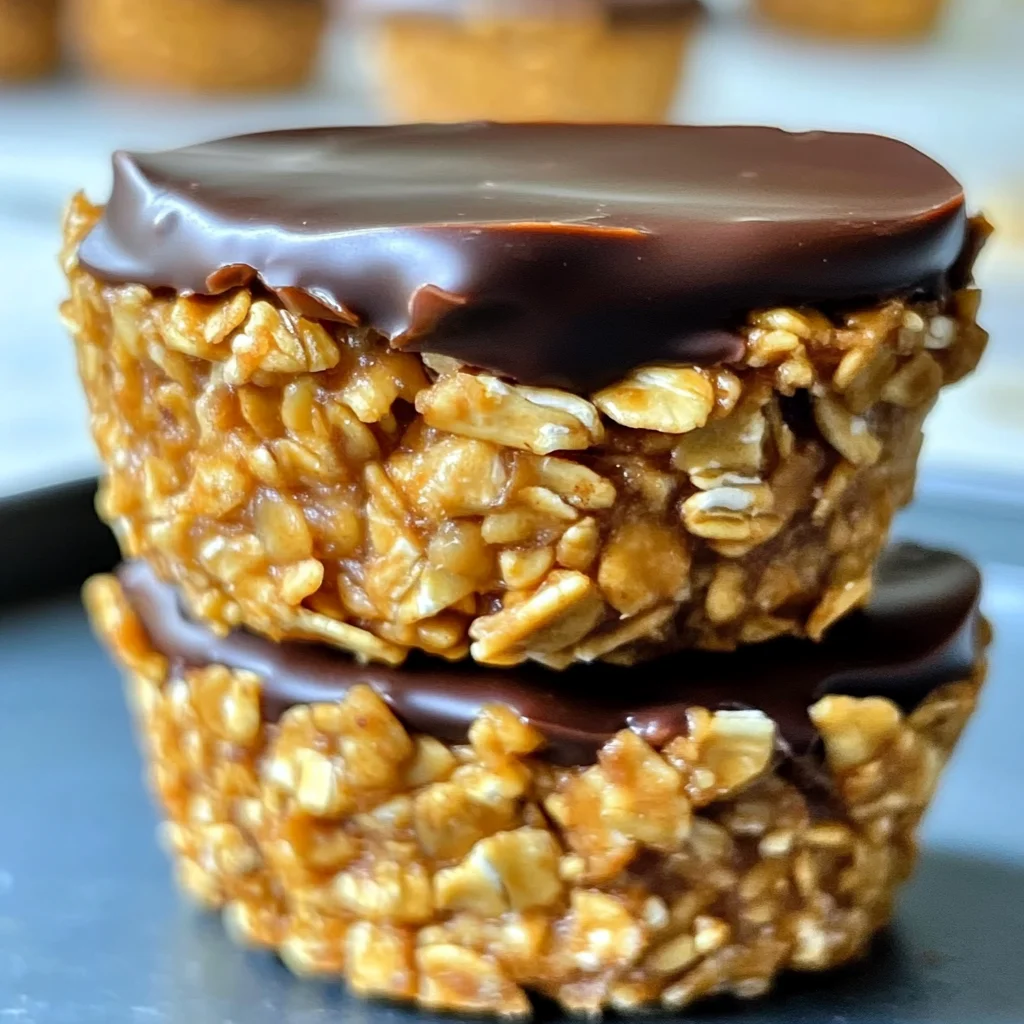
No Bake Peanut Butter Granola Cups
There’s something magical about the simple act of making snacks at home, isn’t there? It’s a dance of flavors and textures that transforms basic ingredients into something extraordinary. When I think of No Bake Peanut Butter Granola Cups, I can almost hear the gentle crunch of granola mingling with the creamy richness of peanut butter and the sweet embrace of honey. Each bite is like a warm hug, reminding us that comfort can be found in the simplest pleasures. This recipe is not just about food; it’s an experience—a delightful fusion of sweet and nutty that brings joy to every moment, whether it’s a busy morning rush or a lazy afternoon snack break.
These granola cups are more than just a quick fix; they echo the warmth of shared moments around the kitchen. Picture this: you’re grabbing one from the fridge for breakfast as you race out the door or enjoying one with a cup of tea while catching up with a friend. They symbolize convenience without compromising on health, proving that you can have your cake—or in this case, your granola cup—and eat it too! Trust me when I say these little gems are not just snacks; they’re energy-boosting bites that fuel your day and add a sprinkle of joy to your routine.
No Bake Peanut Butter Granola Cups: Sweet Simplicity Meets Nutty Goodness
Let’s embark on this culinary journey together! The beauty of No Bake Peanut Butter Granola Cups lies in their effortless preparation and incredible flavor profile. With just a handful of wholesome ingredients, we’ll create something profoundly satisfying and utterly delightful.
Ingredients:
As we dive into our ingredient list, remember that each component plays a pivotal role in crafting our delightful granola cups. The magic starts here!
- 2 ½ cups granola – This is our base, the heart of our creation! Granola brings not only texture but also a wonderful mix of oats, nuts, and seeds that provide dietary fiber and energy. When choosing granola, look for one that is low in added sugars for healthier options; it should be slightly crunchy yet able to hold moisture when mixed with other ingredients. If you prefer homemade granola, feel free to use your favorite recipe—it allows you to customize flavors to your liking!
- 1 cup chopped peanuts – These little powerhouses add crunch and a nutty flavor that’s simply irresistible. Peanuts are also packed with protein and healthy fats, making them an excellent choice for sustaining energy throughout your day. When selecting peanuts, opt for unsalted varieties if possible; this way, we can control the saltiness ourselves while still enjoying their rich flavor.
- 3 Tablespoons peanut butter – This creamy goodness is what ties it all together! Peanut butter adds richness and depth while acting as a binding agent in our mixture. Make sure to choose natural peanut butter without added sugar or hydrogenated oils for the best results—it’s worth it for that pure nutty flavor! If you’re feeling adventurous or have allergies to peanuts, almond or sunflower seed butter could be delicious substitutes.
- 3 Tablespoons honey (or more if needed) – Honey serves as both sweetener and binder in our recipe. Its sticky nature helps hold everything together while imparting its floral sweetness. Plus, honey has its own unique benefits—it’s known for being soothing to sore throats and has antioxidants! Depending on your taste preference or dietary needs, feel free to adjust this amount or swap it out with maple syrup for a vegan alternative.
- 1 cup melted peanut butter – Yes, more peanut butter! Melting it adds an extra layer of creaminess when it’s poured into the center of each cup. The heat transforms it into a pourable liquid gold that melds beautifully with our other ingredients. Just remember not to overheat—gently warming it will allow us to keep its lovely texture intact.
- Topping: 12 oz. dark chocolate (finely chopped) – Ahh chocolate—the crowning glory! Dark chocolate not only adds a luscious finish but also introduces antioxidants that make every bite feel even more indulgent. Choose high-quality dark chocolate (at least 70% cacao) for richer taste without excessive sugar—trust me on this one!
- 1 Tablespoon coconut oil – This unassuming ingredient works wonders as it helps melt the chocolate smoothly while adding subtle tropical notes to our final creation. Coconut oil is fantastic because it solidifies when chilled, helping our topping set perfectly atop those gorgeous granola cups.
Equipment You’ll Need:
Before we dive into making these scrumptious No Bake Peanut Butter Granola Cups, let’s gather our trusty kitchen companions—those essential tools that will make this process smooth and enjoyable.
- Cupcake pan – This is where the magic happens! A standard cupcake pan allows us to mold our mixture into perfectly shaped cups that are easy to grab on-the-go. If you don’t have one handy, silicone molds work wonderfully too—they’re flexible and make releasing those cups oh-so-easy!
- Mixing bowl – A sturdy mixing bowl is essential for combining all those delightful ingredients together harmoniously. I recommend using one large enough to allow some vigorous stirring—trust me; you want everything mixed well!
- Rubber spatula or spoon – This handy tool will help you scrape down every last bit from the sides of your bowl so nothing goes to waste! Plus, you’ll find it incredibly useful when pressing down on your mixture inside the cupcake pan for even distribution.
- Microwave-safe bowl or double boiler – We’ll need this for melting both peanut butter and chocolate later in the process. Using glass works well here since it allows you to see when things are perfectly melted—simply microwave in short bursts or use gentle heat over simmering water if you’re opting for the double boiler method.
Now that we’ve got all our tools ready let’s dive into creating those luscious No Bake Peanut Butter Granola Cups!
Step 1: Mixing Up Your Base
In your mixing bowl, combine granola, chopped peanuts, peanut butter, and honey until everything blends seamlessly together—a beautiful symphony of textures starts taking shape right before your eyes! Don’t rush through this step; take time to ensure every oat is coated with honey’s sweetness and peanut butter’s creaminess so they can stick together later on. If at any point you find your mixture too dry (which can happen depending on how crunchy your granola is), don’t hesitate to add more honey until you achieve that sticky consistency we’re after—it’s absolutely paramount for holding those cups together!
Step 2: Shaping Your Cups
Next comes the fun part: greasing your cupcake pan! Use non-stick spray or rub some coconut oil in each cup—it ensures easy release later on once they’re set (and nobody likes stuck snacks!). Now divide your glorious mixture evenly among the twelve cups—you may want to use about two tablespoons per cup—as you press firmly down using either your fingers or spatula until each one holds its shape nicely while forming an indentation at their center where we’ll pour melted peanut butter later on. Once they’re all molded beautifully (and trust me; they’ll look adorable!), pop them into the freezer for about 5–10 minutes until they firm up nicely.
Step 3: Filling With Liquid Gold
While our granola bases chill out happily in their icy abode, it’s time to melt some peanut butter until it’s pourable—this process should only take about 30 seconds in the microwave if done carefully in short bursts so as not to overheat! Once melted completely (and oh-so-smooth), retrieve those lovely cups from freezing and pour just enough melted peanut butter into each dented center—you want them filled but not overflowing since we’ll need space for chocolate topping later on! Pop them back into the freezer once again for another 5–10 minutes until they’re firm enough—this will create layers upon layers of deliciousness as we build toward peak snacking bliss.
Step 4: Topping It Off
The grand finale awaits us: melting dark chocolate combined with coconut oil creates an indulgent topping that takes these granola cups over-the-top deliciousness levels! Combine finely chopped chocolate with coconut oil in either microwave-safe bowl using short intervals or gently melt over simmering water if you’re sticking with double boiler method—we want silky smooth results here! Once completely melted (don’t forget stirring well!), carefully spoon generous amounts onto each frozen peanut butter layer until fully covered—it feels like icing on top—how exciting is that? Chill them one last time until set firmly before indulging—the anticipation builds as you watch them transform into treats fit for royalty!
With each step taken towards making these No Bake Peanut Butter Granola Cups comes immense satisfaction knowing how simple yet rewarding homemade snacks can truly be—perfectly crafted bites waiting patiently within reach whenever cravings arise!
Stay tuned because there’s more goodness coming up next…
Step 5: Melting the Liquid Gold – Peanut Butter Bliss
Now, let’s get to that utterly intoxicating moment: melting the peanut butter. This step is absolutely paramount because it not only enhances the flavor but also creates a luscious, creamy layer that brings everything together. You’ll want to take your 1 cup of peanut butter and gently melt it in a heatproof bowl over a pot of simmering water, which is often referred to as a double boiler method. Trust me, this gentle heating ensures that your peanut butter doesn’t scorch or become too thick. As you watch it melt, you’ll see it transform into a smooth, pourable consistency—almost like liquid gold!
Once melted, carefully remove the bowl from the heat (don’t forget your oven mitts!), and allow it to cool for just a minute. The key here is patience; if you pour hot peanut butter onto your granola cups too soon, it could warm them up and lead to a messy mixture. So, what I usually do is give it a little stir while it cools—it helps maintain that silky texture and lets you enjoy the delicious aroma wafting through your kitchen. When it’s ready, carefully pour an even amount of this rich peanut butter into the center of each granola cup. This step adds not only flavor but also moisture that binds everything together into a delightful treat.
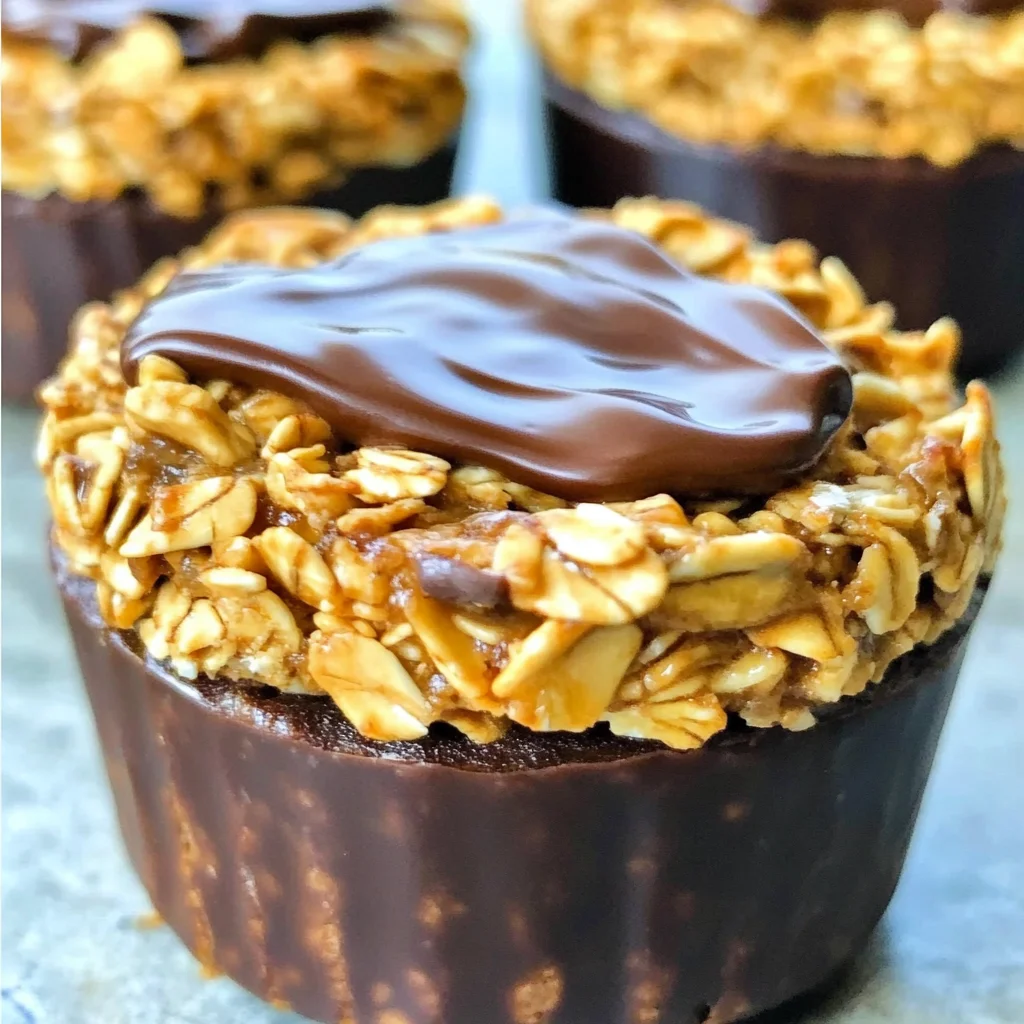
Step 6: The Chocolate Layer – A Decadent Finish
Now comes the fun part—the chocolate! You’ll want to grab your 12 oz. of dark chocolate and 1 tablespoon of coconut oil for this heavenly topping that takes our No Bake Peanut Butter Granola Cups from delightful to truly extraordinary. Start by chopping the chocolate finely; this ensures even melting and prevents those pesky clumps. Then, place the chopped chocolate along with the coconut oil in another heatproof bowl. Just like we did with the peanut butter, we’re going to melt this on a double boiler over simmering water. The coconut oil not only adds a glossy finish but also helps to temper the chocolate, giving it that luscious snap when set.
As you stir gently and watch this mixture come together into a velvety pool of chocolatey bliss, you might find yourself daydreaming about all sorts of dessert possibilities! It’s essential to keep an eye on this mixture; if overheated, chocolate can seize up and become grainy—definitely not what we want for our beautiful granola cups! Once fully melted and smooth, carefully spoon this divine concoction over each peanut butter layer in your cups, ensuring every bit is generously covered. It’s okay if some drips down the sides; after all, we’re making something special here!
Step 7: Chilling Out – The Wait is Worth It
Here’s where we exercise our patience again—this is crucial for achieving that perfect texture! After you’ve added your chocolate layer atop each cup, they need time to chill in the fridge until everything has beautifully set. I recommend placing them in the refrigerator for at least 30 minutes but feel free to leave them longer if you can resist; sometimes I make these in advance and let them chill overnight for an even firmer result. During this time, you might notice how those layers meld together into one cohesive delight; trust me on this—it makes all the difference.
As you wait (and I know waiting can be tough), imagine biting into one of these cups—the cool crunch of granola intermingling with that creamy peanut butter followed by smooth dark chocolate—pure bliss! Remember that chilling allows both flavors and textures to develop fully; without it, you’d miss out on that satisfying contrast between crunchy granola and creamy filling. So go ahead—put your feet up for a moment while these beauties firm up!
Step 8: The Grand Reveal – Serving Up Your Creations
Finally, after what feels like an eternity (but really was just about half an hour), it’s time for the grand reveal! Carefully remove your No Bake Peanut Butter Granola Cups from their molds by gently twisting them free—you should feel an exhilarating rush seeing how well they’ve held up! If they seem resistant or stubbornly clingy (which sometimes happens), don’t panic—give them an extra minute at room temperature or run a small knife around the edges before liberating them.
Once freed from their molds, these little gems are ready to make their debut at snack time or breakfast—a perfect grab-and-go option for busy mornings ahead! You can serve them on their own or present them with fresh fruit or a drizzle of honey if you’re feeling extra fancy. Make sure to store any leftovers in an airtight container in the fridge; they’ll keep fresh for about a week—or freeze them for longer storage if you’re blessed with any extras! Oh my goodness—I am so excited for you to try these delicious No Bake Peanut Butter Granola Cups!
Conclusion:
As we wrap up this delightful journey through making No Bake Peanut Butter Granola Cups, I hope you feel as excited as I do about creating these simple yet utterly extraordinary treats! There’s just something about the combination of crunchy granola, rich peanut butter, and velvety dark chocolate that transforms an ordinary snack into a symphony of flavors that dance on your palate. Every bite embodies comfort and nourishment—perfect for those bustling mornings or afternoon slumps when you need a little boost.
Why should you add this recipe to your repertoire? Well, beyond being irresistibly delicious, these granola cups are an absolute breeze to whip up! They shine during gatherings with friends or family movie nights when everyone wants something sweet but still healthy. Picture this: pulling these beauties out of the fridge on a warm day—the chocolate glistening slightly as it catches the light—and watching everyone’s eyes light up with anticipation. It’s moments like these that truly make cooking worthwhile—creating memories around food that nourishes both body and soul.
Imagine savoring one alongside your morning coffee while basking in sunlight pouring through the kitchen window; or enjoying one as an afternoon pick-me-up after a long day at work. For an extra indulgent experience, try pairing them with some fresh fruit like sliced bananas or strawberries—a perfect contrast that adds another layer of flavor! Or perhaps drizzle some extra melted peanut butter over top before serving; it’s always a hit!
Feeling adventurous? This recipe is wonderfully adaptable! You could swap out the peanuts for almonds if you wish for a different nutty flavor profile or even incorporate dried fruits like cranberries or raisins for added sweetness and chewiness—truly endless possibilities await! Don’t hesitate to experiment with different toppings like shredded coconut or even chia seeds; every variation brings its own unique twist while still honoring that beloved essence of peanut butter goodness. So grab those ingredients, roll up your sleeves, and dive into making these lovely No Bake Peanut Butter Granola Cups today—your taste buds will thank you!
No Bake Peanut Butter Granola Cups
No Bake Peanut Butter Granola Cups are the perfect blend of convenience and indulgence, making them an ideal snack for any time of day. With a delightful crunch from granola, a creamy peanut butter center, and a luscious dark chocolate topping, these treats are not only delicious but also packed with nutrients to fuel your busy lifestyle. They come together quickly without any baking, making them a fantastic choice for last-minute cravings or meal prep. Enjoy them as a grab-and-go breakfast, a satisfying afternoon snack, or a sweet treat to share with friends.
- Prep Time: 15 minutes
- Cook Time: 0 minutes
- Total Time: 15 minutes
- Yield: Approximately 12 servings 1x
- Category: Dessert
- Method: No Bake
- Cuisine: American
Ingredients
- 2 ½ cups granola
- 1 cup chopped peanuts (unsalted)
- 3 Tablespoons natural peanut butter
- 3 Tablespoons honey (or maple syrup)
- 1 cup melted peanut butter
- 12 oz. dark chocolate (finely chopped)
- 1 Tablespoon coconut oil
Instructions
- In a mixing bowl, combine granola, chopped peanuts, natural peanut butter, and honey until well mixed.
- Grease a cupcake pan and evenly distribute the mixture into the cups, pressing down firmly.
- Melt the additional peanut butter in a double boiler and pour it into the center of each cup.
- Chill in the freezer for about 10 minutes until set.
- Melt dark chocolate with coconut oil using the double boiler method and spoon it over each cup.
- Chill again until completely set before removing from molds.
Nutrition
- Serving Size: 1 granola cup (45g)
- Calories: 210
- Sugar: 9g
- Sodium: 35mg
- Fat: 12g
- Saturated Fat: 4g
- Unsaturated Fat: 8g
- Trans Fat: 0g
- Carbohydrates: 24g
- Fiber: 3g
- Protein: 6g
- Cholesterol: 0mg