Salmon Crispy Rice
There’s something truly magical about food that brings us together, and the experience of making Salmon Crispy Rice is no exception. Picture this: you’re in your cozy kitchen, the comforting aroma of vinegared rice wafts through the air, mingling with a hint of fresh scallions and a touch of spicy Sriracha. This dish is not just a recipe; it’s an experience that encapsulates the harmony between tradition and creativity. Each layer tells a story—of sushi bars in bustling cities, intimate gatherings with friends, and the joy that comes from sharing good food. I promise you, when you take that first crispy bite, the satisfying crunch followed by the silky salmon melting in your mouth will transport you to culinary bliss.
Salmon Crispy Rice has become a beloved staple for so many—and for good reason! The contrasting textures of crispy rice against tender sushi-grade salmon create an unforgettable symphony of flavors. It’s perfect for any occasion, whether it’s a casual weeknight dinner or a celebratory gathering with friends. Plus, it’s incredibly versatile! You can customize it with your favorite toppings or spicy sauces to make each batch uniquely yours. Trust me on this: once you try making it at home, you’ll find yourself craving it again and again.
Salmon Crispy Rice: A Crunchy Delight with a Creamy Twist
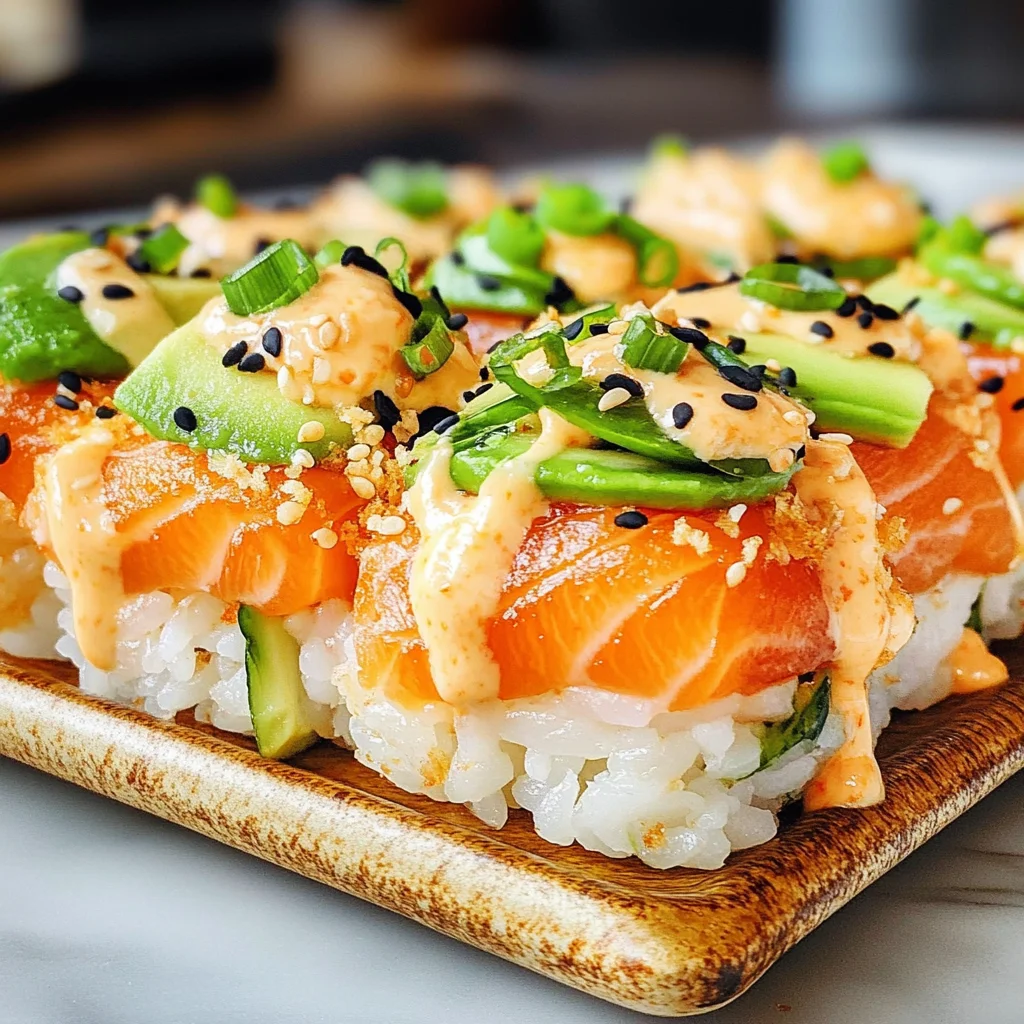
Ready to dive into this culinary adventure? Making Salmon Crispy Rice is easier than you might think, and I’m here to guide you every step of the way. Imagine plating these delightful rice squares topped with vibrant avocado slices and a sprinkle of toasted sesame seeds—it’s like art on a plate! Let’s gather our ingredients and embark on this delicious journey together.
Ingredients:
As we embark on creating our Salmon Crispy Rice, let’s take a moment to appreciate each ingredient’s role in crafting this dish. Every element is essential, contributing not just flavor but also texture and visual appeal.
- 3 cups cooked sushi rice (short grain rice). Sushi rice is the heart of this dish; its sticky nature helps hold everything together while providing that deliciously chewy texture that contrasts beautifully with the crispy exterior we’re aiming for. When preparing sushi rice, it’s important to rinse it thoroughly under cold water until the water runs clear. This removes excess starch and ensures your rice cooks perfectly—fluffy yet sticky enough to form those delightful little squares later on.
- 2 tbsp rice vinegar. This ingredient adds that essential tanginess to our sushi rice, balancing out the richness of the salmon and mayo. The acidity brightens up flavors and enhances overall taste—think of it as the secret handshake among all ingredients! When choosing rice vinegar, opt for unseasoned varieties so you can control sweetness and saltiness in your dish.
- 1 tbsp sugar. You might be wondering about sugar in savory rice—trust me when I say it’s non-negotiable! This little addition perfectly balances out the tanginess of the vinegar while enhancing other flavors present in our dish. It’s like bringing harmony to an orchestra; without it, some instruments may overpower others!
- 1 tsp salt. Essential for seasoning; salt brings out natural flavors in ingredients and elevates them to their fullest potential. Don’t skip this step! It’s crucial for ensuring every bite bursts with flavor.
- Vegetable oil (for frying). Choosing vegetable oil is key here because it’s neutral in flavor and has a high smoke point—perfect for achieving that coveted crispy texture without burning your rice squares. You want something like canola or sunflower oil that’ll allow those edges to brown gloriously while keeping everything inside tender.
- 1 lb sushi-grade salmon. This is where we elevate our dish from good to extraordinary! Sushi-grade salmon is not only incredibly fresh but also safe for raw consumption—so look for vivid color and firm texture when shopping at your local fish market or grocery store. Slicing into those delicate fillets reveals not just flavor but also beautiful marbling—a sign of quality fat content that contributes to its buttery richness.
- 4 tbsp Kewpie mayo. Oh my goodness—you are going to fall in love with Kewpie mayo! It’s creamier than regular mayo with a touch of umami from egg yolks and vinegar—it truly takes this dish up several notches! If you can’t find it at your local grocery store (though I highly recommend checking), feel free to substitute with regular mayo mixed with a dash of soy sauce for an extra kick.
- 2 tbsp Sriracha. This fiery sauce adds depth and heat; it’s absolutely paramount if you’re into bold flavors! The bright red hue catches your eye while its rich flavor profile complements both creamy elements from Kewpie mayo and fresh fish beautifully.
- 2 tbsp scallion (green onion). Freshness is key in any dish! Scallions provide a mild onion flavor along with vibrant green color—both vital components that brighten up our crispy treats visually as well as taste-wise.
- 2 tsp soy sauce. Soy sauce adds savory depth; its salty umami notes play off both sweet elements from sugar & vinegar while enhancing other flavors throughout our dish seamlessly!
- 2 tsp sesame oil. Just like Kewpie mayo, sesame oil introduces another layer of complexity—a nutty essence that ties everything together wonderfully without overshadowing other elements present within our recipe!
- Sliced avocado. Avocado adds creaminess alongside healthy fats; its rich texture contrasts delightfully with crunchy pieces underneath while providing additional nutrition too—it’s basically nature’s butter!
- Jalapeno (thinly sliced). Looking for extra heat? Jalapenos deliver just enough spice without overwhelming palates—and they add gorgeous visual appeal atop each serving!
- Black & white sesame seeds (toasted). Toasted seeds provide crunchiness along with nutty flavor—we’re talking about finishing touches here that make all difference when presenting dishes!
Equipment You’ll Need:
Now that we have gathered our ingredients, let’s talk about some essential tools you’ll need on this culinary journey! Having the right equipment makes all the difference between an enjoyable cooking experience and one filled with frustration.
- Sharp knife – A good-quality sharp knife is vital for slicing through sushi-grade salmon effortlessly while maintaining clean cuts—the last thing we want are ragged edges ruining presentation after all! Look for one designed specifically for filleting fish if possible; they provide excellent control over delicate cuts!
- Cutting board – Opt for a sturdy cutting board made from wood or plastic—a stable surface keeps things safe during prep work while protecting countertops too!
- Rice cooker or saucepan – If you’re using short grain rice (which I highly recommend!), having either option handy ensures consistently cooked sushi rice every time—you’ll never go back once you’ve tasted perfection achieved through proper technique!
- Baking pan lined with plastic wrap – Lining your pan allows easy removal later on after chilling—the last thing we want is stuck-on rice ruining presentation efforts when serving guests!
- Frying pan or deep skillet – A wide frying pan will help us achieve even crispiness across all sides during frying by allowing sufficient space around each piece without overcrowding—it’s crucial so they brown evenly instead of steaming up!
Preparing the Salmon Crispy Rice
Step 1: Infusing Flavor into Your Rice
To start off this adventure right, let’s prepare our sushi rice by infusing it with flavor! In a small mixing bowl, combine your measured rice vinegar along with sugar and salt then stir until everything dissolves completely—it should resemble liquid gold at this point! Why do we do this? Well, pouring seasoned vinegar over cooked sushi rice transforms plain grains into something extraordinary by enhancing their natural sweetness while adding necessary tanginess needed throughout entire dish later on.
Once combined thoroughly pour mixture over freshly cooked sushi rice—make sure each grain gets coated evenly as we gently fold everything together using spatula or wooden spoon until uniformly mixed throughout—that way every bite remains flavorful despite being wrapped around crispy edges later on!
Step 2: Chilling Perfection
Next comes one crucial step: transferring seasoned mixture into baking pan lined generously with plastic wrap before gently pressing down evenly across surface area—we want uniform thickness here folks since it’ll dictate how well pieces hold shape post-frying! Cover tightly before placing into refrigerator letting chill out comfortably anywhere between four hours minimum up till overnight if desired—this process allows grains absorb flavors fully developing texture needed once frying begins as well ensuring crunchy exterior forms beautifully without crumbling apart during cooking session afterwards.
Step 3: Frying Time
Now onto my favorite part – frying these little beauties until they transform into golden crunchy bites full of flavor perfection waiting patiently beneath layers upon layers succulent salmon atop each square awaiting indulgence from eager palate ready devour what lies ahead next… Heat vegetable oil over medium-high flame inside large frying pan until shimmering away invitingly beckoning us forth—I love using enough oil so there’s ample room around pieces allowing browning occur evenly without overcrowding leading soggy results instead crisp delights everyone craves most passionately!
Step 4: Plating Up
Finally after achieving perfectly browned squares remove gracefully placing onto paper towels lined plate absorbing excess grease before moving swiftly onto final touches atop crispy morsels waiting patiently below… Generously spread Kewpie mayo across surfaces lovingly followed swiftly by drizzles Sriracha sprinkled scallions avocados jalapeños sesame seeds watch magic unfold visually appealing scene created before eyes transforming simple fare into masterpiece worthy admiration crowd gathered round table hungry mouths watering anticipating first bites soon arriving hot plates ready serve alongside sparkling beverages chilled refreshing drinks complementing meal beautifully creating atmosphere filled laughter shared stories weaving memories unforgettable moments experienced together enjoying deliciousness shared amongst friends family alike…
This journey into making Salmon Crispy Rice isn’t merely about following steps—it embodies love shared through cooking connections built around table where every bite nourishes souls inspiring conversations laughter joy-filled hearts forever cherished long after plates emptied away leaving remnants behind sweet nostalgia reminding us once more magic happens everyday kitchens everywhere full potential awaiting discovery awaits those willing explore embrace new challenges adventures unfold…
Crafting Your Masterpiece: The Salmon Crispy Rice Delight
Step 5: Preparing the Salmon – A Symphony of Freshness
Now that your rice is perfectly chilled and ready, it’s time to turn our attention to the star of the show: the sushi-grade salmon. This is where the magic truly begins! Start by taking your fresh salmon and cutting it into bite-sized cubes. Aim for pieces that are about ½ inch in size; this ensures they fit beautifully on top of your crispy rice without overwhelming each bite. As you’re slicing, let the knife glide effortlessly through the tender flesh—it’s important that you use a sharp knife here, as a dull blade can crush rather than cut, compromising that gorgeous texture we’re after.
Why do we want such precision? Well, each piece needs to be uniform not only for aesthetic appeal but also for even flavor distribution. Trust me on this one! You want every bite to deliver that exquisite taste of fresh salmon. Once cut, place the salmon cubes into a mixing bowl. Now, drizzle in 2 teaspoons of soy sauce and 2 teaspoons of sesame oil; these ingredients will elevate your salmon from delicious to utterly intoxicating. Gently toss everything together; at this stage, you’re trying to infuse the flavors without breaking down the delicate salmon too much. Let it sit for about 10 minutes—this brief marination period allows the flavors to meld beautifully, creating a depth that will resonate throughout your dish.
Step 6: Frying the Sushi Rice – The Golden Crunch
Now comes one of my favorite parts: frying the sushi rice! Heat about an inch of vegetable oil in a deep skillet or frying pan over medium heat. It’s crucial to get that oil hot enough; you want it shimmering but not smoking—this is where patience pays off! While you wait, take your chilled sushi rice out from its chilling spot and carefully lift it from the pan using a spatula. The key here is to keep it light; we need those grains intact for maximum crunchiness later on.
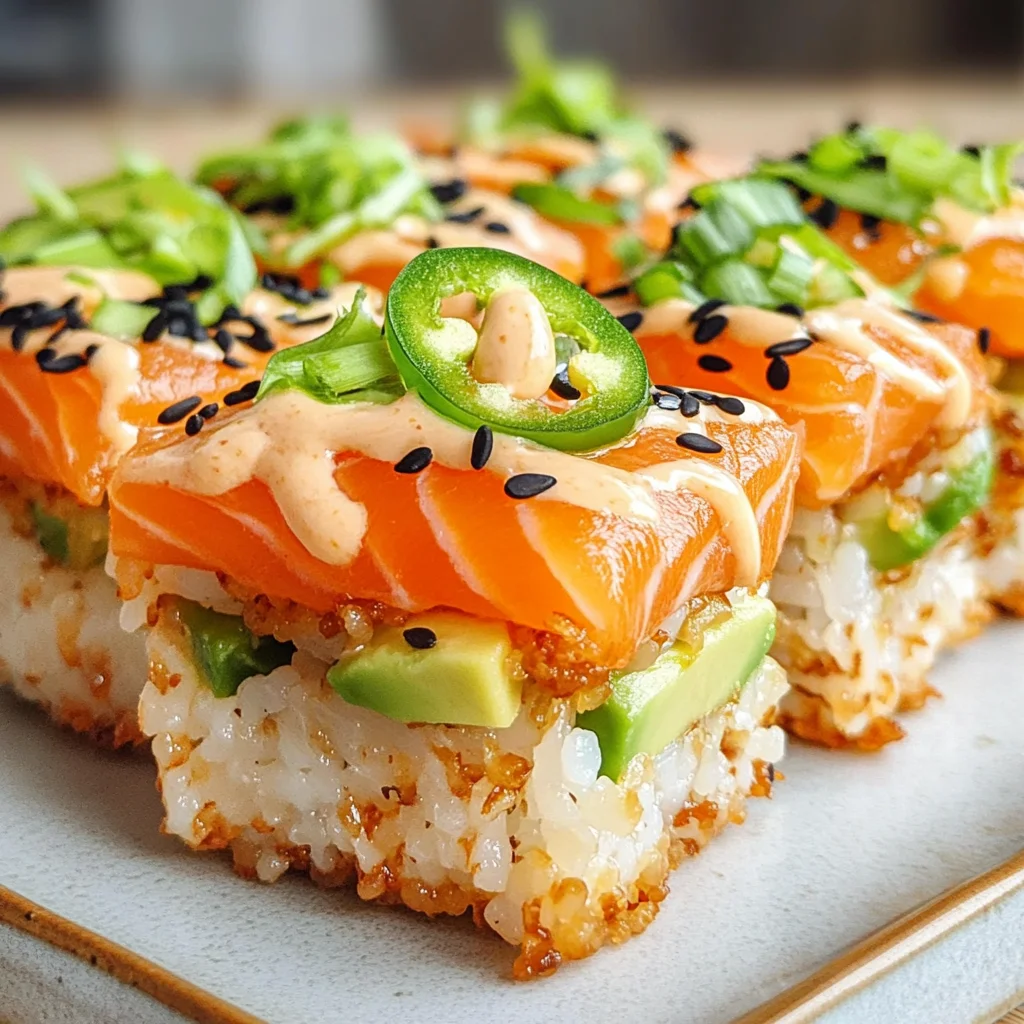
Once your oil has reached that perfect temperature (around 350°F), gently drop in small portions of rice to form patties—think about 2-3 tablespoons per patty. Don’t overcrowd the pan; give them room to breathe! Allow each patty to fry for about 3-4 minutes on one side until they turn a glorious golden brown before flipping them over with care. What you’re looking for here is that beautiful crust developing around each patty—a result of Maillard reaction magic! This step isn’t just about making them crispy; it adds an extraordinary layer of flavor that contrasts so wonderfully with the tender salmon topping we’re preparing next.
Step 7: Assembling Your Crispy Rice Perfection
With those delectable patties now perfectly crispy, it’s time for assembly! Take a plate and lay out your golden rice squares like little canvases waiting for their masterpiece topping. Now, using those succulent salmon cubes you prepared earlier, place them generously atop each rice patty—the visual contrast between golden brown and luscious pink is simply irresistible! As you do this, don’t hesitate to add a dollop of Kewpie mayo mixed with Sriracha on top of each piece; about half a teaspoon should suffice. This creamy-spicy combination adds an additional layer of flavor that ties everything together in such an extraordinary way.
The balance here is essential—crispy base meets soft salmon topped with creamy mayo creates an experience that’s profoundly satisfying on every level. In my experience, this assembly can be done right before serving, as it allows all those lovely textures and flavors to shine at their best. You may even notice how tempting it is not just visually but also aromatically as you catch whiffs of toasted sesame and fresh fish mingling in the air!
Step 8: Adding Final Touches – Elevating Your Dish
We’re almost there! But before we dive into devouring these beauties, let’s talk toppings—because let’s face it, presentation matters just as much as taste! Thinly slice some jalapeños for those who appreciate an extra kick (and trust me when I say this balances beautifully with both the richness of the mayo and the freshness of the salmon). You might also want to add slices of creamy avocado atop some pieces; its rich texture complements everything perfectly.
Finally, sprinkle black and white toasted sesame seeds over all your creations—this finishing touch not only gives your dish stunning visual appeal but infuses a nutty aroma that elevates every bite into something truly extraordinary. Each sprinkle brings joy and excitement! And don’t forget some finely chopped scallions; they provide a pop of color while adding their own subtle oniony sweetness.
Serving Up Your Salmon Crispy Rice
With everything assembled and garnished, it’s time to serve up these delightful morsels! Arrange them beautifully on a platter and watch as your friends’ eyes light up—the vibrant colors will draw them in like moths to a flame. Serve immediately while they are still warm; I promise you there’s nothing quite like biting into that crispy exterior followed by tender salmon kissed by creamy spicy mayo—it’s pure bliss!
As everyone takes their first bite, take a moment to relish in their delighted expressions—you’ve created something special here today! Whether it’s for dinner or a lively gathering with friends or family, these Salmon Crispy Rice treats are sure to impress everyone at your table. Enjoy every moment spent sharing this culinary creation because cooking isn’t just about feeding ourselves—it’s about connection and joy shared over good food. Happy cooking!
Storage and Enjoyment Tips for Your Salmon Crispy Rice
Now that you have crafted this beautiful dish, it’s time to relish every bite of your Salmon Crispy Rice! The anticipation of enjoying your creation is so exhilarating, and I promise you, the flavor journey is just beginning. Whether you’re serving it at a gathering or enjoying a cozy night in, knowing how to store and preserve your delicious masterpiece will ensure it remains enjoyable long after it’s made. Let’s dive into the best practices for keeping your crispy rice fresh and ready to savor whenever the craving strikes!
Storing Leftover Salmon Crispy Rice
To keep your leftover Salmon Crispy Rice fresh and delightful, I recommend transferring it into an airtight container. This is crucial because exposure to air can lead to dryness and loss of flavor; we certainly don’t want that! Store it in the refrigerator, where it will stay good for about 2-3 days. If you’re concerned about texture, a fantastic little trick is to place a slice of bread inside the container with the rice; this helps maintain moisture! When you take it out later, you’ll find that even after storage, the flavors are rich, and while the crispiness may slightly diminish, the satisfaction level remains high. To reheat, simply place it in a non-stick skillet over low heat or pop it in the microwave for a few seconds – just enough to warm it through without sacrificing too much texture. Trust me on this; you’ll be pleasantly surprised at how well it holds up!
Freezing Salmon Crispy Rice for Later
If you find yourself with extra portions—or if you’re like me and want to prepare ahead—you can easily freeze your Salmon Crispy Rice! Begin by cutting it into portions and wrapping each piece tightly in plastic wrap or foil; this step is absolutely paramount to prevent freezer burn. Once wrapped, place them in a freezer-safe bag or container. The rice will keep beautifully frozen for up to 2 months! When you’re ready to indulge again, simply thaw overnight in the fridge before reheating as mentioned earlier. Having these little bites of joy tucked away means you can enjoy an easy-to-prepare meal at any time; it’s such a convenience! Plus, there’s something immensely satisfying about pulling out homemade goodness from the freezer—like finding a treasure chest of flavors waiting just for you.
Salmon Crispy Rice
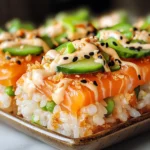
Indulge in irresistibly crispy salmon sushi bites bursting with flavor! Discover how easy it is to make Salmon Crispy Rice today!
- Prep Time: 15 minutes
- Cook Time: 10 minutes
- Total Time: 25 minutes
- Yield: Serves approximately 10 squares 1x
- Category: Appetizer
- Method: Frying
- Cuisine: Japanese
Ingredients
- 3 cups cooked sushi rice
- 2 tbsp rice vinegar
- 1 tbsp sugar
- 1 tsp salt
- Vegetable oil (for frying)
- 1 lb sushi-grade salmon
- 4 tbsp Kewpie mayo
- 2 tbsp Sriracha
- 2 tbsp chopped scallions
- 2 tsp soy sauce
- 2 tsp sesame oil
- Sliced avocado (for topping)
- Jalapeño (for garnish)
- Toasted black & white sesame seeds
Instructions
- Prepare sushi rice by combining cooked rice with seasoned rice vinegar, sugar, and salt until well mixed. Chill in a lined baking pan for at least 4 hours.
- Cut the chilled sushi rice into small squares.
- Heat vegetable oil in a skillet over medium-high heat. Fry the rice squares until golden brown on both sides.
- Cube the sushi-grade salmon and toss with soy sauce and sesame oil.
- Assemble by placing salmon cubes on top of each crispy rice square, drizzling with Kewpie mayo and Sriracha, then adding garnishes like sliced avocado and jalapeños.
Nutrition
- Serving Size: 1 square
- Calories: 150
- Sugar: 1g
- Sodium: 200mg
- Fat: 9g
- Saturated Fat: 1g
- Unsaturated Fat: 7g
- Trans Fat: 0g
- Carbohydrates: 14g
- Fiber: 0g
- Protein: 6g
- Cholesterol: 25mg