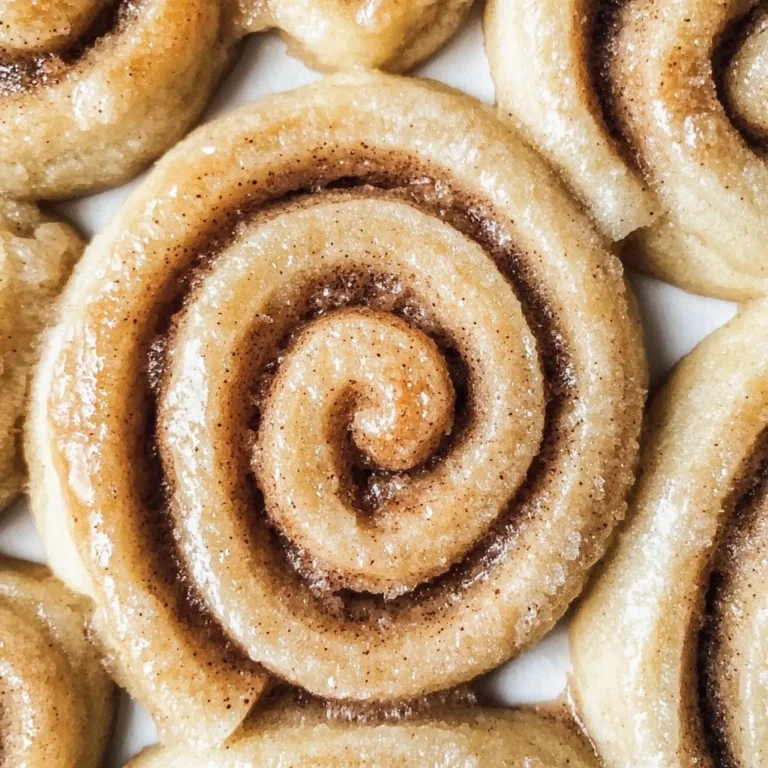
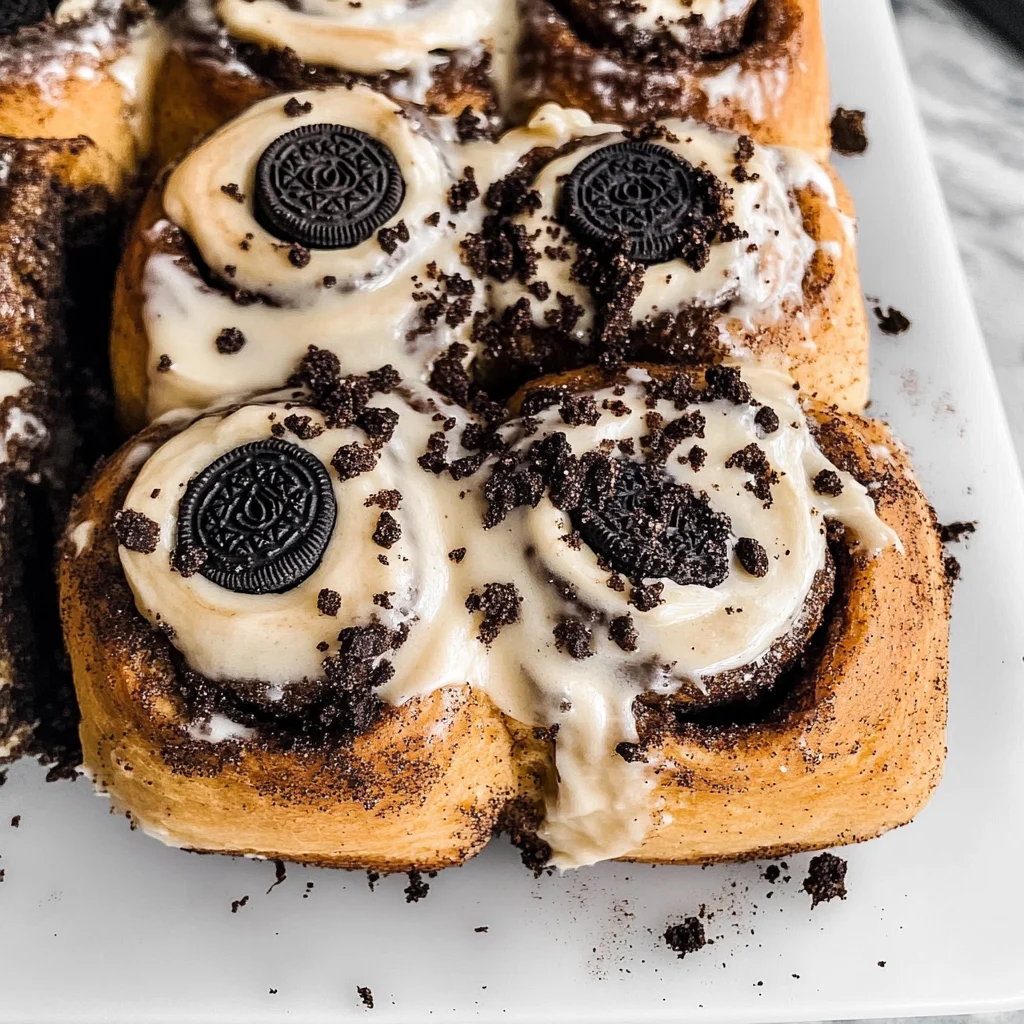
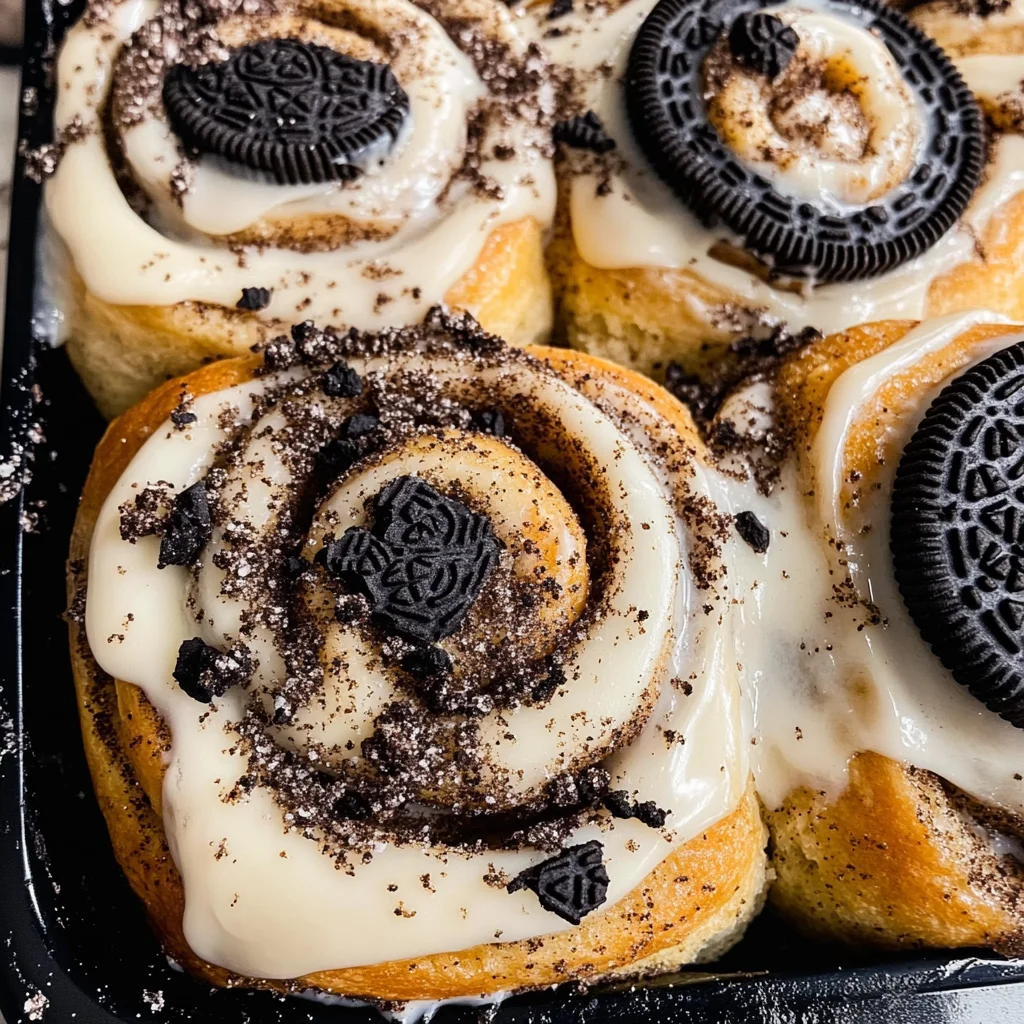
Oreo Cinnamon Roll
There’s something truly magical about the aroma of freshly baked goods wafting through the kitchen, isn’t there? It’s like a warm embrace that wraps around you, transporting you back to cherished memories and special moments. Today, I’m beyond excited to share with you a recipe that embodies that joy—Oreo Cinnamon Rolls. This delightful combination of soft, pillowy dough swirled with crushed Oreo cookies, rich cinnamon, and topped with luscious cream cheese frosting is more than just a dessert; it’s an experience that brings together flavors in a way that will make your heart sing. The very first bite will have you savoring the sweet crunch of Oreos paired with the warmth of cinnamon, creating an utterly intoxicating harmony that is both comforting and indulgent.
I’ve always been captivated by how baking can unite people. Whether it’s a cozy family gathering or simply a quiet moment at home, sharing these rolls can transform any ordinary day into something extraordinary. The beauty of these Oreo Cinnamon Rolls lies not only in their taste but in the memories they create—friends gathered around the table, laughter echoing off the walls, and the sheer delight of watching someone take their first bite and smile. Trust me on this: they are perfect for breakfast, afternoon snacks, or even a late-night treat when you need a little pick-me-up. In my experience, there’s never a wrong time for these delicious rolls.
Oreo Cinnamon Roll: A Sweet Symphony of Flavor
Let’s embark on this culinary journey together! Making Oreo Cinnamon Rolls is not just about following steps; it’s about diving into an experience filled with love and creativity. So roll up your sleeves and get ready to create something truly special.
Ingredients:
As we start gathering our ingredients for this delightful adventure, let me assure you that each component plays a pivotal role in crafting the perfect Oreo Cinnamon Roll. The right ingredients not only enhance flavor but also ensure beautiful textures and a satisfying outcome.
- 4 cups all-purpose flour. Flour is the backbone of our dough—it’s what gives our rolls structure and body. The protein content in all-purpose flour creates gluten when mixed with liquids, which helps give our rolls that wonderful chewy texture we all love. When selecting flour, look for a brand that feels finely milled; this ensures your rolls rise beautifully without being dense or heavy.
- 1/2 cup granulated sugar. Sugar is not just for sweetness; it also tenderizes our dough and helps it brown beautifully as it bakes. When mixed with yeast during activation, sugar feeds the yeast, allowing it to create those lovely air pockets in our rolls—think fluffy clouds! Always opt for fresh sugar because its fine crystals dissolve easily into the mixture.
- 1 packet (2 1/4 tsp) active dry yeast. Yeast is the magical ingredient responsible for turning our dough from a simple mixture into something airy and alive! When activated properly with warm milk and sugar, yeast becomes bubbly and frothy—a sign it’s ready to work its magic. Make sure your yeast is fresh; expired yeast can lead to disappointing results.
- 1 tsp salt. Salt might seem like an afterthought here but trust me—it enhances flavor like nothing else! It balances out sweetness and strengthens gluten structure while also controlling fermentation speed for better texture in our rolls.
- 1 cup whole milk (warmed). Milk adds moisture to our dough while contributing richness thanks to its fat content—this makes our dough tender and flavorful! Warming the milk slightly activates the yeast effectively without cooking it; aim for about 110°F (43°C), which feels pleasantly warm to your touch but not hot enough to scald.
- 1/2 cup unsalted butter (melted). Butter brings that luxurious flavor we crave in baked goods while providing moisture that keeps our rolls soft and tender long after they come out of the oven. Using unsalted butter allows you better control over saltiness in your rolls since we are already adding salt separately.
- 2 large eggs. Eggs enrich both flavor and texture by adding moisture while helping bind everything together. They contribute to a beautiful golden color when baked too! Make sure your eggs are at room temperature—they incorporate more smoothly into the dough compared to cold eggs straight from the fridge.
For the Filling:
– 1 cup crushed Oreo cookies. Ahh, here comes the star of our show! Crushed Oreos add delightful crunch alongside chocolatey goodness—a distinct contrast to our soft dough—and infuse everything with rich creaminess as they melt into every bite! You can even use gluten-free Oreos if needed!
- 1 tbsp ground cinnamon. Cinnamon brings warmth and depth to sweet dishes—it’s honestly one of my favorite spices! It complements chocolate perfectly here by enhancing those rich flavors without overpowering them.
- 1/4 cup brown sugar. Brown sugar offers lovely caramel notes along with additional moisture compared to white sugar—it’s like adding another layer of flavor complexity! If you run out of brown sugar, mixing regular granulated sugar with a bit of molasses can yield similar results!
For the Cream Cheese Frosting:
– 8 oz cream cheese (softened). Cream cheese provides that creamy tang we absolutely adore on cinnamon rolls! Softening it ahead of time ensures smooth incorporation into your frosting without lumps or clumps—nobody wants lumpy frosting!
- 1/4 cup unsalted butter (softened). Just like before, softened butter contributes richness while creating an airy texture when whipped together with cream cheese—both sweetening your frosting while maintaining stability as well!
- 2 cups powdered sugar. Powdered sugar gives frosting its signature sweetness while dissolving quickly into a silky-smooth consistency—a necessity for drizzling over warm rolls!
- 1 tsp vanilla extract. A splash of vanilla elevates flavors beautifully—it’s like adding sunshine! Make sure it’s pure vanilla extract for an authentic taste; imitation vanilla simply won’t do justice here.
- 1-2 tbsp milk (to adjust consistency). Depending on how thick or thin you’d like your frosting—adding milk gradually allows customization until you find just the right drizzle-worthy consistency!
Equipment You’ll Need:
Having the right tools at hand makes all the difference in creating something wonderful in your kitchen! These essential partners will ensure each step flows smoothly as we craft these delicious Oreo Cinnamon Rolls together.
- Mixing bowls – A sturdy set of mixing bowls will be your best friends throughout this process! They come in handy for combining ingredients, allowing ample space for whisking or folding without worrying about spills or messes.
- Measuring cups & spoons – Precise measurements are absolutely paramount in baking; using measuring cups specifically designed for dry versus liquid ingredients ensures accuracy every time!
- Stand mixer or hand mixer – While not strictly necessary—you can certainly mix by hand—a stand mixer makes kneading effortless while yielding consistent results faster than manual methods would allow!
- Rolling pin – A good rolling pin is essential here; it ensures even thickness across your dough so everything bakes uniformly without burnt edges versus undercooked centers—nobody wants unevenly baked treats!
- Baking dish or sheet pan – Choose either option based on preference—just ensure there’s enough room inside so those rolls can rise beautifully without cramping each other during baking time!
Now let’s dive deeper into preparing these heavenly Oreo Cinnamon Rolls together!
Step 1: Activate Your Yeast
Start by warming 1 cup of whole milk until it’s pleasantly warm to touch but not boiling—it should feel about like bathwater (around 110°F). Pour this warmed milk into a mixing bowl along with ½ cup granulated sugar and sprinkle one packet (2 1/4 tsp) active dry yeast over it gently without stirring initially; allow them to mingle undisturbed for approximately five minutes until foamy bubbles appear on top—the glorious sign indicating successful activation has occurred! This process known as proofing is crucial because it awakens dormant yeast cells so they’re ready to work their magic later on when combined with flour mixture.
Step 2: Combine Dry Ingredients
While waiting patiently for those little bubbles to form above all else, combine four cups all-purpose flour along with one teaspoon salt directly within another large mixing bowl using either whisk or spatula until evenly dispersed throughout; doing this step ensures no pockets exist later within dough where salt could remain hidden away from contact altogether—this could lead towards uneven seasoning down line too when rolling up filling mixture later if omitted entirely!
Step 3: Mix Dough Together
Once proofed properly after five minutes elapsed past initial wait—and foamy surface now present atop liquid mixture—we’re ready next step forward! Gradually add activated yeast mixture along side melted half-cup unsalted butter straight into bowl containing dry ingredients along two large eggs lightly beaten beforehand too—the key here lies blending them thoroughly yet gently until cohesive but still slightly sticky ball forms within bowl itself without sticking excessively onto hands afterwards either if touched lightly between palms afterward once finished mixing overall nicely together against sides too!
Step 4: Knead Until Smooth
Now comes one of my favorite parts—the kneading process! Dust countertop lightly before transferring entire dough ball onto clean surface area prepared beforehand earlier then begin folding edges inward repeatedly towards center using palms evenly across entire piece until smooth texture achieved overall consistency emerges visibly different than before! Aim approximately eight minutes total kneading time itself involved throughout entire effort spent focusing solely upon developing gluten strands required ultimately yielding desired lightness later during baking stage itself once again achieved through patience exercised diligently throughout prior stages leading up towards this very momentous occasion arriving swiftly thereafter coming soon enough around corner waiting ever patiently alongside us throughout journey undertaken thus far ahead…
Continue following similar detailed instructions through Steps 5 onward as outlined previously based upon natural breaks occurring between each stage involved leading towards final product expected outcome arrived at shortly thereafter enjoyed fully amidst friends family alike gathered warmly nearby surrounding table filled plentifully overflowing joyfully shared experiences moments cherished forever remembered fondly together onwards toward future days ahead eagerly anticipated awaiting another opportunity indulge again sometime soon once more…
Step 5: Rolling Out the Dough to Perfection
Now that your dough has risen and is as soft and fluffy as a cloud, it’s time to roll it out into a beautiful canvas for your Oreo filling. Lightly flour your work surface to prevent any sticking—trust me, you want this process to be smooth and enjoyable! Gently punch down the dough to release any of those pesky air bubbles that may have formed during its rise. Then, using a rolling pin, carefully shape the dough into a rectangle about 16 by 12 inches. This step is crucial because it allows for even distribution of our delicious filling later on. The dough should feel elastic but not overly sticky; if it sticks to your counter or the rolling pin, don’t hesitate to sprinkle just a little more flour.
As you roll out the dough, visualize how each inch will soon be transformed into a warm, gooey indulgence. The goal here is to achieve an even thickness throughout, about half an inch is perfect. Once you’ve got that rectangle laid out before you, take a moment to admire your handiwork! This is where the magic begins—you’re not just making rolls; you’re crafting memories that will linger long after they’re gone. And trust me on this: when you spread that Oreo filling on top, you want enough surface area for every bite to be packed with flavor.
Step 6: Spreading the Irresistible Filling
Now comes the part where we transform simple dough into something utterly extraordinary! In a medium bowl, combine the crushed Oreo cookies, brown sugar, and ground cinnamon until all those ingredients are beautifully blended together. The sweetness from the Oreos combined with the warmth of cinnamon will create an aroma so intoxicating that it will make your heart flutter with excitement. Spread melted butter evenly over the rolled-out dough with a pastry brush—this acts like glue for our filling and enhances that delightful richness we’re after. Don’t skimp on this step; think of it as adding layers of flavor that will seep into every crevice of your rolls.
Once the butter has been applied generously (go ahead and use all of it!), sprinkle the Oreo mixture evenly across the surface of the dough. Be sure to leave about an inch along one edge free from filling; this will help seal your roll later on. As you spread, let yourself get lost in the anticipation of what’s coming—the sight of dark chocolate cookie crumbles against that soft dough is nothing short of divine! Take your time here; it’s essential that every bite carries those magical flavors that made us fall in love with Oreos in the first place.
Step 7: Rolling Up Your Culinary Masterpiece
With your filling perfectly laid out like a cozy blanket over your dough, it’s time to roll it up into a log of deliciousness! Starting from one long edge (preferably the one without filling), gently lift and begin to roll up the dough tightly toward the unfilled edge. Use both hands to keep an even pressure as you go; aim for a snug roll but don’t squeeze too hard—after all, we want those lovely layers intact! As you reach the end of your rectangle, pinch together that last bit of dough so it seals everything inside beautifully.
This step is absolutely paramount because how tightly you roll can affect how fluffy and tender each piece turns out after baking. If it’s too loose, you’ll end up with rolls that don’t hold their shape; too tight might lead to some baking drama later on when they expand in the oven. Once rolled up completely, use a sharp knife or dental floss (yes, floss works wonders!) to cut your log into twelve equal pieces. Each piece should look like a little swirl of joy—if they’re not quite perfect yet, don’t sweat it! Each roll is unique and beautiful in its own right.
Step 8: The Second Rise – Letting Magic Happen
Now comes one of my favorite parts—the second rise! Place your cut rolls in a greased baking pan or on a parchment-lined baking sheet, leaving enough space between them for expansion as they rise again. Cover them with a clean kitchen towel or plastic wrap; this helps retain moisture while they puff up beautifully—a process known as proofing. Set them aside in a warm spot (like near an oven that’s been turned off) for about 15-20 minutes or until they’ve nearly doubled in size again.
This rise is crucial because it allows our yeast to do its work one more time before heading into the oven. As they sit idly by, soaking up warmth and love from their environment, they become lighter and airier—think fluffy clouds ready to transform into golden rolls! You’ll know they’re ready when they’ve expanded nicely and spring back slightly when touched but still leave an imprint from your finger—a gentle reminder of their journey thus far.
Next Major Phase: Baking Your Perfect Oreo Cinnamon Rolls
Step 9: Baking – Creating That Golden Crust
Ahhh… It’s finally time for these beauties to hit the oven! Preheat your oven to 350°F (175°C), ensuring it’s nice and hot before you pop those rolls inside—this initial heat is key for achieving that golden crust we’re dreaming about! Once preheated, slide your pan onto the middle rack and set a timer for 25-30 minutes. I can’t stress this enough: keep an eye on them towards the end as ovens can vary quite dramatically in terms of heat distribution.
As they bake away blissfully, you’ll soon be enveloped in scents so heavenly they’ll pull everyone into your kitchen like bees drawn to honey! Look for a rich golden-brown color on top—the kind that makes you want to dive right in—and remember not to rush this step; patience here pays off tenfold! If you’re unsure whether they’re done baking, gently tap on one roll—it should sound hollow rather than dense or heavy.
Once baked to perfection, allow them cool slightly in their pan before moving onto frosting them; this brief rest allows any lingering heat within each roll to settle beautifully while also giving you just enough time for some drool-worthy anticipation!
Step 10: Frosting – The Sweet Finale
Oh dear friends, hold onto your taste buds because we are now entering frosting territory—the final flourish that takes these Oreo Cinnamon Rolls from delectable treats to pure bliss! In another mixing bowl (I promise it’s worth dirtying another dish), combine softened cream cheese and butter until smooth and creamy—a texture akin to liquid gold sliding effortlessly from spoon to plate. Gradually add powdered sugar while mixing until fully incorporated; at this point, you’ll start noticing how sweet and velvety things are getting!
A splash of vanilla extract adds depth—we want every bite bursting with flavor—and if needed, adjust consistency using milk until it’s just right—smooth but thick enough not to run off completely once drizzled atop our rolls! Once everything’s mixed together impeccably well (you’ll know when you’ve achieved frosting perfection), grab yourself either a spatula or piping bag—you deserve every bit of indulgence—but trust me when I say there’s no wrong way here!
Finally comes my favorite part: drizzling or spreading that luscious cream cheese frosting over warm rolls straight from their steamy embrace in the oven! Take care as you watch it melt slightly into every nook and cranny—it truly transforms these already delightful creations into something profoundly satisfying that’ll have everyone begging for seconds!
There you have it—the complete journey from humble ingredients straight through all those steps leading us directly toward pure enjoyment around our dinner table (or wherever else you’d like!). Trust me when I say these Oreos Cinnamon Rolls aren’t just food—they’re moments captured forever shared among loved ones who gather around joyously savoring bites full joy wrapped inside comfortingly familiar flavors dancing together harmoniously.
Enjoy every bite knowing you’ve created something truly special today—and don’t forget… sharing is caring!
Storage and Enjoyment Tips for Your Oreo Cinnamon Roll
Now that your kitchen is filled with the utterly intoxicating aroma of freshly baked Oreo Cinnamon Rolls, it’s time to revel in this moment of triumph! But, let’s be honest—if you’re anything like me, you might not finish them all in one sitting. And that’s perfectly okay because these delightful rolls are just as wonderful the next day (or even later!). To keep your treasures fresh and scrumptious, storing them correctly is absolutely paramount.
Storing Leftover Oreo Cinnamon Roll
To ensure your lovely Oreo Cinnamon Rolls maintain their soft and fluffy texture, place them in an airtight container. If you have a glass or plastic container with a good seal, that’s ideal! You can also use aluminum foil or plastic wrap if a container isn’t handy. Just remember to store them at room temperature for the best results. These rolls will stay delicious for about 2 to 3 days—though I doubt they’ll last that long! Trust me when I say that as they sit, they develop an even more profound flavor thanks to the mingling of the cinnamon and chocolate notes from the Oreos. If you want to keep them extra moist, consider placing a slice of bread inside the container; it acts like magic, absorbing excess moisture and keeping your rolls delightfully soft. When you’re ready to indulge again, simply pop them in the microwave for about 15-20 seconds to bring back their warm, gooey goodness.
Freezing Oreo Cinnamon Roll for Later
For those times when you want a sweet treat but don’t want to whip up the whole batch from scratch, freezing your Oreo Cinnamon Rolls is a fantastic option! Once they’ve cooled completely (which keeps them from getting soggy), wrap each roll individually in plastic wrap and then place them into a freezer-safe bag or container. This method keeps your rolls safe from freezer burn while preserving their flavors beautifully. They can be stored in the freezer for up to three months—think of it as stashing away little pieces of happiness for later! When you’re ready to enjoy one (or several!), simply take them out and let them thaw at room temperature for a couple of hours before reheating them gently in the oven or microwave. It’s like having a little celebration waiting for you whenever you crave something sweet!
So go ahead—bake up a batch of these delightful rolls and feel free to share (or not)! Either way, there’s nothing quite like having homemade comfort food on hand.
Oreo Cinnamon Rolls

Indulge in the heavenly delight of homemade Oreo Cinnamon Rolls! With a soft, pillowy dough swirled with crushed Oreo cookies and warm cinnamon, and topped off with a luscious cream cheese frosting, these rolls are an unforgettable treat. Perfect for breakfast, brunch, or any time you need a sweet pick-me-up, they offer a delightful combination of flavors that will transport you back to cozy kitchen memories. Their rich chocolatey goodness and comforting warmth make them the ideal dessert for sharing with friends and family. Get ready to create lasting moments around the table as each bite brings joy and nostalgia!
- Prep Time: 40 minutes
- Cook Time: 30 minutes
- Total Time: 1 hour 10 minutes
- Yield: Serves approximately 12 rolls 1x
- Category: Dessert
- Method: Baking
- Cuisine: American
Ingredients
- 4 cups all-purpose flour
- 1/2 cup granulated sugar
- 1 packet (2 1/4 tsp) active dry yeast
- 1 tsp salt
- 1 cup whole milk (warmed)
- 1/2 cup unsalted butter (melted)
- 2 large eggs
- 1 cup crushed Oreo cookies
- 1 tbsp ground cinnamon
- 1/4 cup brown sugar
- 8 oz cream cheese (softened)
- 1/4 cup unsalted butter (softened)
- 2 cups powdered sugar
- 1 tsp vanilla extract
- 1–2 tbsp milk (to adjust consistency)
Instructions
- 1. Activate yeast by combining warm milk, sugar, and yeast in a bowl; let it sit for about five minutes until foamy.
- 2. In a separate bowl, mix flour and salt. Gradually add the yeast mixture along with melted butter and beaten eggs; stir until combined.
- 3. Knead the dough on a floured surface until smooth (about eight minutes). Let rise in a warm place until doubled in size.
- 4. Roll out the dough into a rectangle, then spread melted butter over it. Sprinkle with crushed Oreos, brown sugar, and cinnamon.
- 5. Roll tightly into a log and cut into twelve equal pieces. Place in a greased baking pan to rise again for about 15-20 minutes.
- 6. Preheat oven to 350°F (175°C) and bake rolls for 25-30 minutes until golden brown.
- 7. While cooling, prepare cream cheese frosting by mixing softened cream cheese, butter, powdered sugar, vanilla extract, and milk to desired consistency before drizzling over warm rolls.
Nutrition
- Serving Size: 1 serving
- Calories: 380
- Sugar: 30g
- Sodium: 250mg
- Fat: 16g
- Saturated Fat: 8g
- Unsaturated Fat: 7g
- Trans Fat: 0g
- Carbohydrates: 53g
- Fiber: 2g
- Protein: 6g
- Cholesterol: 50mg