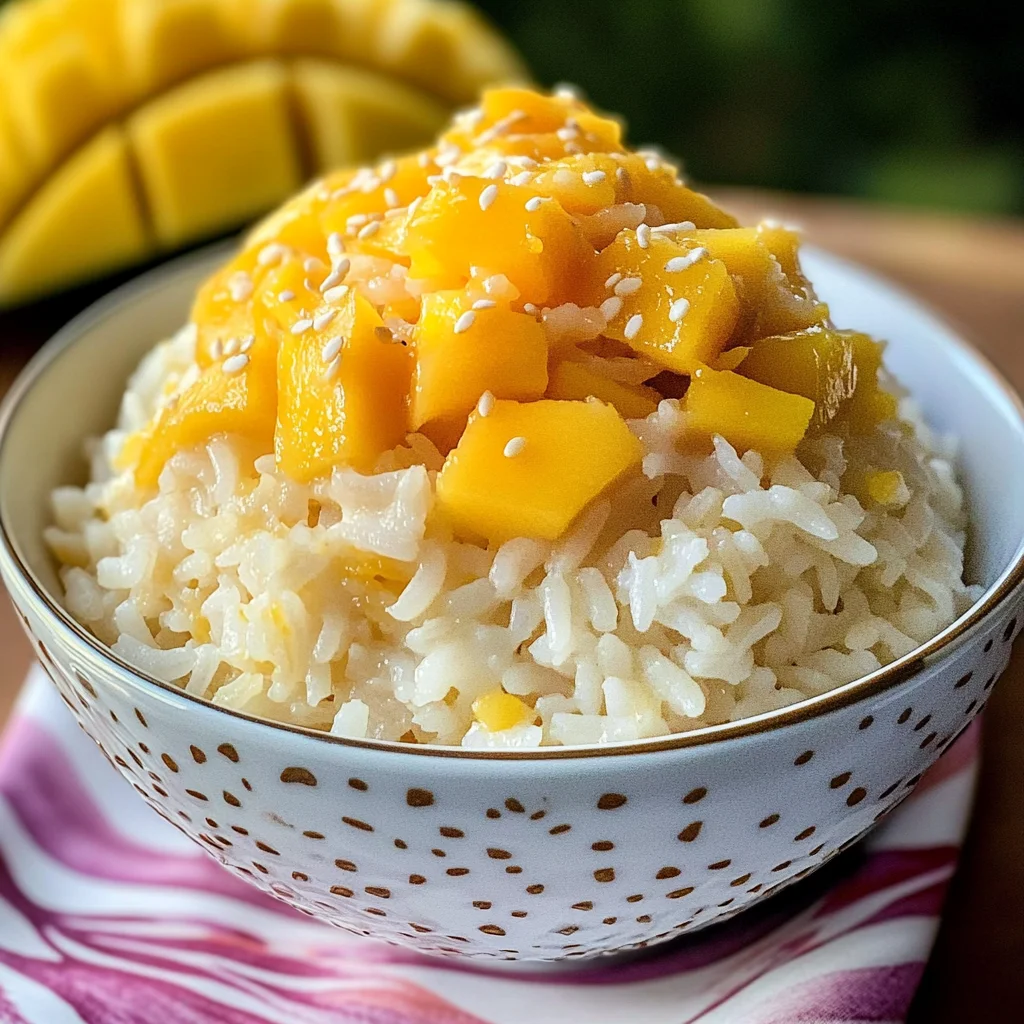
Mango Coconut Sticky Rice
There’s something truly magical about food that transports us to a different time and place, isn’t there? Whenever I prepare Mango Coconut Sticky Rice, I find myself swept away to a sun-drenched beach, the fragrant scent of tropical fruits wafting through the air, and the sound of waves gently lapping at the shore. This dish is not merely a recipe; it is an experience, a vibrant celebration of flavors that harmonizes perfectly with the warmth of summer. The sweet, luscious mango dances gracefully with the creamy coconut milk and sticky rice, creating a symphony of flavors that awakens all your senses. I promise you, each bite will evoke memories of lazy afternoons spent under palm trees and laughter shared among friends.
As you embark on this culinary journey, know that Mango Coconut Sticky Rice is also steeped in tradition. Originating from Southeast Asia, particularly Thailand, this dish has become a beloved comfort food for many. It’s often served during special occasions and celebrations, symbolizing togetherness and joy. The delicate balance between the rich coconut milk and the naturally sweet mango creates an extraordinary contrast that leaves everyone yearning for just one more bite. Just imagine setting this colorful creation on your dining table—its inviting aroma and stunning presentation are sure to captivate your loved ones. Whether it’s for a weeknight meal or a festive gathering, this dish elevates any occasion into something truly special.
Mango Coconut Sticky Rice: A Tropical Delight
Gather around as I share my version of Mango Coconut Sticky Rice! This delightful recipe is perfect for those who crave a taste of paradise right in their own kitchen. It’s surprisingly easy to prepare yet feels like an indulgent treat—a true testament to the beauty of simple ingredients coming together in harmony.
Ingredients:
Let’s dive into the heart of this recipe—the ingredients! Each one plays an essential role in crafting this beautiful dish, so let’s take a moment to appreciate what they bring to our tropical feast.
- 2 cups sushi rice. Sushi rice is key here due to its unique texture—short-grain rice that becomes wonderfully sticky when cooked. This stickiness allows it to hold together beautifully when plated alongside our luscious coconut sauce and fresh mango. When selecting sushi rice, look for grains labeled as short grain or sweet rice. It’s crucial to rinse the rice thoroughly before cooking; this removes excess starch and ensures we achieve that perfect tenderness without being overly gummy.
- 1 large mango (diced). Ah, mangoes—the jewel of tropical fruits! Their vibrant color and intoxicating sweetness elevate our dish from good to extraordinary. When choosing a mango, seek out one that gives slightly when pressed; this indicates ripeness and sweetness while avoiding those hard as rocks or overly soft specimens which may be past their prime. Dicing them into bite-sized pieces not only enhances presentation but also allows each spoonful to burst with flavor.
- 1 14-oz can coconut milk. This liquid gold is what brings our Mango Coconut Sticky Rice to life! Its rich creaminess creates an indulgent sauce that envelops the rice in velvety goodness while imparting that unmistakable tropical essence we adore. Be sure to choose full-fat coconut milk for optimal creaminess—it makes all the difference! Shake well before opening since the cream can separate during storage; we want every drop mixed evenly into our dish.
- 1 cup water. Water plays a supporting role in cooking our sushi rice to perfection; it’s essential for achieving just the right texture—a fluffy yet slightly sticky finish that complements both our coconut milk and diced mango beautifully. Using filtered water can enhance flavor since tap water might have trace elements that affect taste—trust me on this!
- 1 1/4 teaspoon salt. Salt may seem like a simple ingredient but do not underestimate its power! It enhances all other flavors present in our dish and balances the sweetness from both mangoes and coconut milk. Without it, you’ll find your Mango Coconut Sticky Rice lacks depth—that hint of savory contrast makes everything pop even more!
Equipment You’ll Need:
Now that we’ve gathered our ingredients let’s talk tools! Having the right equipment makes cooking such a joy by ensuring efficiency while allowing you to focus on creating something wonderful.
- Medium saucepan with lid: This trusty pot will be your best friend throughout this process—it’s where all the magic happens as it steams the sushi rice perfectly! A tight-fitting lid is non-negotiable here since it traps steam effectively, ensuring even cooking without losing moisture.
- Mixing bowl: You’ll need a mixing bowl for combining your ripe diced mango with some coconut milk later on—a simple step but one that helps integrate flavors beautifully before serving!
- Measuring cups and spoons: Precision is always important in baking or cooking; these tools ensure you’re using exactly what you need for consistent results every time!
- Rice cooker (optional): While not essential if you have a good saucepan at home, using a rice cooker can simplify things significantly—it takes care of timing perfectly while giving you fluffy results effortlessly!
With these ingredients assembled and equipment ready at hand, let’s get started on preparing our mouthwatering Mango Coconut Sticky Rice—it’s going to be fun!
Step 1: Rinse Your Sushi Rice
To kick off this delightful journey toward making Mango Coconut Sticky Rice, we begin by rinsing our sushi rice thoroughly under cold running water until it runs clear—this process may feel tedious but trust me; it’s crucial! Rinsing washes away excess starch which could lead us down the treacherous path of gummy rice instead of tender fluffy grains we aim for in this recipe. Use your fingers gently as you swirl them around in circular motions inside the bowl filled with water—the grains will clump together slightly at first but soon release their starches leaving behind crystal-clear liquid flowing freely down your sink.
Step 2: Cook Your Sushi Rice
Now comes one of my favorite parts—cooking up that beautifully rinsed sushi rice! In your medium saucepan over medium heat combine those two cups of rinsed sushi rice with one cup of water along with 1¼ teaspoons salt sprinkled evenly across its surface—this seasoning step enhances flavor from start till finish making every grain sing harmoniously alongside others once plated up together later! Bring everything just shy of boiling before reducing heat down low enough so it simmers gently under cover (this means keeping steam locked inside). Allow it 18 minutes undisturbed—resist temptation here; don’t lift off lid prematurely lest you disrupt steaming process leading us astray towards mushy outcomes instead…
Step 3: Prepare Your Coconut Sauce
While our precious sushi rice cooks away happily beneath its lid like little treasures waiting patiently for their moment under spotlight… let’s whip up some magical sauce! Open up that beautiful canister filled with full-fat coconut milk (don’t forget about shaking beforehand!) Pour half into mixing bowl then add diced ripe mangoes directly atop pooling creamy liquid—it creates stunning contrast visually too! Gently toss them together using spatula until each piece is coated luxuriously—you want natural sugars released during tossing combined seamlessly against rich backdrop provided by luscious coconut—a match made in heaven if ever there was one!
Step 4: Combine Everything
Once those 18 minutes have passed (impatience levels rising), remove saucepan off heat carefully lifting lid slowly allowing steam escape gradually—exhale deeply inhaling aromatic scent released instantly wafting through kitchen air almost intoxicatingly uplifting mood instantly! Using fork fluff up cooked sushi rice lightly breaking apart clumps while adding remaining half portion reserved earlier from creamy cloud-like mixture slowly incorporating flavors altogether gently folding until fully combined throughout ensuring every grain has been graced equally by heavenly infusion from both sides…. Voilà—you’ve created magic already just by following these steps instinctively knowing how vital patience & love were paramount throughout entire process today!
Stay tuned as we continue crafting this unforgettable dish—I promise you won’t want to miss any moment ahead!
The Joy of Creating Your Mango Coconut Sticky Rice
Step 5: Simmering to Perfection
Now that your rice is rinsed and prepped, it’s time to transform those tiny grains into a luscious, coconut-infused delight. In a medium saucepan, combine your rinsed sushi rice with one cup of water and the can of coconut milk. Stir in the salt—don’t skip this step! Salt enhances the natural sweetness of the coconut milk and helps balance the flavors beautifully. Bring this mixture to a gentle boil over medium heat, keeping a close eye on it because we want to avoid any boiling over; that’s just messy! Once you see those first bubbles rising, reduce the heat to low, cover your pot with a tight-fitting lid, and let it simmer for about 20 minutes.
Why simmer rather than boil? This step is crucial because cooking rice at a lower temperature allows it to absorb moisture evenly without becoming mushy. It’s all about achieving that perfect texture—sticky enough to hold together yet tender enough to melt in your mouth. You’ll know it’s working when you start catching wafts of that intoxicating coconut aroma filling your kitchen. And remember, don’t lift the lid during this time; it’s like peeking at a cake while it bakes—trust me on this one! After 20 minutes, turn off the heat but leave the pot covered for an additional 10 minutes. This resting period is non-negotiable; it lets the grains relax and ensures every bite is profoundly satisfying.
Step 6: Fluffing Up Your Rice
Once those precious minutes are up and you’ve been captivated by the aroma wafting from your pot, it’s time for one of my favorite moments: fluffing the rice! Carefully remove the lid, and using a fork or a rice paddle, gently fluff the rice with light strokes. Be tender here; we’re not trying to break apart those delicate grains but rather letting them breathe and reveal their full potential. The steam trapped inside will have worked its magic, making each grain delightfully sticky yet distinct.
As you fluff, take a moment to admire that glossy sheen—the coconut milk has enveloped each grain like liquid gold. This visual cue is essential; if it looks creamy and slightly sticky but not clumpy or dry, you’ve nailed it! If you find any stubborn bits sticking together, I recommend gently separating them without smashing them down too much—the goal here is harmony among flavors and textures. Set aside this stunning creation while we prepare our mango topping.
Step 7: Preparing Your Mango Masterpiece
Now comes the part where we introduce our star player: the mango! Choosing ripe mangoes is an art form in itself—they should yield slightly to pressure without being mushy when you squeeze them gently. I always opt for large mangoes because they are sweeter and juicier, adding an utterly intoxicating flavor contrast against the rich coconut sticky rice. Peel your mango carefully (a vegetable peeler works wonders here) and then slice it into thin strips or dice it into pleasing cubes—whatever feels right for you!
Why do we add mango? Not only does it provide vibrant color and freshness, but its natural sweetness complements the creamy richness of our sticky rice perfectly. As you slice through that golden fruit, allow yourself to be present in this moment—the fragrant aroma mingling with coconut creates an irresistible anticipation for what’s to come. Set aside your diced mangoes so they’re ready for plating later; trust me, having everything beautifully prepared will make serving much more enjoyable.
Step 8: The Final Touches of Bliss
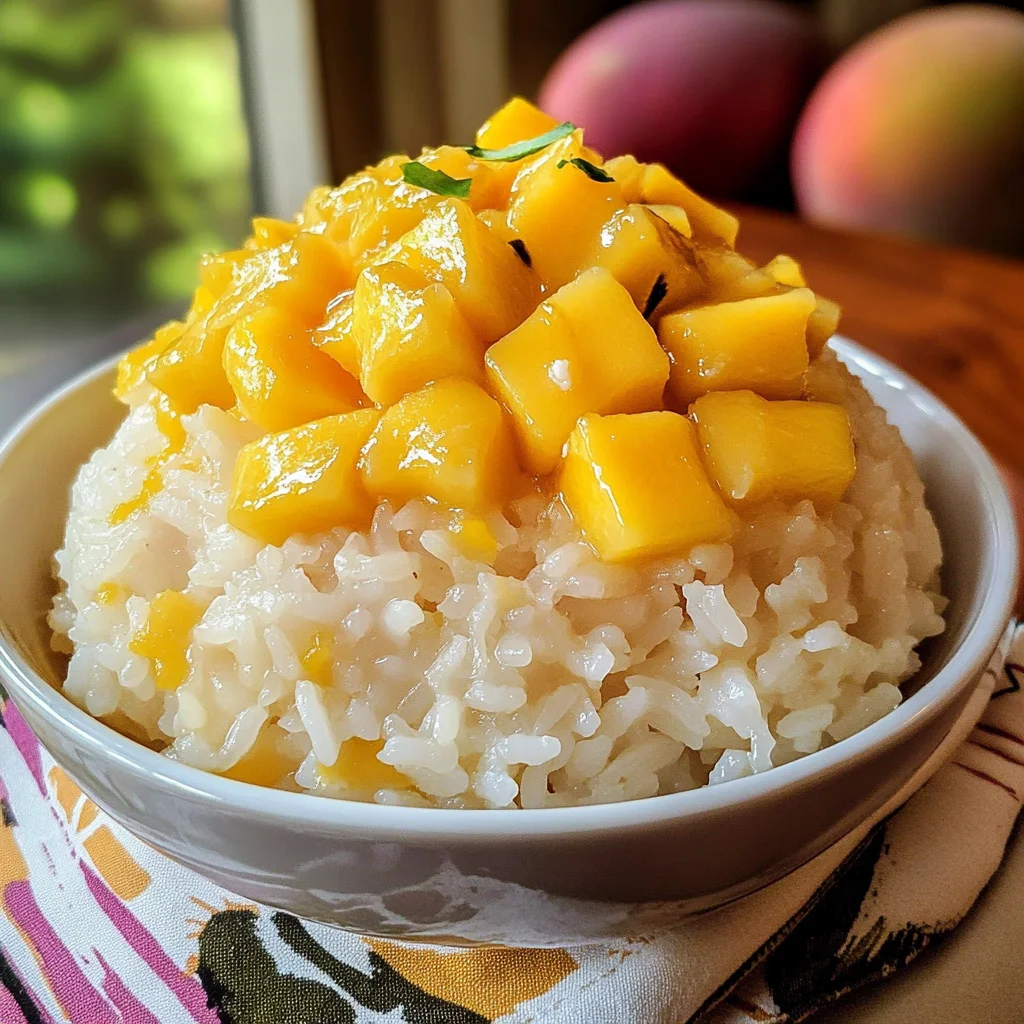
Now it’s time to assemble our masterpiece! Grab your beautiful serving dish (this part is important—presentation matters!), and spoon generous portions of your fluffy Coconut Sticky Rice into one side of the dish. The texture should be soft yet firm enough to hold its shape as you mound it up proudly on your plate. On the other side, create a vibrant display of those freshly diced mangoes—it’s like painting with food!
To elevate this further (because why not?), you can drizzle some extra coconut milk over top—just gently warm up any remaining coconut milk in a small saucepan until it’s slightly heated through but not boiling; feel free to add a pinch more salt if you’d like! This finishing touch adds layers of creaminess that harmonizes beautifully with both components. And there you have it—your Mango Coconut Sticky Rice is ready for the spotlight!
Embracing Your Tropical Delight
Step 9: Savoring Every Bite
Finally, before digging in—isn’t there something so magical about anticipation? Take a moment to appreciate what you’ve created! Each bite promises an explosion of flavors—a delightful dance between creamy coconut rice and juicy mango. This isn’t just food; it’s an experience meant to be savored with every sense engaged.
As you take that first mouthful (I promise you won’t be able to resist), let yourself get lost in that symphony of flavors. The sweet-tartness of mango paired with warm sticky rice creates such harmony that you’ll find yourself transported straight to a tropical paradise with just one bite! I encourage you to share this dish with friends or family; watching their faces light up as they taste your creation makes all those steps worthwhile.
Remember, cooking isn’t just about following recipes—it’s about love, creativity, and connection. Enjoy every bit of this Mango Coconut Sticky Rice experience; trust me—you deserve this delicious reward after all that hard work!
Storage and Enjoyment Tips for Your Mango Coconut Sticky Rice
Now that you’ve created this delightful dish, the stage is set for enjoyment! Picture yourself, perhaps on a warm evening, savoring the sweet aroma wafting from your kitchen as you dive into your bowl of Mango Coconut Sticky Rice. But what happens when you have leftovers? Don’t fret! This dish is just as enjoyable the next day and even allows you to get creative with your meals. Let’s explore how to store it properly so that every bite remains as heavenly as the first.
Storing Leftover Mango Coconut Sticky Rice
To keep your Mango Coconut Sticky Rice fresh and delicious, I recommend transferring it into an airtight container. This is absolutely paramount to avoid any unwanted moisture or flavors invading your tropical masterpiece! You can store it in the refrigerator for up to three days, but trust me, it rarely lasts that long in my house! If you find yourself with a bit leftover, try placing a slice of bread in the container – this clever trick will help absorb excess moisture and keep your rice comforting and fluffy. When you’re ready to enjoy those leftovers, simply reheat them gently in the microwave or on the stovetop with a splash of coconut milk to revive that luscious creaminess. You’ll find that while it may not have the same fresh-off-the-stove warmth, its flavor remains beautifully intact, allowing you to relive that tropical bliss.
Freezing Mango Coconut Sticky Rice for Later
If you want to take your meal prep game up a notch or simply save some of this delightful dish for a rainy day, freezing is a fabulous option! When done correctly, Mango Coconut Sticky Rice can be kept in the freezer for up to three months. Just make sure to cool it completely before portioning it out into freezer-safe bags or containers – this ensures that each serving stays as fresh as possible. When you’re ready for a taste of paradise again, pull out what you need and let it thaw overnight in the fridge. You can also reheat from frozen by gently warming it in a pot with a splash of coconut milk until creamy and inviting again. The convenience factor is what makes this dish truly extraordinary; imagine having this delightful treat waiting for you after a long day – pure joy!
Mango Coconut Sticky Rice
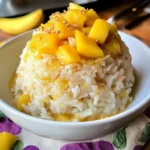
Mango Coconut Sticky Rice is a delightful dessert that transports you straight to a tropical paradise with every bite. This easy-to-make dish combines the sweetness of ripe mangoes with creamy coconut milk and sticky rice, creating an unforgettable flavor experience. Perfect for summer gatherings or as a comforting treat at home, this recipe is not only simple but also showcases the beauty of fresh, wholesome ingredients. The rich aroma and vibrant colors make it an appealing centerpiece on any table, ensuring smiles all around. Whether you’re indulging alone or sharing with loved ones, Mango Coconut Sticky Rice is sure to impress!
- Prep Time: 15 minutes
- Cook Time: 30 minutes
- Total Time: 45 minutes
- Yield: Serves 4
- Category: Dessert
- Method: Cooking
- Cuisine: Thai
Ingredients
- 2 cups sushi rice
- 1 large ripe mango (diced)
- 1 can (14 oz) full-fat coconut milk
- 1 cup water
- 1 ¼ teaspoons salt
Instructions
- Rinse the sushi rice under cold water until the water runs clear to remove excess starch.
- In a medium saucepan, combine rinsed sushi rice, water, and salt. Bring to a boil over medium heat.
- Once boiling, reduce heat to low, cover the pan with a tight-fitting lid, and let it simmer for about 20 minutes.
- After cooking, turn off the heat and let the rice sit covered for an additional 10 minutes.
- Meanwhile, mix half of the coconut milk with diced mango in a bowl until well combined.
- Fluff the cooked rice with a fork and gently fold in the remaining coconut milk.
- Serve by spooning rice onto plates and topping with mango-coconut mixture.
Nutrition
- Serving Size: 1 cup (240g)
- Calories: 380
- Sugar: 15g
- Sodium: 230mg
- Fat: 12g
- Saturated Fat: 10g
- Unsaturated Fat: 1g
- Trans Fat: 0g
- Carbohydrates: 66g
- Fiber: 2g
- Protein: 6g
- Cholesterol: 0mg