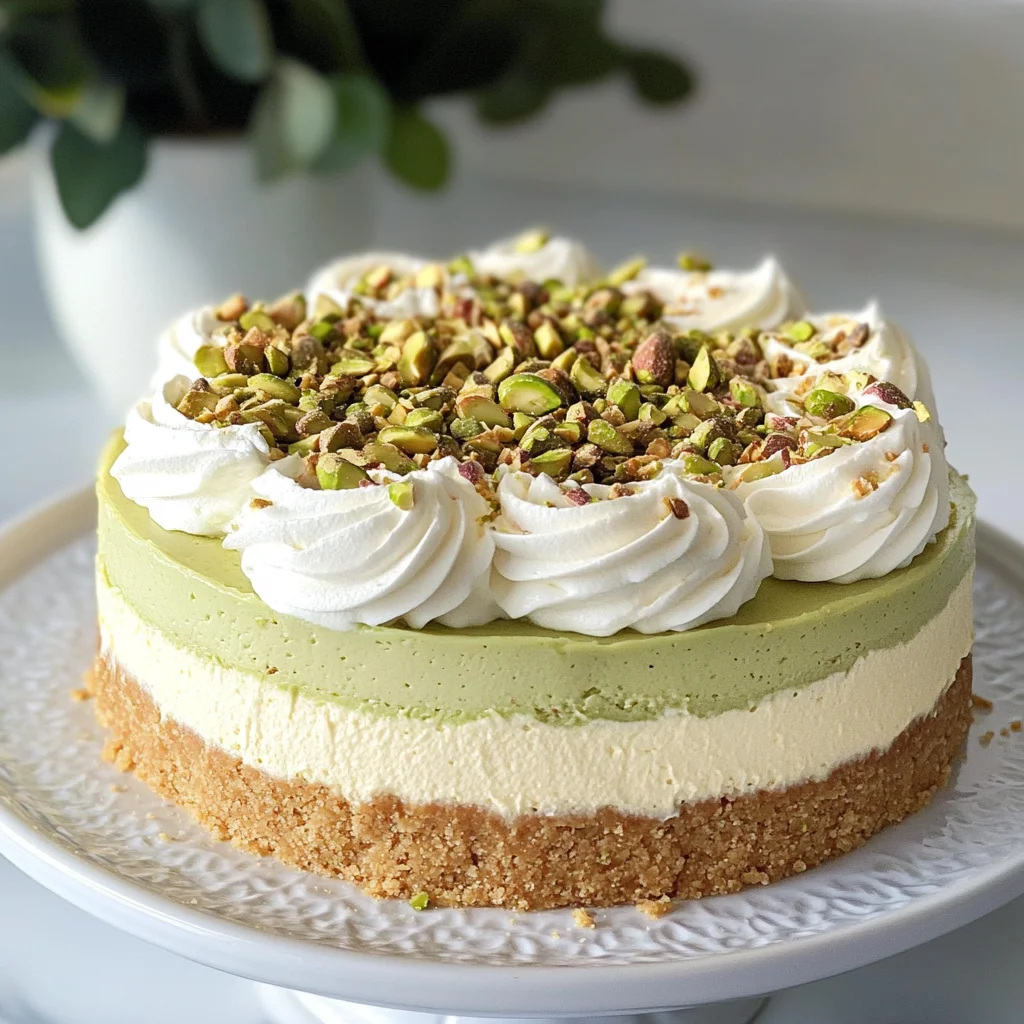
No Bake Pistachio Cheesecake
There’s a certain magic that happens in the kitchen when you decide to create something special, isn’t there? It’s an almost sacred journey where ingredients transform into a beautiful creation that can evoke joy, nostalgia, and even love. Today, I want to share with you one of my all-time favorite recipes—a No Bake Pistachio Cheesecake that is not just a dessert but an experience that wraps around your senses like a warm hug. Imagine the gentle crunch of a buttery vanilla wafer crust giving way to a silky, creamy filling infused with the rich, nutty flavor of pistachios. Each bite is a symphony of flavors and textures that will transport you to a place of blissful indulgence.
What truly sets this No Bake Pistachio Cheesecake apart is not just its delightful taste but also its effortless preparation—it requires no baking! It’s perfect for gatherings or quiet nights at home when you crave something sweet without the fuss of turning on the oven. I’ve always been captivated by how this dessert strikes the perfect balance between decadence and simplicity, making it accessible for everyone from novice bakers to seasoned pros. Trust me, once you make this cheesecake, it will become a cherished recipe in your repertoire.
No Bake Pistachio Cheesecake: A Creamy Delight Without the Heat
Let’s embark on this culinary adventure together! The beauty of this No Bake Pistachio Cheesecake lies not only in its irresistible flavor but also in how quickly it comes together—perfect for those busy days when you just want something delicious without spending hours in the kitchen. Plus, it’s so versatile; you can whip it up for holiday gatherings, birthday celebrations, or even just because you deserve a treat! So grab your mixing bowl and let’s dive into these delightful layers of goodness.
Ingredients:
As we prepare to create this luscious No Bake Pistachio Cheesecake, let’s take a moment to appreciate each ingredient that plays a role in bringing this dessert to life. Every component contributes its unique character and flavor profile that culminates in an extraordinary experience.
- 2 ½ cups vanilla wafer crumbs. These little gems form the foundation of our crust. Their delicate sweetness perfectly complements the rich filling while providing that satisfying crunch we all adore. When choosing your vanilla wafers, look for those with pure vanilla extract listed among the ingredients—this will enhance the overall flavor of your cheesecake and ensure your crust is deliciously aromatic.
- ¼ cup granulated sugar. This humble yet essential ingredient sweetens our crust and filling beautifully. Sugar doesn’t just add sweetness; it also helps achieve the right texture in our crust by binding everything together while adding that lovely hint of caramelization when combined with melted butter. Just be sure not to skip this step; without sugar, our crust would lack depth, leaving it bland.
- ¼ tsp salt. A pinch of salt may seem insignificant, but let me tell you—it’s absolutely paramount! Salt enhances flavors and balances sweetness beautifully, making every element pop. In baking—and in life—don’t shy away from using salt; it transforms ordinary into extraordinary.
- ½ cup unsalted butter (melted). The liquid gold that binds our crust together! Using unsalted butter allows us to control the salt levels better while providing richness and moisture to our cheesecake base. Make sure your butter is melted but not boiling; if it’s too hot when mixed with the crumbs, it could lead to a greasy crust.
- 16 oz cream cheese (room temperature). This ingredient is at the heart of our cheesecake filling! Room temperature cream cheese blends seamlessly into a smooth mixture without lumps—trust me on this one! If you’re short on time, cut your cream cheese into cubes and microwave it for about 10 seconds at low power until softened; we want creamy bliss here!
- 1 pkg instant pistachio pudding mix (3.4 oz). This magical mix does double duty—not only does it infuse our cheesecake with irresistible pistachio flavor, but it also acts as a thickener without any cooking required! When selecting your pudding mix, look for one that uses natural flavors; this ensures you get all those dreamy nutty notes we crave.
- 1 tsp vanilla extract. Pure vanilla extract adds warmth and depth to every bite of our cheesecake filling; it harmonizes beautifully with both pistachio and cream cheese flavors, creating an utterly intoxicating experience for your palate.
- 1 tsp pistachio extract. This is where we really amp up the pistachio flavor profile! Unlike other extracts which can be overpowering if used incorrectly, pistachio extract should be used sparingly—but don’t skimp here; trust me on adding this lovely essence as it enriches every mouthful!
- ½ cup powdered sugar. For sweetness with finesse! Powdered sugar combines effortlessly into our creamy filling without leaving any grittiness behind—ensuring we have nothing but smooth indulgence with each slice.
- 2 cups heavy cream (for whipping). Heavy cream elevates our cheesecake from good to utterly divine by adding lightness through whipped peaks that fold beautifully into our cream cheese mixture! Use fresh cream whenever possible—the richer the fat content (look for around 36% fat), the better your results will be!
- 1 ½ cups heavy cream (for topping). Whipped cream brings elegance to any dessert—and who doesn’t love fluffiness atop their cheesecake? Just remember: when whipping cream at home, chill both your bowl and mixer attachments beforehand for best results!
- ¼ cup powdered sugar (for whipped topping). Just like before, this addition ensures our whipped cream achieves perfection—a delicate sweetness balancing out its airy texture!
- 2 tsp vanilla extract (for whipped topping). Because why not add more warmth? Vanilla elevates even simple whipped toppings into something memorable.
- Chopped pistachios (if desired for decoration). Not only do these add visual appeal with their vibrant green color against creamy white cheesecake but they also contribute delightful crunch—the finishing touch we didn’t know we needed!
Equipment You’ll Need:
Now that we’ve gathered all these wonderful ingredients let’s talk about some essential tools you’ll need along the way! Having the right equipment makes everything smoother—not just for efficiency’s sake but also enhances enjoyment during preparation.
- Mixing bowls – A set of various sizes is crucial—one large bowl for combining filling ingredients and perhaps smaller ones for separating components like whipped cream or other toppings as needed throughout preparation ensures organized chaos rather than overwhelming mess!
- Electric mixer or whisk – While an electric mixer makes whipping heavy cream effortless (and who doesn’t love saving time?), don’t underestimate old-fashioned arm strength if you’re feeling particularly ambitious! Either way works brilliantly; just remember: proper aeration is key here!
- Spatula – A high-quality silicone spatula helps scrape down sides while folding ingredients together gently so we maintain all those precious air bubbles created during whipping—this adds volume which translates directly into luxurious texture!
- 9-inch springform pan – Absolutely non-negotiable! This specialized pan allows easy release once our cheesecake has set beautifully after chilling overnight so we can admire its glorious presentation without worrying about damage or breakage during removal.
With these tools at hand alongside our fantastic ingredients ready—we’re well-equipped for success ahead as we prepare to craft an unforgettable No Bake Pistachio Cheesecake together!
Preparing the No Bake Pistachio Cheesecake
Step 1: Creating Our Irresistible Crust
To start off this delightful journey towards cheesecakey bliss, let’s begin with crafting our vanilla wafer crust—the foundation upon which all other flavors will build upon beautifully! In a large mixing bowl combine those delicate vanilla wafer crumbs along with granulated sugar and salt—mix them well until fully incorporated before pouring in melted unsalted butter—a moment where magic starts happening as aromas fill your kitchen!
Stir everything together until all crumbs are evenly coated—you’ll want them resembling damp sand consistency so they hold their shape firmly when pressed into pan later on; don’t rush this step too much—it’s crucial as proper binding ensures no crumbly disappointment awaits once served later on! Once achieved transfer mixture directly into greased springform pan then press down firmly using either hands or bottom flat measuring cup until compacted tightly along base creating perfect base layer harmony ready for next stage ahead…
Step 2: Whipping Up That Creamy Filling
Now comes one of my favorite parts—the luscious creamy filling itself which promises decadent delight enveloping each slice like soft clouds drifting through summer skies… Begin by grabbing room temperature cream cheese placed within another large mixing bowl then beat vigorously using electric mixer until completely smooth—allowing those stubborn lumps disappear completely ensures silky final product free from any unpleasant surprises lurking beneath surface later on!
Once achieved sprinkle instant pistachio pudding mix atop mixture followed closely by both extracts (vanilla & pistachio) before adding remaining powdered sugar ensuring balanced sweetness throughout entire dish while blending thoroughly again until fully combined—it should have thickened slightly by now thanks largely due added pudding mix working its magic here too! Set aside briefly while preparing heavy whipping cream next…
Step 3: Folding Lightness Into Bliss
Grab chilled heavy whipping cream—this step elevates our previously made mixture significantly toward sheer indulgence… In separate clean mixing bowl whip heavy cream until soft peaks form sticking firmly upon whisk attachment—this indicates we’ve achieved ideal level needed prior folding gently back towards original mixture previously created ensuring minimal deflation occurs along way preserving airiness within resulting masterpiece ahead… Remember: never rush folding process since gentleness matters greatly here maintaining lightness adds heavenly texture desired throughout finished product.
You’ll know it’s ready once combined batter becomes fluffy yet holds shape nicely indicating successful incorporation achieved without losing air bubbles captured earlier… Once done transfer entire batter carefully over prepped crumb crust smoothing out top lightly using spatula ensuring ease when slicing later enhances presentation immensely too!
Step 4: Chilling Perfection
Now comes perhaps most vital part—the waiting game… Cover springform pan tightly using plastic wrap then refrigerate at least four hours preferably overnight allowing flavors meld beautifully while achieving firm-set texture desired across entire cake surface… Why chill? This crucial step allows time necessary develop deep layers enhancing overall quality ensuring satisfaction awaits each person indulging slice afterward… Picture yourself reclining back savoring each forkful knowing careful attention bestowed throughout process has paid off handsomely already—not rushing simply enjoying journey toward delicious end result truly extraordinary awaits ahead…
As we wait patiently enjoying tantalizing anticipation bubbling inside let’s reflect upon how rewarding experience has been thus far creating something special amidst laughter shared memories stirred alongside family friends alike—all tied together through simple act cooking!!
Stay tuned as we finish up final touches before presenting gorgeous creation soon enough…
Crafting Your No Bake Pistachio Cheesecake: The Heart of the Process
Step 5: Bringing the Crust to Life
Now that you have your delightful mixture of vanilla wafer crumbs, sugar, salt, and melted butter, it’s time to transform them into a crust that will serve as the foundation for your no bake pistachio cheesecake. This step is crucial because the crust not only provides texture but also adds a layer of flavor that beautifully complements the creamy filling. Begin by preheating your oven to 350°F (although we won’t actually bake this beauty) just to warm the crust slightly after pressing it into the pan; trust me, you want that buttery goodness to meld perfectly together!
Take a 9-inch springform pan—this will make it so much easier to remove your cheesecake later—and gently press the crumb mixture evenly across the bottom and up the sides. Use the back of a measuring cup or your fingers to make sure it’s tightly packed; this is non-negotiable if you want a firm crust that holds up when you slice into it. Once you’ve achieved a beautiful golden hue through even pressure, pop it in the fridge for about 10-15 minutes while we prepare our luscious filling. I encourage you to take this time to clean up any mess—you’ll thank yourself later!
Step 6: Whipping Up That Creamy Cheesecake Filling
With your crust chilling gracefully in the fridge, it’s time to turn our attention to crafting the dreamy pistachio cheesecake filling. Start by placing your room-temperature cream cheese in a large mixing bowl; this is essential because softened cream cheese blends smoothly without any lumps, giving you that rich and creamy texture we all adore. Using an electric mixer on medium speed, beat until it’s silky and smooth—this should take about two minutes. You want your cream cheese to be utterly intoxicating, so don’t rush this step!
Next, add in that magical package of instant pistachio pudding mix along with vanilla and pistachio extracts—the aroma alone will transport you! Beat these ingredients together until they are well incorporated; within seconds, you’ll notice how the color transforms into a vibrant green reminiscent of spring. Now sprinkle in ½ cup of powdered sugar; this will balance out any tanginess from the cream cheese and give a hint of sweetness without being overbearing. Mix until everything is combined beautifully—trust me on this one; watching those colors swirl together is like witnessing culinary magic unfold right before your eyes.
Step 7: Folding in the Heavy Cream
This part is where true artistry comes into play: folding in the heavy cream. In a separate bowl, whip 2 cups of heavy cream until stiff peaks form—this means when you lift your whisk out, peaks will hold their shape rather than flop over. This whipped cream acts as a luxurious cloud of airiness that cuts through the richness of our filling while adding an ethereal texture that’s simply divine! It’s absolutely paramount not to over-whip here; otherwise, you’ll end up with butter instead of light fluff.
Once you’ve achieved those glorious peaks, gently fold about one-third of it into your cheesecake mixture using a spatula. Why fold instead of mix? This technique preserves all those lovely air bubbles you’ve created while whipping—the secret behind achieving that light-as-air cheesecake experience! Be gentle yet thorough as you continue adding in the rest of the whipped cream until no streaks remain visible. The final result should be an incredibly lush filling that promises utter satisfaction with each bite.
Step 8: Assembling Your Cheesecake Masterpiece
Now comes one of my favorite parts—the assembly! Carefully retrieve your crust from the fridge, which should be nicely set by now and ready for its creamy companion. Using a spatula or spoon, dollop generous amounts of that heavenly pistachio filling directly onto your prepared crust. With each scoop, remember how much love goes into every layer—this isn’t just dessert; it’s an experience meant to be savored! Spread it evenly with gentle strokes; allow it to find its own space in every corner of that crust you’ve worked so hard on.
Once everything looks picture-perfect—and I know it will—smooth out the top with a spatula or an offset spatula for a professional finish. But don’t stop there! Cover your masterpiece with plastic wrap or foil and let it chill in the refrigerator for at least four hours—or even better overnight if you can resist temptation! Why such patience? Allowing time for all those flavors to meld together results in something truly extraordinary; trust me when I say this extra time makes all the difference.
Conclusion:
As we wrap up our delightful journey through making this No Bake Pistachio Cheesecake together, I hope you can feel my excitement echoing through every word! This recipe isn’t just about combining ingredients; it’s about creating something profoundly satisfying that will bring smiles and moments of pure bliss around your table. The enchanting marriage of creamy cheesecake filling with that nutty pistachio flavor creates a symphony of flavors that elevates this dessert beyond ordinary fare—it’s truly extraordinary! Each bite offers a blend of textures: the crunch of the vanilla wafer crust contrasts beautifully with the silken creaminess of the filling, making every mouthful an experience worth savoring.
Why should this recipe be on your must-try list? Well, beyond its exquisite taste lies an easy preparation process that welcomes both novice bakers and seasoned pros alike into its fold. It’s versatile enough for special occasions like birthdays or holidays but also perfect when you need a comforting treat after a long day. Just imagine pulling this beauty from the fridge during dinner with friends—the collective gasp followed by smiles says it all as everyone reaches for another slice!
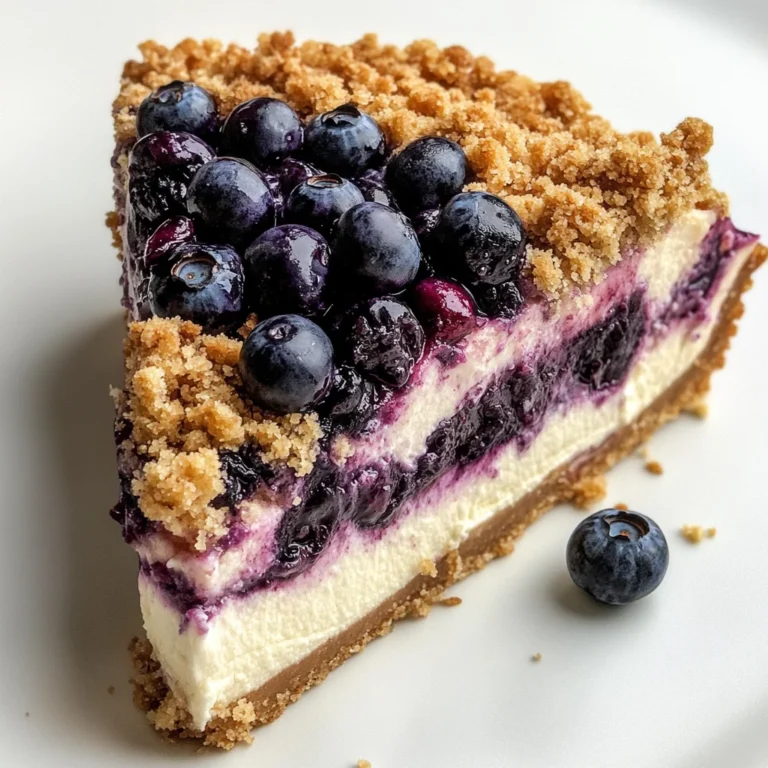
For unforgettable pairings that will elevate your dessert experience to new heights, picture savoring a slice alongside freshly brewed coffee or perhaps some aromatic herbal tea; they complement each other beautifully! Or indulge yourself with some fresh berries on top—the tartness punctuates each creamy morsel wonderfully. On warmer days, serve it chilled with light whipped cream on top paired with crisp mint leaves for décor—an absolute showstopper on any dessert table!
Feeling adventurous? This recipe is wonderfully adaptable! Add crushed chocolate biscuits instead of vanilla wafers for an entirely different crust experience or swap out pistachios for almonds if you’re feeling nutty—each variation will offer its own unique twist while keeping that signature cheesecake essence intact. I truly encourage you to experiment with flavors and share what resonates with you because cooking is meant to be joyful and expressive! So grab those ingredients today and create something magical—I can’t wait to hear about all your delicious experiences!
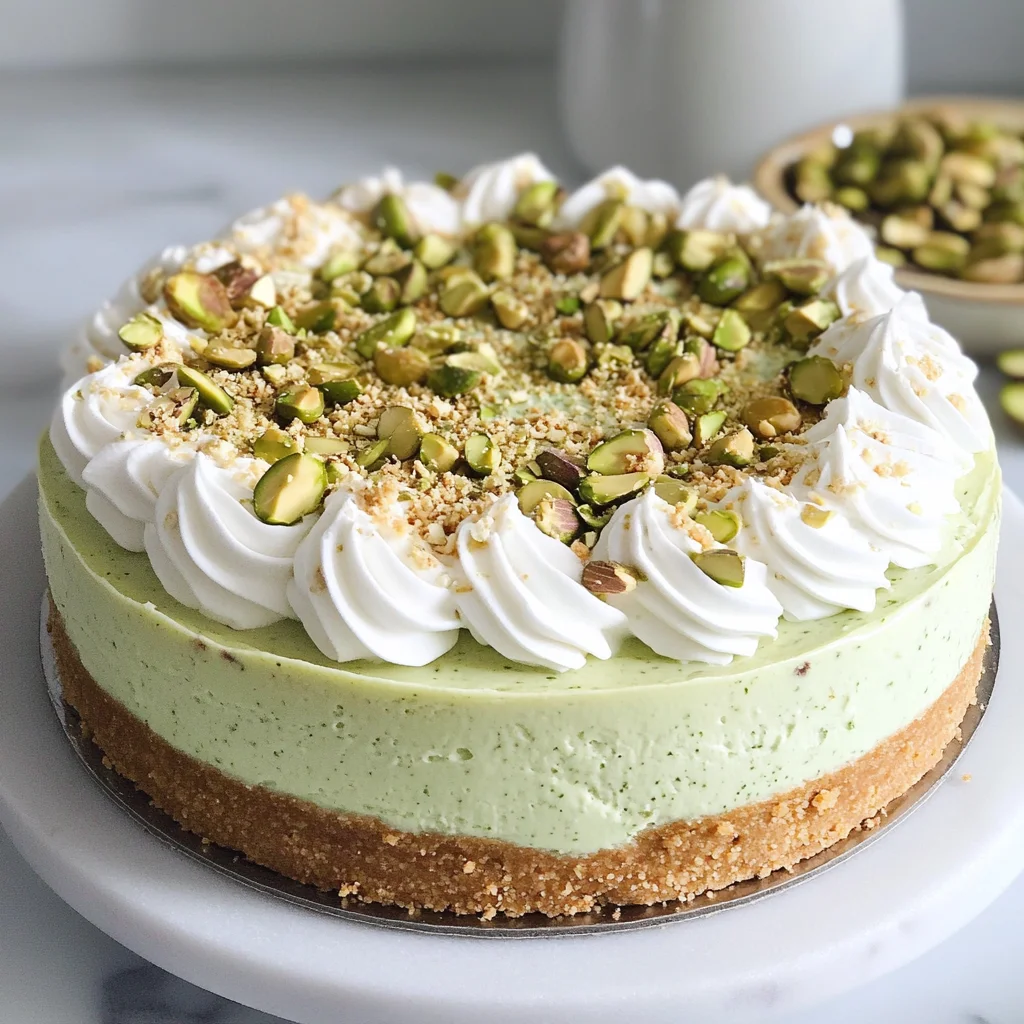
No Bake Pistachio Cheesecake

Indulge in the creamy delight of No Bake Pistachio Cheesecake, a dessert that captivates with its vibrant flavors and luscious texture. This easy-to-make cheesecake offers the perfect balance between the rich nuttiness of pistachios and the smoothness of cream cheese, all atop a buttery vanilla wafer crust. Best of all, there’s no baking required—just chill and serve! Whether it’s for a special occasion or a simple weeknight treat, this cheesecake is sure to impress your family and friends. With each bite, you’ll experience a delightful crunch from the crust paired with a velvety filling that feels like pure bliss. Get ready to create a masterpiece that will become a beloved favorite in your dessert repertoire.
- Prep Time: 30 minutes
- Cook Time: None
- Total Time: 0 hours
- Yield: Serves approximately 10 slices 1x
- Category: Dessert
- Method: No Bake
- Cuisine: American
Ingredients
- 2 ½ cups vanilla wafer crumbs
- ¼ cup granulated sugar
- ½ cup unsalted butter (melted)
- 16 oz cream cheese (room temperature)
- 1 pkg instant pistachio pudding mix (3.4 oz)
- 2 cups heavy cream (for whipping)
- ½ cup powdered sugar
Instructions
- In a large mixing bowl, combine vanilla wafer crumbs, granulated sugar, and melted butter until the mixture resembles damp sand. Press firmly into the bottom of a greased 9-inch springform pan to form the crust. Chill in the refrigerator for 10-15 minutes.
- In another bowl, beat room temperature cream cheese until smooth. Add pistachio pudding mix, vanilla extract, and powdered sugar; mix until well combined.
- In a separate bowl, whip heavy cream until stiff peaks form. Gently fold one-third of whipped cream into the cheesecake mixture until fully incorporated, then fold in the remaining whipped cream.
- Spread the filling evenly over the chilled crust and smooth out the top with a spatula. Cover with plastic wrap and refrigerate for at least 4 hours or overnight.
- Before serving, whip additional heavy cream with powdered sugar and vanilla extract for topping. Spread or pipe over the cheesecake and garnish with chopped pistachios if desired.
Nutrition
- Serving Size: 1 slice (100g)
- Calories: 360
- Sugar: 22g
- Sodium: 210mg
- Fat: 25g
- Saturated Fat: 14g
- Unsaturated Fat: 10g
- Trans Fat: 0g
- Carbohydrates: 30g
- Fiber: 1g
- Protein: 5g
- Cholesterol: 70mg