Blueberry Crumble Cheesecake
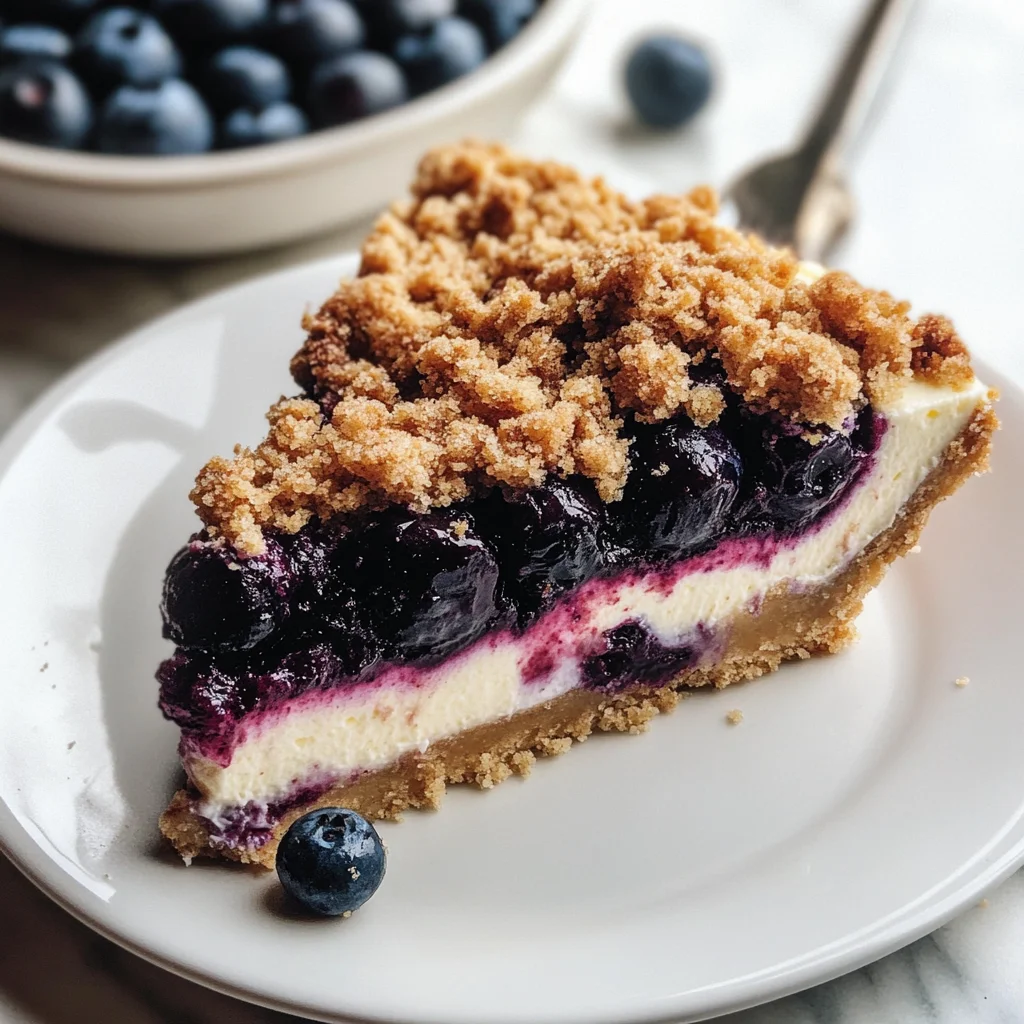
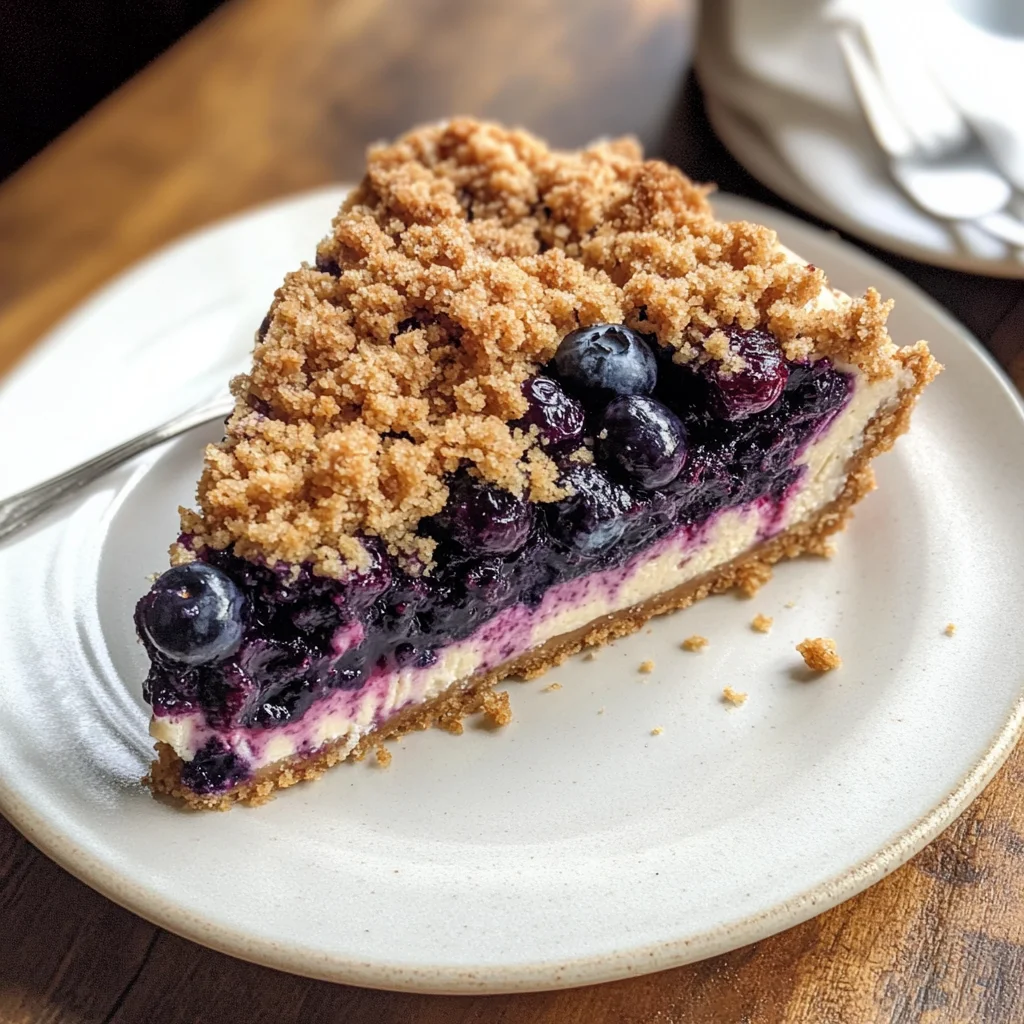
There’s something truly magical about desserts that bring us back to our roots while simultaneously offering a modern twist. I’ve always been captivated by the rich, creamy texture of cheesecake combined with the delightful crunch of a crumble topping, all enveloped in the sweet embrace of juicy blueberries. This Blueberry Crumble Cheesecake isn’t just a dessert; it’s a celebration of flavors and textures that harmonize beautifully with every bite. When you cut into this luscious creation, the smooth cream cheese filling mingles with the vibrant blueberries, creating an experience that feels both comforting and indulgent. Each slice is like a warm hug, inviting you to savor its layers and relish in its sweet nostalgia.
What makes this dessert even more special is not just its taste but also the memories it can create. Picture this: a sunlit afternoon spent with friends or family, laughter mingling with the sweet aroma wafting from your kitchen as this cheesecake bakes to perfection. The combination of creamy cheesecake and crumbly topping evokes those cherished moments spent gathering around the table, sharing stories and indulging in life’s simple pleasures. Trust me when I say that preparing this Blueberry Crumble Cheesecake will not only fill your home with enticing scents but will also fill your heart with warmth and joy.
Blueberry Crumble Cheesecake: A Sweet Symphony of Flavor
Let’s dive into this delightful recipe together! The beauty of making a Blueberry Crumble Cheesecake lies in how effortlessly it combines distinct elements—crunchy crust, velvety filling, and sweet-tart blueberry topping—into one unforgettable dessert. This recipe is designed to be approachable yet rewarding, perfect for anyone looking to impress at their next gathering or simply indulge in a treat that’s worth every calorie.
Ingredients:
As we embark on this culinary journey together, let’s take a moment to appreciate each ingredient that plays a vital role in crafting our Blueberry Crumble Cheesecake. Each component is essential, contributing unique flavors and textures that make this dessert sing.
- 250 g digestive or graham crackers. These humble cookies form the foundation of our cheesecake crust. Their slightly sweet flavor and crumbly texture provide the perfect base for holding all those luscious layers together. When crushed finely, they create a sturdy yet tender crust that contrasts beautifully with the creamy filling above. You can choose digestive biscuits for their richer flavor or graham crackers for their classic sweetness—both work splendidly!
- 2 tbsp granulated sugar. Sugar isn’t just about sweetness; it enhances flavors and helps achieve that lovely golden color on our crust as it bakes. This small amount mixed into our crushed cookies elevates their taste while ensuring they crisp up nicely in the oven. It’s essential for balancing out the tartness of our blueberries later on.
- 75 g butter. Ahh, butter—the secret ingredient that brings everything together! Softened butter binds our cookie crumbs while adding richness and moisture to the crust. I recommend using unsalted butter for better control over seasoning; if you ever find yourself short on butter, feel free to use coconut oil as a fantastic alternative!
- 300 g fresh blueberries. The stars of our show! Not only do these plump berries burst with flavor, but they also add stunning color to our cheesecake. Fresh blueberries are key here—they’re juicy and naturally sweet-tart, making them an ideal pairing for the creamy filling below. If fresh ones are hard to find out-of-season or you prefer frozen blueberries, those will work too—just remember to thaw them first!
- 1 tbsp granulated sugar (for blueberries). This little addition will help coax out the juices from those beautiful berries as they bake atop our cheesecake. By sprinkling some sugar over them along with lemon juice and flour before baking, we create a syrupy layer that seeps down into our cheesecake—oh my goodness!
- 1 tbsp all-purpose flour (for blueberries). Flour acts like a magic dust here—it binds with the juices released from the blueberries during baking and helps prevent them from sinking into our cheesecake filling while also thickening any liquid that might ooze out during baking.
- 2 tsp lemon juice. Freshly squeezed lemon juice brightens up not just the flavor profile but also complements the sweetness of both our blueberries and cheesecake filling beautifully! It adds depth and balances out richness while enhancing all those fruity flavors—we wouldn’t want anything too cloyingly sweet now, would we?
- 110 g all-purpose flour (for cheesecake). In addition to providing structure to our creamy filling, flour helps stabilize it during baking so it doesn’t collapse when cooled! It’s crucial for achieving that perfect sliceable texture we crave in cheesecakes.
- 80 g dark brown sugar. Unlike regular granulated sugar, dark brown sugar adds rich caramel notes thanks to its molasses content—a delightful twist here! It deepens flavors without overshadowing them while keeping things moist throughout baking; plus who doesn’t love that hint of warmth?
- 70 g butter (for filling). Just like before, softened butter plays an important role here by enriching our cream cheese mixture further—it’s essential for achieving silky smoothness throughout every bite.
- 800 g full fat cream cheese (room temperature). This ingredient is non-negotiable—it gives us that luxurious texture characteristic of classic cheesecakes! Make sure it’s soft enough so it blends easily without lumps; otherwise you’ll end up with an unevenly textured filling instead of one that melts in your mouth!
- 260 g granulated sugar (for filling). We’re using quite a bit here because cream cheese has its own tanginess which needs balancing out nicely…don’t worry though: once everything mixes together well enough under heat magic happens!
- 200 g sour cream (18% room temperature). Sour cream adds both creaminess AND tanginess—it rounds out flavors perfectly while keeping things light at the same time! Opting for higher fat content ensures maximum richness without sacrificing overall balance either.
- 1 1/2 tbsp cornstarch. Cornstarch serves as another stabilizer here—it absorbs excess moisture so we don’t end up with watery slices later on! This little detail is absolutely paramount because nobody wants their gorgeous dessert falling apart upon cutting into it.
- 2 1/2 tsp vanilla extract. Vanilla extract infuses warmth into every layer—trust me when I say quality matters here! Pure vanilla has much more robust flavor than imitation varieties; therefore investing slightly more pays off immensely when it comes time for tasting!
- 4 large eggs (room temperature). Eggs are essential not only for binding together all components but also for creating lift within baked goods such as cheesecakes! Letting them come down closer towards room temp helps ensure they incorporate smoothly without any unwanted lumps forming.
Equipment You’ll Need:
Now let’s gather some trusty tools to help us along this delicious adventure! Having the right equipment can truly make your experience smoother—and let’s face it: who doesn’t want their time spent baking to be enjoyable?
- Springform pan (9-inch) – A must-have for any cheesecake enthusiast! Its removable sides allow easy release after cooling so you can serve up beautiful slices without fussing over stuck edges—no one likes crumbling crusts!
- Mixing bowls – You’ll need various sizes; larger ones are great for mixing batters while smaller ones help keep ingredients organized before combining later on…plus they save space!
- Electric mixer (stand or hand-held) – For achieving smooth cream cheese mixtures quickly without strenuous effort! Creaming properly results in light fluffy textures which we desire most greatly here.
- Spatula – Essential for folding ingredients gently yet effectively; using one allows us not only to scrape down sides but also combine mixtures thoroughly without deflating air incorporated earlier on.
- Measuring cups & spoons – Accurate measurements ensure consistency throughout recipes—this cannot be overstated when trying something new!
Preparing the Blueberry Crumble Cheesecake
Step 1: Crafting a Perfect Crust
Let’s start by preparing that delightful crust which serves as the bedrock of our Blueberry Crumble Cheesecake! Begin by preheating your oven to 175°C (350°F) so it’s nice and hot when we slide in our creation later on—that step is crucial because proper heat ensures an evenly baked base without sogginess beneath all those luscious toppings! While waiting for things heat up nicely grab your digestive or graham crackers then crush them finely—this process can be done manually using a rolling pin or simply tossing them into a food processor until resembling coarse sand-like consistency works wonders too! Once crushed transfer crumbs into mixing bowl followed by adding two tablespoons granulated sugar ensuring even distribution among crumbs before pouring melted butter straight over top—mix together until fully combined resembling wet sand-like texture ready to press firmly down into bottom of springform pan ensuring even coverage across entire base area since no one wants uneven pieces falling apart later on!
Step 2: Baking Our Beautiful Base
Now comes one exciting part where we pop this prepared crust directly into preheated oven allowing it bake away blissfully for about ten minutes until lightly golden brown appears across surface—which indicates it’s ready! As aromas fill your kitchen don’t rush this step; keep an eye out because ovens vary widely regarding exact timing needed—once achieved remove carefully allowing cool completely at room temperature before moving onto next stage involving wondrous cream cheese batter creation itself…
Step 3: Blending The Creamy Filling
With crust set aside now comes arguably most enjoyable mixing phase where we whisk together luscious components resulting in dreamy texture upon final assembly stage shortly thereafter… Start by placing softened full-fat cream cheese inside large mixing bowl then beat vigorously until fluffy consistency emerges—this process known as creaming creates air pockets leading ultimately toward lightness achieved within final product itself plus aids breaking down any lumps present initially too… Next gradually sprinkle granulated sugar incorporating slowly followed immediately afterward by adding sour cream mixing thoroughly until everything blends seamlessly leaving behind no visible traces whatsoever lingering behind—a smooth batter at last means we’re progressing well towards completion folks!
Step 4: Adding Eggs & Flavor Enhancements
Here comes another crucial aspect ensuring rich flavor profile present throughout entire dessert experience awaits ahead so let’s focus closely here now shall we? Begin cracking open eggs directly into mixture maintaining steady rhythm whilst blending continuously afterward; incorporating cornstarch alongside vanilla extract provides added stability helping bind everything tightly together while avoiding potential cracks developing later during cooling phase too… Continue mixing gently until fully integrated allowing flavors meld beautifully rounding edges off transitioning from mere batter towards something extraordinary indeed—a true testament showcasing artistry created through simple ingredients combined harmoniously crafted under guidance provided throughout each step taken thus far…
Now my friend, stay tuned as we dive deeper into preparing those juicy blueberry toppings next along with crumble layer completing masterpiece entirely bringing forth ultimate indulgence everyone deserves enjoying every slice served forth proudly upon tables everywhere shared amongst loved ones gathered around cherishing memories made lasting forever through food lovingly prepared personally each time undertaken…
Step 5: Creating the Silky Cheesecake Filling
Now that we have our crust baked and cooled, it’s time to dive into one of the most exciting parts—the cheesecake filling! Begin by placing your room temperature cream cheese into a large mixing bowl. It’s crucial that the cream cheese is at room temperature because this allows it to blend smoothly, creating that utterly luxurious texture we all crave in a cheesecake. Using a hand mixer or a stand mixer fitted with a paddle attachment, beat the cream cheese on medium speed until it’s fluffy and smooth—this usually takes about 2-3 minutes. You’re looking for a creamy consistency without any lumps; trust me, achieving this is absolutely paramount to your cheesecake’s final texture.
Once your cream cheese is perfectly whipped, gradually add in the granulated sugar while continuing to mix. This step is not just about sweetening; it also helps incorporate air into the mixture, which will give your cheesecake an ethereal lightness. After the sugar is fully combined, it’s time to add in the sour cream and vanilla extract. The sour cream adds a delightful tang that balances the sweetness beautifully—it’s like a kiss of brightness in every bite! Mix these ingredients together until they are well incorporated, but don’t overdo it; you want to avoid incorporating too much air at this stage. Lastly, add each egg one at a time, ensuring each egg is fully mixed in before adding the next. This method allows for better emulsification and creates that perfect creamy structure we adore in cheesecakes.
Step 6: Bringing Blueberries into the Mix
Next up is integrating our beautiful blueberries into this velvety filling! In a separate bowl, combine your fresh blueberries with the tablespoon of granulated sugar, flour, and lemon juice. This step is vital because it not only sweetens those gorgeous berries but also helps thicken their juices as they cook—preventing them from turning your cheesecake into a soggy mess! Gently toss everything together until all the blueberries are evenly coated. You’ll notice how the sugar starts to draw out some of that juicy goodness from the blueberries; this is what we want!
Now, fold these luscious berries gently into your cheesecake mixture using a spatula. Be careful here—over-mixing can break down those beautiful blueberries and turn them into mush. We want those bursts of flavor intact when you take a bite! The sight of those plump blueberries nestled within your creamy filling will make your heart sing as you imagine how they will taste once baked. Trust me on this; this step adds not just flavor but also visual appeal—each slice will be dotted with stunning blue jewels!
Step 7: Layering for Perfection
With our blueberry-laden filling ready to go, it’s time for the thrilling part—pouring it over our cookie crust! Carefully take your crust from the fridge and ensure it’s completely cooled; if it’s still warm, it could cause your filling to melt—definitely something we want to avoid! Pour the cheesecake mixture directly onto your prepared crust, spreading it evenly with a spatula until you have a smooth layer on top. As you do this, take note of how rich and thick the batter feels; that’s exactly what you’re looking for.
This step is essential because how you layer matters significantly when it comes to baking evenness and overall aesthetics of your Blueberry Crumble Cheesecake. A well-distributed batter ensures that every slice has an equal amount of that dreamy blueberry filling and buttery crust. Once you’ve added all of that luscious batter into the pan, give it a gentle shake or tap on the counter to release any air bubbles trapped within—it’s important for avoiding cracks later on in baking!
Step 8: Baking Your Blueberry Crumble Cheesecake
Now comes perhaps one of my favorite moments—the baking process! Preheat your oven to 160°C (320°F), ensuring it’s nice and hot before introducing your cheesecake. Place your filled springform pan on a baking sheet; this makes it easier to handle and catches any potential drips while baking—trust me, it’s less stress during cleanup later! Bake the cheesecake for approximately 55-65 minutes until set around the edges but still slightly jiggly in the center when gently shaken. This slight jiggle is crucial because it indicates that there’s still moisture which will firm up as it cools—a key element for achieving that silky texture.
As tempting as it might be to keep peeking at our creation through the oven door (and I understand completely!), try not to open it too frequently during baking. Every time you open that door, you let out precious heat which can lead to uneven cooking or unsightly cracks forming on top—a common pitfall I want you to avoid! When done baking, turn off the oven but leave the door ajar with your cheesecake inside for about an hour; this gradual cooling process helps prevent sudden temperature changes which can lead to cracking as well.
Blueberry Crumble Cheesecake
Indulge in our delicious Blueberry Crumble Cheesecake, a delightful fusion of creamy cheesecake and sweet-tart blueberries topped with a crunchy crumble. This dessert brings together rich textures and vibrant flavors, elevating your dessert experience to new heights. Perfect for gatherings or a cozy evening at home, this cheesecake is not only visually stunning but also incredibly easy to make. Each slice reveals layers of luscious cream cheese filling and juicy blueberries, all encased in a buttery crust that crumbles beautifully with every bite. Whether you’re celebrating a special occasion or simply treating yourself, this Blueberry Crumble Cheesecake is sure to impress!
- Prep Time: 30 minutes
- Cook Time: 90 minutes
- Total Time: 2 hours
- Yield: Approximately 12 servings 1x
- Category: Dessert
- Method: Baking
- Cuisine: American
Ingredients
- 250 g digestive or graham crackers
- 2 tbsp granulated sugar
- 75 g butter (plus additional for the filling)
- 300 g fresh blueberries
- 1 tbsp granulated sugar (for blueberries)
- 1 tbsp all-purpose flour (for blueberries)
- 2 tsp lemon juice
- 110 g all-purpose flour (for cheesecake)
- 80 g dark brown sugar
- 70 g butter (for filling)
- 800 g full-fat cream cheese (room temperature)
- 260 g granulated sugar (for filling)
- 200 g sour cream (18% room temperature)
- 1 1/2 tbsp cornstarch
- 2 1/2 tsp vanilla extract
- 4 large eggs (room temperature)
Instructions
- Preheat your oven to 175°C (350°F).
- Crush the digestive biscuits or graham crackers and mix with melted butter and granulated sugar to form the crust. Press this mixture firmly into the bottom of a springform pan.
- Bake the crust for about 10 minutes until golden brown, then allow it to cool.
- In a bowl, mix fresh blueberries with sugar, flour, and lemon juice; set aside.
- In a separate bowl, beat the cream cheese until smooth, then gradually incorporate granulated sugar, sour cream, and vanilla extract.
- Add eggs one at a time until fully combined; fold in blueberry mixture gently.
- Pour the filling over the cooled crust and smooth the top.
- Bake for approximately 55-65 minutes until set around edges but slightly jiggly in center; turn off oven and leave cheesecake inside for an hour.
- Allow to cool completely before refrigerating for at least four hours (or overnight).
- Prepare crumble topping by mixing dark brown sugar with flour and melted butter; sprinkle over cooled cheesecake and bake for an additional 20-25 minutes until golden.
Nutrition
- Serving Size: 1 slice (130g)
- Calories: 380
- Sugar: 30g
- Sodium: 240mg
- Fat: 24g
- Saturated Fat: 14g
- Unsaturated Fat: 10g
- Trans Fat: 0g
- Carbohydrates: 37g
- Fiber: 2g
- Protein: 6g
- Cholesterol: 95mg