Hibiscus Lemonade
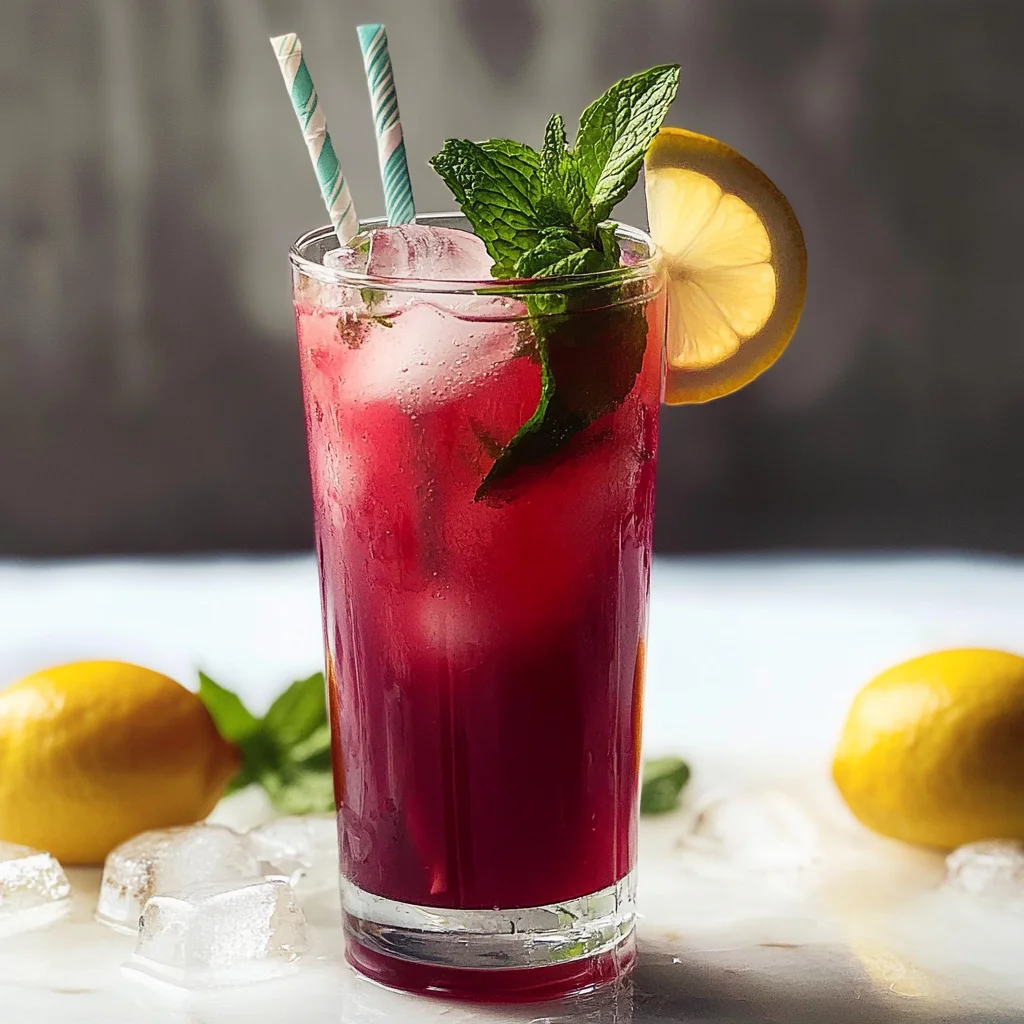
There’s something magical about a glass of Hibiscus Lemonade that transcends mere refreshment; it’s an experience that dances on the palate and evokes memories of sunny days spent in the company of good friends and laughter. This vibrant drink, with its gorgeous crimson hue, is not just another beverage—it’s a celebration of flavors that marries the tartness of fresh lemons with the earthy notes of hibiscus flowers. Each sip is a reminder of nature’s beauty, an embrace from a sunlit garden filled with blooming flowers and lush greenery. I promise you, this Hibiscus Lemonade will awaken your senses and transport you to a place where time stands still, where every moment is savored like the last drop in your glass.
What makes this Hibiscus Lemonade so special is not just its stunning color or refreshing taste, but also its rich history and cultural significance. Hibiscus has been cherished across various cultures for centuries, celebrated for both its beauty and health benefits. In many tropical regions, hibiscus tea is enjoyed for its tart flavor and vibrant color. Here in America, we’re embracing this floral gem in creative ways, bringing it into our kitchens to create concoctions that are both traditional and innovative. Whether you’re hosting a summer gathering or simply looking for a delightful way to cool down, this lemonade is perfect for any occasion. It’s not just a drink; it’s an invitation to share stories and create memories.
Hibiscus Lemonade: A Refreshing Twist on Tradition
Let’s dive into this delightful recipe together! Making Hibiscus Lemonade is an adventure filled with beautiful colors and invigorating scents that make your kitchen come alive. It’s easy enough for anyone to whip up yet sophisticated enough to impress even the pickiest guests at your next get-together. So grab your apron—let’s embark on this flavorful journey!
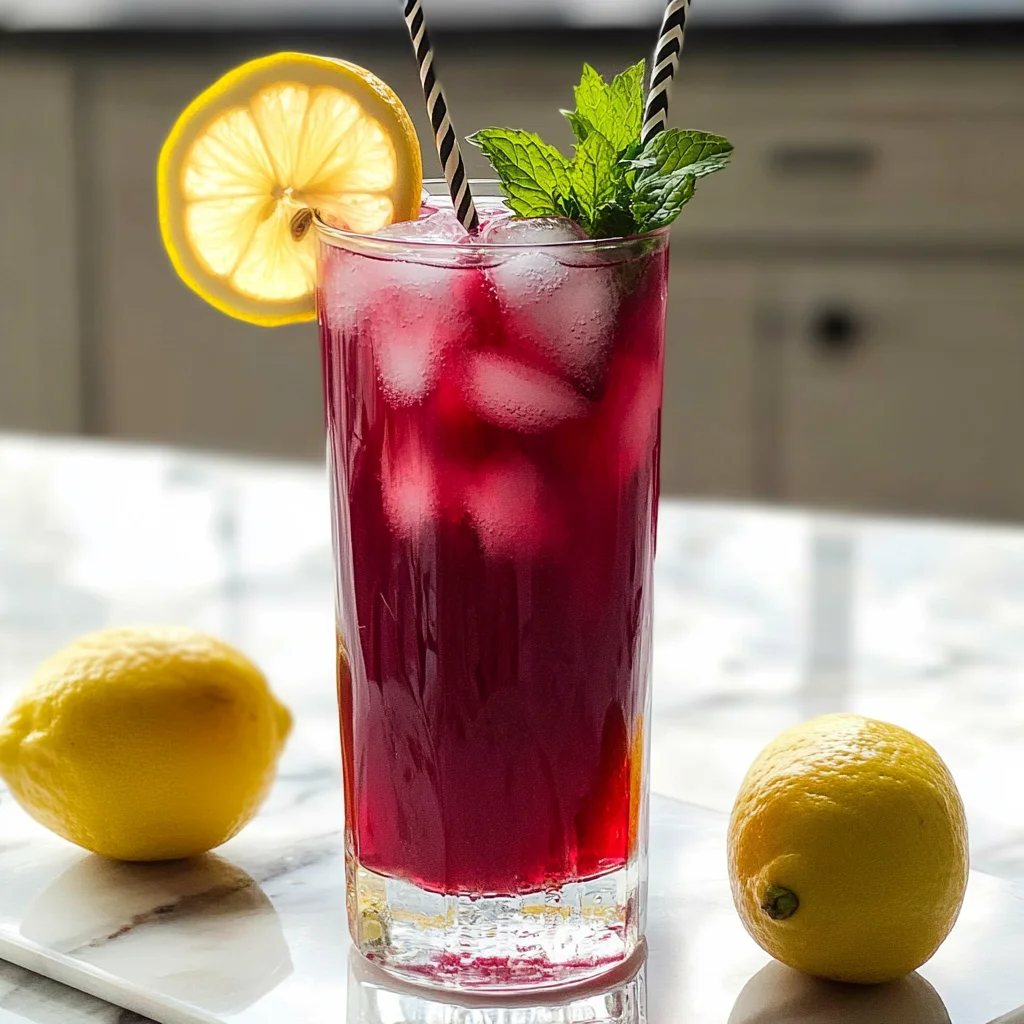
Ingredients:
As we embark on our culinary journey to create this exquisite Hibiscus Lemonade, let’s take a moment to appreciate each ingredient that plays a crucial role in crafting this delightful drink. The beauty of cooking lies not just in the act itself but in understanding how each component contributes to the final masterpiece.
- 1 cup granulated sugar. This sweetener serves as the backbone of our lemonade, balancing out the tartness of the lemons and the earthy notes of hibiscus. The sugar dissolves easily when mixed with water during the syrup-making process, creating a luscious sweetness that’s essential for achieving that perfect balance of flavors. If you’re looking for alternatives, feel free to experiment with honey or agave syrup—but note that each will impart its unique flavor profile.
- 2 cups water (for making the simple syrup). Water acts as the canvas upon which our flavors will dance! It’s important to use filtered water if possible; this ensures that no unwanted minerals or flavors interfere with our beautiful drink. This initial mixture will allow the dried hibiscus flowers to release their vibrant color and tangy essence as they steep—a vital step that brings life into our lemonade.
- ½ cup dried hibiscus flowers. This is where the magic truly begins! Dried hibiscus flowers contribute a stunning ruby red hue and an enchanting tartness reminiscent of cranberries. When purchasing these flowers, look for high-quality options without additives; they should be fragrant and bright in color. Trust me on this—the quality of your dried hibiscus will significantly affect both taste and appearance. If you can’t find them locally, they are widely available online.
- 5 cups cold water. After we’ve crafted our simple syrup infused with hibiscus goodness, we’ll need cold water to dilute it down into a refreshing beverage. Using cold water not only helps to chill your drink faster but also preserves that crisp taste we crave on hot days—perfect for quenching thirst!
- 2 cups fresh lemon juice. Freshly squeezed lemon juice adds brightness and acidity, giving our lemonade its signature zing! When juicing lemons, roll them on the counter before cutting; this helps release more juice from their segments. Also, always taste before adding—you may find you want more or less depending on how tart those lemons turn out!
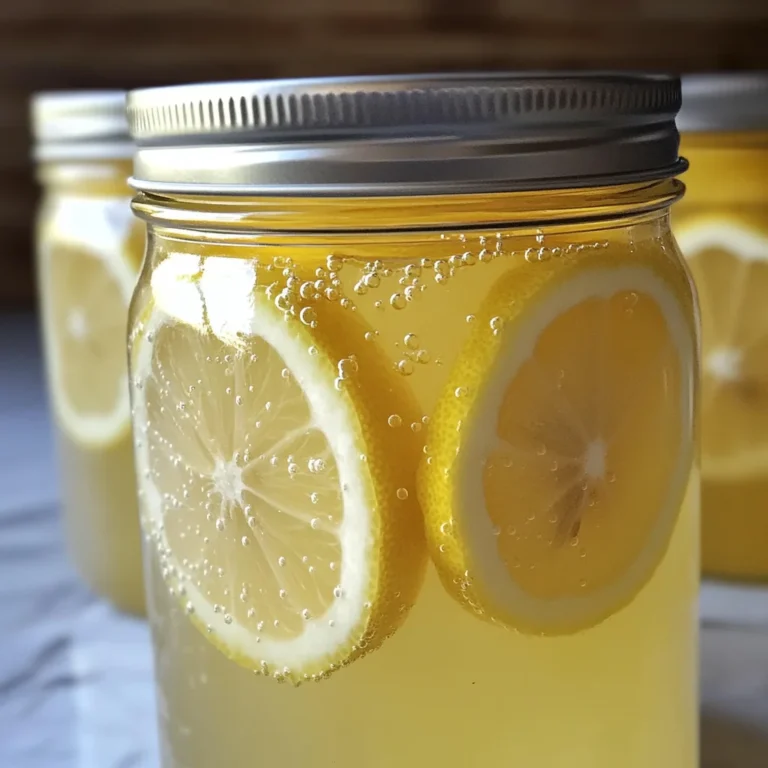
- 1 lemon (thinly sliced). These beautiful slices are not just decorative—they add visual appeal while infusing subtle lemon flavor throughout your drink as it sits in the refrigerator (if there’s any left!). Choose firm lemons with bright skin for optimal juiciness.
- Ice cubes—because what’s lemonade without ice? Ice keeps everything refreshingly cool while preventing dilution until you’re ready to enjoy your drink.
- Fresh mint (for garnish). A sprig or two of fresh mint elevates this drink from delicious to extraordinary! Its aromatic qualities bring an added layer of freshness that complements both hibiscus and lemon beautifully; don’t skip it!
Equipment You’ll Need:
Before we get started mixing up our magical elixir, let’s gather some essential tools that’ll help make this process smooth and enjoyable. Having the right equipment can make all the difference when it comes to creating something wonderful in your kitchen.
- Saucepan – A medium-sized saucepan is perfect for making our simple syrup; it allows enough room for boiling without splattering all over your stove! Look for one with a heavy bottom to provide even heat distribution—this is crucial because we want everything melted together harmoniously without burning any sugar.
- Measuring cups – Accurate measurements are key when it comes to crafting recipes like this one! Using dry measuring cups for solids (like sugar) versus liquid measuring cups ensures precision—trust me; precision matters here!
- Fine mesh strainer – This useful tool will help us separate those beautiful hibiscus flowers from our lovely syrup after steeping them perfectly in hot water! A fine mesh strainer ensures none of those delicate petals end up in your finished lemonade—unless you want them there as part of presentation!
- Juicer – A handheld citrus juicer can be incredibly helpful when extracting juice from lemons efficiently while minimizing seeds slipping through into your mixture.
Now that we have everything lined up beautifully, let’s move forward into preparing our Hibiscus Lemonade—it’s going to be such fun!
Step 1: Creating Your Hibiscus Simple Syrup
To begin crafting this delightful concoction, we’ll first create our hibiscus simple syrup by combining granulated sugar and water in a medium saucepan over medium heat. Stirring gently will encourage the sugar crystals to dissolve completely while avoiding any chance of burning or sticking at the bottom—a common pitfall if we’re not careful! As soon as you notice little bubbles forming around the edges (but before it reaches a full boil), it’s time to add those gorgeous dried hibiscus flowers into the mix.
This infusion step is absolutely paramount because it’s where all those incredible flavors bloom—literally! As you stir occasionally over low heat for about five minutes until everything becomes fragrant and deeply colored (think ruby-red jewels), you’ll witness something truly extraordinary happening right before your eyes: The dried petals releasing their essence into warm liquid transforms plain old water into something vibrant and intoxicatingly aromatic! Once you’ve reached peak infusion bliss—take off heat—and allow it cool slightly before straining out those beautiful petals using your fine mesh strainer directly over another bowl or measuring cup.
Step 2: Mixing It All Together
After letting our syrup cool down slightly (just enough so we don’t scald ourselves), it’s time to combine it with cold water along with freshly squeezed lemon juice—a marriage made in flavor heaven! In a large pitcher or bowl (something big enough so there’s room for ice later!), pour in those five cups of cold water first followed by two cups freshly squeezed lemon juice along with all that luscious hibiscus simple syrup we’ve made earlier.
At this point, give everything a good stir using either spoon or whisk until completely combined—this allows all flavors meld beautifully together while ensuring sweetness remains consistent throughout each glass poured later on! Don’t rush through this step; take moments longer if needed as nothing beats tasting along way through final adjustments too—it might need more sweetness based off personal preference!
Step 3: Garnishing Your Drink
Now comes one last touch before serving up these beauties: garnishing them properly! Take thin slices from remaining lemon prepared earlier—these add visual appeal while infusing subtle citrus notes throughout every sip enjoyed later on—and place them gently inside pitcher alongside handfuls fresh mint leaves added too at same time too since they complement both flavors wonderfully!
Again remember presentation matters here especially when hosting gatherings—everyone loves drinks served pretty enough they feel invited by aesthetics alone which invites smiles right away upon arrival at table spreading joy immediately amongst guests gathered around enjoying deliciousness shared together!
Step 4: Serving Up Your Creation
Finally—we’ve reached what I consider most satisfying moment—the time has come serve up refreshing glasses filled brimming full ice cubes floating atop gorgeous ruby-colored liquid gold waiting patiently beneath surface ready welcome everyone joining festivities ahead… Pour generous amounts chilled mixture over each glass filled previously prepared ice cubes until nearly overflowing then top off extra slice lemon adorned rim further enhancing visual appeal dramatically inviting folks savor goodness awaiting inside…
As guests take first sips laughter fills air mingling joyous sounds as flavors explode pleasantly within mouths reminding everyone present how special these moments shared really are… Trust me when I say nothing feels quite so rewarding than enjoying homemade creations shared amongst loved ones celebrating life together—all thanks delightful recipe passed down generations forever cherished among families everywhere…
I cannot wait for you try making this yourself—I promise it’ll become staple during warm months ahead filled countless joyful gatherings ahead memories created serving others love through food shared most intimately… Happy sipping my friend!!
Step 5: Creating the Hibiscus Syrup – The Heart of Flavor
Now, let’s dive into the heart of our Hibiscus Lemonade—the syrup! This is where the magic truly begins. In a medium saucepan, combine that beautiful cup of granulated sugar with 2 cups of water and the ½ cup of dried hibiscus flowers. As you stir this mixture together over medium heat, allow yourself to be enveloped by the intoxicating aroma wafting up from the pot—it’s like a floral hug in your kitchen! You want to bring this mixture to a gentle boil, which usually takes about 3-5 minutes. Keep stirring occasionally; this is crucial because it ensures that all that lovely sugar dissolves completely and blends beautifully with the hibiscus.
As the syrup heats, you’ll notice that the water starts turning an enchanting shade of crimson, a sign that those little dried petals are doing their job, infusing their flavor into your simple syrup. Trust me on this: patience is key during this step. Once it reaches a rolling boil and the sugar has fully dissolved, reduce the heat and let it simmer for another 2-3 minutes. This simmering time allows those hibiscus flavors to deepen and concentrate, resulting in a truly extraordinary syrup that will elevate your lemonade to new heights. Afterward, remove it from heat and let it steep for about 10-15 minutes; this resting period helps extract even more flavor from those flowers.
Step 6: Straining – The Art of Separation
With our hibiscus syrup now complete and beautifully vibrant, it’s time to strain out those dried flowers. Grab a fine-mesh sieve or cheesecloth and place it over a bowl or measuring cup. Carefully pour your syrup through the sieve—watch as the liquid flows through, leaving behind those once-vibrant petals like forgotten memories of summer days. This step is essential not just for aesthetics but also for texture; we want our lemonade smooth and refreshing without anything clinging to it.
Give the sieve a gentle press with a spatula or spoon to extract every last drop of that glorious liquid gold—don’t waste any of it! You should end up with about 1¾ cups of concentrated hibiscus syrup. Set aside this jewel until we’re ready to mix everything together. Just imagine how fantastic it will taste when blended with fresh lemon juice! It’s vital to let this syrup cool completely before moving on, as hot liquids can alter the balance of flavors when combined with cold ingredients later on.
Step 7: Mixing It All Together – The Symphony Begins
Now comes one of my favorite moments—the blending of flavors! In a large pitcher or bowl (you’ll need something that holds at least 2 quarts), pour in your freshly squeezed lemon juice—this should ideally be around 2 cups’ worth. As you add it in, take a moment to inhale deeply; there’s nothing quite like the bright citrusy scent that fills your space. Next, slowly pour in your beautiful hibiscus syrup—you’ll see those two vibrant colors swirl together like an artist’s palette! Stir gently but thoroughly with a wooden spoon or spatula until they are harmoniously combined.
At this stage, it’s time to introduce our cold water! Add in those remaining 5 cups of cold water while continuing to stir. This balance between tartness from the lemons and sweetness from our hibiscus syrup is absolutely paramount for achieving that perfect Hibiscus Lemonade experience. Give it a taste—if you find it’s too sweet for your liking, don’t hesitate to add more lemon juice or water until it feels just right for you; after all, cooking is about personal expression! Remember, it’s okay if you feel compelled to adjust things slightly; trust your palate!
Step 8: Chilling – Patience Makes Perfect
Ahh, now we arrive at perhaps one of the most crucial steps—chilling your Hibiscus Lemonade! Pour your vibrant mixture into an airtight container or simply cover your pitcher with plastic wrap or a lid before placing it in the refrigerator. Letting this sit for at least an hour—or better yet, two hours—will allow all those flavors to meld beautifully together into something truly profound and satisfying.
Why chill? Well, not only does cooling enhance refreshment on those warm days ahead (and believe me when I say you’ll want that!), but it also allows time for the hibiscus notes to really shine and meld with the bright citrusy tang from the lemons. If you’re planning ahead for guests or special occasions (or just because!), preparing your Hibiscus Lemonade ahead of time can elevate both its taste and presentation—it’s genuinely transformative! Serve it ice-cold straight from the fridge; I guarantee each sip will be like biting into summer itself.
Conclusion:
As we wrap up this journey through crafting the perfect Hibiscus Lemonade, I hope you feel inspired and excited to dive into this delightful recipe! From its beautiful crimson color that catches your eye to its intoxicatingly refreshing taste that dances on your tongue, this drink is truly extraordinary. The combination of tart lemon juice with earthy hibiscus creates a symphony of flavors that elevates it beyond mere refreshment—it’s an experience that captures the essence of summer in every sip.
Why is this Hibiscus Lemonade a must-try? It’s not just about quenching your thirst; it’s about joyfully creating something special in your kitchen. The process is simple yet rewarding—a few minutes spent mixing and measuring transports you into a world where aromatic scents fill the air and laughter flows freely among friends and family. Picture yourself serving this vibrant drink at gatherings—each glass brings smiles and compliments while making memories that linger long after the last drop has been savored.
Imagine savoring one alongside spicy tacos during taco night; the refreshing zing pairs perfectly with savory dishes! For an afternoon pick-me-up, pour it over ice with fresh mint sprigs—the aroma alone will uplift your spirits! And for those cozy evenings spent by candlelight? Picture indulging in dessert while sipping on this delight—perhaps paired with chocolate-dipped strawberries or light fruit tarts to complement its berry-like notes.
Feeling adventurous? This recipe is wonderfully adaptable! You could switch things up by adding different herbs like basil or rosemary for an aromatic twist or infuse some ginger for warmth and spice—it adds a whole new dimension! You might even consider experimenting with other fruits such as raspberries or strawberries blended right into the mix! Whatever variation you choose, I encourage you to embrace creativity in your kitchen. Try it out, share your experiences with friends and family, and don’t forget to connect with us—we’d love to hear how your own Hibiscus Lemonade turns out!
Hibiscus Lemonade
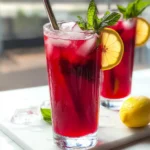
Hibiscus Lemonade is a refreshing drink that beautifully blends the tartness of fresh lemons with the floral notes of hibiscus flowers, creating a vibrant beverage perfect for warm days.
- Prep Time: 15 minutes
- Cook Time: 10 minutes
- Total Time: 25 minutes
- Yield: Approximately 8 servings 1x
- Category: Beverage
- Method: Mixing
- Cuisine: American
Ingredients
- 1 cup granulated sugar
- 2 cups water (for simple syrup)
- ½ cup dried hibiscus flowers
- 5 cups cold water
- 2 cups fresh lemon juice
- 1 lemon (thinly sliced)
- Ice cubes
- Fresh mint (for garnish)
Instructions
- In a medium saucepan, combine sugar and 2 cups of water over medium heat, stirring until sugar dissolves.
- Add dried hibiscus flowers to the mixture and bring to a gentle boil for about 3-5 minutes. Reduce heat and simmer for another 2-3 minutes until fragrant.
- Remove from heat and let steep for 10-15 minutes before straining out the hibiscus flowers using a fine mesh strainer.
- In a large pitcher, combine the cooled hibiscus syrup with 5 cups of cold water and 2 cups of freshly squeezed lemon juice. Stir well to combine.
- Chill in the refrigerator for at least one hour before serving.
- Serve over ice with lemon slices and mint for garnish.
Nutrition
- Serving Size: 1 cup (240ml)
- Calories: 120
- Sugar: 28g
- Sodium: 0mg
- Fat: 0g
- Saturated Fat: 0g
- Unsaturated Fat: 0g
- Trans Fat: 0g
- Carbohydrates: 30g
- Fiber: 0g
- Protein: 0g
- Cholesterol: 0mg