Fruit Pizza
There’s something truly magical about a recipe that combines simplicity with a burst of flavor, and this Fruit Pizza does just that. Each slice feels like a celebration, a canvas where the sweetness of fruits meets the comforting embrace of a warm brown sugar cookie crust. I’ve always been captivated by how this dessert transforms any gathering into a joyful occasion, from summer barbecues to cozy family nights. It’s not just food; it’s an experience that invites laughter, connection, and those heartwarming moments that linger in your memory long after the last bite has been savored. Imagine the aroma wafting through your kitchen as it bakes—sweet, buttery notes mingling with hints of vanilla and almond—and you’ll understand why I can’t help but share this Fruit Pizza recipe with you.
Every time I prepare this dessert, I find myself reminiscing about family gatherings where laughter echoed around the table, and everyone was eager for another slice. This Fruit Pizza is more than just a pretty dish; it bridges generations—the brown sugar cookie crust is reminiscent of classic desserts my grandmother used to make, while the vibrant array of fruits reflects our ever-evolving tastes. It’s perfect for any celebration or even just an ordinary day when you want to make something extraordinary. Trust me; your friends and family will be asking for seconds!
Fruit Pizza: A Sweet Symphony of Flavor
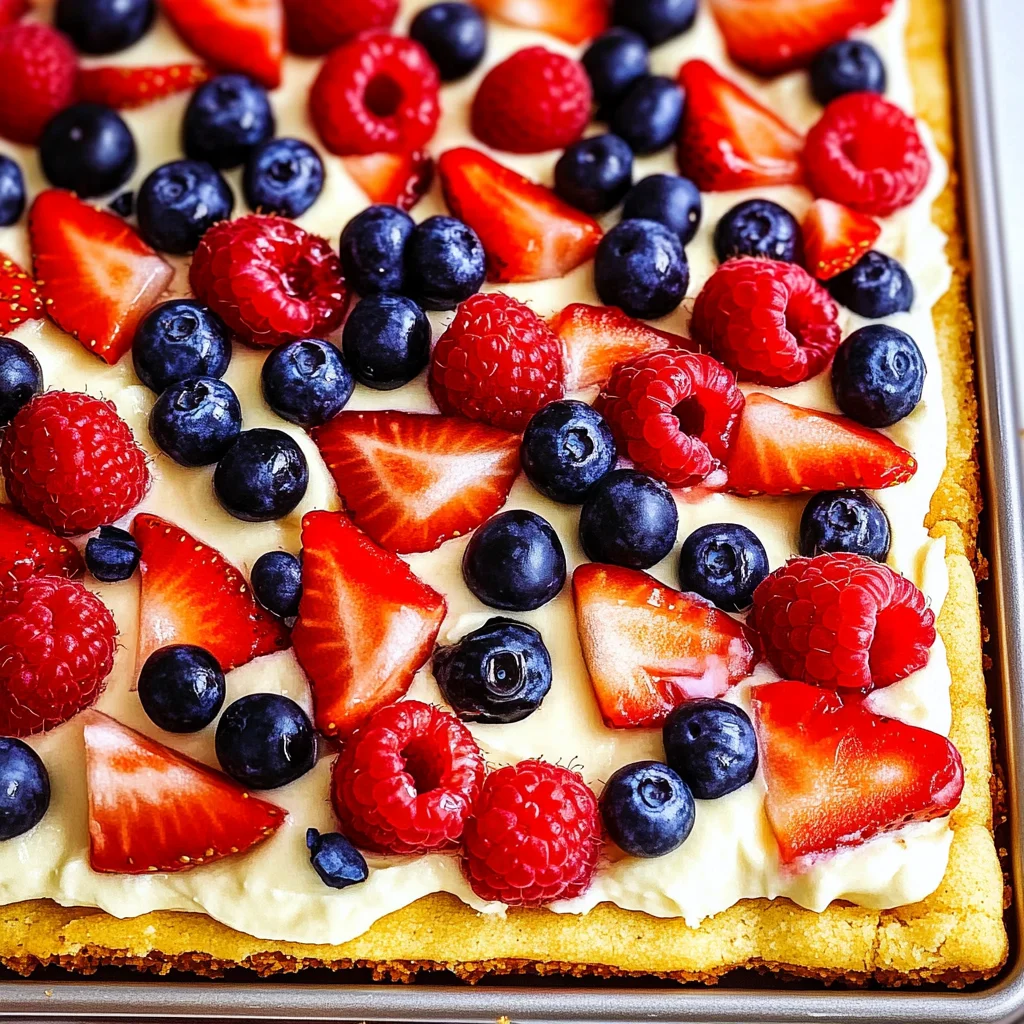
If you’re ready to embark on this delicious journey, let’s dive right into one of my favorite recipes—a delightful Fruit Pizza! This treat features a luscious brown sugar cookie crust topped with creamy frosting and an array of colorful fruits that will not only satisfy your sweet tooth but also bring a smile to your face. The beauty of this dessert lies in its versatility; feel free to mix and match your favorite fruits, making it uniquely yours!
Ingredients:
As we gather our ingredients for this delightful Fruit Pizza, think of each one as an essential note in a beautiful melody—each plays its part in creating something truly special.
- 1 1/2 cups all-purpose flour (plus extra for rolling). Flour is the backbone of our crust; it provides structure and stability while allowing us to achieve that perfect balance between chewy and crisp. When selecting your flour, look for all-purpose varieties that are finely milled; they yield the best results here. If you’re feeling adventurous or want a gluten-free option, consider substituting with almond flour or a gluten-free blend—just keep in mind it may alter the texture slightly.
- 1 teaspoon baking powder. This little powerhouse is responsible for giving our crust its height and lightness. Baking powder works by releasing carbon dioxide when mixed with moisture and heat, causing the dough to rise. It’s crucial that you use fresh baking powder for optimal results—if it’s been sitting in your pantry for ages, it might not pack the punch we need!
- 1/4 teaspoon salt. You might wonder why salt makes an appearance in a sweet recipe; however, it’s absolutely paramount! Salt enhances flavors and balances sweetness—it brings out the natural taste of our ingredients without making it salty at all. Just remember to use fine sea salt for even distribution throughout our cookie dough.
- 1/2 cup (1 stick) unsalted butter, softened. This is crucial for creaming properly and creating that light, airy texture we’re aiming for in our Fruit Pizza. If your butter is too cold, it won’t cream effectively; if melted, your cookies will spread too much during baking. The quality matters here too—a high-fat European-style butter will yield even richer results.
- 1/2 cup packed light brown sugar. The rich molasses flavor in brown sugar adds depth to our crust that white sugar simply cannot match. Not only does it provide sweetness, but its moisture content keeps the cookie tender and chewy—absolutely divine! Always pack your brown sugar into the measuring cup firmly to ensure accuracy.
- 1 egg. Eggs play multiple roles—they bind our ingredients together while adding moisture and richness to our dough. For vegan alternatives, you could use flaxseed meal mixed with water or unsweetened applesauce as substitutes; just know they will change the texture slightly!
- 1 teaspoon vanilla extract. Vanilla is like the secret handshake among flavors; it elevates sweetness while adding warmth and depth to every bite we take from this pizza! Opt for pure vanilla extract over imitation; you’ll appreciate the difference when those fragrant notes waft through your kitchen.
- 1/2 teaspoon almond extract. This ingredient takes our flavor profile up another notch! Almond extract contributes an aromatic quality that’s reminiscent of marzipan—it’s subtle yet profound when combined with vanilla and fruit.
- 1 (8 ounce) package low-fat cream cheese. The cream cheese forms the base of our frosting—it’s smooth and tangy while providing body to this dreamy topping! Be sure it’s at room temperature before mixing so we avoid lumps—nobody wants a chunky frosting on their beautiful pizza!
- 2-3 tablespoons maple syrup or honey (or 1 cup powdered sugar). Here’s where you get to choose how sweet you want things! Maple syrup lends an earthy sweetness while honey adds floral notes that enhance everything brilliantly—both are natural alternatives to refined sugars if you prefer them over powdered sugar.
- 1 teaspoon vanilla extract (for frosting)—yes, we need another round! Just like earlier, this will harmonize beautifully with cream cheese’s tanginess.
- Pinch of fine sea salt for frosting—as mentioned before; balancing flavors is key here too!
- Fresh strawberries (blueberries, raspberries, blackberries) or any other fruit that sounds good! Use whatever seasonal fruits excite you most—they not only provide vibrant colors but also contrasting textures against creamy frosting.
- Optional fresh honey, for drizzling—because who wouldn’t want just a touch more sweetness? Drizzling honey over fresh fruit adds both flavor complexity and visual appeal.
Equipment You’ll Need:
Ahh… let’s talk tools! Having the right equipment can elevate your cooking experience from good to absolutely wonderful—the right tools become partners in creating something special together!
- Mixing bowls – A set of sturdy mixing bowls will be invaluable as we combine everything from dry ingredients to buttery goodness—and trust me when I say having various sizes helps streamline every step along the way!
- Electric mixer (stand or hand) – While you could do things manually if you’re feeling strong-willed (and have time), using an electric mixer makes achieving that perfect airy dough effortless! It takes all that arm work out so you can save energy for enjoying slices later on.
- Measuring cups & spoons – Accurate measurements are non-negotiable when baking—use dry measuring cups for solids like flour & brown sugar while wet measuring cups do wonders for liquids such as maple syrup or extracts!
- Spatula – A good rubber spatula is vital here—it helps scrape down sides efficiently ensuring no bits go unnoticed while blending everything together seamlessly!
Preparing the Fruit Pizza / Making the Cookie Crust
Step 1: Preheat Your Oven
Before diving into mixing magic, let’s preheat our oven to 350°F (175°C). This step is essential because starting from cold means uneven baking—not what we want for our gorgeous cookie crust! While waiting patiently like I know you’ll do (no peeking!), grease either a quarter sheet pan or whichever suitable baking dish calls out to you today with cooking spray—this little coat prevents sticking disasters down the line!
Step 2: Whisking Together Dry Ingredients
Now grab yourself a medium bowl where we’ll whisk together 1 ½ cups all-purpose flour along with 1 teaspoon baking powder and ¼ teaspoon salt until combined nicely—this ensures everything blends evenly during mixing later on! The science behind whisking? It incorporates air into these dry ingredients which helps produce fluffier baked goods… who doesn’t want that? Once done set aside so we can focus on bringing flavors together next!
Step 3: Creaming Butter & Sugar
In another large mixing bowl (preferably one big enough!), beat together ½ cup softened unsalted butter along with ½ cup packed light brown sugar using either an electric mixer fitted with its blade attachment or hand mixer at medium speed until light and fluffy—about two minutes long should do nicely here! This process known as creaming creates tiny air pockets within fat molecules which ultimately leads us toward achieving tenderness throughout each bite later on… don’t rush this step—it’s absolutely paramount!
Step 4: Adding Egg & Extracts
Once we’ve achieved fluffy perfection through creaming earlier on—it’s time now to add in one egg followed by both teaspoons vanilla & almond extracts into that buttery goodness mixture we created earlier! Beat again at medium speed until completely combined—you may need to scrape down sides midway through if needed—but trust me when I say those aromatic notes will start dancing around soon enough once blended well together… absolute bliss awaits us ahead!
Stay tuned as we continue crafting this delectable treat by combining those dry ingredients next—and don’t worry—I’m right here cheering you on every step of way!
Step 5: Whipping Up the Dreamy Frosting
Now that our cookie crust has cooled to a perfect, irresistible temperature—warm enough to melt in your mouth but cool enough that it won’t ruin the frosting—let’s whip up that truly extraordinary cream cheese frosting. To do this, grab a medium-sized mixing bowl and add in your softened low-fat cream cheese. Trust me, using softened cream cheese is absolutely paramount here; it allows for a smooth and creamy texture that will envelop our cookie base like a gentle hug. Using either a stand mixer fitted with the paddle attachment or a handheld mixer, beat the cream cheese on medium speed until it’s silky smooth—this usually takes about 1-2 minutes.
Once you’ve achieved that luscious consistency, it’s time to sweeten the deal! Add in your maple syrup or honey along with another teaspoon of vanilla extract and just a pinch of fine sea salt. The maple syrup adds a warm depth of flavor while balancing the tanginess of the cream cheese, creating a symphony of flavors that I promise you will make your taste buds sing with joy. Beat everything together until fully combined and fluffy, which should take another minute or so. You want this frosting light and airy—think cloud-like! If you’re using powdered sugar instead of maple syrup or honey, fold it in gently to prevent any sugar clouds from forming in your kitchen and ensure an even mix. Remember, the goal is to create something utterly intoxicating that will elevate each bite of your Fruit Pizza beyond ordinary dessert!
Step 6: Spreading Love Across Your Cookie Canvas
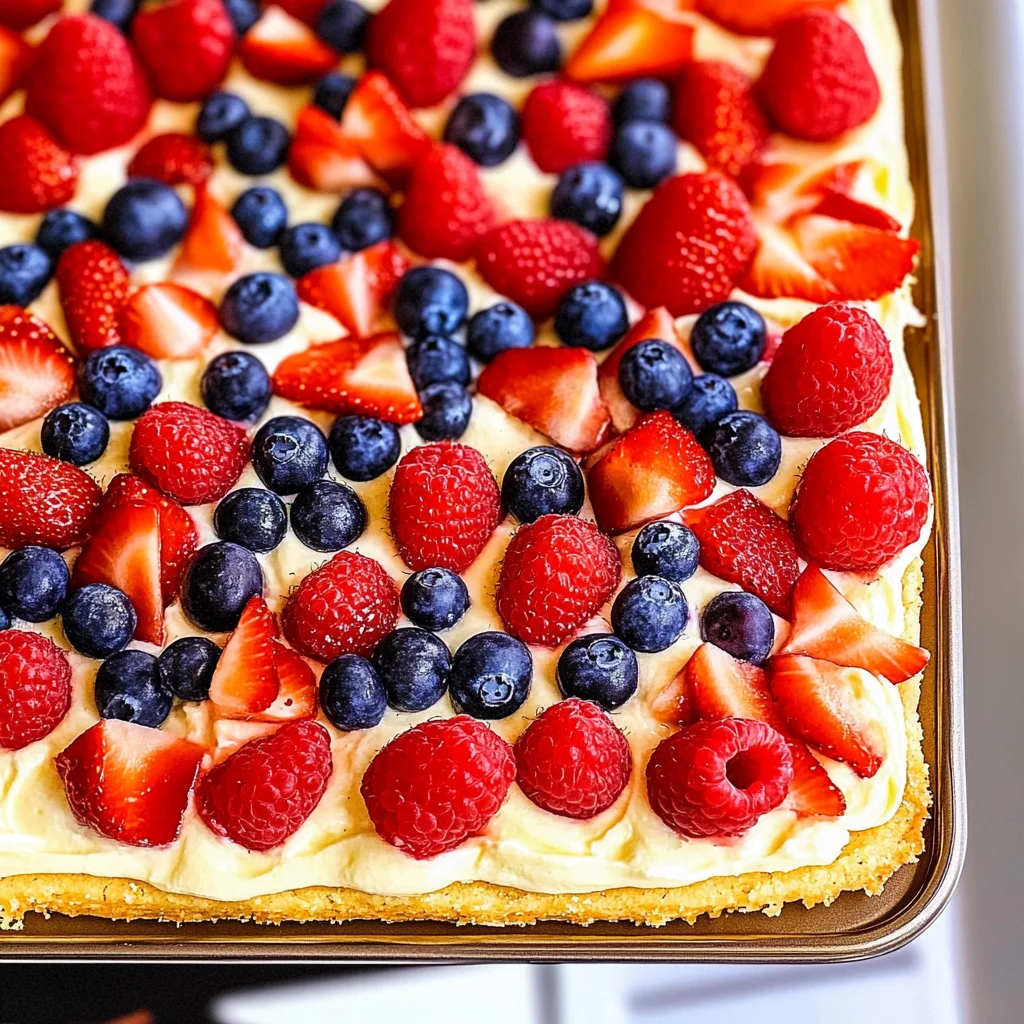
With your frosting ready to go, it’s time for one of my favorite parts—spreading that creamy concoction over our beautiful brown sugar cookie crust! Start by taking a spatula (or even the back of a spoon if you prefer) and dolloping generous amounts of frosting onto the cooled cookie base. Now, don’t rush this step; take your time as you gently spread the frosting outwards from the center towards the edges. The idea is to cover every inch of that warm cookie with love and care because each slice deserves an equal amount of this delectable goodness.
As you spread, pay attention to how the frosting glides effortlessly across the surface. This is where you can really let your creativity shine! If you’re feeling extra festive or artistic, consider creating swirls or peaks in the frosting for added texture. Not only does this look stunning, but it also provides little pockets for all those vibrant fruits we’re about to add on top. And don’t worry about perfection; embrace those little imperfections—the character they bring will only enhance its homemade charm! Once you’ve smoothed out every corner of your pizza crust with that dreamy frosting, set aside any remaining frosting for later use or for enjoying straight from the bowl (no one’s judging!).
Step 7: Topping It Off with Nature’s Candy
Now comes the best part: decorating our Fruit Pizza with an abundance of fresh fruits! Gather up your favorite fruits—be it strawberries bursting with sweetness, blueberries that pop with flavor, raspberries offering a delightful tartness, or blackberries adding their deep hue—and prepare them for their starring role on this canvas of deliciousness. If you’re using strawberries, I recommend slicing them into thin rounds so they lay beautifully across the surface; blueberries can be placed whole since they are perfectly bite-sized as they are.
As you arrange these jewels atop your frosted masterpiece, think about balance—not just visually but also flavor-wise. Consider contrasting textures and colors; vibrant oranges or kiwi slices can add an eye-catching pop against darker berries. This step isn’t just about aesthetics; it’s about creating layers of flavor that will dance on your palate with every bite! And don’t forget to sprinkle on any leftover bits like those blueberries or extra raspberries—every fruit brings its own special magic to our Fruit Pizza.
Step 8: The Sweet Finishing Touch
Finally, let’s elevate our creation one last time with a delicate drizzle of fresh honey over all those luscious fruits—a sweet finish that ties everything together beautifully! To do this simply pour some honey into a small bowl and use a spoon to drizzle it gently over each fruit topping. Not only does this add an enticing sheen to our pizza (hello Instagram-worthy shot!), but it also adds an additional layer of sweetness that complements all those vibrant flavors we just layered on.
But don’t go overboard here; we want just enough honey to enhance—not overpower—the natural sweetness and tartness already present in our fruits. A little goes a long way! As you gaze upon your completed Fruit Pizza masterpiece, take a moment to appreciate what you’ve created: layers upon layers of flavors and textures presented so beautifully together—a true celebration of nature’s bounty! Now grab a sharp knife and slice through this colorful array into wedges or squares—whatever suits your fancy—and serve immediately for maximum freshness.
Next Major Phase – Serving Your Fruit Pizza Delight
This easy Fruit Pizza recipe is not just food; it’s an experience waiting to happen around your table! As you serve each slice adorned with its fruity crown, watch as faces light up with delight at first sight alone—there’s something profoundly satisfying about presenting such vibrant colors and wholesome ingredients together. Whether it’s at a family gathering or simply an evening treat after dinner, I promise you this dish will bring smiles all around.
Remember to savor every bite yourself too; allow yourself to relish in this creation you’ve crafted with love and care. Each mouthful is not just dessert; it’s memories being made—all thanks to your effort in bringing together such simple yet delightful ingredients into something truly extraordinary! Enjoy sharing this labor of love—you deserve every moment spent basking in its deliciousness!
Storage and Enjoyment Tips for Your Fruit Pizza
Now that you’ve crafted this beautiful, vibrant Fruit Pizza, the moment of enjoyment is nearly here! Picture yourself slicing into that golden brown crust, revealing the creamy frosting and a rainbow of succulent fruits just waiting to be savored. Yet, as much as we might want to devour it all in one sitting—trust me, I understand the temptation—there are some simple ways to keep your delicious creation fresh for those moments when you want to indulge later.
Storing Leftover Fruit Pizza
To preserve your delightful Fruit Pizza for future enjoyment, gently cover any leftovers with plastic wrap or transfer slices to an airtight container. Ideally, store it in the fridge where it can stay fresh for up to three days. I always recommend placing a slice of bread in the container with your pizza; this little trick helps absorb moisture and keeps that cookie crust from getting too soft. When you take it out later, you’ll find that the flavors meld beautifully over time—though nothing beats the fresh-out-of-the-oven experience! Serve it chilled for a refreshing treat, or let it sit at room temperature for about 15 minutes before diving into another slice to let those flavors pop even more.
Freezing Fruit Pizza for Later
If you’re looking to extend your enjoyment even further, freezing is a fantastic option! To freeze your Fruit Pizza effectively, slice it into individual portions and wrap each piece tightly in plastic wrap or aluminum foil before placing them in a freezer-safe bag or container. This way, you can easily grab just what you need without defrosting the whole batch. It’s best used within two months for optimal flavor and texture, although I promise you that even after longer storage, it’ll still taste wonderful! When you’re ready for a fruity treat, simply remove a slice from the freezer and let it thaw in the refrigerator overnight—it’s as easy as pie! The convenience of having these sweet delights on hand makes it feel like each day is a celebration.
Conclusion:
What a delightful culinary journey we’ve embarked on together through this easy-to-make Fruit Pizza recipe! From the moment we combined our ingredients to that first glorious bite filled with creamy frosting and vibrant fruit topping, there’s something truly special about this dessert. Each element—from the warm brown sugar cookie base to the silky cream cheese frosting and bursts of fresh fruit—creates a symphony of flavors that dances on your palate. It’s not just a treat; it’s a heartfelt expression of joy and creativity.
This recipe is undeniably a must-try because it brings so much joy not only in its preparation but also in its sharing. Whether you’re celebrating a birthday party or simply enjoying an afternoon pick-me-up with friends over coffee, this Fruit Pizza will undoubtedly steal the spotlight. Imagine pulling it from the oven and watching as everyone gathers around eagerly awaiting their slice; there’s such warmth in those moments of anticipation! The versatility of this dessert means you can customize it with seasonal fruits or whatever delights your taste buds at any given time.
As you savor each bite of this delightful creation, consider how wonderful it would be enjoyed alongside a scoop of vanilla dairy-free ice cream or paired with freshly brewed tea for an afternoon escape. For an even more indulgent experience, drizzle some extra honey over each slice right before serving—it’s like adding little drops of sunshine! Picture sharing slices at picnics or family gatherings where laughter fills the air; there’s simply no end to how this dish can elevate any occasion.
Feeling adventurous? This recipe is wonderfully adaptable—you might try swapping out traditional cream cheese frosting for a tangy lemon ricotta spread, or perhaps experimenting with chocolate drizzle instead of honey for those chocolate lovers among us! You could even go tropical by including pineapple and kiwi along with coconut flakes atop your masterpiece! The possibilities are endless, and I can’t wait for you to explore them all. So gather your loved ones around, make this Fruit Pizza together, share your experiences, and celebrate the joy that cooking brings into our lives!
Fruit Pizza
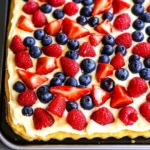
Indulge in the vibrant flavors of this delightful Fruit Pizza, where a luscious brown sugar cookie crust meets creamy frosting and a colorful array of fresh fruits. Perfect for any occasion, whether it’s a summer barbecue or a cozy family night, this dessert brings joy and celebration to the table. Each slice is not just food—it’s an experience filled with love, laughter, and sweet memories. With its versatility, you can mix and match your favorite fruits to create a unique treat that reflects your tastes and seasonal offerings. Prepare to impress your friends and family with this stunning dessert that is as delicious as it is beautiful!
- Prep Time: 20 minutes
- Cook Time: 15 minutes
- Total Time: 35 minutes
- Yield: Serves approximately 8 slices 1x
- Category: Dessert
- Method: Baking
- Cuisine: American
Ingredients
- 1 ½ cups all-purpose flour
- 1 teaspoon baking powder
- ¼ teaspoon salt
- ½ cup unsalted butter, softened
- ½ cup packed light brown sugar
- 1 egg
- 1 teaspoon vanilla extract
- 1 (8 ounce) package low-fat cream cheese
- 2–3 tablespoons maple syrup or honey
- Fresh fruits (strawberries, blueberries, raspberries)
Instructions
- Preheat your oven to 350°F (175°C) and grease a suitable baking dish.
- In a bowl, whisk together the flour, baking powder, and salt.
- In another bowl, cream the butter and brown sugar until light and fluffy. Add the egg and vanilla extract; mix until combined.
- Gradually incorporate the dry ingredients into the wet mixture until fully combined.
- Spread the dough evenly in the greased baking dish and bake for about 12–15 minutes until golden brown.
- Allow the crust to cool completely before preparing the frosting.
- Beat cream cheese with maple syrup or honey until smooth; spread over the cooled crust.
- Decorate with fresh fruits of your choice and drizzle with honey if desired.
Nutrition
- Serving Size: 1 slice (70g)
- Calories: 190
- Sugar: 12g
- Sodium: 150mg
- Fat: 9g
- Saturated Fat: 5g
- Unsaturated Fat: 4g
- Trans Fat: 0g
- Carbohydrates: 24g
- Fiber: 1g
- Protein: 3g
- Cholesterol: 25mg