Easy Tres Leches Cake
There’s something utterly magical about a Tres Leches Cake, isn’t there? Just imagine the first bite – it’s like diving into a cloud of creamy sweetness, each forkful taking you on a nostalgic journey through time and tradition. This cake isn’t just a dessert; it’s an experience, a celebration of flavors that bridges cultures and generations. The way the milks soak into the light, airy cake is truly an art form, creating a moist, tender crumb that cradles the rich essence of sweetened condensed milk and evaporated milk. And it’s so easy to make! With my Easy Tres Leches Cake recipe, you’ll find that whipping up this classic treat is as simple as pie (or should I say cake?). Trust me when I say this will be the star of your next gathering or family dinner.
When you think about what makes Tres Leches Cake so special, it’s not just the taste; it’s about the way it brings people together. This dessert has roots in Latin American cuisine, often gracing tables during celebrations and family gatherings. Every bite tells a story – stories of love, laughter, and shared moments around the table. Whether it’s a birthday party or simply a Tuesday night craving for something sweet, this cake is perfect for any occasion. And hey, who doesn’t appreciate a dessert that feels both indulgent and comforting? So grab your mixing bowl and let’s dive into this delightful recipe together!
Easy Tres Leches Cake: A Dreamy Delight Awaits
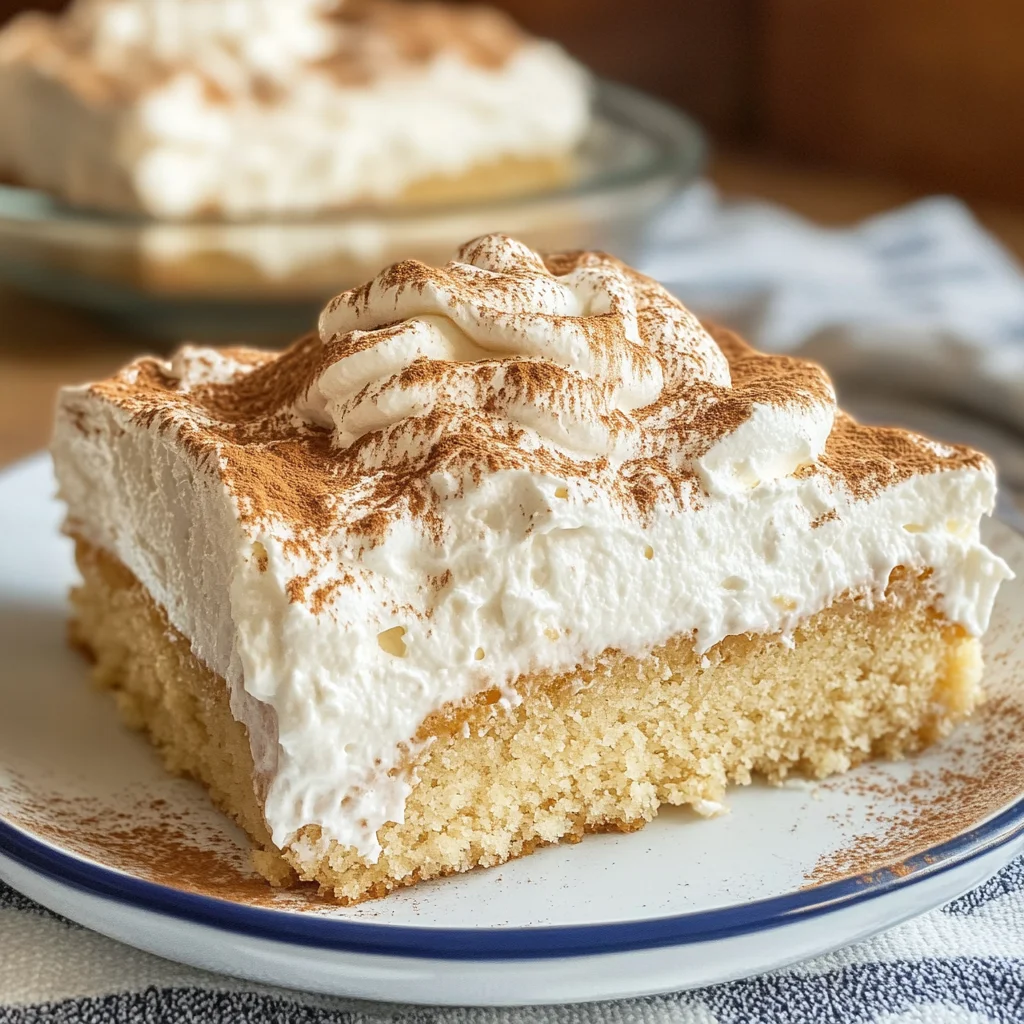
This Easy Tres Leches Cake is bound to become your new favorite! With its creamy layers and hints of cinnamon wafting through your kitchen, you’ll be swept off your feet by its charm. Not only is it easy to prepare with boxed cake mix, but it also invites creativity – whether you’re adding fresh fruit on top or sticking with classic whipped cream. Let’s embark on this delicious journey together!
Ingredients:
As we begin our culinary adventure, let’s take a moment to gather our ingredients. Each one plays a crucial role in crafting this heavenly dessert!
- 1 (14.25 oz) box yellow cake mix: Using boxed cake mix may feel like cheating at first glance, but trust me – it’s all about convenience without compromising flavor! The yellow cake mix serves as the canvas for our masterpiece; its subtle buttery notes provide a warm backdrop that perfectly absorbs the luscious milks we’re going to add later.
- 1 (3.4 oz) package instant vanilla pudding mix: This ingredient isn’t just for flavor; it adds richness and keeps our cake moist while enhancing its overall texture. The pudding creates a lovely creaminess that melds beautifully with the soaked milks later on. It’s like giving your cake a warm hug from the inside out.
- 1 teaspoon cinnamon: Ahh, cinnamon – the spice that evokes warmth and nostalgia! Just imagine how this fragrant dusting will elevate our cake’s flavor profile with its sweet warmth! It ties everything together beautifully while echoing traditional flavors found in many Latin desserts.
- 3 large eggs: Eggs are essential here; they act as binders while providing structure to our cake. They add richness too! When beaten correctly into our batter, they contribute to that delightful fluffiness we crave in every bite.
- 1/2 cup whole milk: Whole milk offers creaminess that enhances flavor and texture in baked goods. It also promotes browning during baking which gives our cake those appealing golden edges! Go for high-quality whole milk if you can—it makes all the difference.
- 1/2 cup vegetable oil: This liquid gold keeps our cake moist over time; unlike butter which can solidify when chilled, vegetable oil remains fluid even after refrigeration ensuring every slice stays tender and delicious.
- 1/3 cup water: Adding water might seem unnecessary at first glance but will help balance out dryness from other ingredients while making the batter easier to mix without overworking it—a key point for achieving fluffy results!
- 1/4 cup sour cream: You might wonder why sour cream? Well, my friend, this tangy addition introduces moisture while also balancing sweetness beautifully! It adds depth to the flavor profile—just one more layer of complexity waiting to surprise you.
- 1 teaspoon vanilla extract: Vanilla is vital for enhancing overall flavor—it brings everything together harmoniously. Always opt for pure vanilla extract over imitation when possible; you’ll notice an incredible difference in taste!
- 1 (14 oz) can sweetened condensed milk: Here comes the star player! Sweetened condensed milk allows us to achieve that signature soaking effect—it’s essentially liquid gold pouring happiness all over our cake.
- 1 (12 oz) can evaporated milk: Evaporated milk contributes additional creaminess without overwhelming sweetness—it balances perfectly with sweetened condensed milk ensuring every bite remains enjoyable rather than cloyingly sweet.
- 1 cup heavy cream: Heavy cream is key for whipping up luscious topping options! Its high-fat content ensures stability when whipped—no one wants their beautiful topping collapsing before serving.
- 16 oz tub cool whip (or homemade whipped cream): If you’re short on time or feel adventurous enough to whip up some homemade whipped cream instead—go for it! Either way will provide an ethereal finish atop our creation—just remember not to skip this step!
- Cinnamon (for dusting): Lastly, don’t forget this final touch! A light dusting of cinnamon right before serving brings everything full circle—visually stunning and aromatic too!
Equipment You’ll Need:
Before we jump into mixing ingredients like excited kids in a candy store, let’s ensure we have all our essential equipment on hand. The right tools make any cooking or baking endeavor smoother and far more enjoyable!
- 9×13-inch baking pan – This pan is perfect because it provides ample space for our batter to rise beautifully while ensuring even cooking throughout; those golden edges we love come from having just enough room!
- Mixing bowls – A set of various sizes will serve you well in separating dry ingredients from wet ones before combining them later—this helps prevent clumping and creates a unified batter.
- Whisk – A sturdy whisk is crucial here for blending dry ingredients seamlessly—the goal is no lumps! Plus, it’s great for incorporating air which leads us toward lighter baked goods!
- Spatula – This handy tool helps scrape down sides of bowls ensuring nothing goes wasted while also smoothing out batter within our pan before baking begins!
- Toothpick or skewer – An unassuming yet vital tool used during baking—it checks doneness by poking into cakes allowing us insight into whether they’re ready for cooling!
With these essentials lined up alongside our ingredients waiting patiently—let’s roll up those sleeves and get started on preparing this dreamy Easy Tres Leches Cake!
Step 1: Preheat & Prepare
First things first – preheat your oven to 350°F (175°C)! This step might seem mundane but trust me when I say it sets everything else in motion perfectly by ensuring proper baking temperatures throughout your cake’s life cycle inside that oven. While it’s warming up (and filling your home with anticipation), grab your beloved 9×13-inch baking pan and spray it generously with non-stick baking spray—this little act ensures effortless release once baked! No one wants their masterpiece stuck to the pan after all those efforts!
Step 2: Mix Dry Ingredients
In a spacious mixing bowl—a large one because we’ll be adding plenty more soon—combine your yellow cake mix along with instant vanilla pudding mix and cinnamon using that trusty whisk we discussed earlier. Whisk until evenly blended because mixing these dry components first helps distribute flavors uniformly throughout your soon-to-be-sweet creation—it avoids clumping issues later during wet additions—and nobody enjoys biting down unexpectedly hard on clumps of powdered sugar or flour!
Step 3: Add Wet Ingredients
Now comes some fun! To your dry mixture add three large eggs along with whole milk followed by vegetable oil plus water then finally sour cream plus vanilla extract—we’re creating magic here folks! Gently whisk until combined but avoid overmixing—we want lightness not density which could happen if you beat too vigorously at this stage—you’ll notice small lumps remaining—that’s okay! They’ll dissolve during baking leading us straight toward success.
Step 4: Bake Away!
Pour this delightfully fragrant batter into prepared pan smoothing out any uneven spots across surface level using spatula gently—we’re aiming for symmetry here folks so everyone gets equal portions later on too! Slide it into preheated oven letting heat envelop every corner—set timer for 25 minutes—but keep an eye out since ovens vary widely—when toothpick inserted comes out clean or leaving behind moist crumbs then it’s done—remove from heat immediately allowing cooling rack access where patience kicks in next!
Stay tuned as we continue diving deeper into creating this delicious Easy Tres Leches Cake—a treasure trove awaits beyond mere ingredients awaiting exploration through each soaking layer afterward…
Step 5: A Crucial Cooling Moment
Once your cake emerges from the oven, it’s time for a crucial cooling moment. Allowing the cake to cool for about 10 minutes on a wire rack is not just a waiting game; it’s a vital step in ensuring the perfect texture for our Easy Tres Leches Cake. During this time, the cake continues to set, locking in moisture and creating that tender crumb we all adore. Trust me on this—if you skip this cooling period, you might risk having a denser cake than desired, which would be an absolute shame given how fluffy and delightful this dessert is meant to be!
After those precious ten minutes have passed, let’s get to the fun part: poking holes into the cake! This isn’t just some whimsical activity; it’s absolutely paramount for achieving that signature tres leches texture. Using a skewer, toothpick, or even a large fork, gently pierce numerous holes across the surface of your cake. The goal here is to create channels through which the milks can seep in and transform your humble yellow cake into an utterly intoxicating sweet treat. Don’t rush this step; take your time and ensure you’re puncturing enough holes—this allows each luscious layer of milk to soak in deeply, infusing flavor throughout. You want every single bite to resonate with that creamy goodness!
Step 6: The Milky Transformation
Now comes the moment of magic—pouring the milks! This is where your Easy Tres Leches Cake truly earns its name. In a separate bowl, combine the sweetened condensed milk, evaporated milk, and heavy cream. As you mix these ingredients together, you’re preparing a veritable elixir of deliciousness that will soak into every crevice of your cake. I promise you; this milky mixture is what transforms an ordinary cake into something profoundly satisfying and memorable.
With your milky concoction ready, it’s time to get pouring! Start by drizzling about one-third of the milk mixture over the top of your cooled cake. Take care to spread it evenly but don’t worry if some pools in certain areas; those little pockets will become heavenly when they soak in! Allow this first layer to absorb for about five minutes before adding more. This layering technique ensures that each bite is luxuriously moist without overwhelming the cake at once—a delicate balance that enhances both taste and texture. Repeat until all three layers of milk have been added. Watching as the liquid gold seeps into your creation feels like witnessing culinary alchemy—magical!
Step 7: Chilling Out
Ah, patience—the most essential ingredient in any truly great dessert! After ensuring all those beautiful milks have been poured over your cake, it’s time for it to chill out in the refrigerator. Cover your masterpiece with plastic wrap or foil and let it rest in its cool sanctuary for at least four hours but ideally overnight if you can wait that long! This prolonged chilling allows those flavors to meld beautifully together while ensuring that each slice remains moist and rich.
Why is chilling so important? Well, during this time, the milk mixture permeates every inch of the cake while also helping it maintain its structural integrity as it absorbs all that deliciousness. If you try to serve too soon, you may find that some parts remain dry or lack that full tres leches experience we are striving for—and we wouldn’t want that now, would we? So trust me on this one: give yourself permission to wait; it’s worth every second! Imagine cutting into that perfectly chilled slice—when the spoon meets cake; it should almost glide through like slicing through cloud nine!
Step 8: The Whipped Cream Crown
Finally! All your hard work leads us to this glorious moment—the finishing touch with whipped cream! Once you’re ready to serve after all that careful chilling (and I know it’s been hard waiting), take out your Easy Tres Leches Cake from its cool haven. Now comes my favorite part: spreading Cool Whip or freshly whipped cream over the top of your creation! If you’re opting for homemade whipped cream—whisk together heavy cream with a bit of sugar and vanilla until soft peaks form—you’ll be rewarded with an utterly luxurious topping that’s simply divine.
Gently spread or dollop on a generous layer of whipped cream over your well-soaked cake until it’s beautifully covered. This final layer adds not only a delightful contrast in texture but also brings an airy sweetness that perfectly complements the rich moistness beneath it. You can garnish with an extra sprinkle of cinnamon—an aromatic finish that invites everyone closer with its warm scent.
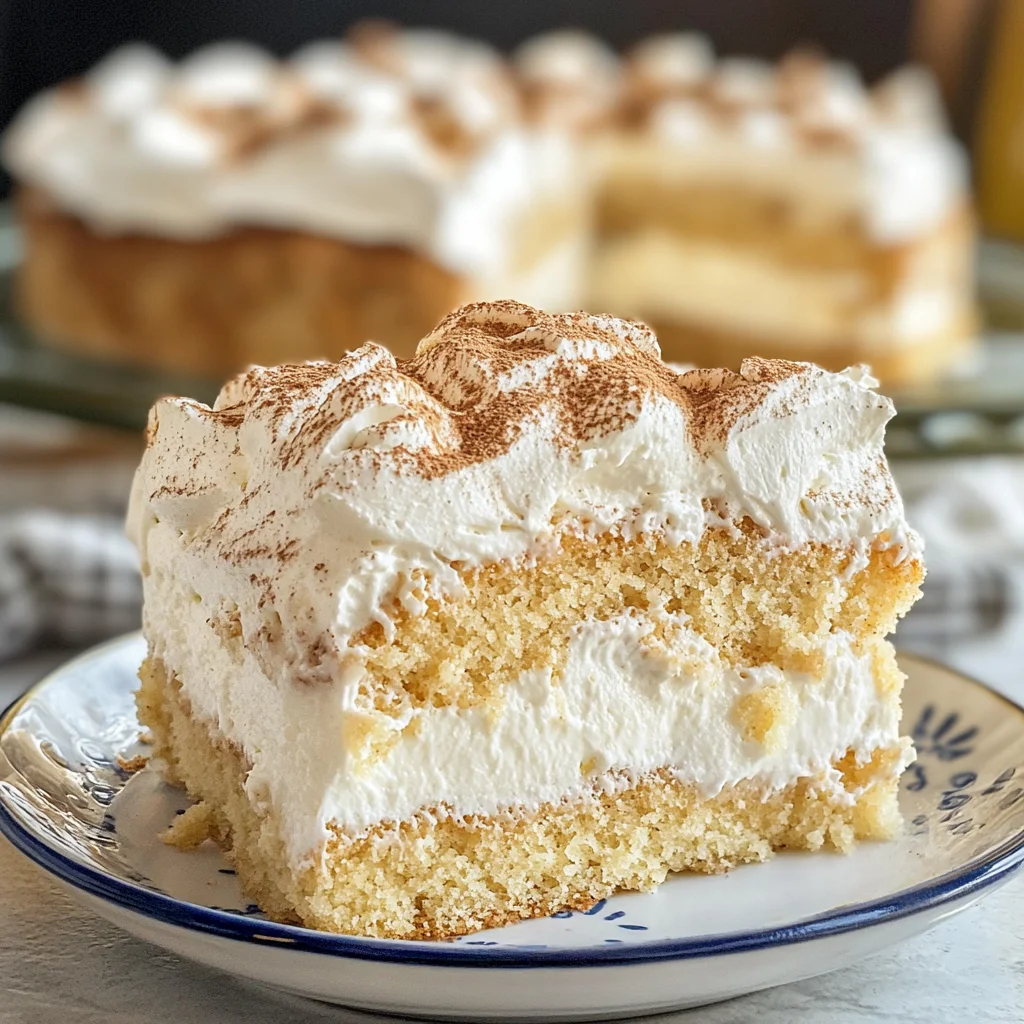
As you slice into this creamy confection and watch those layers come apart effortlessly, know you’ve created something truly extraordinary for your friends and family to enjoy together! Each bite will reveal a symphony of flavors—a luscious blend where rich vanilla meets hints of cinnamon and mouthwatering creaminess—it’s simply irresistible!
So gather around, share stories over slices of this dreamy Easy Tres Leches Cake, and celebrate not just good food but wonderful memories made together around the table! Happy baking!
Storage and Enjoyment Tips for Your Easy Tres Leches Cake
Now that your Easy Tres Leches Cake has chilled to perfection, it’s time to dig in and enjoy! The anticipation builds as you slice through the soft, moist layers, revealing the creamy goodness hidden within. This cake is not just a dessert; it’s an experience meant to be shared with loved ones, creating sweet memories that linger long after the last slice is gone. But what about those inevitable leftovers? Fear not! I’ve got you covered with some handy storage tips so you can savor this delightful treat even longer.
Storing Leftover Easy Tres Leches Cake
To keep your Easy Tres Leches Cake fresh and scrumptious, simply transfer any leftover slices into an airtight container and pop it in the refrigerator. This method is crucial for preserving the cake’s moist texture and luscious flavor. Ideally, your cake will stay delicious for about 3 to 5 days when stored properly. If you’re worried about the cake drying out (which, trust me, would be a tragedy!), consider placing a slice of bread in the container alongside the cake; it absorbs excess moisture while keeping everything nice and tender. And don’t worry if it has been sitting for a couple of days—this cake actually gets better with time as the milks continue to infuse their flavors into every bite. When you’re ready to serve again, just take it out of the fridge and let it sit at room temperature for a bit before indulging—this way, you’ll enjoy that rich creaminess at its best!
Freezing Your Easy Tres Leches Cake for Later
If you find yourself with more cake than you can handle (which is often a delightful dilemma), freezing it is an excellent option! To freeze your Easy Tres Leches Cake properly, first make sure it’s fully chilled and then slice it into individual portions or leave it whole—whichever suits your fancy. Wrap each piece tightly with plastic wrap or aluminum foil, ensuring no air can sneak in; then place them into a freezer-safe container or zip-top bag. This cake can be safely kept frozen for up to three months without losing its charm! When you’re ready to indulge in this creamy delight again, just thaw it in the refrigerator overnight or on the counter for a couple of hours. The convenience factor here is absolutely paramount—imagine having this delectable treat ready at a moment’s notice for unexpected guests or simply when that craving strikes!
Easy Tres Leches Cake

Indulge in the deliciousness of Easy Tres Leches Cake, a light and airy dessert soaked in a blend of three milks, creating a moist and creamy texture that’s simply irresistible. This delightful cake is perfect for any occasion, from birthdays to casual gatherings. With hints of cinnamon and sweetened condensed milk, each bite transports you to a world of nostalgia and comfort. Best of all, this easy recipe requires minimal effort, making it accessible for bakers of all skill levels. Elevate your dessert game with this stunning treat that not only looks beautiful but tastes heavenly!
- Prep Time: 20 minutes
- Cook Time: 25 minutes
- Total Time: 45 minutes
- Yield: Approximately 18 servings 1x
- Category: Dessert
- Method: Baking
- Cuisine: Latin American
Ingredients
- 1 box yellow cake mix
- 1 package instant vanilla pudding mix
- 3 large eggs
- 1 cup whole milk
- 1/2 cup vegetable oil
- 1/4 cup sour cream
- 1 can sweetened condensed milk
- 1 can evaporated milk
- 1 cup heavy cream
- Whipped topping (Cool Whip or homemade)
- 1 teaspoon cinnamon
- 1/3 cup water
- 1 teaspoon vanilla extract
Instructions
- Preheat your oven to 350°F (175°C) and prepare a 9×13-inch baking pan with non-stick spray.
- In a mixing bowl, whisk together the yellow cake mix, vanilla pudding mix, and cinnamon until combined.
- Add eggs, whole milk, vegetable oil, water, sour cream, and vanilla extract to the dry ingredients. Mix gently until just combined.
- Pour the batter into the prepared pan and bake for about 25 minutes or until a toothpick comes out clean.
- Allow the cake to cool for 10 minutes before poking holes across the surface using a skewer or fork.
- In a separate bowl, mix together the sweetened condensed milk, evaporated milk, and heavy cream.
- Gradually pour the milk mixture over the cooled cake, allowing it to soak in for about five minutes between layers.
- Refrigerate the cake for at least four hours or overnight before serving topped with whipped cream.
Nutrition
- Serving Size: 1 slice (90g)
- Calories: 230
- Sugar: 22g
- Sodium: 150mg
- Fat: 11g
- Saturated Fat: 6g
- Unsaturated Fat: 5g
- Trans Fat: 0g
- Carbohydrates: 30g
- Fiber: <1g
- Protein: 3g
- Cholesterol: 45mg