Easy Samoa Brownies
There’s something profoundly satisfying about creating a dessert that feels like a warm hug, enveloping you in nostalgia and sweetness. When I think of my Easy Samoa Brownies, I’m not just reminded of the delicious layers of toasted coconut and gooey caramel; I’m transported back to cozy afternoons spent in the kitchen with loved ones, laughter filling the air as we would sample each stage of whatever we were baking. These brownies are more than just a treat; they are an experience—a delightful journey where every bite is layered with memories. Trust me when I say that this recipe, with its perfectly fudgy texture, rich chocolate drizzle, and sumptuous coconut topping, will not only satisfy your sweet tooth but also create moments worth cherishing.
The magic of these Easy Samoa Brownies lies in their simplicity paired with indulgence. Using a boxed brownie mix as our base allows us to focus on elevating flavors without getting bogged down in complicated techniques. Each layer tells a story: the rich chocolatey goodness of the brownie itself beckons you in, while the caramel and toasted coconut dance atop like a celebration of flavors. Imagine biting into one—your teeth sinking into the moist brownie, followed by a delightful crunch from the golden coconut and then that luscious caramel enveloping your senses like liquid gold! It’s truly extraordinary how something so simple can evoke such joy and connection, making it perfect for any occasion—be it a family gathering or simply treating yourself after a long day.
Easy Samoa Brownies: A Sweet Symphony of Flavor
I can hardly contain my excitement as I share this recipe with you! These brownies are not just easy to make; they’re utterly intoxicating in flavor and presentation. With minimal effort, you’ll have a dessert that turns heads and brings smiles to faces. But remember: cooking is all about enjoying the process as much as it is about savoring the result. So roll up your sleeves and let’s dive into this culinary adventure!
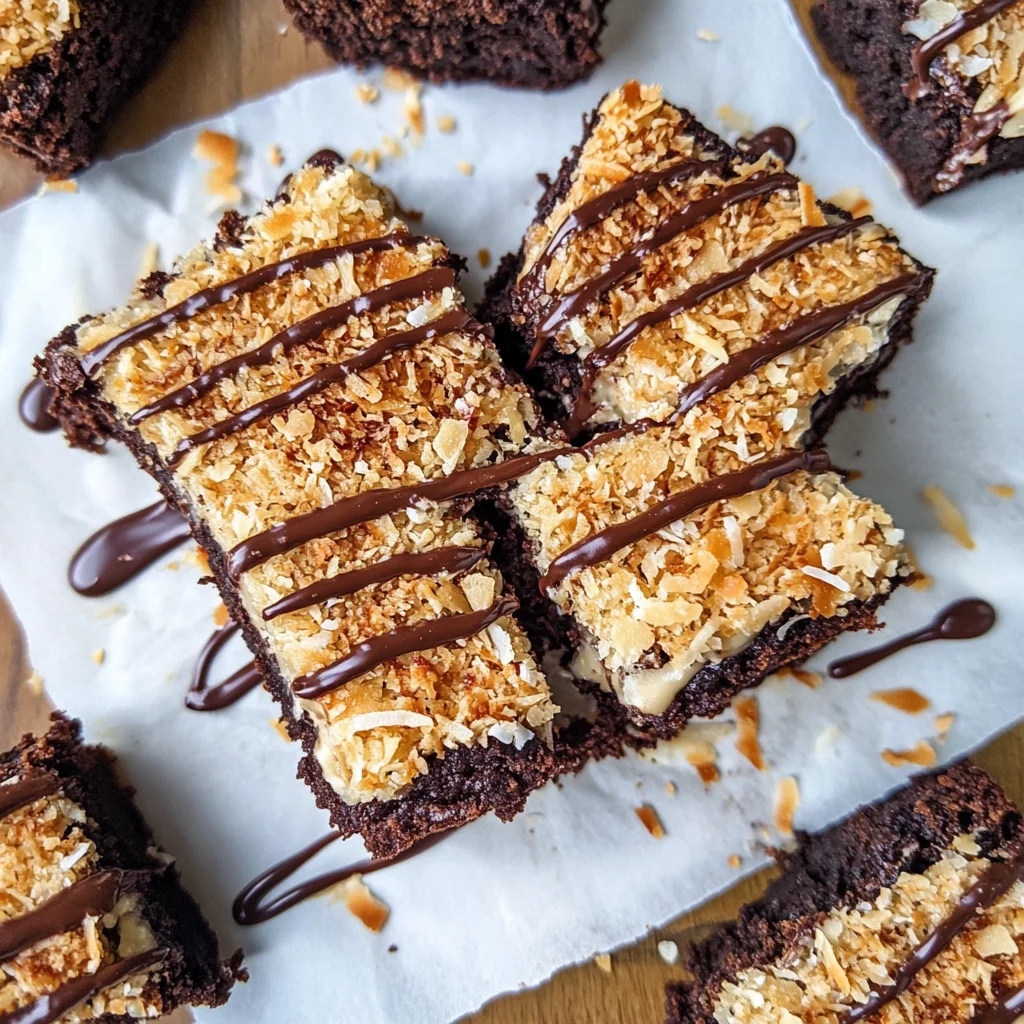
Ingredients:
As we set out on this journey to create our Easy Samoa Brownies, let’s take a moment to appreciate each ingredient that contributes to this decadent treat. Every component plays its own vital role in crafting this symphony of flavors.
- 1 box brownie mix (prepared according to the package directions). This is our starting point—the foundation upon which we build our masterpiece! Opting for a high-quality brownie mix ensures that your base is rich, fudgy, and full of chocolatey goodness. The beauty here is in convenience; just follow the instructions on the box and you’ll achieve that perfect chewy texture that’s so satisfying. If you’re feeling adventurous or want to avoid certain additives found in some mixes, consider making homemade brownies instead—just be sure they have similar moisture content!
- 2 cups shredded coconut. Ahh, coconut—the ingredient that adds such an enchanting tropical flair! Toasted coconut gives our brownies that signature crunch along with an irresistible nutty sweetness that beautifully contrasts with the rich chocolate. When purchasing shredded coconut, look for unsweetened varieties if possible; they offer a deeper flavor without being overly sweet. This ingredient also provides fiber, adding nutritional value without sacrificing taste!
- 16-ounce bottle caramel ice cream topping. Here’s where we introduce some heavenly richness! This liquid gold not only adds sweetness but also creates that signature gooey layer reminiscent of those beloved cookies we all know so well. The key is to choose a high-quality caramel sauce; one that’s thick enough to hold its form on top of our brownies but still oozy enough to create those mesmerizing drips when you slice into them. If you’re feeling particularly daring, try making your own caramel sauce—it’s easier than you think!
- ½ cup semi-sweet chocolate chips (melted). Chocolate lovers rejoice—this is what ties everything together! Melting semi-sweet chocolate creates an indulgent drizzle that’s both beautiful and deliciously rich. You can use dark or milk chocolate if you prefer—it’s all about personal taste here! Just be sure to melt it slowly; either using a double boiler or microwaving in short bursts—this will prevent scorching and ensure you achieve that smooth consistency we crave.
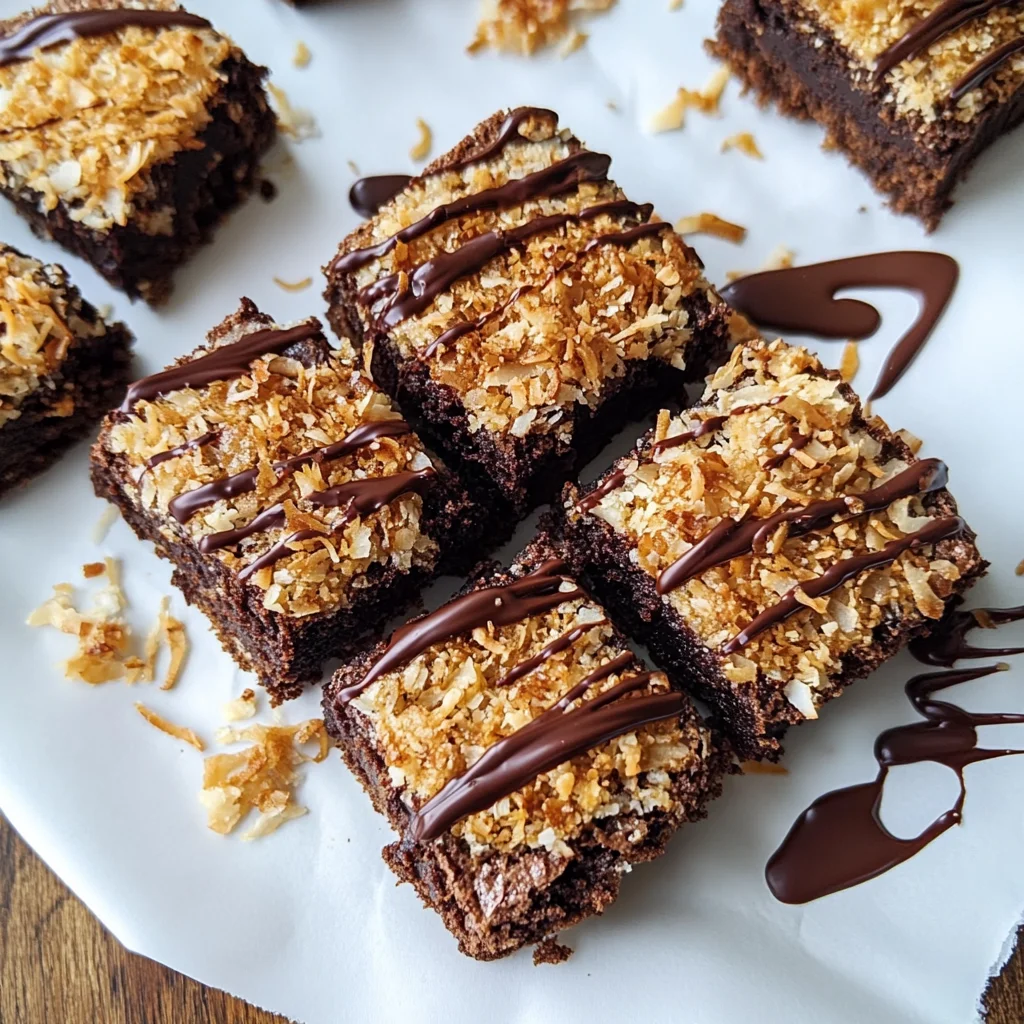
Equipment You’ll Need:
Having the right tools makes all the difference when it comes to baking! Think of these items as your trusty sidekicks—they’ll help ensure everything runs smoothly as we whip up these delightful brownies.
- Mixing bowl – A sturdy mixing bowl is essential for combining your ingredients thoroughly without fear of spills or messes. Glass bowls are excellent because they’re microwave-safe if you choose to melt your chocolate directly in them.
- Parchment paper – This non-stick wonder will line your baking sheet or pan perfectly! It prevents sticking and makes cleanup effortless—a non-negotiable step if you want those beautiful brownie edges intact.
- Baking sheet or pan – Choose an appropriate size based on your brownie mix instructions; usually an 8×8 inch pan works wonderfully here. A light-colored pan helps ensure even baking—dark pans can sometimes lead to over-browning on the outside before it cooks through.
- Spatula – An indispensable tool for folding ingredients gently together or spreading toppings evenly across your brownies without disturbing their delicate structure.
Now that we’ve gathered our ingredients and equipment, let’s get started on bringing these Easy Samoa Brownies to life!
Step 1: Toasting Coconut Like a Pro
Toasting coconut might seem like a small detail, but trust me—it’s absolutely paramount for unlocking its full flavor potential! Preheat your oven while preparing your brownie mix according to package directions; this way, we can multitask effectively! Spread the shredded coconut evenly across a parchment-lined baking sheet—this allows for even browning without clumping together.
Pop it into the oven for about 3 to 5 minutes, stirring frequently so nothing burns—coconut can go from golden perfection to charred bitterness quicker than you can blink! As soon as it reaches that lovely golden hue and wafts enticingly fragrant through your kitchen (oh yes!), remove it immediately from the oven and let it cool slightly while you finish preparing those brownies.
Step 2: Creating That Irresistible Layer
Once those brownies are baked to perfection (make sure they’re slightly underbaked if you love that fudgy texture!), allow them to cool for just a moment before layering on our toasted coconut mixed with caramel ice cream topping—this step adds depth and complexity beyond belief! In a medium bowl, combine your cooled toasted coconut with almost all of that luscious caramel sauce (saving some for drizzling later).
Gently fold them together until every strand of coconut is coated in velvety goodness—this mixture becomes the crowning glory atop your brownie base! Spoon this mixture generously over those warm brownies—you want it spread evenly across every inch so each bite has equal parts caramel-coconut bliss.
Step 3: Drizzling Chocolate Perfection
Ahh—the moment when melted chocolate transforms these beauties from delicious treats into absolute showstoppers! Take half a cup of semi-sweet chocolate chips (or more if you’re feeling generous) and melt them gently until silky smooth—if using microwave method be cautious not too heat too long at once!
Once melted transfer this divine concoction into either a piping bag or simply use a spoon if you prefer (no need for fancy tools here!). Drizzle liberally over those gorgeous brownies now adorned with caramel-coconut topping—we want every square inch covered because life is too short not to indulge fully!
Step 4: Chilling for Ultimate Enjoyment
Now comes perhaps one of my favorite steps: letting these Easy Samoa Brownies cool completely before cutting into them—it’s crucial for achieving clean slices later on! Pop them into the fridge once everything has set at room temperature; this chilling time allows flavors meld beautifully while firming up any melted toppings into perfection.
Trust me here; skipping this step may lead to messy servings—and nobody wants melted gooeyness everywhere no matter how tempting it looks fresh outta oven! After about an hour (or however long patience allows), slice those babies up into perfect squares ready-to-share—or keep all for yourself (I won’t tell)!
And there you have it: Easy Samoa Brownies bursting with flavor at every turn—each bite takes you on an adventure filled with nostalgia wrapped tightly in warmth from home-cooked delights shared among loved ones…now who’s ready for dessert?
Step 5: Drizzle the Chocolate of Dreams
Now comes the moment we’ve all been waiting for—the rich, velvety chocolate drizzle that will crown your Easy Samoa Brownies with a truly luxurious finish. Once you’ve transferred your melted semi-sweet chocolate into a piping bag—trust me, this is going to feel like you’re wielding a magic wand—snip off just a small corner of the bag. You want a fine, steady stream, so don’t go overboard with the snip; a tiny opening will give you more control. As you begin to drizzle, hold the piping bag about six inches above the coconut-covered brownies and gently squeeze, allowing the chocolate to cascade down in delicate ribbons.
The beauty of this step lies not just in its aesthetics; it’s also about enhancing flavor. The cocoa notes from your semi-sweet chocolate will contrast beautifully with the sweetness of the caramel and toasted coconut. It’s like creating an edible piece of art! As you drizzle, keep an eye on how much chocolate you’re applying; you want an even distribution without overwhelming the other flavors. Remember, balance is key here! Each bite should serve up a delightful surprise where every ingredient shines through—your friends and family will be begging for this recipe!
Step 6: Chill for Perfection
Now that your brownies are adorned with that stunning chocolate drizzle, it’s time to let them chill out in the refrigerator. I know patience can be tough when you’re surrounded by such heavenly aromas, but trust me on this one: chilling is absolutely crucial. By placing your Easy Samoa Brownies in the fridge for at least 30 minutes, you’re allowing all those luscious layers—the brownie base, gooey caramel-coconut topping, and silky chocolate—to meld together into one harmonious treat. This cooling period not only firms up the layers but also enhances their flavors as they mingle in their cozy little fridge environment.
As they chill, think of it as giving your brownies some time to relax after their big moment in the oven—just like us after a long week! You’ll notice that once they come out of the refrigerator, slicing them into squares becomes so much easier. The chocolate will set beautifully, making for clean cuts rather than melting chaos. So take a deep breath and enjoy this moment; good things come to those who wait!
Step 7: Slice Into Heavenly Squares
Once those delightful brownies have had their time to chill—yes, you can do it!—it’s time to slice them into squares of pure bliss. Using a sharp knife is key here; I always recommend warming your knife under hot water before drying it off—this little trick helps create clean edges as you cut through that beautiful chocolate crust without smudging everything around it. Aim for generous squares; after all, these brownies are meant to be shared (or not!). Visualize cutting through those layers: first encountering that chewy brownie base before hitting the sweet coconut-caramel layer and finishing with that silky chocolate drizzle.
When slicing, don’t rush; take your time and savor each cut. You want each piece to represent all the hard work and love you put into these Easy Samoa Brownies! If at any point during slicing you feel resistance or see uneven edges forming, don’t get discouraged—simply wipe down your knife between cuts for a smoother experience. Trust me when I say that these treats are going to disappear faster than you can say “Samoa!”
Step 8: Serve Up Some Sweet Joy
And there you have it—your masterpiece is complete! As you plate up these gorgeous Easy Samoa Brownies, take a moment to appreciate their beauty—the golden-brown toasted coconut glistening under that glossy chocolate drizzle is nothing short of irresistible. Whether you’re serving them at a gathering or indulging solo (no judgment here!), I promise you’ll find joy in each bite. As you take your first taste, allow yourself to be enveloped by that symphony of flavors—the rich brownie base followed by a wave of caramel sweetness and nutty coconut.
Don’t forget about presentation; maybe sprinkle some extra toasted coconut on top or add a fresh berry on the side for color—it’s all about elevating that experience! And if you’re feeling particularly generous (or just want more brownie goodness), consider pairing these with a scoop of your favorite non-dairy ice cream or whipped topping made from coconut cream for an indulgent finish that’s simply extraordinary.
Remember to share this recipe with friends and family so they too can revel in this delightful dessert experience! After all, food tastes better when shared with loved ones—and trust me when I say these Easy Samoa Brownies won’t last long on any table!
Conclusion:
As we reach the end of our culinary adventure with these Easy Samoa Brownies, I hope you feel as excited as I do about this recipe! It’s been such a joy sharing my love for baking with you—there’s something magical about combining simple ingredients like brownie mix with toasted coconut and silky caramel that results in a treat that’s not just delicious but also deeply comforting. Every layer creates a symphony of flavors and textures: the rich chocolate base meets the crunchy coconut topping, while the gooey caramel glues everything together in an utterly intoxicating way. This combination transforms what could be an ordinary dessert into something truly extraordinary!
I cannot emphasize enough why this recipe is a must-try. Not only does it deliver on taste — think of how heavenly it is to pull these beauties out of the oven — but it also makes baking accessible and fun! Perfect for gatherings or cozy nights at home, these brownies shine on any occasion. Picture yourself serving them at a family dinner or bringing them along to share with friends; their enticing aroma will draw everyone in like bees to honey!
Imagine savoring one with a cup of coffee in hand during an afternoon break or enjoying it alongside a scoop of vanilla ice cream for a truly decadent experience after dinner. Each bite promises a delightful contrast between chewy brownie goodness and crunchy coconut flakes that dance on your palate. For an elevated touch, consider pairing these with fresh berries — their tartness beautifully balances out the sweetness.
Feeling adventurous? This recipe is wonderfully adaptable too! You can swap out the shredded coconut for other toppings like crushed nuts if you’re looking for an extra crunch or drizzle some peanut butter over the top for added indulgence — trust me; it’s divine! There’s no limit to how you can make this dessert your own. So go ahead; experiment until you find your perfect version! I invite you to try making these Easy Samoa Brownies soon and share your experience with others. Let’s spread joy through our kitchens together!
Easy Samoa Brownies
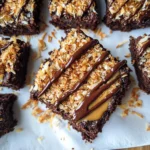
Indulge in the delightful world of Easy Samoa Brownies, where nostalgia meets indulgence! These brownies are a tribute to the beloved Samoa cookie, featuring layers of toasted coconut and gooey caramel, all topped with a luscious drizzle of melted chocolate. With a fudgy brownie base made from a convenient boxed mix, this recipe takes minimal effort while delivering maximum flavor. Perfect for family gatherings or as a sweet escape after a long day, each bite is an adventure filled with rich chocolatey goodness and sunny coconut crunch. Treat yourself and your loved ones to this extraordinary dessert that’s destined to become a new favorite!
- Prep Time: 15 minutes
- Cook Time: 25 minutes
- Total Time: 40 minutes
- Yield: Serves approximately 12 brownies 1x
- Category: Dessert
- Method: Baking
- Cuisine: American
Ingredients
- 1 box brownie mix (prepared according to package directions)
- 2 cups shredded coconut (toasted)
- 16-ounce bottle caramel ice cream topping
- ½ cup semi-sweet chocolate chips (melted)
Instructions
- Preheat your oven and prepare brownie mix according to package directions.
- Spread shredded coconut on a baking sheet and toast in the oven for 3–5 minutes until golden brown, stirring frequently.
- Bake brownies according to instructions, letting them cool slightly once done.
- In a bowl, combine toasted coconut with most of the caramel sauce; spread this mixture over the warm brownies.
- Melt semi-sweet chocolate chips and drizzle over the top of the brownies.
- Chill in the refrigerator for at least 30 minutes before slicing into squares.
Nutrition
- Serving Size: 1 brownie (50g)
- Calories: 210
- Sugar: 22g
- Sodium: 150mg
- Fat: 9g
- Saturated Fat: 6g
- Unsaturated Fat: 3g
- Trans Fat: 0g
- Carbohydrates: 34g
- Fiber: 2g
- Protein: 2g
- Cholesterol: 0mg