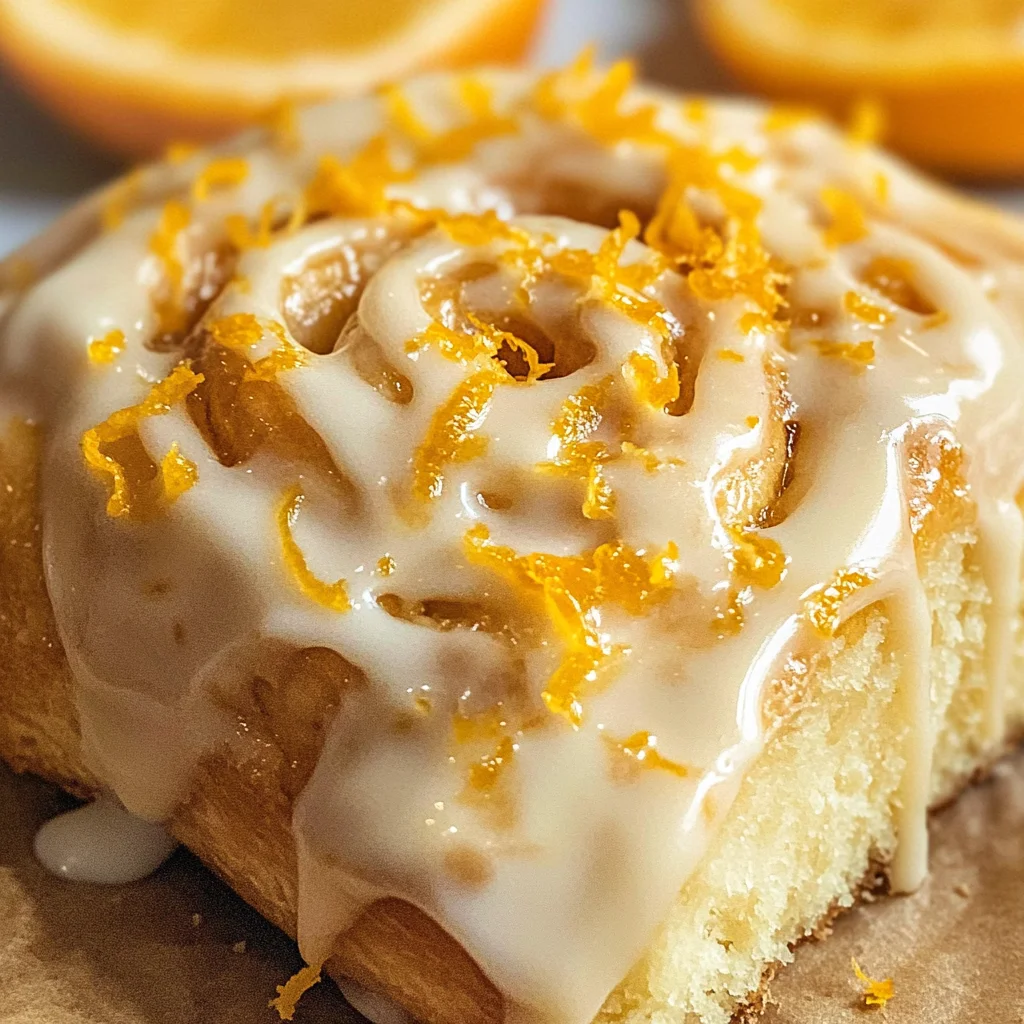
Best Orange Rolls Recipe
There’s something truly magical about the aroma of freshly baked orange rolls wafting through your home, isn’t there? It’s like a warm embrace on a chilly morning, instantly transporting you to a place filled with love, laughter, and the sweet memories of family gatherings. This Best Orange Rolls Recipe is more than just a treat; it’s an experience—a bright burst of citrus sunshine that dances on your palate and envelops your senses. With each fluffy roll, you’ll discover layers of sweet orange cream cheese icing that not only tantalize your taste buds but also evoke nostalgia for those special moments spent in the kitchen with loved ones. Trust me when I say, these rolls have a way of bringing people together, making them perfect for brunches or cozy breakfasts.
What makes these rolls so special? Well, it’s all in the details—each ingredient plays a vital role in crafting this delightful creation. The combination of fresh orange juice and zest infuses every bite with vibrant flavor, while the soft, pillowy texture creates an utterly irresistible experience. And let’s not forget about that luscious frosting! It’s like draping your rolls in a velvety blanket of sweetness that beckons you back for just one more bite. Whether you’re enjoying them on a leisurely weekend or preparing for a festive gathering, I promise you these Best Orange Rolls will become a cherished staple in your home.
Best Orange Rolls Recipe: A Bright Start to Your Day
Welcome to the world of baking where flour meets joy! This recipe will guide you through creating a dozen perfect, fluffy rolls that are not only freezer-friendly but also topped with an indulgent orange cream cheese icing. You’ll find yourself returning to this recipe time and time again as it becomes your go-to for brunches and breakfast celebrations alike.
Ingredients:
Embarking on this culinary journey requires selecting the right ingredients that each bring their unique charm to our Best Orange Rolls Recipe. Let’s dive into what you’ll need!
- 1 cup milk (warm): The warmth of the milk is essential as it helps activate the yeast effectively—this step is non-negotiable! Aim for temperatures between 100-110°F; too hot will kill the yeast while too cold won’t wake it up enough. Whole milk is ideal as its richness contributes to the overall flavor and texture of your rolls.
- 1/4 cup granulated white sugar: This sugar serves two purposes: it sweetens our dough and provides food for the yeast during fermentation. This process helps create those lovely pockets of air within each roll, lending them that light and fluffy texture we crave. Remember to use granulated sugar rather than powdered or brown sugar here for optimal results.
- 1 Tablespoon active dry yeast: Yeast is our little magic worker! It’s what transforms our dough from a simple mixture into something airy and delicious. Be sure to check the expiration date on your yeast before using it; fresh yeast guarantees better rise and flavor.
- 1 teaspoon salt: Salt is crucial not only for flavor but also for controlling the fermentation process of the yeast. It enhances all other flavors while ensuring we don’t end up with overly fermented dough that’s too sour.
- 1/2 cup butter, softened: Butter adds richness and flavor to our rolls—it’s what makes them taste so indulgent! Soften it at room temperature so it can cream well with other ingredients. If you’re feeling adventurous, using European-style butter can elevate the richness even further.
- 1 egg: Eggs contribute moisture and act as a binding agent in our dough. They’re also responsible for giving our rolls that beautiful golden color as they bake, creating an inviting appearance.
- 2 teaspoons orange zest (from one orange): Here comes the star player—the zest imparts vibrant citrus notes without adding excess liquid. Use a microplane grater to get fine shavings; avoid any bitter white pith as much as possible.
- 1/4 cup fresh orange juice (from one orange): Freshly squeezed juice brings brightness and acidity to balance out sweetness while enhancing that signature orange flavor throughout our rolls.
- 4 cups all-purpose flour (plus extra for rolling out): All-purpose flour provides structure without being overly dense—perfect for achieving those fluffy rolls we desire! Make sure you measure accurately by spooning flour into your measuring cup rather than packing it down.
- 1 cup sugar: For our filling! This sugar adds sweetness but also combines beautifully with spices to create layers of flavor within each roll.
- 2 teaspoons zest (from another orange): More zest means more flavor; layering this ingredient ensures every bite bursts with delightful citrus goodness.
- 1/2 teaspoon ground ginger: Ginger adds warmth and depth to our filling—it’s like an unexpected hug that complements the orange beautifully!
- 1/2 cup butter: Another helping of softened butter goes directly into our filling, creating a luscious spread that melts into our dough as it bakes—pure heaven!
- ¼ cup all-purpose flour: A small amount mixed into our filling helps bind everything together so we have no runny mess when spreading it onto our dough.
- 4 oz cream cheese, softened: This creamy delight forms the base of our frosting—it offers tanginess paired perfectly with sweetness from powdered sugar later on!
- 2 oz butter, softened again! We’re building layers here; blending both creates an irresistible creamy consistency in our frosting.
- 1/2 teaspoon vanilla extract: Vanilla amplifies flavors like nothing else can; it’s essential for rounding out our rich frosting profile beautifully!
- 2 Tablespoons frozen orange juice concentrate: Concentrate packs intense flavor without adding additional liquid—just be sure to thaw before mixing into frosting!
- 2 cups powdered sugar: The final piece needed to sweeten up our frosting—you’ll want this finely ground sugar so we achieve that smooth finish when decorating those glorious rolls!
Equipment You’ll Need:
Before diving into baking bliss, let’s gather some essential tools that will make this process smoother and more enjoyable. Trust me; having these partners by your side makes all the difference!
- Stand mixer or large mixing bowl: A stand mixer simplifies kneading and mixing tasks immensely—particularly if you’re making a double batch! However, if you enjoy hands-on experiences or don’t own one yet, mixing by hand works just as well; it’s all about personal preference here!
- Dough hook or wooden spoon: If using a stand mixer, the dough hook beautifully mimics hand kneading while allowing you freedom to multitask around your kitchen! A wooden spoon is perfect if you’re opting for traditional methods; both options will yield fantastic results!
- Plastic wrap or clean kitchen towel: Covering your rising dough protects it from drafts while keeping moisture locked in—ensuring proper fermentation occurs during its crucial resting phase!
- Baking sheet lined with parchment paper: Parchment paper prevents sticking while promoting even baking across all sides—the key factor allowing you to slide those glorious rolls off effortlessly once they’re ready!
Now that we have everything lined up perfectly let’s dive into crafting those delightful Best Orange Rolls together! Each step is filled with care because every detail matters in creating something extraordinary—let’s get started!
Step 1: Wake Up Your Yeast
In a small bowl, combine warm milk (between 100°F – 110°F) with granulated white sugar and sprinkle active dry yeast over top before letting sit undisturbed for about five minutes until foamy bubbles form on surface—a sign that our little friends are awakening! If you’re using instant yeast instead (which doesn’t require activation), simply mix all remaining ingredients without waiting on this initial step—it’s still important though as salt could slow down growth if combined too soon!
Step 2: Mix Your Base
In either your stand mixer bowl or large mixing vessel (if going manual), combine salt along with softened butter until smooth followed by egg incorporation next along with both zests plus fresh juice squeezed directly from oranges themselves! Now pour in foamy yeast mixture carefully then gradually add four cups flour stirring gently until cohesive dough starts forming! If working by hand feel free switching over to kneading once mixed enough—you want texture resembling play-dough yet slightly tacky still after about eight minutes’ worth laboring away.
Step 3: Knead Until Smooth
As you knead away (be patient!), notice how dough begins pulling away from sides becoming less sticky over time—that’s just what we want here folks! Don’t hesitate adding up half-cup additional flour if necessary till reaching desired consistency where hands stay relatively clean whilst handling! Once complete transfer ball-shaped mass into greased bowl then cover tightly using plastic wrap resting somewhere warm until doubled size occurs roughly one hour later—a beautiful testament showcasing patience pays off deliciously.*
Step 4: Shape Those Rolls
Once risen magnificently take dough out gently punching down center releasing built-up air pockets formed during rising phase previously enjoyed! Now turn out onto lightly floured surface before rolling gently creating large rectangle shape roughly half-inch thick ready prepped rolling out generous amounts filling mixture prepared earlier consisting primarily sugars plus spice goodness along melted buttery goodness layered within beautiful foldable masterpiece!*
Your adventure in making these exquisite Best Orange Rolls has only just begun! Stay tuned as we continue crafting perfection together through each mouthwatering step ahead…
Step 5: The Art of Shaping Your Rolls
Once your dough has risen beautifully, almost doubling in size and becoming a delightful, puffy cloud of promise, it’s time to bring it to life by shaping those rolls. Gently punch down the dough—this may sound harsh, but it’s crucial for releasing the gases that formed during the rise. This process also helps redistribute the yeast, ensuring even fermentation throughout. You’ll notice a satisfying deflation as you do this; it’s like giving that dough a little hug! Transfer it to a floured surface and knead it just a couple of times to bring it back together. Remember, we’re not looking for perfection here; just a smooth ball will do.
Next, roll out your dough into a rectangle about ¼ inch thick. Why a rectangle? This shape will allow us to create those lovely layers when we roll them up! Picture each layer as a ticket to flavor town—more layers mean more deliciousness. Now, spread your softened butter across the surface generously; this is the glue that binds our flavors together! Sprinkle the sugar mixture evenly over the butter: this is where your orange zest and ginger come into play, imparting an aromatic sweetness that will make your kitchen smell like heaven itself. Don’t rush this step—take your time ensuring every inch is covered because this is what will transform these rolls from good to utterly extraordinary!
Step 6: Rolling & Cutting with Love
Now comes the fun part: rolling up that rectangle into a log! Starting at one long edge, gently lift and roll the dough towards you, making sure it’s tight enough to hold its shape but not so tight that you squish out all that glorious filling. Think of it as tucking in a warm blanket around something cozy—you’re cradling those flavors inside! Once you’ve rolled it up completely, pinch the seams gently to seal everything in.
With a sharp knife or unflavored dental floss (trust me on this!), slice your log into twelve equally sized rolls. Each cut should yield a perfect swirl of orange sweetness peeking out from each side—how beautiful they look! As you cut, if you notice any filling escaping from the sides, don’t fret; simply tuck it back in as best you can. Place each roll in a greased baking dish or on parchment-lined baking sheets, leaving some space between them since they’re going to rise again. This second rise is absolutely paramount—it allows our rolls to become fluffy and tender instead of dense and chewy.
Step 7: The Second Rise – A Lesson in Patience
Cover your rolls with plastic wrap or a clean kitchen towel and let them rise for another 30-45 minutes until they puff up once more. This step is crucial because it’s when all those beautiful air pockets form within each roll. The warmth helps activate the yeast one last time before baking; without this step, you’re likely to end up with heavy rolls rather than ethereal clouds of orange goodness. During this waiting period, I often take a moment just to breathe in that sweet aroma wafting through my kitchen—it’s intoxicating!
You might be tempted to peek too soon or rush through this process; resist that urge! Trust me on this one—the transformation happening underneath that cover is what makes all the difference between ordinary and spectacular rolls. When they’ve risen enough (they should look puffy but not overflowed), gently press down on one roll with your finger; if it springs back slowly but leaves just a slight indent, you know they’re ready for the oven.
Step 8: Baking Your Perfect Best Orange Rolls Recipe
Preheat your oven to 350°F (175°C), and while you’re waiting for that wonderful heat to envelop your kitchen, take a moment to prepare yourself for what’s about to happen next—a truly magical experience awaits! Once preheated, place those glorious rolls in the oven carefully. Bake them for approximately 25-30 minutes or until they’re golden brown on top and emanating an irresistible fragrance that fills every corner of your home.
Keep an eye on them during those final minutes; ovens can vary quite dramatically in temperature due to hot spots or age. You’ll want them baked until they’re beautifully golden brown but still soft when touched gently—a perfect balance of color and texture is key here! And here’s where my heart races slightly: if you have an instant-read thermometer handy, aim for an internal temperature of about 190°F (88°C). This means they’re cooked through perfectly! When done, remove them from the oven and let them cool slightly while you prepare for their crowning glory—the orange cream cheese icing!
Conclusion:
As we wrap up our delicious journey through making the Best Orange Rolls Recipe together, I hope you’re feeling as excited as I am! There’s something truly magical about working with yeast dough and watching it transform into these fluffy delights filled with bright orange zest and sweetness. Each bite is like a warm hug on a plate, resonating with cheerful citrus notes that are both refreshing and comforting. The combination of tangy orange cream cheese icing melting into the warm rolls elevates this dish from ordinary to extraordinary—it’s all about those little moments of joy we create in our kitchens.
This recipe is an absolute must-try not just for its incredible flavor but also for the sheer joy it brings while making it. Imagine pulling these golden-brown rolls from your oven; they emerge puffed up like clouds, filling your kitchen with an intoxicating aroma that beckons everyone nearby. Whether it’s for brunch gatherings with friends or cozy breakfasts at home with loved ones, these orange rolls never fail to impress. They’re versatile enough to be enjoyed any time of day—breakfast, dessert, or even as an afternoon snack paired with tea.
As you savor one warm roll drizzled with icing, consider pairing it with a cup of freshly brewed coffee or perhaps something fruity like a berry smoothie; both elevate this experience further! For those who love surprises, why not spread some raspberry jam on top? Or if you’re feeling adventurous—try adding chopped nuts or cranberries into the filling before rolling it up! This recipe is wonderfully adaptable and invites creativity; each variation opens new pathways of flavor just waiting to be explored. So gather your ingredients and make this recipe your own—share your experience with friends or family because nothing brings people together quite like freshly baked goods!
I can’t wait for you to try this Best Orange Rolls Recipe; may it fill your home with warmth and laughter just as it has mine over the years! Happy baking!
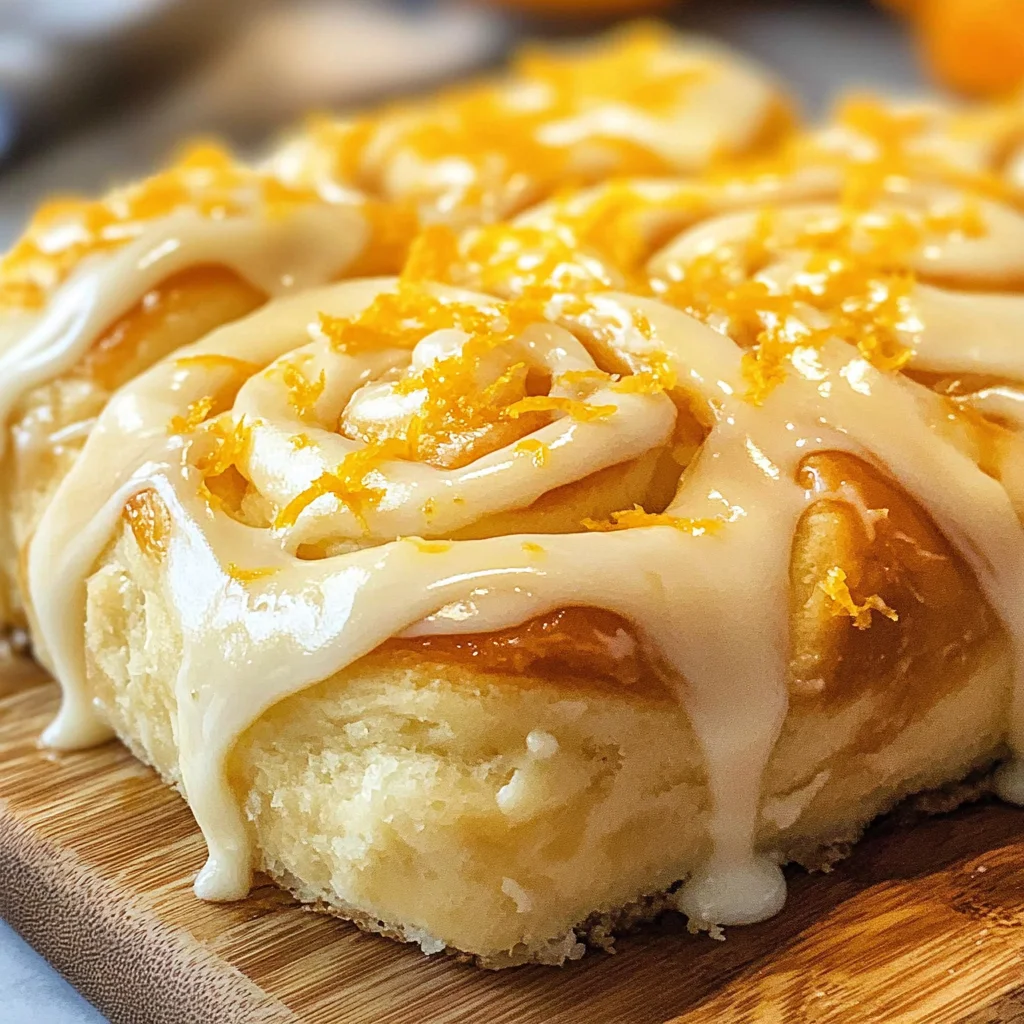
Best Orange Rolls Recipe

There’s something truly delightful about the aroma of freshly baked orange rolls filling your kitchen, creating a warm and inviting atmosphere. This Best Orange Rolls Recipe is not just a treat; it’s an experience that brings smiles to faces and warmth to hearts. Each fluffy roll is infused with the vibrant essence of fresh oranges, topped with a creamy orange cream cheese icing that makes for an irresistible combination. Perfect for brunches or cozy breakfasts, these rolls will surely become a beloved staple in your home.
- Prep Time: 30 minutes
- Cook Time: 30 minutes
- Total Time: 1 hour
- Yield: Approximately 12 servings 1x
- Category: Dessert
- Method: Baking
- Cuisine: American
Ingredients
- 1 cup warm milk (100-110°F)
- 1/4 cup granulated sugar
- 1 tablespoon active dry yeast
- 1 teaspoon salt
- 1/2 cup softened butter (plus more for filling)
- 1 egg
- 2 teaspoons orange zest (from one orange)
- 1/4 cup fresh orange juice (from one orange)
- 4 cups all-purpose flour
- 1 cup sugar (for filling)
- 2 teaspoons orange zest (from another orange)
- 1/2 teaspoon ground ginger
- 4 oz cream cheese, softened
- 2 oz butter, softened
- 1/2 teaspoon vanilla extract
- 2 tablespoons frozen orange juice concentrate
- 2 cups powdered sugar
Instructions
- Activate the yeast by combining warm milk and sugar in a small bowl. Sprinkle yeast on top and let it sit for about five minutes until foamy.
- In a mixing bowl, combine salt and softened butter until smooth. Add the egg, both zests, and fresh orange juice followed by the foamy yeast mixture.
- Gradually mix in flour until a cohesive dough forms. Knead for about eight minutes until smooth.
- Place the dough in a greased bowl, cover it, and let it rise in a warm place until doubled in size (about one hour).
- Punch down the dough gently and roll it out into a rectangle about half an inch thick.
- Spread softened butter evenly over the dough and sprinkle with filling ingredients: sugar, zest, ginger, and melted butter.
- Roll up tightly from one long edge and cut into twelve pieces. Place them in a greased baking dish.
- Cover rolls and let them rise again for about 30-45 minutes until puffy.
- Preheat oven to 350°F (175°C) and bake for approximately 25-30 minutes until golden brown.
- Prepare icing by mixing cream cheese, butter, vanilla extract, frozen orange juice concentrate, and powdered sugar until smooth.
- Drizzle icing over warm rolls before serving.
Nutrition
- Serving Size: 1 roll (85g)
- Calories: 290
- Sugar: 18g
- Sodium: 220mg
- Fat: 13g
- Saturated Fat: 8g
- Unsaturated Fat: 4g
- Trans Fat: 0g
- Carbohydrates: 38g
- Fiber: <1g
- Protein: 4g
- Cholesterol: 40mg