Red, White, and Blue Marble Cake
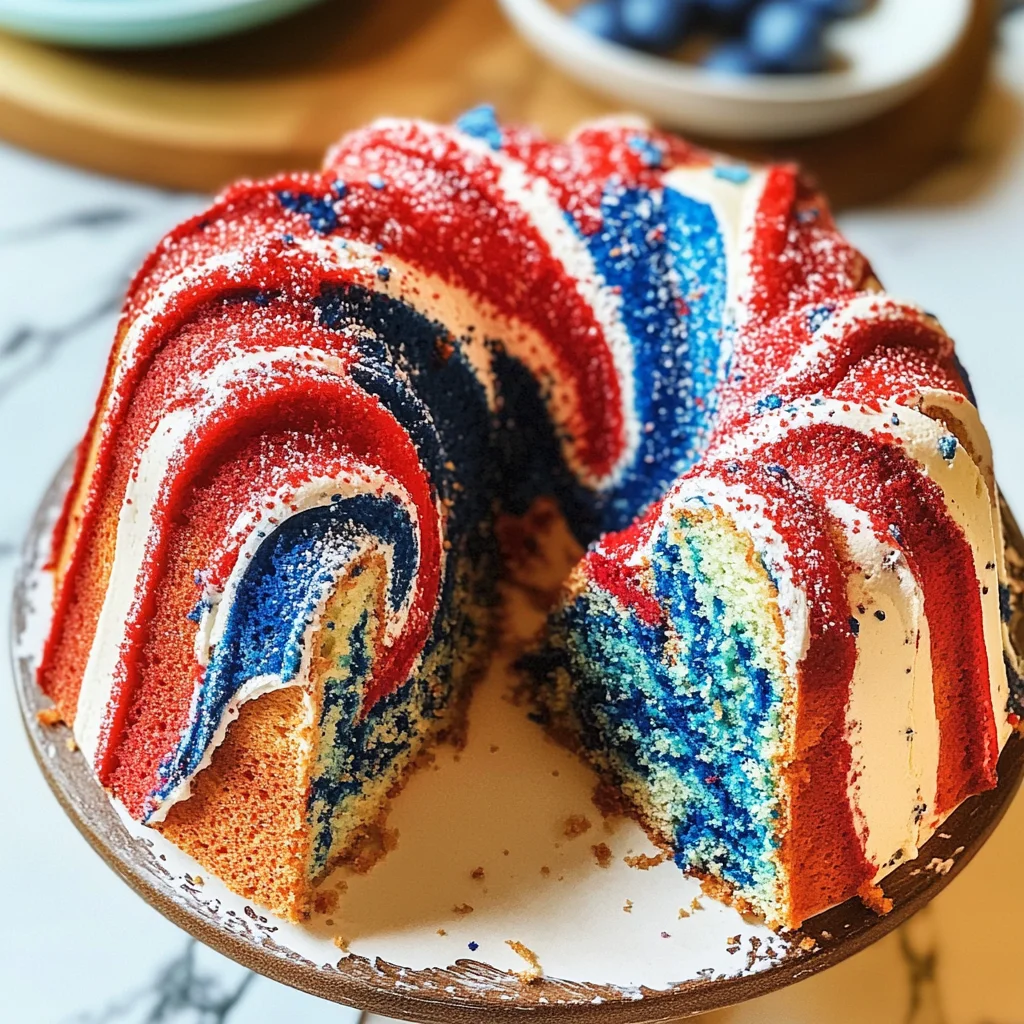
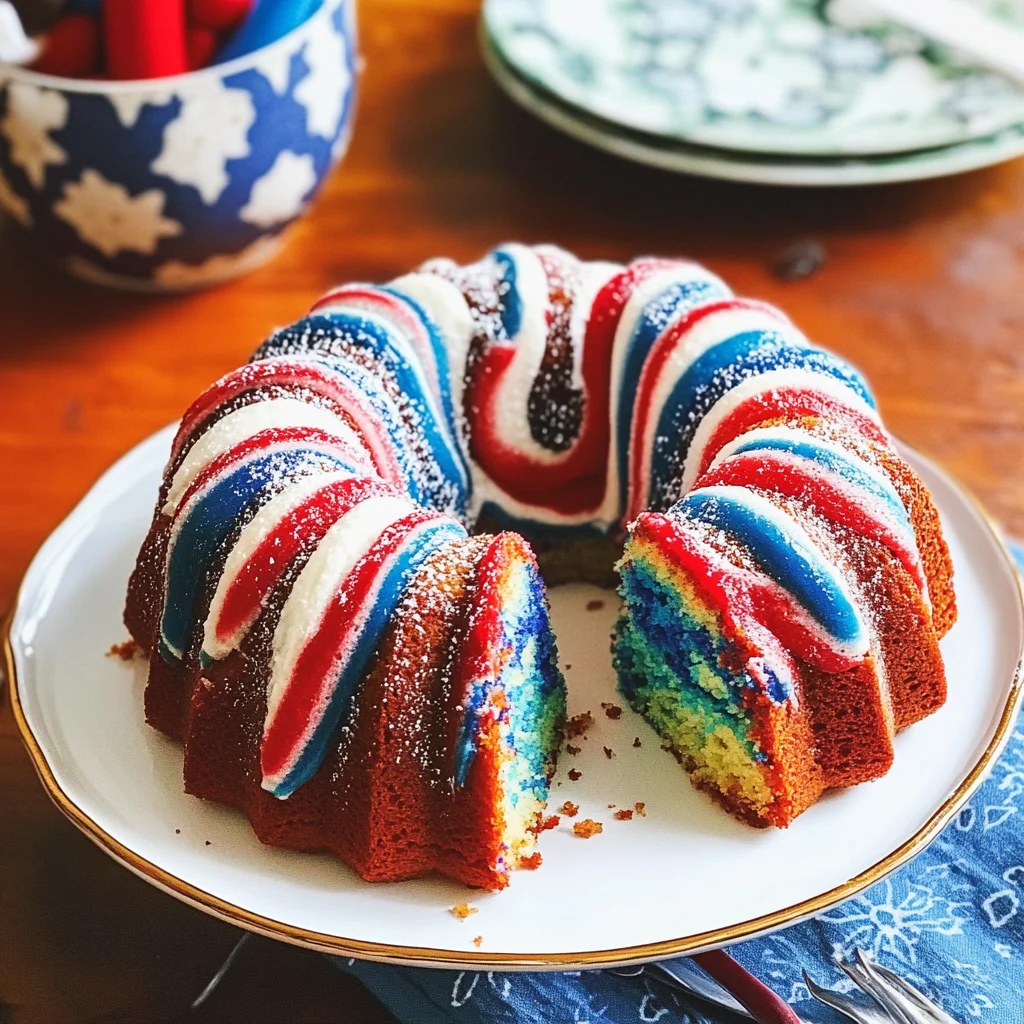
There’s something utterly enchanting about baking, isn’t there? It’s more than just the simple act of mixing flour and sugar; it’s a transformative experience that envelops you in warmth and nostalgia. When I think about the Red, White, and Blue Marble Cake, I am reminded of summer days filled with laughter, family gatherings, and the sweet aroma of freshly baked goods wafting through the air. This cake is not merely a dessert; it’s a celebration of life itself—a canvas where vibrant colors swirl together to create a stunning masterpiece that beckons everyone to slice in. The sight of those red, white, and blue swirls has an ability to bring smiles all around, making it perfect for festive occasions like Independence Day or any joyful gathering that calls for a touch of sweetness. Trust me when I say that this Red, White, and Blue Marble Cake will not only be a feast for the eyes but also a delight for your taste buds.
As I share this cherished recipe with you, I want you to feel the love and enthusiasm that goes into each step. It’s about creating memories—whether you’re baking with friends or simply treating yourself to something special. The moist vanilla bundt cake serves as a delightful backdrop for those bright swirls of color, each bite revealing layers of buttery goodness balanced by just the right amount of sweetness. And let me tell you; the feeling of pulling this beautiful cake from the oven is akin to uncovering a hidden treasure! So grab your apron and let’s dive into this culinary adventure together!
Ingredients:
Embarking on this journey requires some key ingredients that will come together beautifully to create our stunning cake. Each component plays a vital role in achieving that perfect texture and flavor balance we’re after.
- 1 cup (2 sticks or 226g) unsalted butter, softened to room temperature. This is crucial for achieving that light and airy texture in our Red, White, and Blue Marble Cake. When butter is at room temperature, it cream beautifully with sugar, incorporating air into the mixture which helps our cake rise perfectly in the oven. If your butter is too cold, it won’t incorporate well; if it’s melted, you’ll end up with a dense cake rather than one that’s fluffy and tender. Opt for high-quality butter here—European-style varieties with higher fat content can elevate your results even more.
- 2 ½ cups granulated sugar. Sugar doesn’t just sweeten our cake; it also contributes to its structure by helping to create air pockets during the creaming process with butter. The result? A wonderfully soft crumb that melts in your mouth! Be sure to measure accurately—using too little sugar can lead to a dry cake while excessive amounts can make it overly sweet.
- 1 tablespoon vanilla extract. Ahh, vanilla—the heart and soul of many desserts! This extract adds depth and complexity to our cake’s flavor profile. Always choose pure vanilla extract over imitation because it brings an authentic taste that complements the other ingredients superbly.
- 2 large eggs (at room temperature). Eggs are essential for binding everything together and providing moisture. Room temperature eggs mix more easily into batters than cold ones from the fridge. They also help with leavening when they’re beaten properly—creating an airy texture.
- 4 large egg whites (at room temperature). Including extra egg whites enhances our cake’s lift without adding additional fat from yolks—they contribute incredible volume while keeping things light. Again, having them at room temperature allows them to whip up better if you’re looking for that fluffy texture.
- 1 cup buttermilk (at room temperature). Buttermilk adds richness while also providing acidity which tenderizes gluten in the flour resulting in a softer crumb structure. You can substitute regular milk mixed with a tablespoon of vinegar or lemon juice if you don’t have buttermilk on hand—just allow it to sit for about five minutes until it thickens slightly.
- 3 cups cake flour. Cake flour is lower in protein compared to all-purpose flour which means less gluten formation during mixing—a key factor for cakes as we want them tender rather than chewy. It creates that delicate crumb we all adore! If you don’t have cake flour available, you can make your own by measuring out all-purpose flour and removing two tablespoons before adding two tablespoons of cornstarch back in.
- 2 teaspoons baking powder. This leavening agent helps our batter rise as it bakes—creating those heavenly layers we love so much! It’s important not to confuse baking powder with baking soda; they serve different purposes in baking chemistry!
- ½ teaspoon salt. While seemingly small, salt plays an indispensable role in enhancing flavors across all ingredients—it balances sweetness while also strengthening gluten structures.
- Red food coloring & Blue food coloring (as needed). These vibrant colors bring life to our marble cake! Use gel food coloring instead of liquid if possible as it provides more intense shades without altering the batter’s consistency.
Equipment You’ll Need:
Now that we’ve gathered our ingredients full of promise and potential, let’s talk about the tools we’ll need along this delightful journey! Having the right equipment not only makes things smoother but also elevates your baking experience into something truly enjoyable.
- 12-cup Bundt pan – This special pan isn’t just about aesthetics; its unique shape allows heat distribution throughout the batter ensuring even cooking while providing those lovely ridges on your cake’s exterior which will look stunning once plated up! Greasing and flouring are essential steps here as they prevent sticking—a non-negotiable if you want your beautiful creation intact when inverted!
- Stand mixer or electric hand mixer – A stand mixer fitted with a paddle attachment makes creaming butter and sugar an absolute breeze—allowing you focus on other aspects of preparation without tiring out your arms! If you don’t have one handy though, an electric hand mixer works just fine too—it’s all about what feels comfortable for you!
- Measuring cups & spoons – Accurate measurements are key when baking! Invest in good quality measuring cups (both dry and liquid) along with precise spoons so every ingredient gets its due respect during mixing!
- Rubber spatula – This tool is invaluable for scraping down sides of bowls ensuring nothing goes unincorporated when mixing batters—it’s like giving each scoop some loving attention before sending them off into their destiny!
Preparing the Red, White, and Blue Marble Cake
Step 1: Preheat Your Oven
Before diving into any mixing magic, let’s set ourselves up for success by preheating our oven to 350°F (175°C). This step may seem trivial but trust me—it’s absolutely paramount! Preheating ensures that when your batter hits those hot oven walls, chemical reactions kick off immediately leading us toward beautifully risen slices later on! While waiting for magic temperatures inside your oven—which takes roughly 10 minutes—you can take this time prep work ahead: grease & flour your Bundt pan thoroughly so nothing gets stuck later on when we unveil our masterpiece.
Step 2: Cream Butter & Sugar
Once your oven’s warm embrace welcomes us in anticipation let’s move onto creaming together 1 cup of softened unsalted butter along with 2 ½ cups granulated sugar using either your stand mixer or electric hand mixer set at medium speed until light & fluffy—a process known simply as creaming. This usually takes around 3–5 minutes depending on equipment used; keep an eye out here because texture matters greatly! Ideally what we’re aiming for is pale yellow color accompanied by billowy clouds filling up those bowl spaces indicating incorporation has occurred successfully… If yours looks grainy still don’t fret—it may just need another minute or two before reaching desired state where air bubbles form creating pockets within batter promising delightful tenderness later post-baking!
Step 3: Add Eggs & Vanilla
Next up comes adding magic potion ingredients—the eggs & vanilla extract—to enrich flavors deeply rooted within each bite taken afterward! Crack open both whole eggs along with four egg whites directly into bowl then pour over tablespoonfuls worth pure vanilla extract before turning mixer speed low once again allowing everything combine gently yet thoroughly over next minute or so until homogenous mixture appears before eyes pleasingly… Remember: patience pays off here especially concerning egg incorporation—it shouldn’t feel rushed since these proteins help bind everything neatly together forming cohesive structure needed down line!
Step 4: Incorporate Buttermilk
Now let’s introduce our rich friend—buttermilk—by pouring one cup slowly while letting mixer run at low speed until fully blended through existing wet components already present inside bowl… Why use buttermilk? Well aside from adding moisture factor crucially needed during bake cycle thanks being acidic nature contributing softness overall too plus slightly tangy flavor profile dancing alongside sweetness balancing act beautifully across palate upon tasting slices down road ahead… Don’t rush this step either folks because allowing proper incorporation means better results overall trust me on this one—it truly does matter!
And there you have it—the first few steps laying foundation solidly beneath us as we venture forth toward colorful marvel awaiting unveiling soon enough… Stay tuned as we continue unraveling secrets behind crafting these delicious swirls next time around!
Step 5: The Creaming Technique—Creating a Fluffy Base
Now, let’s dive into the heart of our cake—the creaming technique. In the bowl of your stand mixer, or using a trusty hand mixer if that’s your style, combine that glorious cup of room temperature butter with the 2 ½ cups of granulated sugar. You want to beat them together until they’re fluffy and light—a process that typically takes about 4 to 5 minutes. Why is this step so crucial? Well, as you mix, the sugar crystals create tiny air pockets in the butter, resulting in a delightful texture that makes our cake moist and tender. It’s like giving your cake a cozy little blanket of softness!
As you watch the mixture turn from yellow to a pale, almost white hue, you’ll know you’re on the right track. Trust me on this: don’t rush it! The fluffier it gets, the better your cake will rise later on. Once you’ve achieved that perfect consistency, start adding in your eggs—two large eggs and four egg whites—one at a time. This gradual addition allows each egg to meld into the batter thoroughly before the next one joins the party. As you mix, you’ll notice how the batter transforms into a silky smooth concoction. This is what we call building structure; those proteins in the eggs are essential for helping your cake hold its shape.
Step 6: Adding Flavor—The Vanilla Essence
Now it’s time to elevate our batter with a splash of flavor! Add that fragrant tablespoon of vanilla extract and mix just until combined. Oh, my friends, vanilla is not just an ingredient; it’s an experience! Adding vanilla to your batter creates an aromatic layer that complements the sweetness beautifully and rounds out all those flavors we’re building. It’s like adding an unexpected twist to a familiar song—it makes everything sing in harmony.
Next up is buttermilk—one cup of this dreamy liquid gold adds moisture and a slight tanginess that makes your cake truly extraordinary. The acid in buttermilk interacts with our baking powder later on, creating those lovely little air bubbles that contribute to our cake’s rise and tenderness. Mix it in carefully until well-combined; you want everything to be evenly distributed without overmixing at this stage. Overmixing can lead to a dense texture instead of the lightness we’re aiming for! Remember, gentle hands are key here; think of yourself as coaxing rather than forcing.
Step 7: The Dry Ingredients—Bringing It All Together
Now comes one of my favorite moments when baking—the incorporation of our dry ingredients! Gently sift together three cups of cake flour, two teaspoons of baking powder, and half a teaspoon of salt into another bowl. Sifting isn’t just for show; it aerates the flour and ensures there are no clumps lurking around. We want our batter to be as smooth as possible because every bite should feel like pure bliss!
Gradually add this dry blend into your wet mixture while mixing on low speed. This is where patience comes into play again; take your time with this step! The goal is to combine everything just until incorporated—don’t be tempted to overmix! You may still see small flecks of flour here and there; that’s perfectly fine! Overworking the batter can activate gluten too much and lead us down the path toward a chewy cake instead of one that’s tender and fluffy.
Once everything looks beautifully blended together without any dry patches, stop mixing! Set aside your bowl filled with delicious vanilla batter because we’re about to introduce some color into our creation!
Step 8: Creating Colorful Swirls—The Magic Begins
This part feels almost like painting on canvas—it’s time to make our Red, White, and Blue Marble Cake come alive with color! Begin by scooping out one and a half cups of batter into a separate bowl; this will be our base for those vibrant red swirls we’re after. Now do exactly the same thing for another bowl where we will create our blue swirls.
Add red food coloring to one bowl and blue food coloring to another—start with about one tablespoon in each bowl initially. Now here’s where creativity meets science: gently fold in the colors using a spatula or spoon until they reach your desired vibrancy! It’s such an exhilarating moment seeing these vivid hues emerge from simple white batter—it truly feels magical.
Don’t forget: adjust based on preference; if you want more intense colors for that eye-catching effect (perfect for festive occasions!), feel free to add more coloring gradually until you’re satisfied with how bold they look. Color also plays an important role here aesthetically; having those striking contrasts will ensure every slice looks appealing when served at gatherings or celebrations!
Next Major Phase – Baking Your Perfect Red, White, and Blue Marble Cake
With all elements ready for assembly now—and I promise you this part will be immensely satisfying—we’re going to layer these batters beautifully into our prepared bundt pan.
Step 9: Layering for Swirls—A Beautiful Technique
Using a quarter-cup measuring cup (this helps keep things uniform), begin layering your batters starting with plain vanilla first right at the bottom of your greased bundt pan. Drop one scoop directly in before moving onto red—this alternating method creates those mesmerizing marbled swirls inside once baked!
So why do we do it this way? By starting off with plain then layering colored batters alternatively without stirring them together prematurely allows each layer its own distinct identity while still blending them beautifully during baking—a process known as “marbling.” Just imagine cutting into each slice later only to reveal stunning patterns bursting forth from within! It’ll be utterly intoxicating!
Continue dropping scoops until you’ve used up all three batters while ensuring no gaps remain between layers—this ensures even baking throughout! After all layers have been added (don’t fret if it’s not perfect!), give that pan gentle taps against your countertop surface which helps settle any air bubbles trapped below while leveling out surfaces without disturbing those gorgeous layers too much.
Now it’s time for baking magic! Pop that beautiful creation into preheated oven set at 350°F (175°C). Bake for approximately 50-70 minutes—but keep an eye on it after about 50 minutes since ovens vary quite significantly!
To check doneness accurately stick in wooden toothpick right through center; if it comes out clean or with only crumbs attached—that’s how you’ll know it’s ready! If there’s wet batter still clinging onto it,your cake needs just a few more moments inside—to avoid overbaking though monitor closely by checking every few minutes thereafter.
Once done baking allow cooling down slightly before transferring from pan onto wire rack after about fifteen minutes rest period inside pan itself—that initial resting allows steam escape preventing sogginess while also helping retain shape too when flipping over later on!
And there you have it—the anticipation builds as you witness each phase unfold toward something truly remarkable—a Red, White, and Blue Marble Cake unlike any other waiting eagerly for its final touches before serving up joyously among friends or family alike!
Storage and Enjoyment Tips for Your Red, White, and Blue Marble Cake
Ah, the moment has finally arrived! Your stunning Red, White, and Blue Marble Cake is out of the oven, golden brown and bursting with vibrant swirls that beckon to be devoured. Before you dive in, let’s chat about how to keep this beauty fresh so you can relish its moistness and flavors long after it’s baked. I promise you, knowing how to store it properly will enhance your enjoyment tenfold.
Storing Leftover Red, White, and Blue Marble Cake
To preserve the lusciousness of your cake, I recommend storing it in an airtight container at room temperature. This keeps the moisture locked in while preventing any unwanted dryness—a non-negotiable aspect of cake storage! If you think it won’t be enjoyed within a couple of days (though I doubt it!), you might consider keeping it in the fridge. Generally speaking, when stored in an airtight container at room temperature, your delightful creation will remain fresh for about three to four days. For those who want to take things up a notch, I suggest placing a slice of bread inside the container; trust me on this one! The bread will absorb excess moisture while keeping your cake perfectly soft and utterly intoxicating. When you take that first bite after a day or two? Oh my goodness—it’s still as moist as when it was fresh out of the oven! If you’re feeling a bit adventurous (and I know you are), reheat slices gently in the microwave for just a few seconds to restore that warm comfort.
Freezing for Later
Now let’s talk about freezing—oh yes, this is where life gets even more convenient! To freeze your Red, White, and Blue Marble Cake like a pro, simply wrap individual slices tightly in plastic wrap or aluminum foil. Placing them in a freezer-safe bag will add an extra layer of protection against freezer burn—this is crucial if you want to maintain that dreamy texture. When done right, your cake can last up to three months frozen without losing its charm. When you’re ready to indulge again (and who wouldn’t be?), simply move a slice from the freezer to the fridge overnight or pop it into the microwave for about 30 seconds directly from frozen. Imagine pulling out a slice for an impromptu gathering or just because; it’s like having a little piece of celebration waiting for you anytime! The convenience factor here is absolutely paramount—perfect for those busy weeks when you crave something sweet but don’t have time to bake.
Red, White, and Blue Marble Cake
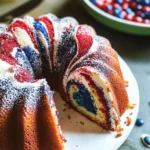
Get ready to celebrate with a scrumptious Red, White, and Blue Marble Cake! This delightful dessert is a true showstopper for any occasion, combining moist vanilla cake with vibrant swirls of red and blue. The light and fluffy texture makes it not just visually appealing but also a treat for your taste buds. Perfect for summer picnics, family gatherings, or festive celebrations, this cake brings joy and laughter to every table. With easy-to-follow instructions and simple ingredients, you can create this masterpiece in your own kitchen. Let’s dive into the recipe!
- Prep Time: 20 minutes
- Cook Time: 60 minutes
- Total Time: 1 hour 20 minutes
- Yield: Serves approximately 12 1x
- Category: Dessert
- Method: Baking
- Cuisine: American
Ingredients
- 1 cup (226g) unsalted butter, softened
- 2 ½ cups granulated sugar
- 1 tablespoon vanilla extract
- 2 large eggs (room temperature)
- 4 large egg whites (room temperature)
- 1 cup buttermilk (or milk + vinegar)
- 3 cups cake flour
- 2 teaspoons baking powder
- ½ teaspoon salt
- Red food coloring
- Blue food coloring
Instructions
- Preheat your oven to 350°F (175°C) and grease a 12-cup Bundt pan.
- In a stand mixer, cream together the butter and sugar until light and fluffy.
- Add the eggs one at a time, mixing well after each addition, then add vanilla.
- Mix in the buttermilk until fully combined.
- In another bowl, whisk together the cake flour, baking powder, and salt.
- Gradually add the dry ingredients to the wet mixture until just combined.
- Divide the batter into three bowls: one for vanilla, one for red coloring, and one for blue coloring.
- Layer scoops of batter into the prepared Bundt pan alternately to create swirls.
- Bake for 50-70 minutes or until a toothpick comes out clean.
- Allow cooling before inverting onto a wire rack.
Nutrition
- Serving Size: 1 slice (85g)
- Calories: 310
- Sugar: 30g
- Sodium: 200mg
- Fat: 15g
- Saturated Fat: 9g
- Unsaturated Fat: 5g
- Trans Fat: 0g
- Carbohydrates: 40g
- Fiber: 0g
- Protein: 3g
- Cholesterol: 70mg