Easy Chicken Burrito Casserole
There’s something truly magical about gathering around a warm, hearty meal that effortlessly brings people together. The aroma of spices dancing in the air, the vibrant colors of fresh ingredients, and the anticipation of a delicious dinner create an experience that’s far more than just food—it’s a celebration. Today, I want to share my absolute favorite recipe with you: Easy Chicken Burrito Casserole. This dish is not just a comforting blend of flavors; it’s a heartfelt embrace on a plate, rich with protein and nutrition, perfect for those busy weeknights when you need something quick yet utterly delightful. I promise you, one bite will transport you to your favorite little Mexican cantina!
The beauty of this casserole lies in its simplicity and versatility. It’s packed with everything you love about burritos but can be whipped up in one big baking dish, making cleanup a breeze! The way the layers meld together creates a symphony of flavors that will have everyone at the table asking for seconds—and maybe even thirds! Whether you’re hosting friends for game night or just treating your family to something special after a long day, this dish checks all the boxes. You’ll find it’s not only satisfying but also incredibly nourishing, striking that perfect balance between indulgence and health.
Easy Chicken Burrito Casserole: A Hearty Hug in Every Bite
Let’s dive into this culinary journey together! Cooking should be fun and exciting, and I want you to feel empowered as we prepare this Easy Chicken Burrito Casserole. This dish showcases vibrant ingredients that come together harmoniously to create comfort food at its finest. The combination of shredded chicken, beans, rice, and cheese creates an irresistible texture—think creamy meets crunchy—and every forkful is bursting with flavor. So roll up your sleeves and let’s get started!
Ingredients:
As we embark on this culinary journey, it’s essential to understand each ingredient’s role in our Easy Chicken Burrito Casserole. Each component adds depth and richness, making this dish truly extraordinary.
- 1/2 cup finely diced onion: Onions are the backbone of many savory dishes, providing a foundational flavor that’s both sweet and aromatic when cooked. Their natural sugars caramelize beautifully during baking, adding sweetness to balance out the spices in our casserole. When selecting onions, look for firm bulbs with papery skins—avoid any that feel soft or have dark spots.
- 1 red bell pepper (diced): Bright and cheerful red bell peppers don’t just add color; they also contribute a subtle sweetness that complements the other ingredients perfectly. Their crisp texture contrasts beautifully with the softness of the rice and beans. Opt for peppers that are firm to touch with shiny skin; these are signs of freshness.
- 1 cup uncooked parboiled long-grain brown rice: This type of rice is partially cooked before packaging, allowing it to retain its nutrients while still cooking up fluffy and tender in our casserole. Brown rice offers a nutty flavor and chewy texture that enriches our dish nutritionally as well as taste-wise. If you prefer white rice for quicker cooking time, it can be used instead—but do keep an eye on liquid levels since it cooks faster.
- 3 tablespoons fajita seasoning: Whether homemade or store-bought, fajita seasoning brings bold, zesty flavors reminiscent of sizzling fajitas right into our casserole! It typically includes chili powder, cumin, garlic powder, and other spices that elevate each bite into something spectacular. If you’re feeling adventurous (and I hope you are!), try blending your own mix—it’s super easy and allows you to customize it to your taste!
- 1/8 teaspoon cayenne pepper (optional): This pinch of heat is entirely optional but offers an exciting kick if you’re feeling daring! Cayenne adds depth without overwhelming the other flavors; it’s all about finding that perfect balance according to your preference.
- 1 cup corn kernels (frozen): Sweet corn brings a delightful burst of sweetness coupled with a bit of crunch in every mouthful. It also adds vibrant color—because who doesn’t love a splash of sunshine on their plate? Frozen corn is incredibly convenient; just toss it in straight from the bag without thawing!
- 1 14-ounce can low sodium black beans (drained and rinsed): These nutritious gems are not only rich in protein but also provide fiber which helps make this casserole hearty and filling. Rinsing them removes extra sodium while ensuring they blend seamlessly with our other ingredients.
- 5 cups shredded chicken: Shredded chicken acts as the star protein in this delightful dish! Using pre-cooked chicken saves time—think rotisserie chicken or leftovers from another meal—allowing us to focus on creating layers of flavor rather than cooking from scratch.
- 3 cups reduced sodium chicken broth: Broth infuses moisture into our casserole while enhancing all those delicious flavors we’re layering together! Using reduced sodium options allows us more control over saltiness without sacrificing taste.
- 1 4-ounce can mild green chilies: These little cans pack a punch! Mild green chilies bring warmth without being too spicy—they add complexity that works beautifully alongside our fajita seasoning.
- 1 tablespoon olive oil: Extra virgin olive oil is my go-to for both flavor and health benefits—it helps bind everything together while adding richness that elevates our casserole.
- 2 tablespoons tomato paste: Tomato paste contributes an intense tomato flavor while adding necessary moisture to ensure everything stays nice and juicy during baking. It’s like liquid gold for our casserole!
- 1 1/4 cups shredded Monterey Jack cheese: Finally—the cheese! It melts into gooey perfection atop our casserole creating that wonderful cheesy crust we all crave when thinking about comfort food. Look for good quality cheese for best melting results—it makes all the difference!
Equipment You’ll Need
Having the right tools is essential for making this Easy Chicken Burrito Casserole a smooth experience filled with joy rather than frustration. While they may not be ingredients themselves, these kitchen companions will help ensure your creation turns out perfectly every time!
- 9×13 inch baking dish: This size is ideal for holding all those delicious layers we’re assembling! A glass or ceramic dish retains heat well during baking—a crucial factor for even cooking throughout our casserole.
- Mixing bowls: You’ll need some mixing bowls for combining ingredients before they make their way into the baking dish! A set with various sizes is useful—you’ll appreciate having smaller bowls handy when prepping spices or sauces separately.
- Measuring cups & spoons: Precision matters when it comes to creating balanced flavors in any recipe—including ours! Accurate measuring tools ensure consistency so every batch tastes just as good as the last one.
- Whisk or wooden spoon: Either tool works great for mixing up sauces or stirring ingredients together! A whisk helps incorporate air if needed (like when mixing sauces), while wooden spoons are perfect for combining heartier ingredients like rice and beans.
Now that we’ve gathered all our beautiful ingredients and tools ready at hand let’s dive into preparing our Easy Chicken Burrito Casserole!
Step 1: Prepping Your Flavor Base
Before anything else happens in this delightful culinary dance we’re doing, let’s get things started by preheating your oven to 400°F (200°C). This step is absolutely paramount because we want everything hot from start to finish—it helps cook evenly throughout without losing moisture! Next up—grab your trusty 9×13 inch baking dish; let’s layer down some flavor magic by adding finely diced onion along with diced red bell pepper directly into there along with uncooked parboiled brown rice followed by fajita seasoning spices (don’t forget cayenne if using!). Take your time here as properly combining these elements ensures those lovely flavors meld beautifully during cooking—trust me on this!
Step 2: Creating Liquid Gold
In another bowl or measuring cup (you know those mixing bowls come handy!), whisk together three cups of reduced-sodium chicken broth along with green chilies’ contents plus tomato paste drizzled generously over everything combined with olive oil until well mixed—it should resemble liquid gold shimmering under light! Why go through this trouble? Well…the broth brings moisture while binding all flavors together perfectly inside each layer within casserole; think lusciousness beyond compare!
Step 3: Marrying All Components
Once you’ve got both mixtures prepared separately—that’s where true magic happens next; pour chicken broth mixture over veggie-rice blend ensuring every bit gets covered evenly! Then give it an affectionate stir—the kind where nothing gets left behind—so everything commingles delightfully before introducing shredded chicken alongside drained black beans plus frozen corn kernels ensuring maximum satisfaction comes from every spoonful later down line…
Step 4: Baking Away!
Now comes perhaps my favorite part—the patience aspect involved here feels simultaneously exhilarating yet nerve-wracking… Cover tightly using aluminum foil resting gently atop baking dish then transfer boldly into preheated oven awaiting transformation over next sixty-five-to-seventy minutes until liquids absorb completely leaving behind lusciousness waiting patiently beneath surface… Don’t rush this step either—I promise you won’t regret letting those flavors develop further while aromas waft through kitchen inviting everyone nearby closer toward bubbly goodness ahead…
Stay tuned as we prepare even more steps leading us toward glorious completion soon enough—this journey has only begun!
Step 5: The Heart of the Dish – Baking to Perfection
Once you’ve assembled all those vibrant ingredients in your baking dish, it’s time to cover it with aluminum foil and send it into the oven for a good long bake. This step is absolutely crucial because it allows the rice to absorb all the delicious flavors from the broth and seasonings, transforming simple grains into a flavorful base that holds this entire casserole together. As you cover the dish tightly, think of it as creating a cozy little steam bath for your ingredients. The moisture trapped inside will ensure that everything cooks evenly and prevents any dryness—nobody wants a dry burrito casserole!
Set your oven temperature to 400°F (that’s about 200°C for my friends across the pond) and let that casserole work its magic for 65-70 minutes. During this time, the rice will become tender, soaking up every ounce of flavor from that rich chicken broth while melding beautifully with the spices and veggies. Keep an ear out; you should hear a gentle bubbling as things cook away. When you finally pull it out of the oven, check to see if most of the liquid has been absorbed and that there are no crunchy bits of rice left. If there’s still some liquid present, just give it a few extra minutes; trust me, it’s worth waiting for that perfect consistency.
Step 6: The Golden Crown – Adding Cheese
Now comes one of my favorite parts—the cheese! After carefully removing the foil, which may release a fragrant steam filled with all those wonderful aromas, your casserole should look like a bubbling treasure trove. It’s time to sprinkle on that shredded Monterey Jack cheese generously over the top. This step is not just about taste but also about texture—when melted, this cheese turns into a creamy layer that adds richness and an utterly intoxicating gooeyness.
Return your baking dish back to the oven for an additional 5-10 minutes. Watch closely during these last moments; you want that cheese to melt completely and develop just a hint of golden-brown color—a clear sign that it’s reached its peak cheesy goodness! This melty layer not only enhances flavor but also creates a beautiful visual presentation that makes everyone at the table eager to dig in. Letting it melt just enough is key here; too little time results in unmelted cheese, while too much can lead to an overly browned crust that might not be as delightful. So keep an eye on it—this is where patience pays off!
Step 7: The Essential Rest – Allowing Flavors to Marry
Once you’ve got that beautiful casserole out of the oven and set aside for its final resting period of about 5-10 minutes, I can’t stress enough how important this step is! Just like any great dish needs time to cool slightly before serving, allowing this Easy Chicken Burrito Casserole some moments to rest lets all those incredible flavors marry together beautifully. During this short interval, you’ll notice how everything settles down; sauces thicken slightly while the textures soften into harmony.
This resting period also aids in slicing and serving—I promise you won’t have a runaway mess when scooping portions onto plates! Instead, you’ll achieve clean edges with each serving, showcasing those layers of chicken, beans, rice, and gooey cheese without losing any precious components along the way. Plus, letting it cool for just a few moments means you won’t burn your tongue when indulging in this comforting meal straight from the oven!
Step 8: The Grand Finale – Garnishing Your Masterpiece
Finally, we arrive at one of my favorite parts—the garnishing! As you prepare to serve your Easy Chicken Burrito Casserole, take a moment to think about how you can elevate this dish even further with some fresh toppings. A sprinkle of freshly chopped cilantro adds a burst of freshness that contrasts beautifully with all those rich flavors beneath. If you’re feeling adventurous (and I hope you are!), adding thinly sliced green onions brings another layer of brightness while adding crunch.
And let’s not forget salsa! A dollop on top or served on the side brings acidity and zing—a perfect counterbalance to the richness of cheese and chicken. For those who adore creamy textures (who doesn’t?), consider adding sliced avocado or guacamole as well; their buttery consistency complements each bite wonderfully. Remember that these last touches aren’t just decorative—they’re transformative! Each garnish contributes additional layers of flavor and texture that make every forkful feel like an extraordinary experience.
Once everything is beautifully plated up with vibrant colors dancing on your dinner table, take a moment before diving in—appreciate what you’ve created! This Easy Chicken Burrito Casserole isn’t merely food; it’s comfort on a plate and love baked into every layer. Enjoy sharing this delicious meal with family or friends; I promise they will be asking for seconds…or maybe even thirds!
Storage and Enjoyment Tips for Your Easy Chicken Burrito Casserole
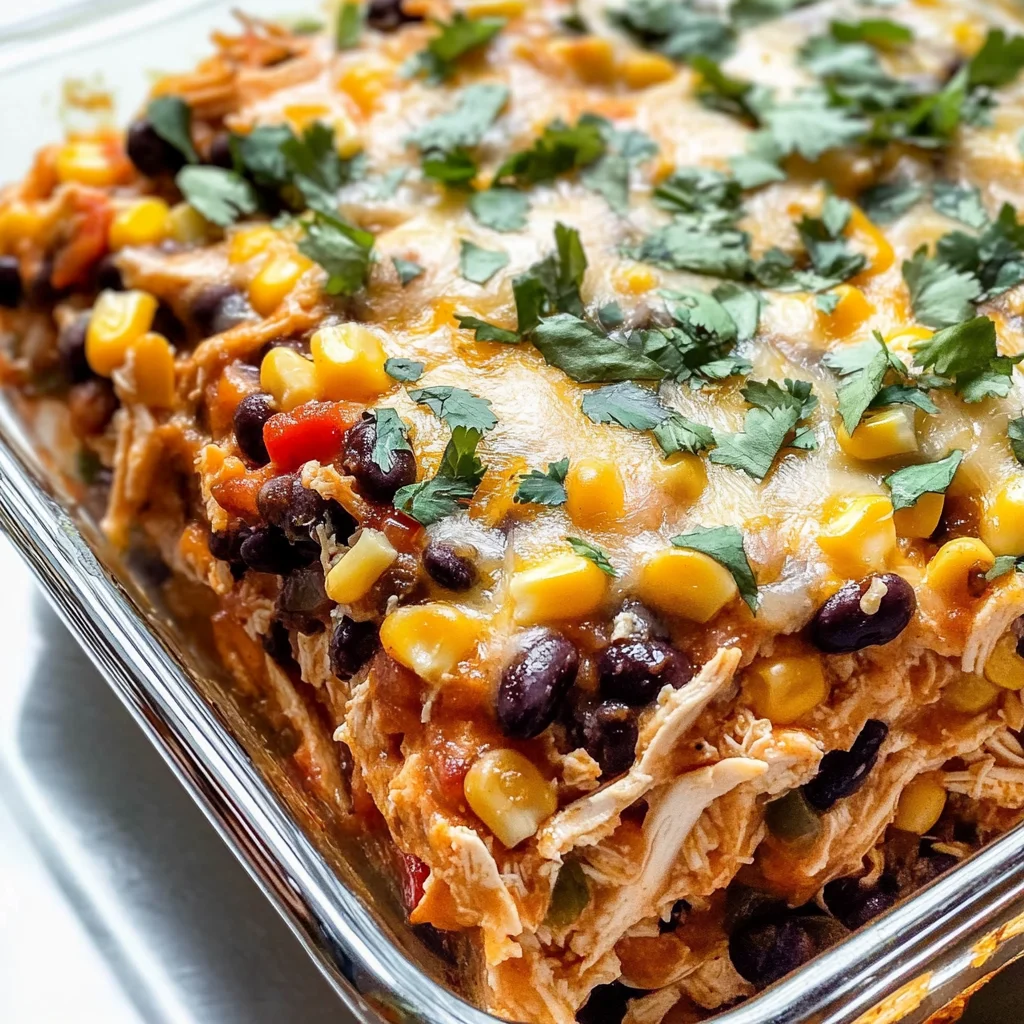
Now that your Easy Chicken Burrito Casserole has emerged from the oven, bubbling and golden atop with melted cheese, it’s time to dig in! But before you dive into this heavenly dish, let’s talk about how to store any leftovers (if there happen to be any—trust me, this casserole is a crowd-pleaser). The beauty of this recipe lies not only in its deliciousness but also in its versatility for meal planning throughout the week.
Storing Leftover Easy Chicken Burrito Casserole
To keep your casserole fresh and delightful for days to come, transfer any leftovers into an airtight container. Glass containers work wonderfully as they help maintain moisture without absorbing flavors. If you’re planning to enjoy it within 3-4 days, you’re all set! For optimal quality, though, consider storing it in the fridge—keeping your casserole at the right temperature is crucial to preserving that symphony of flavors you’ve created. If you notice a little dryness upon reheating, don’t fret! Just add a splash of chicken broth or water before warming it up; this will reintroduce some much-needed moisture. The flavors deepen and meld together beautifully after resting in the fridge, creating an even more satisfying experience when you reheat it for lunch or dinner.
Freezing Easy Chicken Burrito Casserole for Later
If you’ve got a busy week ahead or simply want to prepare a meal for another day, freezing your Easy Chicken Burrito Casserole is an excellent option! To do so properly, allow the casserole to cool completely before wrapping it tightly with plastic wrap or aluminum foil; this will lock in freshness and prevent freezer burn. It can stay frozen for up to three months—just imagine having this flavorful dish ready whenever those cravings hit! When you’re ready to enjoy it again, simply let it thaw overnight in the fridge or pop it straight into the oven from frozen (just add a bit more time). This convenience factor means less stress during hectic weeknights while still treating yourself and your loved ones to something truly extraordinary!
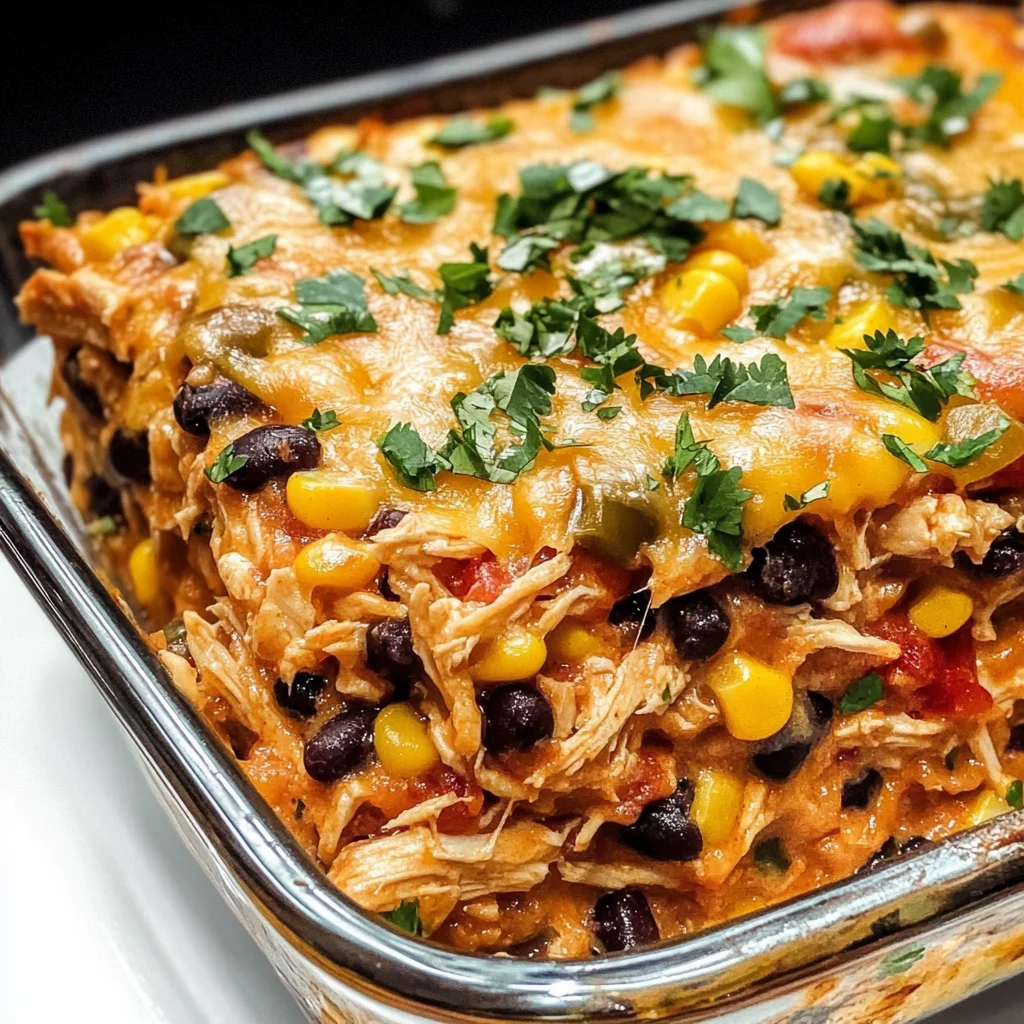
Easy Chicken Burrito Casserole

Gather around the dinner table and indulge in a comforting dish that brings the vibrant flavors of Mexican cuisine right to your home. Our Easy Chicken Burrito Casserole is a delightful blend of shredded chicken, black beans, corn, and melty cheese, all layered with fluffy brown rice and seasoned to perfection. This one-dish wonder is not only easy to prepare but also makes cleanup a breeze—ideal for those busy weeknights when you crave something hearty yet wholesome. With every bite, you’ll relish the warmth and richness reminiscent of your favorite burrito, making this casserole a new family favorite. Serve it up with fresh toppings like cilantro or avocado for an added touch of freshness.
- Prep Time: 15 minutes
- Cook Time: 70 minutes
- Total Time: 1 hour 25 minutes
- Yield: Serves approximately 8
- Category: Main
- Method: Baking
- Cuisine: Mexican
Ingredients
- 1/2 cup finely diced onion
- 1 diced red bell pepper
- 1 cup uncooked parboiled long-grain brown rice
- 3 tablespoons fajita seasoning
- 1 cup frozen corn kernels
- 1 can (14 ounces) low sodium black beans, drained and rinsed
- 5 cups shredded chicken
- 3 cups reduced sodium chicken broth
- 1 can (4 ounces) mild green chilies
- 1 tablespoon olive oil
- 2 tablespoons tomato paste
- 1 1/4 cups shredded Monterey Jack cheese
Instructions
- Preheat your oven to 400°F (200°C). In a large mixing bowl, combine onion, red bell pepper, brown rice, fajita seasoning, and cayenne pepper (if using).
- In another bowl, whisk together chicken broth, green chilies (with juices), tomato paste, and olive oil.
- Pour the liquid mixture over the rice mixture and stir until well combined. Add in the shredded chicken and black beans; mix gently to combine.
- Transfer everything to a greased 9×13 inch baking dish and spread evenly. Cover tightly with aluminum foil.
- Bake for 65-70 minutes until most liquid is absorbed and rice is tender. Remove foil, sprinkle cheese on top, and bake for an additional 5-10 minutes until cheese is melted and bubbly.
- Let the casserole rest for 5-10 minutes before serving. Garnish with fresh cilantro or green onions if desired.
Nutrition
- Serving Size: 1 cup (240g)
- Calories: 365
- Sugar: 3g
- Sodium: 480mg
- Fat: 11g
- Saturated Fat: 4g
- Unsaturated Fat: 7g
- Trans Fat: 0g
- Carbohydrates: 43g
- Fiber: 6g
- Protein: 28g
- Cholesterol: 80mg