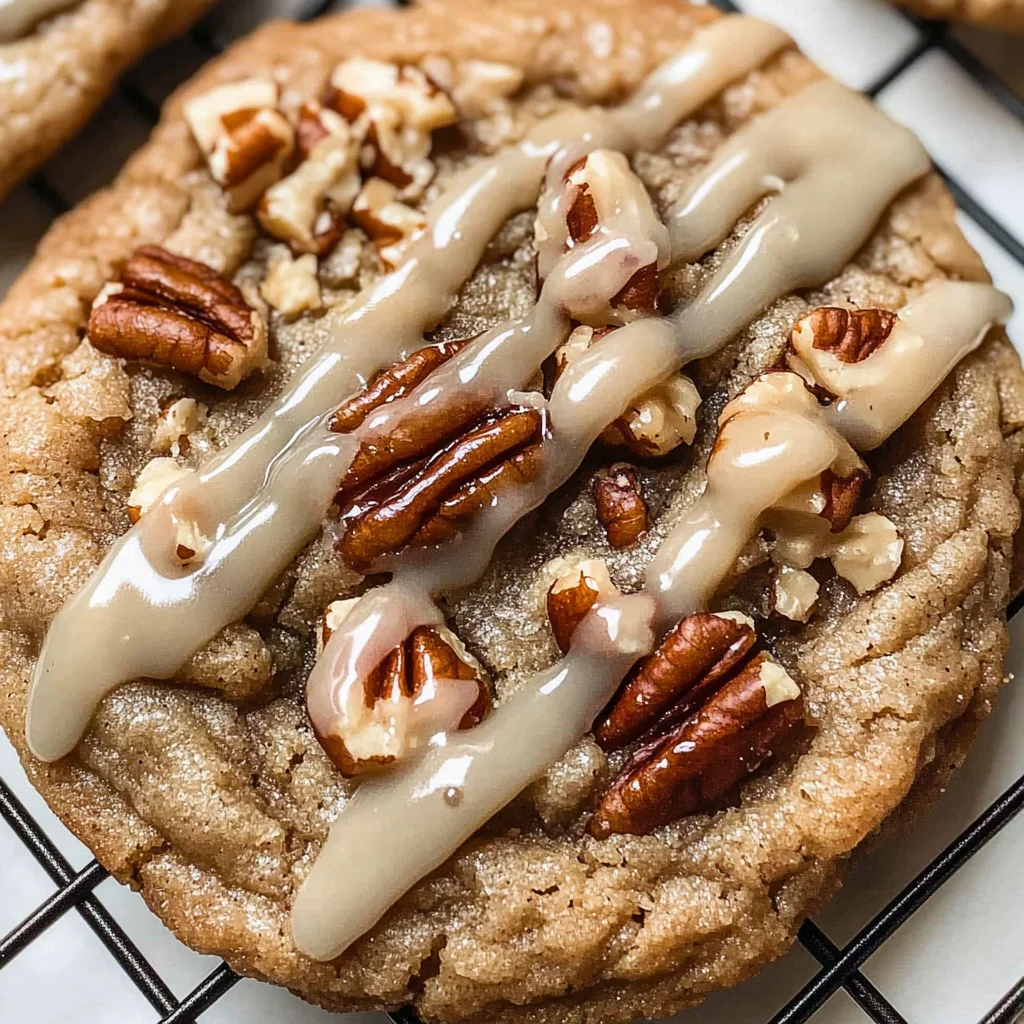
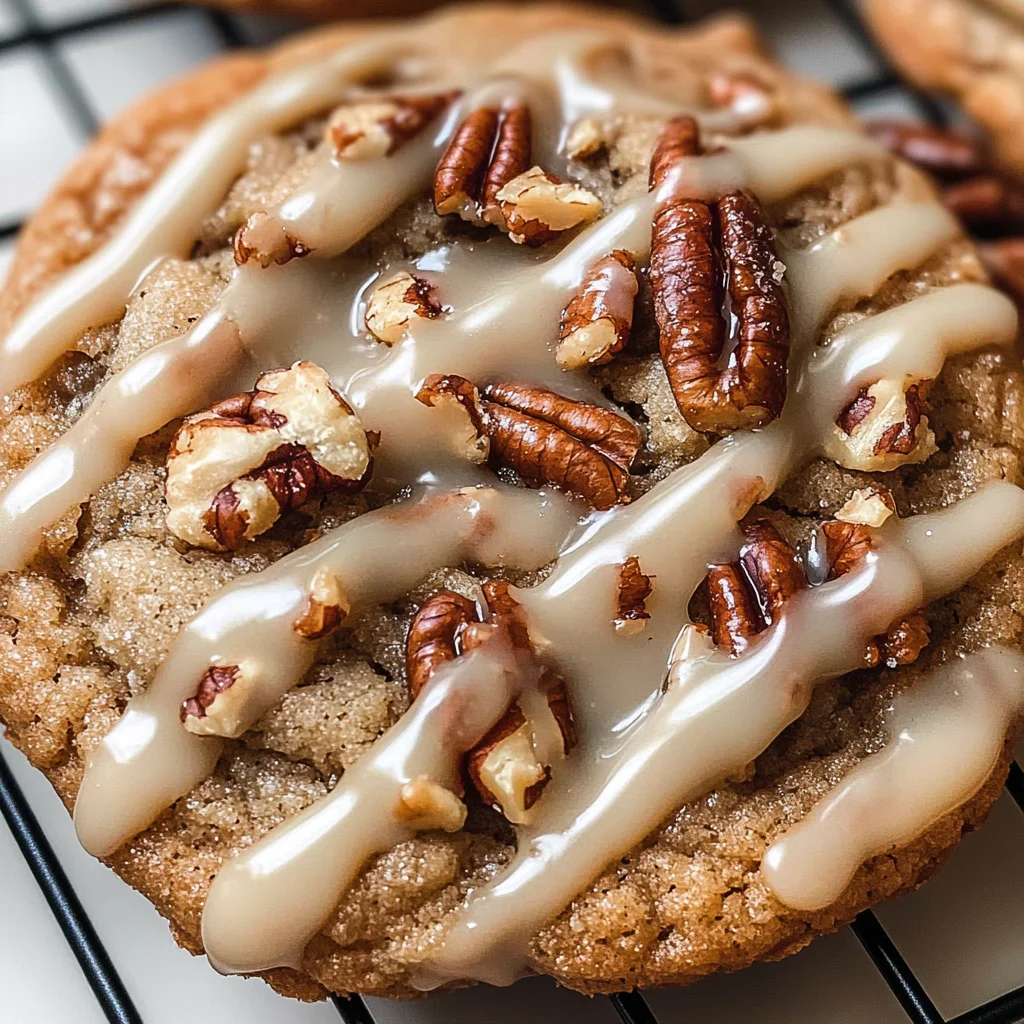
Maple Pecan Cookies
There’s something truly magical about the aroma of warm cookies wafting through the kitchen, isn’t there? These Maple Pecan Cookies are not just a delightful treat; they encapsulate the essence of autumn, bringing together the rich flavors of brown butter and maple syrup in a way that feels like a warm hug on a chilly day. Each bite reveals a perfect balance between a crispy exterior and a soft, chewy center, with toasted pecans adding that delightful crunch. It’s as if every cookie whispers secrets from generations past while inviting you to create new memories around the table. I promise you this: once you take your first bite, you’ll find it hard to resist going back for another.
As we embark on this culinary adventure together, let’s celebrate the simple joys of baking—where ingredients transform under our hands into something utterly enchanting. You see, these cookies hold a special place in my heart; they remind me of cozy family gatherings, laughter echoing in the background, and the joy of sharing something homemade with loved ones. The blend of maple syrup and toasted pecans sings with nostalgia, evoking memories of my grandmother’s kitchen during those crisp autumn afternoons. So grab your apron and let’s dive into this extraordinary experience that is nothing short of spectacular!
Maple Pecan Cookies: A Taste of Autumn Bliss
Welcome to your new favorite cookie recipe! These Maple Pecan Cookies are not only incredibly delicious but also surprisingly easy to make. They are perfect for sharing at gatherings or simply enjoying with a cup of coffee on a quiet afternoon. Trust me when I say this—once you get a taste of these cookies, you’ll want to whip up batch after batch to savor that delightful flavor all season long.
Ingredients:
Let’s gather our ingredients! Each one plays an essential role in crafting these delightful Maple Pecan Cookies.
- 1 cup + 2 tbsp unsalted butter (browned and cooled). Browning the butter is where the magic begins. This step transforms ordinary butter into liquid gold—rich, nutty, and utterly intoxicating. As it cooks over medium heat, watch as it foams and then turns amber, creating those beautiful brown bits at the bottom that are packed with flavor. Allowing it to cool before using ensures it won’t cook the eggs when we mix everything together; this is crucial for achieving that perfect texture in our cookies.
- 1 1/2 cups brown sugar (dark or light). Brown sugar adds depth and moisture to our cookies thanks to its molasses content. Whether you choose dark or light depends on how rich you want your cookies; dark brown sugar will impart a deeper flavor while light brown will yield a more subtle sweetness. Either way, the caramel notes will shine through beautifully when combined with our other ingredients.
- 1/4 cup maple syrup. This liquid sweetener enhances the cookie’s natural sweetness while complementing the nutty pecans perfectly. Look for pure maple syrup rather than imitation for an authentic taste that speaks volumes about quality—this small detail elevates our cookies from ordinary to extraordinary.
- 1 large egg (room temperature). Room temperature eggs blend better into batters compared to cold ones, helping achieve an even consistency throughout our dough. Eggs are also vital for binding our ingredients together; they provide structure and moisture, contributing significantly to those soft centers we crave.
- 1 egg yolk (room temperature). Adding an extra yolk enriches the dough with fat, which results in a chewier texture—a non-negotiable quality in great cookies! Plus, it brings additional richness that complements our brown butter beautifully.
- 1 tsp vanilla extract. This classic ingredient adds warmth and depth to baked goods. Vanilla works its charm behind the scenes—it enhances all other flavors without being overpowering. Opt for pure vanilla extract whenever possible; its complex aroma is unparalleled compared to synthetic versions.
- 1 tsp maple extract (optional). If you’re feeling adventurous—or if you simply adore maple flavor—this optional addition can intensify those sweet notes even further. Just be cautious though; too much can overwhelm other flavors, so start small!
- 2 1/2 cups all-purpose flour. Flour provides structure to our cookies by forming gluten when mixed with wet ingredients—a process that gives our cookies their shape while still allowing them to remain delightfully tender.
- 3/4 tsp baking soda. This leavening agent is responsible for giving our cookies lift during baking; it reacts with acidic components (like brown sugar) to create carbon dioxide bubbles that help them rise beautifully without becoming cakey.
- 1/2 tsp kosher salt. A pinch of salt is absolutely paramount! It balances out sweetness and enhances overall flavor, ensuring each bite is deliciously satisfying rather than cloyingly sweet.
- 1 tsp ground cinnamon. Cinnamon adds warmth and depth—think cozy autumn mornings! Its fragrant aroma envelops your kitchen as these cookies bake; there’s something deeply comforting about this spice that just feels right during fall.
- 1 cup chopped pecans (lightly toasted, plus more for topping cookies). Toasting nuts before adding them releases their natural oils and amplifies their flavor—a step I never skip! Pecans bring crunchiness alongside creamy richness that pairs exquisitely with maple flavors.
- 2 tbsp unsalted butter (melted). We’ll use this melted butter in our glaze later on—its creamy richness will help create that luscious finish we desire atop each cookie!
- 1/3 cup maple syrup (for glaze). Just like earlier in the dough itself, incorporating pure maple syrup here ensures every bite bursts with irresistible sweetness—this glaze takes these already amazing cookies over-the-top!
- 1/2 tsp maple extract (optional). Again optional but recommended if you’re craving an extra punch of maple goodness!
- 3/4 cup powdered sugar. Powders easily dissolve into liquids which makes it perfect for creating smooth glazes; adding sweetness without any graininess results in velvety perfection on top of each cookie!
Equipment You’ll Need:
Having the right tools makes baking not only easier but truly enjoyable! Think of these items as partners in your culinary journey—they’ll help turn your preparation into something wonderful!
- Mixing bowls – A set of varying sizes will serve you well here! Mixing bowls allow us space for assembling ingredients comfortably without fear of spills or messes. Look for sturdy glass or metal varieties since they withstand heat well if necessary during cooking processes later on!
- Whisk – This tool is essential for combining dry ingredients uniformly while ensuring no lumps remain behind before adding them into wet mixtures—it helps achieve proper incorporation effortlessly!
- Rubber spatula – Perfectly suited for folding dry ingredients into wet mixes gently without deflating air bubbles formed during creaming phases earlier—the flexibility allows us precision control needed while mixing everything harmoniously together!
- Parchment paper – Using parchment paper saves time cleaning up afterward plus prevents sticking issues when transferring freshly baked goods onto cooling racks post-baking session—it’s almost like having an extra pair of hands helping out!
With every ingredient perfectly measured out and all tools assembled neatly at hand…
Preparing the Maple Pecan Cookies
Step 1: The Art of Browning Butter
To begin this beautiful journey toward cookie bliss, let’s focus on browning our butter—a simple yet transformative technique that elevates these Maple Pecan Cookies from ordinary to extraordinary! Place your unsalted butter in a small saucepan over medium heat; watch closely as it melts down into bubbling foam before gradually transitioning through various golden hues until reaching its final amber shade—this process might take around 5–8 minutes depending upon stove settings used so don’t rush this step! Stir frequently while keeping an eye out for little brown specks forming at the bottom—that’s where all those rich flavors linger waiting patiently until added directly into dough later on once cooled down sufficiently after about half-an-hour resting time allowed post-removal from heat source.
Step 2: Toasting Those Pecans
Now let’s move onto prepping those luscious pecans—they deserve some love too! In a dry skillet over medium heat (no oil necessary!), toss your chopped pecans around gently using a wooden spoon or spatula so they toast evenly without burning—this should take anywhere between 5–7 minutes max until fragrant aromas fill your kitchen air inviting everyone nearby closer in anticipation! Once they’ve taken on deep golden tones visually evident against their original color palette—you’ll know they’re ready! Remember: burnt nuts ruin everything so keep vigilant eyes peeled throughout this entire process!
Step 3: Mixing Wet Ingredients Together
Once both browning & cooling processes complete successfully along with toasted nut preparation finished off—we’re ready now dive headfirst into combining everything together harmoniously within one bowl! Start by pouring cooled browned butter into large mixing bowl followed by generous amounts dark/light brown sugar along with maple syrup then whisk vigorously until combined well—this combination creates initial sweetness base layer necessary building blocks upon which entire cookie foundation built upon rests firmly structured overall texture-wise later down road ahead while ensuring smooth integration achieved effortlessly throughout mixture itself too… Now crack open that room-temperature egg plus yolk straightaway adding both directly alongside flavorful extracts chosen earlier then continue mixing thoroughly till fully incorporated bouncing back unified consistency achieved showcasing glossy sheen finish visible just beneath surface layer reminding us how important getting correct ratios balanced properly plays decisive role shaping outcomes seen finally once baked off during final stages ahead soon thereafter!
Step 4: Dry Ingredients Meet Their Match
In another bowl whisk together flour alongside baking soda & kosher salt before slowly introducing these dry elements gradually into previously prepared wet counterpart—we want every last bit blended evenly without leaving behind any stubborn pockets hiding inside corners lurking quietly waiting emerge unexpectedly later spoiling overall texture integrity desired meanwhile folding gently ensures no excess air lost either keeping lightness intact throughout dough formation process essential maintaining softness chewy centers promised initially… Finally sprinkle freshly toasted/chopped-up pecans directly atop then fold through carefully avoiding excessive stirring which might deflate air pockets built up previously causing undesired flatness instead aiming preserve fluffiness achieved thus far making certain delicious crunch remains intact amidst soft chewiness once baked off shortly thereafter!
I can’t wait for you to experience how wonderfully these Maple Pecan Cookies come together—their homey aroma fills every nook as they bake away filling hearts & bellies alike creating lasting memories shared amongst family friends alike! Stay tuned as we continue exploring steps leading towards ultimate indulgence awaiting beyond next few moments ahead…
Baking Your Perfect Maple Pecan Cookies
Step 5: The Art of Combining Ingredients
Now that we have our cooled brown butter, it’s time to mix it with the sugars and that delightful maple syrup. In your large mixing bowl, combine the cooled brown butter, 1 ½ cups of brown sugar, and ¼ cup of maple syrup. It’s like creating a liquid gold mixture that will become the heart of our cookies! Mix these ingredients together with a spatula or a hand mixer – I promise you, this is where the magic begins. The warmth from the brown butter will melt into the sugars, making them beautifully glossy and slightly caramelized. This step is crucial; it not only integrates flavors but also helps to dissolve the sugar for a smoother texture in your cookies.
Once you achieve that tempting consistency, it’s time to add in one whole egg, one extra egg yolk (yes, we want all that richness!), and both extracts—1 teaspoon each of vanilla and maple extract (if you’re feeling adventurous). Mixing these wet ingredients until they are fully combined is vital because it ensures an even distribution of flavors throughout your cookie dough. Don’t rush this step; take a moment to watch how those ingredients meld together into a luscious batter that’s incredibly inviting to taste. You’ll notice the texture becoming creamy and fragrant – just wait until you smell that intoxicating blend!
Step 6: Folding in Dry Ingredients
In a separate bowl, whisk together 2 ½ cups of all-purpose flour, ¾ teaspoon of baking soda, ½ teaspoon of kosher salt, and 1 teaspoon of ground cinnamon. This particular combination not only provides structure but also infuses our cookies with warm spices that echo fall’s embrace. The baking soda is non-negotiable here; it’s what gives our cookies their lift and chewy texture while balancing out the sweetness from the sugars. Cinnamon brings an aromatic warmth that’s absolutely comforting and ties everything back to those cozy autumn days we’ve all come to love so dearly.
Now comes the gentle yet essential act of folding these dry ingredients into your wet mixture. It’s important to do this gradually—start by adding about half of your flour mixture at once and using a spatula or wooden spoon to carefully incorporate it into the wet ingredients. Folding is a technique that preserves air bubbles created during mixing; this keeps our cookies airy rather than dense. Trust me on this: overmixing can lead to tough cookies instead of the tender morsels we’re aiming for! Once you’ve incorporated all the dry ingredients but still see some streaks of flour, gently fold in those heavenly chopped pecans which bring in such delightful crunchiness and nutty goodness.
Step 7: Chilling for Perfection
Now here comes one of my favorite—and most crucial—steps: chilling your cookie dough! Using an ice cream scoop (about 1 ½ oz), portion out your dough onto a cookie sheet lined with parchment paper. Don’t worry if they look like little mounds; we’re going to pop them into the refrigerator for at least one hour but ideally up to two hours. Why chill? Well, my friends, this phase allows the fats in our dough to solidify again after being warmed by mixing. It not only makes handling easier but also significantly improves flavor as it allows for hydration—the flour absorbs moisture from the wet components over time, leading to richer taste and better texture.
While you’re waiting patiently (and trust me—I know it’s hard!), think about how much better these cookies will be for having taken this extra time. They’ll spread less when baked, resulting in wonderfully thick cookies with crisp edges and soft centers that are utterly divine. So grab yourself a cup of tea or coffee, enjoy this moment—you deserve it!
Step 8: Baking Your Cookies
Preheat your oven to a comforting temperature of 350°F (175°C) while those delightful mounds are chilling away in your fridge. Once ready to bake, arrange those chilled cookie scoops on parchment-lined sheets—make sure they’re about two inches apart because they will indeed spread as they bake! Aim for six cookies per sheet so they have space to breathe while transforming into golden perfection.
Bake them for approximately 11-12 minutes until the edges are lightly golden but still soft in the center—the key here is watching for those tiny visual cues! When you pull them out of the oven, they should look puffed up; they’ll deflate slightly as they cool down creating that perfectly chewy center we’re all dreaming about. If you’d like perfectly round cookies (because who doesn’t?), grab a round cookie cutter just slightly larger than your baked goods and gently scoot them around right after taking them out of the oven. It’s such an easy trick that makes them look professionally made!
Allow these beauties to cool on the pan for about five minutes before transferring them onto a wire rack—the cooling process lets them firm up just enough so they won’t fall apart when you pick them up.
Final Touches: The Irresistible Maple Glaze
Step 9: Drizzling on That Irresistible Maple Glaze
As if these Maple Pecan Cookies weren’t already extraordinary enough on their own, let’s elevate them further with a luscious maple glaze! In a small saucepan over low heat, melt another two tablespoons of unsalted butter—watch as it gently liquefies into something rich and inviting before adding in one-third cup of maple syrup along with optional maple extract for an extra punch (or stick with just vanilla if that’s what you prefer). Stir in three-quarters cup of powdered sugar until smooth; this simple process transforms ordinary sweetness into something truly magical.
Once everything is well mixed—like silky liquid sunshine—it’s time for drizzling! Using a spoon or small whisk, gracefully drizzle this glaze over each cooled cookie while they sit on your wire rack beneath you. Each swirl adds not just flavor but also an enchanting sheen reminiscent of golden autumn leaves shimmering under sunlight! Allowing these cookies some time after glazing helps set everything nicely before diving in but oh boy…the anticipation builds as you take in every aromatic note wafting through your kitchen!
And there you have it—your masterpiece Maple Pecan Cookies are ready to be devoured! Share them with family or friends or keep them close just for yourself; either way, I promise you these delicious morsels will be met with delight! Enjoy every crispy-chewy bite filled with warmth and sweetness—a true celebration of flavor crafted lovingly by your hands.
Storage and Enjoyment Tips for Your Maple Pecan Cookies
Now that your kitchen is filled with the intoxicating aroma of freshly baked Maple Pecan Cookies, it’s time to embrace the joy of sharing (or savoring them all by yourself—it’s entirely up to you!). These delightful morsels are not only a treat for your taste buds but also a testament to the fabulous flavors of autumn. But what happens when you have a few left over? Fear not! I’ve got you covered with some simple storage tips to keep these cookies as scrumptious as they were on day one.
Storing Leftover Maple Pecan Cookies
To keep your Maple Pecan Cookies fresh and bursting with flavor, store them in an airtight container at room temperature. This is absolutely crucial because exposure to air can lead to dryness, and we don’t want that for our delightful treats! If properly stored, they can last up to a week. For those who want to maintain their soft and chewy texture, consider adding a slice of bread into the container; this little trick keeps moisture levels just right! And trust me—these cookies only get better with time as the flavors meld together beautifully. If you find yourself with any leftover cookies (which I doubt you will!), simply reheat them in the oven for a minute or two before serving; this warms them up and restores that melt-in-your-mouth goodness!
Freezing Cookie Dough for Later
If you’re anything like me and often feel the urge to bake but don’t always have the time, freezing your cookie dough is a game-changer! To freeze your Maple Pecan Cookie dough, scoop it onto a parchment-lined sheet pan and flash freeze it until solid. Then, transfer the frozen dough balls into a zip-top freezer bag or an airtight container. They’ll keep beautifully frozen for up to three months! On those days when you’re craving something sweet but don’t want to go through the entire baking process, simply take out how many cookies you need, place them on a baking sheet while still frozen, and bake straight from the freezer—just add an extra minute or two to the baking time. The convenience of this method means you can enjoy fresh-baked cookies whenever your heart desires!
With these storage tips in hand, there’s no excuse not to indulge in these heavenly treats at any moment!
Maple Pecan Cookies

Maple Pecan Cookies are a delightful ode to autumn, combining the rich flavors of brown butter and maple syrup for an irresistible treat. Each cookie features a crispy exterior that gives way to a soft, chewy center, enriched by lightly toasted pecans that add a satisfying crunch. These cookies are perfect for cozy gatherings or enjoying with your favorite warm beverage. The enchanting aroma fills your kitchen, creating an atmosphere of warmth and nostalgia. With simple ingredients and straightforward steps, this recipe makes it easy to embrace the joy of baking while crafting delicious memories.
- Prep Time: 20 minutes
- Cook Time: 12 minutes
- Total Time: 32 minutes
- Yield: Approximately 24 cookies 1x
- Category: Dessert
- Method: Baking
- Cuisine: American
Ingredients
- 1 cup + 2 tbsp unsalted butter (browned and cooled)
- 1 1/2 cups brown sugar (dark or light)
- 1/4 cup pure maple syrup
- 1 large egg (room temperature)
- 1 egg yolk (room temperature)
- 2 1/2 cups all-purpose flour
- 3/4 tsp baking soda
- 1/2 tsp kosher salt
- 1 tsp ground cinnamon
- 1 cup chopped pecans (lightly toasted)
Instructions
- Brown the butter in a saucepan over medium heat until golden and fragrant; cool.
- In a mixing bowl, combine cooled browned butter, brown sugar, and maple syrup; mix until smooth.
- Add the egg, egg yolk, and extracts; mix until well combined.
- In another bowl, whisk together flour, baking soda, salt, and cinnamon.
- Gradually fold dry ingredients into the wet mixture; gently incorporate the toasted pecans.
- Chill dough for at least one hour.
- Preheat oven to 350°F (175°C). Scoop dough onto lined baking sheets about two inches apart.
- Bake for 11-12 minutes until edges are golden but centers remain soft; cool on racks.
Nutrition
- Serving Size: 1 cookie (28g)
- Calories: 130
- Sugar: 10g
- Sodium: 75mg
- Fat: 7g
- Saturated Fat: 4g
- Unsaturated Fat: 3g
- Trans Fat: 0g
- Carbohydrates: 16g
- Fiber: <1g
- Protein: 2g
- Cholesterol: 15mg