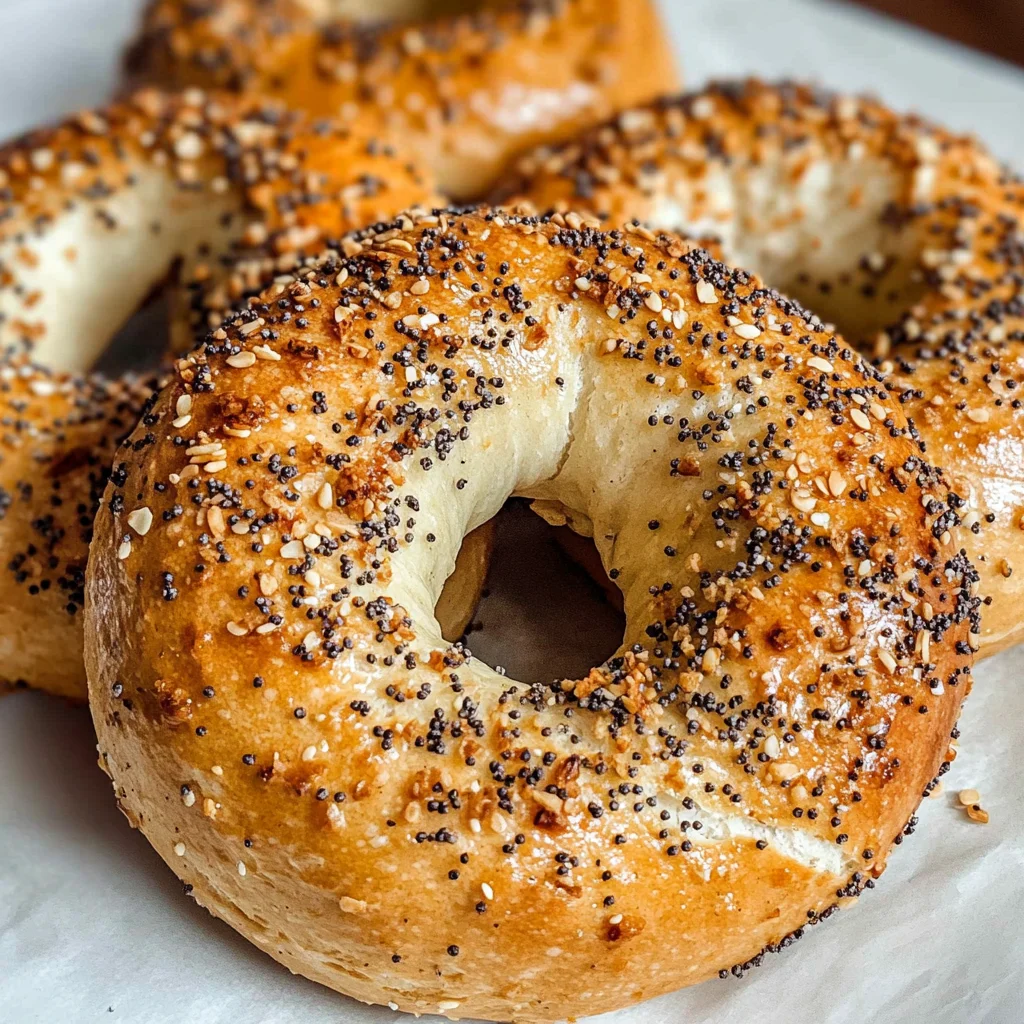
Protein Bagels (Greek Yogurt Bagels)
There’s something undeniably magical about freshly baked bagels, isn’t there? The mere thought of warm dough rising in the oven, filling your kitchen with that comforting aroma, can transport you to a bustling New York street corner, where bagel shops proudly display their golden creations. Picture this: as you slice into a freshly baked Protein Bagel (Greek Yogurt Bagels), the crust crackles softly, and the interior is fluffy and inviting, ready to be adorned with your favorite toppings. This recipe is not just about food; it’s an experience that weaves together tradition and innovation, creating a bridge between cherished memories and modern convenience. With just two ingredients, these bagels promise to be an effortless delight, bringing 11 grams of protein each to fuel your day.
I’ve always been captivated by how simple ingredients can transform into something extraordinary when treated with love and care. That’s why I can’t wait to share this recipe with you! These Protein Bagels are perfect for breakfast on-the-go, a satisfying lunch option, or even as a snack throughout your busy day. They’re so easy to make that they’ll quickly become a staple in your kitchen. Trust me on this—once you get the hang of it, you’ll find yourself making them again and again, experimenting with different seasonings and toppings to make them uniquely yours.
Protein Bagels (Greek Yogurt Bagels): A Wholesome Twist on Tradition
These Protein Bagels are not only incredibly delicious but also exceptionally nutritious. Made from self-raising flour and Greek yogurt, they offer a beautiful balance of texture and flavor without the need for yeast or lengthy resting times. You’ll be amazed at how straightforward it is to whip up a batch of these delightful bagels that are both healthy and satisfying. Let’s dive into this culinary adventure together!

Ingredients:
As we embark on this exciting culinary journey together, let’s take a moment to appreciate each ingredient that plays a vital role in crafting our delicious Protein Bagels (Greek Yogurt Bagels). Each one has its own character and purpose, contributing to the overall symphony of flavors.
- 1 ½ cups self-raising flour or all-purpose flour: This ingredient serves as the foundation of our bagels. If you choose self-raising flour, you’re skipping the need for additional leavening agents since it already contains baking powder and salt. However, if you’re using plain all-purpose flour (which I often do for those whole grain vibes), it’s essential to add baking powder for that delightful rise. The beauty of flour lies in its versatility—whether you opt for whole wheat or white flour depends entirely on your preference for taste and texture. Whole wheat will give you a nuttier flavor and more fiber while white flour offers a lighter texture; either choice will yield delicious results!
- 2.5 teaspoons baking powder: Now, if you’re going down the all-purpose route rather than self-raising flour, this little powerhouse is absolutely paramount! Baking powder is what helps our bagels rise beautifully in the oven. Remember that chemistry lesson where we learned about leavening? Well, that’s what we’re relying on here! When moisture activates the baking powder during baking, it produces carbon dioxide bubbles that lift our dough into those lovely pillowy shapes we adore.
- 1 cup Greek yogurt: Ahh, Greek yogurt—our secret weapon! Not only does it add moisture to our bagel dough but it also infuses an incredible creaminess while providing that hefty protein boost—11 grams per bagel! By using non-fat yogurt like I do, we’re keeping things light without sacrificing flavor or texture. Plus, yogurt’s tangy essence complements the subtle sweetness of the dough perfectly; think of it as adding a layer of depth to our creation.
- Pinch of sea salt: While it may seem like a small addition, salt acts as an enhancer—it elevates flavors from bland to brilliant! It balances out sweetness while drawing out moisture from our ingredients. A pinch goes a long way in ensuring each bite bursts with flavor.
- Glaze – egg wash or oil spray: This step may feel optional but trust me—it’s crucial for achieving that golden-brown crust we all crave! An egg wash gives your bagels a shiny finish while adding richness; on the other hand, an olive oil spray provides a healthier alternative without compromising aesthetics.
- Seasoning – homemade everything bagel seasoning: Last but definitely not least is where you can truly express yourself! Everything bagel seasoning brings together sesame seeds, poppy seeds, garlic flakes, onion flakes—a joyful medley that adds crunch and flavor complexity to every bite. But don’t stop there; feel free to swap in any spices or herbs you adore!
Equipment You’ll Need:
Before we roll up our sleeves and start mixing those beautiful ingredients together, let’s ensure we have all the necessary tools at our disposal. Having the right equipment makes this cooking experience smoother and more enjoyable—like having trusted friends by your side in the kitchen!
- Mixing bowl: A sturdy mixing bowl will be your best friend throughout this process—it’s where all the magic begins! Look for one that’s large enough to hold your ingredients comfortably without spilling over as you mix.
- Wooden spoon or spatula: Using either of these tools will help you combine your ingredients without over-mixing them—a key factor in achieving tender bagels instead of tough ones.
- Clean kitchen counter: You’ll want ample space for kneading your dough later on; just make sure it’s clean and lightly dusted with flour so everything stays mess-free!
- Baking tray lined with parchment paper: This step ensures easy cleanup post-baking while also preventing sticking—no one wants their precious creations glued to the pan!
- Cooling rack: Once they’re baked to perfection (and trust me—you’ll know when!), allowing them to cool properly keeps them fluffy inside instead of soggy underneath.
With our ingredients gathered and tools at hand let’s get ready for some fun as we prepare these delightful Protein Bagels (Greek Yogurt Bagels) together!
Step 1: Combine Ingredients with Love
To begin this delightful adventure in baking our Protein Bagels (Greek Yogurt Bagels), preheat your oven to 350°F (175°C). This initial step is important because having your oven ready means those glorious aromas will soon fill your home as soon as they bake! In a large mixing bowl—a space where magic happens—add together 1 ½ cups of self-raising flour along with a pinch of sea salt. If you’re using plain all-purpose flour instead (which I sometimes do for whole grain goodness), sprinkle in those 2.5 teaspoons of baking powder too; this ensures we’re giving ourselves every chance at achieving optimal rise during baking! Next up is our creamy star player: pour in 1 cup of Greek yogurt into that cozy mixture so it can mingle with its fellow ingredients. Using either a wooden spoon or spatula—whatever feels most comfortable—gently stir until everything comes together into one big ball of dough; don’t shy away from using your hands if needed! It’s perfectly okay if it feels slightly sticky at first—the magic happens when we move onto kneading…
Step 2: Knead until Smooth
Now comes one of my favorite parts—the kneading process! Lightly dust your clean kitchen counter with some extra flour before transferring that lovely ball of dough onto its new surface. Kneading isn’t just about working out any lumps; it’s about developing gluten which gives structure—and ultimately chew—to our final product. Spend several minutes here lovingly folding and pressing down on the dough until it reaches smooth consistency without clumps remaining behind; think soft yet firm—as though you’re coaxing out all its hidden potential! If during this process things start feeling too wet or sticky again? No problem at all; simply sprinkle tiny amounts more flour until manageable—you want control over texture rather than frustration creeping in here!
Step 3: Shape Your Dough
Once you’ve achieved that glorious smoothness through kneading joyfully—it’s time for shaping those dough pieces into their destined forms! First things first—we’re going to divide this beautiful ball into four equal pieces; use either knife skills or just tear apart gently by hand—it doesn’t have to be perfect! Roll each piece into small balls reminiscent of soft clouds waiting patiently before taking flight into their new universe shaped like…bagels! To create their iconic shape next poke holes through centers carefully using fingers before stretching gently around edges until evenly formed resembling donuts (remember—they’re going to puff up during baking!). This step requires love so take care not rush through; ensuring holes remain sizable enough guarantees they won’t close up entirely while rising later!
Step 4: Prepare for Baking
Now let’s get these beauties onto their destined platform—the baking tray lined generously with parchment paper laid out waiting eagerly beneath them like clouds awaiting rain! Arrange each shaped bagel carefully upon this tray leaving room between them so they’ll have space dance around during baking—that lovely rising action needs room after all! Here comes an optional step—but oh-so rewarding if you choose—brushing each topped off lightly either using egg wash imparting glistening finish alongside added richness OR opting instead for olive oil spray keeping things healthy yet equally enticing visually too (who doesn’t appreciate shiny treats?). Lastly sprinkle generously some homemade everything bagel seasoning over tops pressing gently down ensuring flavors stick firmly rather than fall off when biting later too—all part delighting senses fully here!
And there we have it—the first steps toward creating these magnificent Protein Bagels (Greek Yogurt Bagels)! Stay tuned because soon enough we’ll be sliding these gems into their warm oven home where they’ll transform into golden delights ready for us savor together…
Step 5: Shaping Your Bagels with Love
Now that your dough has come together beautifully, it’s time to give these bagels their signature shape—a process that’s as satisfying as it is crucial. Transfer your dough onto a clean kitchen counter that you’ve lightly dusted with flour. This not only prevents sticking but also adds a touch of finesse to the whole experience. Knead the dough gently for about 2-3 minutes until it feels smooth and elastic; you want to feel the transformation from a rough mix into a cohesive ball of goodness. If at any point the dough feels too wet or sticky, don’t be shy! Sprinkle in a little more flour, just enough to make it manageable. Remember, this step is all about creating that perfect texture which will yield bagels that are chewy yet soft—utterly delightful.
Once you have your dough nicely kneaded, roll it into a ball and slice it into four equal pieces. Each piece will become its own bagel, so treat them gently! Roll these pieces into smaller balls and then push your finger through the center of each one to create the classic bagel hole. As you do this, gently stretch the dough with your fingers to ensure the hole is wide enough—this is vital! Trust me on this; if the hole is too small, it’ll close up during baking, leaving you with round little buns instead of glorious bagels. Some folks prefer to roll their pieces into thick ropes and join them at the ends, pressing to seal; both methods work beautifully, so choose whichever speaks to you!
Step 6: The Art of Baking Preparation
With your bagels shaped and ready for their big moment in the oven, it’s time to prep for baking! Preheat your oven to 350°F (175°C)—this temperature is absolutely paramount. It ensures that your bagels bake evenly and develop that gorgeous golden-brown crust we all crave. While the oven warms up, line a baking tray with parchment paper. This simple act not only prevents sticking but also makes cleanup a breeze—who doesn’t love easy cleanup after creating something delicious?
Before placing your beautiful creations in the oven, consider giving them an optional glaze for added flavor and shine. Brush each bagel lightly with either an egg wash or a spray of olive oil—this is where things get exciting! The glaze enhances their appearance and creates a mouthwatering crust while they bake. Then comes my favorite part: sprinkling on homemade everything bagel seasoning or any other topping that tickles your fancy! Gently press down on the seasoning so it adheres well—it’s like giving each bagel its own cozy blanket of flavor.
Step 7: Baking Your Perfect Protein Bagels (Greek Yogurt Bagels)
Now comes the moment we’ve been waiting for—the actual baking! Slide your tray of bagels into the preheated oven and let them work their magic for about 25-30 minutes. I can’t stress enough how important it is to keep an eye on them towards the end of baking—ovens can vary greatly in temperature and efficiency. You’ll want to watch for that beautiful golden-brown color developing on top; it’s like watching sunrise over freshly baked bread! If you notice they aren’t browning enough by around 25 minutes, feel free to leave them in for another few minutes; you want them fully cooked through with that enticing crust.
As they bake, your kitchen will fill with an utterly intoxicating aroma that will have everyone wondering what heavenly creation you’re cooking up. The transformation happening inside those ovens is nothing short of magical—the heat causes steam to build up within each bagel, ensuring they rise beautifully while still maintaining a chewy texture on the outside. So trust me when I say: patience pays off here!
Step 8: Cooling Down Time – The Anticipation Builds
Once those glorious Protein Bagels are out of the oven (and oh boy are they stunning!), resist every urge to slice right into them immediately—even though I know it will be hard! Allowing them to rest on a cooling rack for about 10-15 minutes before slicing is non-negotiable if you want optimal texture. This resting period helps set their structure by allowing steam to escape slowly rather than rushing out all at once—which could make your beloved bagels tough and chewy instead of tender.
During this time, you might find yourself peeking at them repeatedly—trust me; I’ve been there too! Just remember: good things come to those who wait. Once they’ve cooled just enough not to scorch any fingers during slicing, grab your favorite serrated knife and cut right through those beauties. You’ll find their insides soft yet sturdy—perfect for holding all kinds of toppings from cream cheese spreads to avocado slices.
Next Major Phase – Enjoying Your Homemade Protein Bagels!
Step 9: The Finishing Touch – Toppings Galore!
Now comes perhaps my favorite part—the toppings! These Protein Bagels are like blank canvases just waiting for your culinary artistry. You can toast them if you’d like—a quick turn in the toaster brings an extra layer of warmth and crunchiness that’s truly extraordinary. Slathering on some cream cheese mixed with fresh herbs or even avocado sprinkled with sea salt can elevate these bagels from delightful breakfast bites to gourmet creations worthy of any brunch table.
The possibilities are endless! You may want to pile on sliced cucumbers or tomatoes alongside some sprouts for a refreshing crunch; or perhaps you’re feeling indulgent and want peanut butter drizzled with honey? Trust me when I say whatever route you take here will yield profound satisfaction because these homemade Protein Bagels are uniquely yours—a reflection of what flavors resonate most deeply within you.
So go ahead—gather around the table with family or friends (or enjoy one all by yourself!) because these Protein Bagels aren’t just food; they’re a testament to creativity in cooking and love shared through meals made from scratch. Enjoy every bite knowing you’ve created something genuinely special right in your own kitchen!
Storage and Enjoyment Tips for Your Protein Bagels (Greek Yogurt Bagels)
Now that you’ve crafted these delightful Protein Bagels, your kitchen is filled with an irresistible aroma that beckons you to take that first bite. But what happens when you find yourself with a few extra bagels? Don’t fret! Allow me to share my favorite tips for keeping these beauties fresh and as delicious as the moment they came out of the oven.
Storing Leftover Protein Bagels (Greek Yogurt Bagels)
To keep your leftover Protein Bagels in prime condition, store them in an airtight container at room temperature. This will typically maintain their freshness for about 2-3 days. If you’re anything like me, you might have a fondness for that wonderful crusty exterior paired with a soft interior, and proper storage is crucial for preserving this texture. A little pro tip: place a slice of bread in the container with your bagels! This simple trick will help keep moisture levels balanced, preventing those freshly baked delights from turning stale too quickly. When you do decide to indulge in one of these bagels after a day or two, you’ll find they still hold up beautifully—just slightly toasted on the inside for an utterly intoxicating experience! To reheat, simply pop them in the toaster or warm them in the oven for a few minutes, and watch as they transform back into their golden glory.
Freezing Protein Bagels (Greek Yogurt Bagels) for Later
If you’ve made a batch of these delectable Protein Bagels and want to save some for later enjoyment, freezing is an excellent option! Simply let the bagels cool completely before wrapping each one tightly in plastic wrap or placing them in freezer-safe bags. They can be stored in the freezer for up to 3 months without losing flavor or texture. When you’re ready to enjoy one of these beauties again, just pull it from the freezer and allow it to thaw at room temperature; then give it a quick toast or warm-up in the oven to bring it back to life. The convenience of having homemade bagels ready at a moment’s notice is absolutely fantastic! Imagine pulling out a perfectly preserved bagel on a busy morning; it’s like having breakfast magic right at your fingertips.
Protein Bagels (Greek Yogurt Bagels)

Indulge in the delightful world of homemade Protein Bagels (Greek Yogurt Bagels) that are both easy and nutritious! With just two simple ingredients—self-raising flour and Greek yogurt—you can create bagels that are fluffy on the inside and golden on the outside, all while packing a protein punch of 11 grams per serving. These bagels are perfect for breakfast on-the-go, satisfying lunches, or wholesome snacks throughout your busy day. Customize them with your favorite seasonings or toppings for a unique twist every time. Whether you’re enjoying them fresh out of the oven or storing them for later, these bagels will quickly become a staple in your kitchen!
- Prep Time: 10 minutes
- Cook Time: 25 minutes
- Total Time: 35 minutes
- Yield: Makes 4 servings 1x
- Category: Breakfast
- Method: Baking
- Cuisine: American
Ingredients
- 1 ½ cups self-raising flour or all-purpose flour
- 2.5 teaspoons baking powder (if using all-purpose flour)
- 1 cup Greek yogurt (non-fat recommended)
- Pinch of sea salt
- Egg wash or olive oil spray for glazing
- Everything bagel seasoning (optional)
Instructions
- Preheat your oven to 350°F (175°C).
- In a mixing bowl, combine self-raising flour and salt. If using all-purpose flour, add baking powder.
- Add Greek yogurt into the dry mixture and stir until combined.
- Knead the dough on a floured surface until smooth (about 2-3 minutes).
- Divide dough into four equal pieces, shape into balls, and poke holes in the center to form bagels.
- Place shaped bagels on a parchment-lined baking tray. Brush with egg wash or olive oil spray and sprinkle with seasoning.
- Bake for 25-30 minutes until golden brown.
Nutrition
- Serving Size: 1 bagel (80g)
- Calories: 160
- Sugar: 3g
- Sodium: 250mg
- Fat: 2g
- Saturated Fat: 0g
- Unsaturated Fat: 1g
- Trans Fat: 0g
- Carbohydrates: 28g
- Fiber: 1g
- Protein: 11g
- Cholesterol: 0mg