These Homemade Reese’s Cups Will Change Your Dessert Game!
There’s something utterly magical about creating a beloved treat from scratch, isn’t there? When I think of my childhood, I often find myself lost in the warm embrace of nostalgia that comes flooding back with every bite of chocolate and peanut butter. These homemade Reese’s cups are not just about satisfying a sweet tooth; they are a celebration of comfort, a reminder of simpler times spent laughing with friends and family. The rich, creamy texture of the peanut butter mingling with the silky smoothness of chocolate creates a symphony of flavors that dances on your palate. Trust me when I say, these Homemade Reese’s Cups Will Change Your Dessert Game! They transform an ordinary day into something truly extraordinary, making you feel like a culinary magician.
As we embark on this delicious journey together, let’s take a moment to appreciate the beautiful contrast between the sweet and salty notes that make these treats so irresistible. The combination of creamy peanut butter and luscious chocolate brings back memories of cozy evenings spent around the kitchen table, indulging in sweets and sharing stories. What makes these cups truly special is their simplicity; anyone can whip them up in no time, yet they pack an impressive punch that will have your friends and family begging for more. So gather your ingredients and get ready to create something memorable!
These Homemade Reese’s Cups Will Change Your Dessert Game!: A Sweet Journey Awaits
There’s nothing quite like sinking your teeth into a rich chocolate shell only to discover a delightful peanut butter surprise waiting inside. This recipe is not just about mixing ingredients but about creating moments that you’ll treasure forever. With just four simple ingredients, we’re going to craft these delectable little morsels that will leave you wondering why you ever bought store-bought versions again!
Ingredients:
Let’s dive into the essential components that will come together to create our delightful Reese’s cups. Each ingredient plays a pivotal role in ensuring that every bite is as heavenly as it sounds.
- 1 cup creamy peanut butter. Peanut butter is the star of this show! It brings not only flavor but an incredible creaminess that contrasts beautifully with the smooth chocolate coating. When selecting peanut butter, look for one that has minimal ingredients—just peanuts and salt are ideal—because it ensures you’re getting pure flavor without unnecessary additives. The richness of this ingredient forms the heart of our treats, providing both satisfaction and nostalgia all at once.
- 1 cup powdered sugar. This ingredient might seem straightforward, but it truly is crucial for achieving that perfect sweetness while maintaining a delightful texture in our peanut butter filling. Powdered sugar dissolves easily, which helps create that velvety consistency we’re aiming for without any graininess. Make sure to sift it if it’s clumpy—the last thing we want is a gritty experience when biting into these heavenly cups!
- 2 cups milk chocolate chips. Ah yes, milk chocolate—the sweet embrace that envelops our delectable filling! The choice of chocolate chips here is important; they should be high-quality to ensure a rich flavor profile. Milk chocolate adds a gentle sweetness which balances the saltiness of the peanut butter beautifully. If you’re feeling adventurous or want to cater to dark chocolate lovers, feel free to substitute with dark chocolate chips for an even deeper flavor!
- 1 tablespoon coconut oil. This little gem helps achieve the perfect melt-in-your-mouth consistency when combined with our milk chocolate chips. Coconut oil adds a subtle tropical hint while ensuring our chocolate achieves that glossy finish—it’s all about aesthetics and taste! If you don’t have coconut oil on hand, you could use vegetable oil in its place; however, I promise you’ll love what coconut oil brings to this recipe.
Equipment You’ll Need:
Having the right tools can make all the difference when bringing this recipe to life! Think of them as your trusty sidekicks on this culinary adventure.
- Mixing bowl – A sturdy mixing bowl is essential for combining our creamy peanut butter and powdered sugar smoothly without any messes. Opt for one that’s large enough so you have plenty of space to stir vigorously without fear of ingredients spilling over.
- Microwave-safe bowl – This will be your go-to vessel for melting those luscious chocolate chips along with coconut oil. Ensure it’s made from materials safe for microwave use—glass or ceramic works wonderfully!
- Muffin tin – A standard muffin tin is what we’ll be using to form our lovely cups! You could also use silicone molds if you have them on hand; just remember they can offer an easier release after chilling.
- Cupcake liners – These charming little liners not only make clean-up a breeze but also add an extra touch of cuteness to your finished treats! Choose colorful or patterned ones if you’re feeling festive—they’ll definitely impress at parties!
- Spatula or spoon – A good spatula will help you scoop out every last bit of peanut butter filling from your bowl without leaving any behind! Alternatively, any sturdy spoon will do just fine if that’s what you have available.
Now that we’ve gathered everything necessary for our sweet adventure, let’s move on to creating these divine homemade Reese’s cups!
Step 1: Combining Peanut Butter & Sugar
First things first—we need to create our rich filling by skillfully mixing together our creamy peanut butter and powdered sugar until smooth like silk. Start by placing your peanut butter in your mixing bowl; it should be at room temperature so it’s easy to work with—this step is non-negotiable because cold or hard peanut butter won’t blend well at all! Gradually sprinkle in the powdered sugar while stirring gently until everything comes together seamlessly into this thick yet velvety mixture. It should be soft enough to scoop but firm enough not to run off your spoon—that’s how you’ll know you’ve got it just right!
Step 2: Melting Chocolate & Coconut Oil
Now comes one of my favorite steps: melting those gorgeous chocolate chips along with coconut oil until they transform into liquid gold! Place both ingredients in your microwave-safe bowl and heat them in short bursts—about 30 seconds at a time—stirring after each interval until fully melted and beautifully glossy. This gentle melting process ensures we don’t scorch our precious chocolate; trust me when I say burnt chocolate has no place here! Once melted and combined into a luscious mixture, set it aside momentarily while we prepare our muffin tin.
Step 3: Preparing Your Muffin Tin
Grab your muffin tin and line each cup with cupcake liners—this step is crucial as it helps in easy removal once they’re set! Take your time doing this because these liners are going to cradle our delicious creations perfectly as they chill out in the fridge later on. Once lined up nicely (you can go for fun colors or patterns!), we’re ready for some chocolaty action!
Step 4: Layering Chocolate & Peanut Butter
With everything prepped beautifully, we’re now going to start layering: begin by pouring just enough melted chocolate into each cupcake liner so it covers the bottom completely—about one tablespoon should do nicely here—and then give them just enough time to set slightly (we don’t want them solid). Afterward, add generous spoonfuls of that dreamy peanut butter mixture right atop the softened layer—you can really pile it high because who wouldn’t want more deliciousness? Finish by drizzling more melted chocolate over top until each liner is filled—a little tapping on the counter can help settle things down evenly too!
I hope you’re feeling excited because we’re almost there! In our next steps, we’ll let these beauties chill out until they’re perfectly set so you can enjoy every decadent bite without hesitation…
Stay tuned as we continue crafting these homemade Reese’s cups into perfection!
Step 5: Pouring the Chocolate Base – Setting the Stage for Magic
Now that we have our peanut butter filling mixed to a luscious, creamy consistency, it’s time to work with that melted chocolate. This step is where the magic truly begins! Carefully take your muffin tin lined with cupcake liners and pour a small amount of the melted chocolate into the bottom of each liner—aim for about a tablespoon per cup. The goal here is to create a beautiful base that will hold everything together. As you pour, take a moment to watch how the chocolate flows; it should be smooth and glossy, almost like liquid gold cascading into place.
Why is this step so crucial? Well, the chocolate not only forms a delightful shell but also serves as a protective barrier that keeps your peanut butter filling from seeping out. It’s also essential to ensure that you don’t skip this step because a well-formed base will provide structural integrity to your homemade Reese’s cups. If you find yourself pouring too much chocolate, don’t worry! Just scoop some back into your bowl before moving on. Once you’ve distributed the chocolate evenly, gently tilt the muffin tin from side to side to help spread the chocolate if needed—it should cover just enough of the bottom without overflowing. Trust me, this attention to detail will pay off when you bite into that first cup!
Step 6: Adding the Peanut Butter Layer – The Heart of the Cup
Now comes one of my favorite parts—the addition of that rich peanut butter mixture! With your chocolate base set, it’s time to scoop out generous spoonfuls of that velvety peanut butter filling and place it right on top of your melted chocolate layer. Aim for about one heaping tablespoon in each cup; this ensures that every bite will be packed with flavor and creaminess. As you do this, take a moment to savor the intoxicating scent of peanut butter mingling with chocolate—it’s utterly divine!
This layer is what makes these Homemade Reese’s Cups truly extraordinary. It’s where you get that signature taste we all love—sweet yet slightly salty, creamy yet satisfying. You’ll want to make sure that each spoonful is as evenly placed as possible because an uneven distribution can lead to some cups being overly sweet or lacking in flavor balance. Use the back of your spoon to press down gently on the peanut butter mixture so it adheres well to the chocolate below; this little bit of effort helps create a seamless blend when you take that first bite later on! Don’t rush this step; enjoy it! Picture yourself indulging in these delightful treats as you go along.
Step 7: Sealing in Happiness – Covering with More Chocolate
With our rich peanut butter filling nestled snugly atop our chocolate bases, it’s time for another drizzle of melted chocolate—this is where we seal in all that deliciousness! Grab your bowl of melted chocolate once more and pour over another generous layer, completely covering the peanut butter filling until each liner is full. You’ll want to use about another tablespoon or so per cup here—just enough so everything is enveloped in silky sweetness.
This final layer is absolutely paramount because it creates that satisfying snap when you bite into these homemade treats. Plus, it locks in all those tantalizing flavors beneath and makes them pop even more! As you pour, remember: don’t fret if some layers look thicker than others; variation adds character! However, do keep an eye out for any air bubbles forming on top as they can affect how evenly they set later on. If you notice any bubbles while pouring, simply give your muffin tin a gentle tap against your countertop—that should help them release effortlessly! This process may feel simple but trust me; it elevates your dessert game exponentially.
Step 8: Chilling Out – The Essential Setting Time
Now comes perhaps one of the most critical steps in creating these Homemade Reese’s Cups: chilling them in the refrigerator! Once you’ve completed pouring your final layer of melted chocolate over each cup, pop that muffin tin into the fridge and let them chill out for at least 30 minutes—or even longer if you’re feeling patient (I promise it’s worth it!). This chilling period is non-negotiable because it’s during this time that all those magical flavors meld together beautifully while allowing everything to set properly.
As they chill, I encourage you to think about how transformative this step is: not only does it harden up our lovely layers into perfect little cups ready for indulgence, but it also enhances their taste profile significantly. The cooling process allows for an exciting symphony of textures—the creamy peanut butter becomes firmer while still retaining its delightful creaminess against the firm outer shell of chocolate. Trust me on this one—you’ll want to resist any temptation to skip ahead here! After about half an hour has passed, check on them by gently pressing down on one; if it’s firm but still slightly springy, then you’re good to go!
Next Major Phase – Unveiling Your Masterpiece
Once chilled and perfectly set—oh my goodness—you’re ready for the grand reveal! Let’s bring these beauties out from their cool sanctuary and prepare ourselves for pure bliss as we unwrap our homemade creations.
Step 9: The Grand Reveal – Enjoy Every Moment
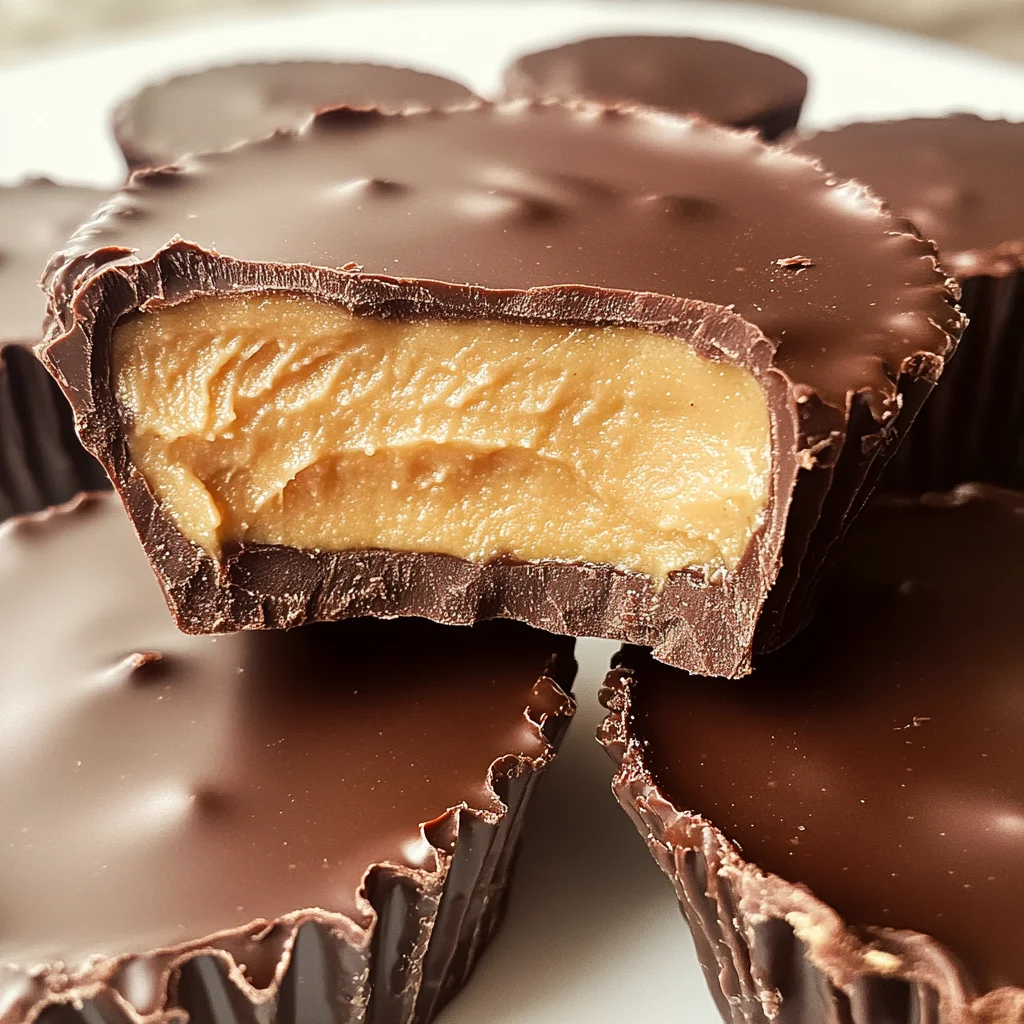
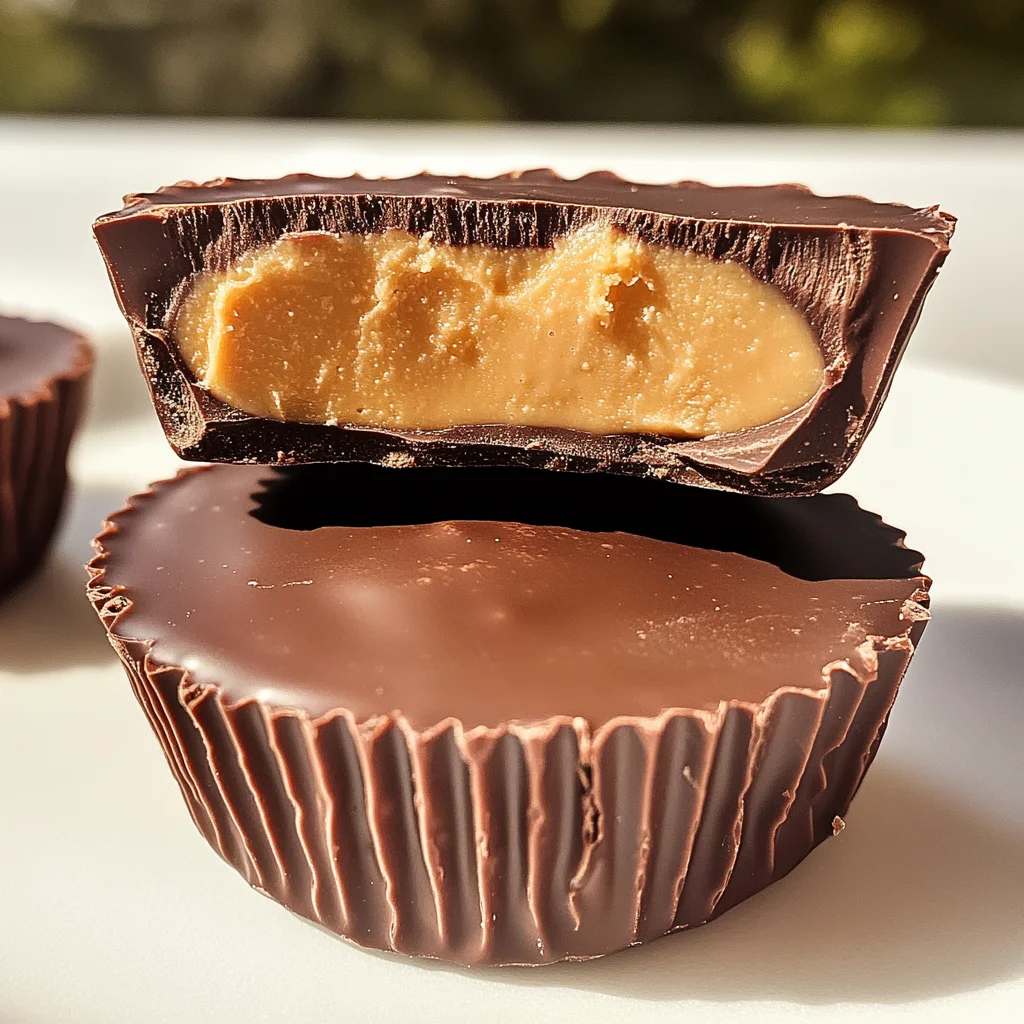
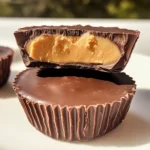
Carefully remove each cup from its cupcake liner; I cannot stress enough how rewarding this moment feels! With anticipation building inside me every single time I unveil these treasures from their wrappers reveals something magical—a flawless combination of rich chocolate and creamy peanut butter awaits! Take a moment here; appreciate what you’ve created—the effort you’ve put in has transformed ordinary ingredients into something profoundly satisfying.
As you lift one up and admire its gleaming surface glistening under light, I encourage you not just to dive right in (even though I know it’s tempting!). Instead, consider taking a quick snapshot—capture this culinary triumph before devouring it whole! Each bite offers an utterly intoxicating burst of flavor; savor every second and share with friends or loved ones if you’re feeling generous (though I completely understand if you’d like them all for yourself). These Homemade Reese’s Cups Will Change Your Dessert Game forever—they’re bound to become a cherished recipe you’ll return to again and again!
So there you have it—a journey through texture, taste, and sheer delight wrapped up beautifully in each homemade treat! Whether enjoyed on special occasions or simply as an everyday indulgence after dinner (or breakfast—I won’t tell!), these cups are sure-fire winners every time. Happy cooking—and more importantly—happy indulging!
Storage and Enjoyment Tips for Your These Homemade Reese’s Cups Will Change Your Dessert Game!
Now that your delightful Homemade Reese’s Cups are ready to enjoy, let’s talk about how to keep the magic alive for as long as possible! The joy of biting into that creamy peanut butter and silky chocolate combination is something you’ll want to hold onto. Whether you plan to savor them all at once or save a few for later, knowing how to store these little treasures will ensure they remain as delicious as the day you made them.
Storing Leftover These Homemade Reese’s Cups Will Change Your Dessert Game!
To store your leftover Homemade Reese’s Cups, I highly recommend using an airtight container; this is absolutely paramount for maintaining their luscious flavors and delightful texture. Placing them in the fridge will keep them fresh for about one week, although trust me, they’re likely to disappear much quicker than that! For those who want to maintain that perfectly smooth mouthfeel, consider placing a slice of bread in the container with your cups; it may sound quirky, but it helps retain moisture and prevents any unwanted drying out. After a few days in storage, you might notice that they develop an even deeper flavor profile—think of it as the peanut butter getting cozy with the chocolate. When you’re ready to indulge again, simply take one out and allow it to come to room temperature for a few minutes before enjoying; this makes each bite utterly intoxicating!
Freezing for Later
If you find yourself with an abundance of these delectable treats—or if you just want to be prepared for unexpected guests—freezing is a fantastic option! To freeze your Homemade Reese’s Cups properly, wrap each individual cup tightly in plastic wrap or place them in a freezer-safe zip-top bag. This way, they’ll stay protected from freezer burn while retaining their divine taste. They’ll keep well in the freezer for up to three months, which means you can stash away a batch now and pull them out whenever a dessert craving strikes or when friends pop by unexpectedly. Simply remove them from the freezer and let them thaw at room temperature for about 10-15 minutes before diving back into that symphony of flavors. The convenience factor is incredible—who doesn’t love having homemade dessert on hand at all times?
These Homemade Reese’s Cups Will Change Your Dessert Game!
Indulge in the ultimate homemade treat with these delightful Homemade Reese’s Cups! Combining the rich creaminess of peanut butter with a luscious chocolate coating, this easy-to-follow recipe transforms simple ingredients into a nostalgic dessert that will impress friends and family alike. Whether you’re reminiscing about childhood or creating new memories, these cups are perfect for any occasion. With just four key ingredients, you can whip up a batch of these no-bake delights that will change your dessert game forever. Get ready to experience the irresistible blend of sweet and salty flavors that will have everyone coming back for seconds!
- Prep Time: 15 minutes
- Cook Time: 0 minutes
- Total Time: 15 minutes
- Yield: Approximately 12 servings 1x
- Category: Dessert
- Method: No-Bake
- Cuisine: American
Ingredients
- 1 cup creamy peanut butter
- 1 cup powdered sugar
- 2 cups milk chocolate chips
- 1 tablespoon coconut oil
Instructions
- In a mixing bowl, combine the creamy peanut butter and powdered sugar until smooth.
- In a microwave-safe bowl, melt the chocolate chips and coconut oil in short bursts, stirring until glossy.
- Line a muffin tin with cupcake liners and pour about 1 tablespoon of melted chocolate into each liner to create the base; allow it to set slightly.
- Scoop a generous spoonful of peanut butter filling onto each chocolate base and press gently.
- Pour another tablespoon of melted chocolate over the peanut butter layer to seal it.
- Chill in the refrigerator for at least 30 minutes until set.
Nutrition
- Serving Size: 1 serving
- Calories: 157
- Sugar: 9g
- Sodium: 90mg
- Fat: 9g
- Saturated Fat: 4g
- Unsaturated Fat: 5g
- Trans Fat: 0g
- Carbohydrates: 17g
- Fiber: 1g
- Protein: 3g
- Cholesterol: 0mg