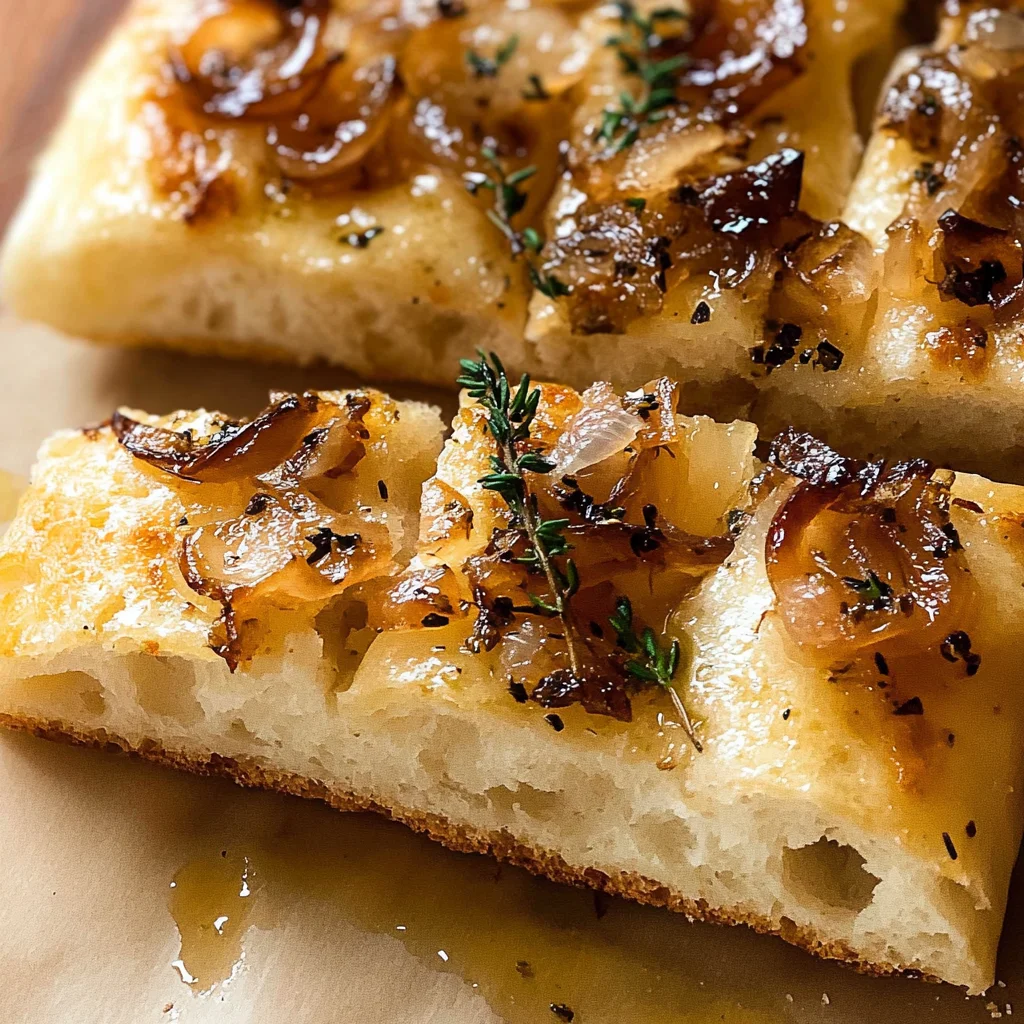
Caramelized Onion Focaccia
There’s something utterly enchanting about the aroma of freshly baked bread wafting through the house, isn’t there? It wraps around you like a warm hug, inviting you to gather around the table and share not just food, but moments that become cherished memories. This Caramelized Onion Focaccia is more than just a recipe; it’s an experience that transforms simple ingredients into a symphony of flavors. The tender dough, fluffy and golden, serves as a canvas for the rich sweetness of caramelized onions, the fragrant notes of fresh thyme, and the hint of garlic that dances on your palate. Each bite is a revelation, connecting you to the heart of Italian cuisine while also bringing a sense of comfort that only homemade bread can offer.
I’ve always been captivated by focaccia’s versatility. Whether served as an elegant appetizer or a comforting side dish to your favorite meal, it has this magical ability to elevate any dining experience. Imagine slicing into that golden crust, revealing a soft and airy interior that practically begs for olive oil or perhaps even a smear of herb-infused butter. Trust me when I say that once you make this Caramelized Onion Focaccia, it will forever hold a special place in your heart—and on your dinner table.
The Irresistible Allure of Caramelized Onions
What truly makes this focaccia stand out is the caramelized onions. They’re not just an ingredient; they’re the soul of this bread. As they cook down slowly in olive oil and butter, they transform from sharp and pungent to sweet and luscious—almost like nature’s own jam! This process requires patience; after all, good things take time! The contrast between the fluffy focaccia and these deeply flavorful onions creates a delightful balance that’s simply irresistible. Perfect for gatherings or quiet evenings at home, this focaccia is sure to impress anyone who takes a bite.
Ingredients:
As we embark on this culinary journey together, let’s explore each ingredient that contributes to our Caramelized Onion Focaccia masterpiece. These components are not just random items from the pantry; each one plays a vital role in crafting flavors and textures that will make your taste buds dance with joy.
- 2 tbsp olive oil: Olive oil acts as both a flavor enhancer and an essential fat in our focaccia dough. It contributes richness while also helping to keep our bread tender. When choosing olive oil, look for extra virgin varieties, which offer robust flavor profiles ranging from fruity to peppery. This liquid gold is non-negotiable; it not only enriches the dough but also infuses our caramelized onions with depth as they sauté.
- 1 tbsp salted butter: Butter brings its creamy goodness to our focaccia, enhancing both flavor and texture. It helps in creating that lovely golden crust we all adore while also enriching the sweetness of our caramelized onions. Opt for high-quality butter—preferably unsalted if you’re controlling salt intake since we’re adding salt elsewhere in our recipe.
- 4 cups diced yellow onions: Onions are truly the star here! Their natural sugars caramelize beautifully when cooked low and slow, resulting in those sweet, deeply flavored morsels that crown our focaccia. Yellow onions are perfect for this dish due to their balance of sweetness and acidity; they provide layers of flavor as they soften into silky strands during cooking.
- 1/4 cup water: Just enough water aids in softening those stubborn onions as they begin cooking down. It prevents them from burning initially while allowing them to release their own moisture—a crucial step for achieving those perfectly caramelized results.
- 2 tbsp fresh thyme (chopped): Fresh thyme adds an aromatic touch that complements the sweetness of our onions beautifully. Its earthy fragrance works harmoniously with both the dough and toppings, making every bite feel like a warm embrace from nature itself.
- 2 1/2 cups all-purpose flour: Flour is the backbone of any bread recipe—think of it as our foundation! For this focaccia, all-purpose flour strikes just the right balance between structure and tenderness. When measuring flour, be gentle—spoon it into your measuring cup rather than scooping directly from the bag to avoid packing it down too tightly.
- 1 1/4 cups lukewarm water: Water activates yeast while ensuring our dough stays moist but not sticky—crucial elements for achieving a light crumb structure. Lukewarm water (around 110°F) works best because it provides just enough warmth without killing off those precious yeast cells!
- 1/4 cup parmesan cheese (finely shredded): Parmesan cheese introduces umami richness into our dough—its nutty flavor elevates each bite beyond mere carbohydrates! Opt for finely shredded cheese so it distributes evenly throughout without clumping together.
- 2 tbsp olive oil (for drizzling): This additional olive oil will grace our focaccia before baking—it helps create that lovely crust we crave while imparting even more flavor into every nook and cranny!
- 1 tbsp granulated sugar: Sugar serves two purposes here—it feeds our yeast (helping with rise!) while also adding subtle sweetness to counterbalance savory elements like garlic and thyme later on!
- 2 tsp instant yeast: Instant yeast is my go-to choice because it makes bread-making effortless—it doesn’t require proofing beforehand! Just mix it directly into dry ingredients like flour without worrying about waiting around too long for activation.
- 3/4 tsp salt: Salt may seem simple; however, it’s absolutely paramount! Not only does it enhance flavors by balancing out sweetness but also strengthens gluten formation during fermentation—leading us toward those gorgeous airy pockets we desire within our focuses!
- 1-2 tbsp fresh thyme (for topping): A sprinkle atop before baking showcases freshness while providing aromatic notes—we eat with our noses too!
- 1/4 cup olive oil (for garlic infusion): This final drizzle enhances overall richness while allowing roasted garlic aromas permeate throughout every slice when we press dimples into risen dough pre-baking!
- 3 whole garlic cloves (crushed): Garlic elevates everything; its pungent aroma becomes mellow when infused in warm oil—perfectly complementing both thyme & onion layers atop finished loaf!
Equipment You’ll Need:
Let’s talk tools—the right equipment can make your culinary adventure much smoother! While these items may not be ingredients per se, they are essential partners in creating something truly wonderful.
- Large skillet – A sturdy skillet ensures even heating when caramelizing those lovely onions; size matters here! You want enough space so each piece has contact with heat for optimal browning without overcrowding—which leads us back toward steaming instead!
- Large mixing bowl – This bowl will host all your delicious ingredients as they come together seamlessly into dough perfection! Choose one big enough so you have room to stir vigorously without fear of spills—it makes life easier!
- Plastic wrap – Essential for covering rising doughs during fermentation periods! Keeping moisture trapped allows yeast activity while preventing drying out—a critical component leading toward final fluffy results!
By gathering these tools ahead of time along with ingredients listed above—you’ll set yourself up beautifully before diving into preparation steps ahead!
Preparing the Caramelized Onion Focaccia
Step 1: The Sweet Beginning – Caramelizing Onions
Let’s dive right into one of my favorite parts—the caramelization process! Start by melting together your butter along with two tablespoons of olive oil over medium heat in your large skillet. Once melted & bubbling gently invite those chopped yellow onion pieces into their warm embrace! Add just enough water to help kickstart their journey towards deliciousness before covering them with a lid briefly—for about five minutes—to soften slightly without browning yet. After five minutes have passed? Remove lid & reduce heat down low—this part takes patience but trust me; good things come from taking time here! Stir regularly over next hour until those lovely strands become deeply golden brown & utterly intoxicatingly sweetened up—it’s worth every moment spent watching them transform!
Step 2: Mixing Up Our Dough
While those glorious onions do their thing let’s shift focus toward preparing dough mixture! Grab another large mixing bowl then combine flour alongside lukewarm water (remember around 110°F!), finely shredded parmesan cheese along with remaining tablespoon olive oil plus granulated sugar followed by instant yeast & salt—all together creating base foundation needed for beautiful bread ahead! Use wooden spoon now vigorously stir together until fully combined—you want no lumps left behind because uneven mixing could lead toward inconsistency later on during baking phase which isn’t what we’re aiming for here—trust me on this one!
Step 3: Letting Dough Rise
Once everything mixed well then lightly coat hands using some olive oil before transferring formed ball-shaped mass directly inside another large oiled bowl cover top completely using plastic wrap & pop somewhere warm (ideally around room temperature). Here comes magic part—we wait patiently until doubled volume achieved—about one hour will do just fine depending upon ambient temperatures surrounding area might vary slightly longer needed sometimes don’t rush though enjoy glass wine perhaps while waiting?
Step 4: Crafting Garlic Oil
With dough rising away it’s time now concoct delicious garlic-infused oil which packs extra punch flavor-wise later adding depth overall final product achieved once baked golden brown perfection arrives at table too!! Heat remaining quarter-cup extra virgin olive oil within smaller skillet then toss crushed cloves inside letting them simmer gently—not boiling mind you—as fragrant aroma fills kitchen space after five minutes remove cloves discard leaving behind aromatic liquid gold ready top off soon-to-be glorious focaccia creation awaiting us shortly thereafter!!
Now that we’ve laid down such foundational knowledge surrounding both recipe components involved let’s continue progressing further until finally presenting delightful finished masterpiece worthy sharing amongst family friends alike!!
Step 5: Infusing Flavor with Garlic Oil
This next step is where we introduce a truly magical element to our Caramelized Onion Focaccia—garlic oil. To create this delightful infusion, pour a generous amount of olive oil into a skillet and gently heat it over medium heat. As the oil warms, stir in three whole garlic cloves that have been crushed to release their aromatic oils. Now, trust me on this—don’t rush this process! Allow the garlic to cook for about five minutes until it becomes fragrant and starts to turn golden brown. This gentle cooking not only mellows out the raw bite of garlic but also transforms it into a liquid gold that will permeate every bite of your focaccia with an utterly intoxicating flavor.
Once the garlic has reached that perfect state of readiness, remove it from the skillet and discard it—you’ve done your job beautifully! Let the oil cool slightly before you proceed; this is crucial because if it’s too hot when you add it to your dough later, it could hinder yeast activity and affect the final rise of your bread. You want to make sure that when you pour that beautiful garlic-infused oil over your focaccia dough, it’s at just the right temperature to encourage everything to come together perfectly.
Step 6: The Art of Shaping Your Dough
Now comes one of my favorite parts—the shaping of our focaccia dough! Once your dough has doubled in size after its first rise (and believe me, seeing that fluffy ball of dough is so satisfying), it’s time to bring some air back into it. Lightly oil your hands to prevent sticking and gently grab a section from the top of the dough. Stretch it upwards and fold it toward the center—this technique is known as stretch and fold. Repeat this process with each side (you’ll do this four times in total), pulling and tucking the dough back into itself like a loving hug.
Why do we do this? Well, stretching the dough helps develop gluten structure without kneading, ensuring your focaccia will be delightfully airy yet sturdy enough to hold those sweet caramelized onions later on. After you’ve completed this little dance with your dough, transfer it seam-side down into an oiled 9×9 baking pan. Cover it with plastic wrap once again, and find another warm spot for it to rise for about an hour. You’ll know it’s ready when it’s puffed up beautifully and looks like it’s ready for its moment in the spotlight—trust me, patience here pays off!
Step 7: Witnessing Dough Magic
After giving your focaccia another hour to rise, prepare for one of those ‘wow’ moments! When you uncover your pan, you should see a jiggly mass of dough filled with large bubbles—it’s almost like watching magic unfold right before your eyes! This signifies that fermentation has happened beautifully; tiny air pockets have formed thanks to our eager yeast working hard during its second rise. But here’s where you need to be careful; if your dough hasn’t risen quite as much or doesn’t have those glorious bubbles yet, don’t fret! It might just need a bit more time in its cozy spot.
Once you’re satisfied with how lofty and bubbly your dough looks, it’s time for the next layer of flavor—the garlic oil we made earlier! Drizzle half of that fragrant liquid gold over the top of the dough. Using your fingers, press down gently but firmly into the surface to create deep dimples all over; think of them as little pockets waiting for flavor! This technique not only adds texture but also ensures that each dimple holds onto that luscious garlic oil and will later capture those heavenly caramelized onions.
Step 8: Baking Your Perfect Caramelized Onion Focaccia
Now we’re entering the home stretch—the moment we’ve all been waiting for: baking our Caramelized Onion Focaccia! Preheat your oven to a robust 425°F (220°C). As soon as it’s hot enough, take those beautiful dimples filled with garlic oil and sprinkle fresh thyme across the top; its earthy aroma pairs perfectly with our sweet onions waiting in the wings. Now slide that pan into the oven and let the magic happen! I promise you’ll be amazed by how quickly room fills with a symphony of aromas—sweetness from caramelizing sugars in both onion and bread mingling together is an experience you won’t forget.
Bake for approximately 12-18 minutes; keep an eye on it around that 12-minute mark since ovens can vary quite a bit. You’ll know when it’s perfectly baked by looking for a golden-brown top that’s crisp yet soft underneath—a true delight waiting just for you! Use an instant-read thermometer if you’re unsure; you’re aiming for an internal temperature of at least 190°F (88°C). When you pull it out of the oven, allow yourself a moment to simply admire what you’ve created—glistening golden crust embellished with bright green thyme signals that something truly extraordinary is about to grace your table.
Final Touches
With our focaccia now gloriously baked and smelling divine, we’re ready for those final touches that will elevate this dish even further!
Step 9: The Grand Finale – Topping Off With Onions
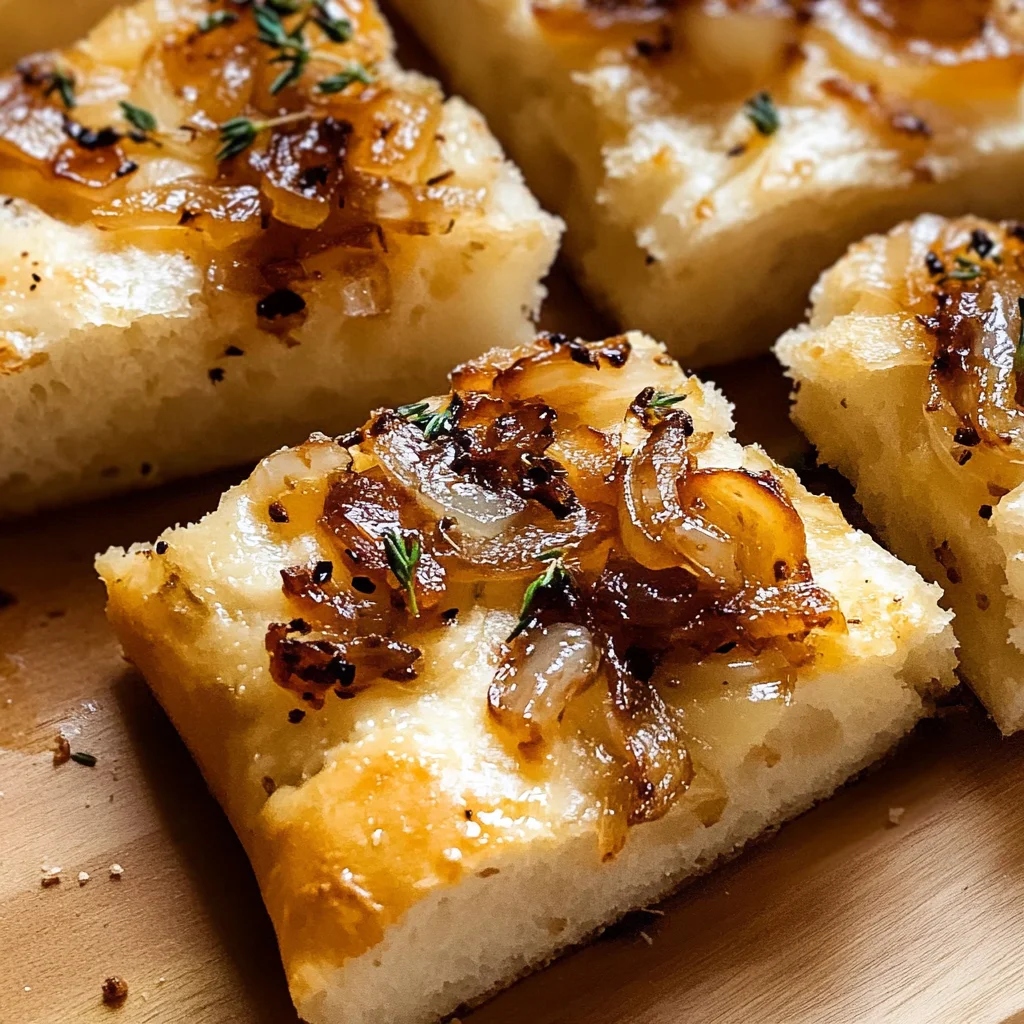
Once you’ve allowed your focaccia to cool slightly on a wire rack—a crucial step because steam can make things soggy—it’s time for one last flourish: spooning on those lovingly caramelized onions we prepared earlier. I cannot emphasize enough how essential this step is; these sweet morsels add depth and complexity while providing bursts of flavor throughout every bite. Spread them evenly across the top while they’re still warm so they meld beautifully into every crevice.
Finish off with a sprinkle of flaky sea salt—it elevates flavors dramatically—and perhaps more fresh thyme if you’re feeling adventurous! Cut into generous squares or strips as desired—it’s perfect as an appetizer paired alongside olives or as part of any meal as a side dish complementing pastas or salads alike. Don’t forget: focaccia is best enjoyed fresh from the oven or day-of; however, leftovers can be stored in an airtight container or wrapped tightly for future enjoyment.
So there you have it—the journey isn’t just about making bread; it’s about creating memories through food shared among friends and family. Whether served as part of dinner or savored alone over coffee while lost in thought, I hope this Caramelized Onion Focaccia brings joy as well as deliciousness into every bite! Happy baking!
Storage and Enjoyment Tips for Your Caramelized Onion Focaccia
Now that your kitchen is filled with the irresistible aroma of freshly baked caramelized onion focaccia, it’s time to revel in the joy of enjoying this delightful creation! I can just envision you pulling apart those fluffy layers, each bite bursting with rich, savory flavors. Whether you decide to serve it warm as an appetizer, alongside a comforting soup, or simply as a snack throughout the day, I promise you that this focaccia will be a star at any gathering. But what happens if there are leftovers? Fear not; I’ve got you covered with some essential tips to ensure your focaccia remains just as delicious even after the first day!
Storing Leftover Caramelized Onion Focaccia
To keep your caramelized onion focaccia fresh and flavorful, store it in an airtight container at room temperature. This method allows the bread to maintain its soft texture for up to three days. If you’re like me and want to make sure you enjoy every last crumb, consider placing a slice of bread inside the container; this little trick helps retain moisture while preventing the focaccia from drying out too quickly. When stored properly, each bite will still bring that delightful blend of sweetness from the caramelized onions and warmth from the garlic oil. If you’ve got some leftovers after a couple of days—or let’s be real, if you’re trying hard to save them—simply reheat individual slices in the microwave for about 15-20 seconds or pop them in the oven until warmed through. Trust me, you’ll be amazed at how good it tastes even after storage!
Freezing Caramelized Onion Focaccia for Later
If you want to savor your caramelized onion focaccia weeks after making it, freezing is an excellent option! To freeze it properly, wrap the cooled focaccia tightly in plastic wrap and then place it into a freezer-safe bag or container. This double-layer approach protects against freezer burn and preserves its wonderful flavors. When frozen correctly, your focaccia can last up to a month without losing its charm! When you’re ready to indulge again, simply take it out of the freezer and let it thaw at room temperature for a few hours before reheating. This convenience means you can have homemade goodness on hand whenever cravings strike—imagine being able to pull out a piece of that fluffy bread on a whim!
Caramelized Onion Focaccia
Experience the heartwarming joy of homemade Caramelized Onion Focaccia—a fluffy, golden flatbread that’s perfect for any occasion. With its rich aroma of caramelized onions, roasted garlic, and fresh thyme, this focaccia serves as a delightful appetizer or a comforting side dish that elevates your meals. Each bite offers a lovely balance between sweet and savory, making it an irresistible addition to your dining table. The easy preparation and simple ingredients ensure that this recipe is accessible for all skill levels. Whether you enjoy it fresh out of the oven or as leftovers, this focaccia will undoubtedly become a cherished favorite in your home.
- Prep Time: 20 minutes
- Cook Time: 30 minutes
- Total Time: 50 minutes
- Yield: Serves approximately 12 slices 1x
- Category: Side Dish
- Method: Baking
- Cuisine: Italian
Ingredients
- 2 tablespoons olive oil
- 1 tablespoon salted butter
- 4 cups diced yellow onions
- 2 ½ cups all-purpose flour
- 1 ¼ cups lukewarm water
- 2 tablespoons fresh thyme (chopped)
- 1 tablespoon granulated sugar
- 2 teaspoons instant yeast
- ¾ teaspoon salt
- 3 whole garlic cloves (crushed)
Instructions
- In a large skillet, melt butter with olive oil over medium heat. Add diced onions and a splash of water; cover for about five minutes to soften.
- Remove the lid, reduce heat to low, and stir occasionally for about an hour until onions are golden brown.
- In a mixing bowl, combine flour, lukewarm water, parmesan cheese, remaining olive oil, sugar, yeast, and salt. Stir until fully combined.
- Transfer dough to an oiled bowl, cover with plastic wrap, and let rise in a warm spot for about an hour until doubled in size.
- Prepare garlic oil by heating olive oil in a small skillet with crushed garlic cloves for five minutes.
- Once dough has risen, transfer it into an oiled baking pan and press dimples into the surface.
- Drizzle with garlic oil and top with caramelized onions and additional thyme.
- Preheat oven to 425°F (220°C) and bake for 12-18 minutes until golden brown.
Nutrition
- Serving Size: 1 slice (75g)
- Calories: 190
- Sugar: 2g
- Sodium: 250mg
- Fat: 7g
- Saturated Fat: 2g
- Unsaturated Fat: 5g
- Trans Fat: 0g
- Carbohydrates: 29g
- Fiber: 1g
- Protein: 4g
- Cholesterol: 10mg