Brown Butter Snickerdoodles
There are moments in the kitchen that transcend the mere act of cooking; they become a tapestry woven with memories, aromas, and flavors that linger long after the meal is finished. One such moment happens when I pull a batch of Brown Butter Snickerdoodles from the oven, their golden edges perfectly crisp while the centers remain soft and inviting. The alluring scent of nutty brown butter wafts through the air, wrapping around me like a warm hug, whispering tales of comfort and joy. These cookies are not just a treat; they are an experience—a delightful bridge between nostalgia and creativity that captures the essence of all things cozy. With every bite, you’ll discover a symphony of flavors that dances on your palate, making it impossible to resist reaching for just one more.
I’ve always been captivated by the magic that happens when simple ingredients come together to create something utterly intoxicating. The humble snickerdoodle—a cookie that can feel so familiar—transforms into a truly extraordinary delight when the butter is browned to perfection. This step infuses the dough with a rich flavor profile that elevates these cookies to new heights. Plus, there’s no need to chill the dough; we’re diving straight into baking bliss! These Brown Butter Snickerdoodles are perfect for any occasion—be it a casual afternoon treat or a sweet ending to a family gathering. So gather your ingredients, roll up your sleeves, and let’s make some delicious memories together!
Brown Butter Snickerdoodles: A Cozy Classic with a Nutty Twist
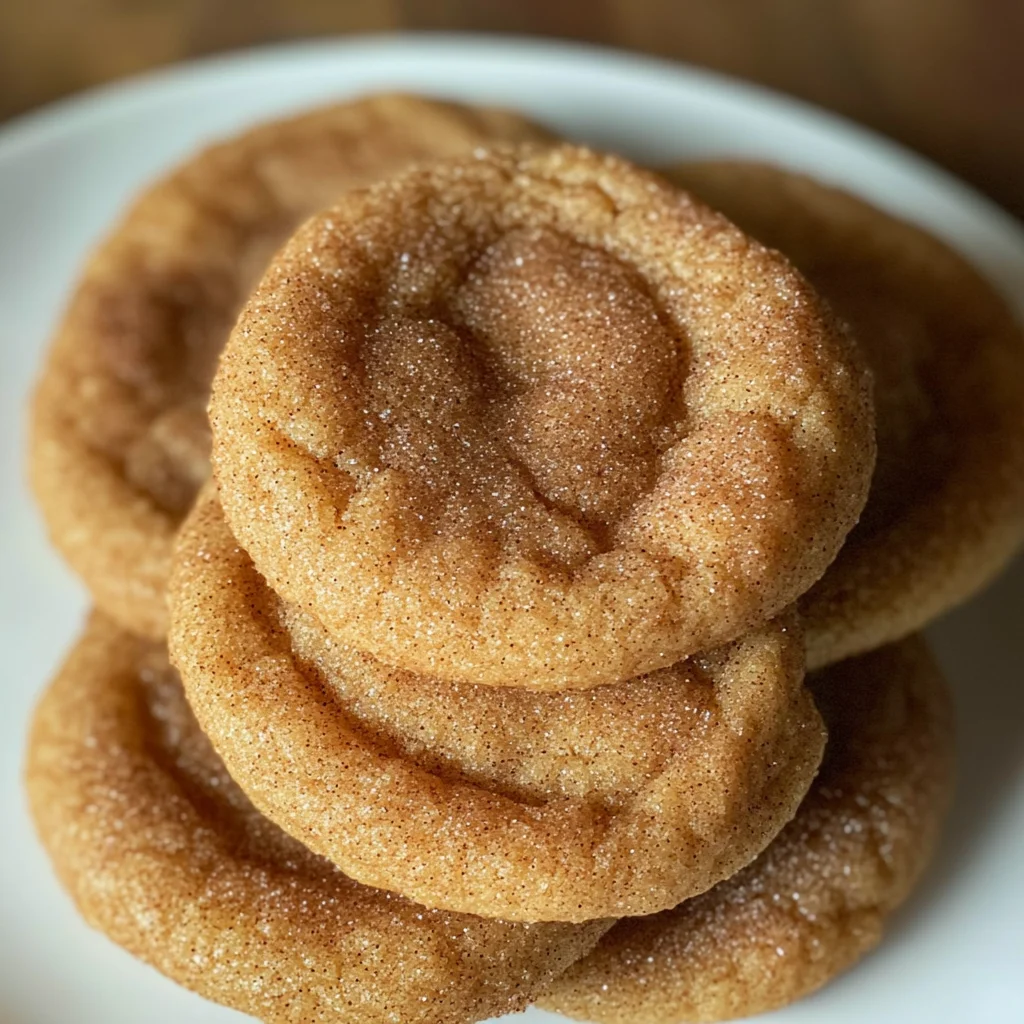
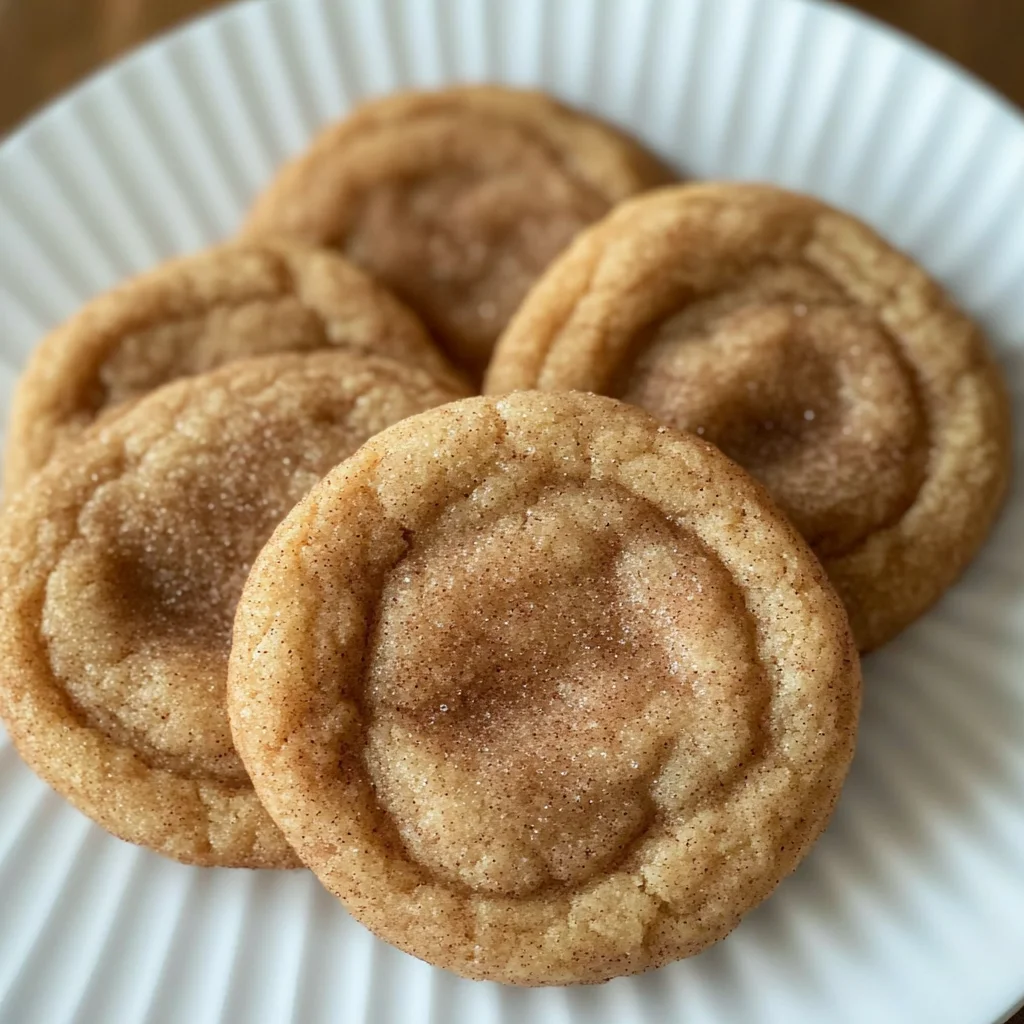
Welcome to my cozy kitchen where today we’re diving into the world of Brown Butter Snickerdoodles! These delightful cookies are everything you dream about when you think of home-baked goodness—soft, chewy centers with slightly crispy edges and an enchanting hint of cinnamon sugar on top. Perfectly balanced in flavor and texture, they invite everyone to indulge without hesitation. Imagine serving them fresh from the oven alongside a glass of cold milk or perhaps sharing them with friends at a gathering; they truly encapsulate warmth and happiness!
Ingredients:
As we embark on this culinary journey together, let’s explore each ingredient that plays a vital role in shaping our Brown Butter Snickerdoodles into something magical.
- 1/2 cup butter, browned. This is where the magic begins! Browning butter transforms it into liquid gold—nutty and aromatic—with its flavor intensified in ways that plain butter simply cannot match. You’ll want to melt this over medium heat until it turns a beautiful amber color and gives off a rich aroma reminiscent of toasted nuts. Just be sure not to let it burn; keep an eye on it as it can go from perfect to burnt in seconds! If you’re looking for alternatives due to dietary preferences, consider using plant-based butter which can still provide great results.
- 1/2 cup sugar (95 g). Regular granulated sugar contributes sweetness but also aids in achieving that coveted chewy texture we adore in our cookies. It helps create structure by caramelizing during baking while enhancing all the other flavors harmoniously. Make sure it’s fresh—stale sugar can affect both taste and texture.
- 1/3 cup dark brown sugar (57 g). Dark brown sugar not only adds depth with its rich molasses flavor but also enhances moisture within our snickerdoodles. This ingredient is crucial for achieving softness; without it, you’d be left with dry cookies lacking personality! When selecting brown sugar, be sure to use one that’s packed tightly in your measuring cup for accurate sweetness.
- 1 egg, medium size. Eggs are essential for binding our ingredients together seamlessly while lending moisture and richness to our dough. Room temperature eggs work best here as they incorporate more easily into our mixture compared to cold ones straight from the fridge.
- 1 tsp whole milk. A splash of whole milk adds creaminess which complements our brown butter beautifully! It helps balance out flavors while ensuring our cookie dough remains pliable enough for rolling into balls without sticking excessively.
- 1 tsp vanilla. Vanilla extract acts as an aromatic enhancer that elevates every other flavor present in these snickerdoodles—it’s non-negotiable! Opt for pure vanilla extract if possible; imitation vanilla simply doesn’t hold a candle to its depth.
- 1/2 tsp cornstarch. Cornstarch is an often-overlooked ingredient that plays an important role here by adding tenderness while preventing gluten formation—a common culprit behind tough cookies! Its inclusion ensures our snickerdoodles deliver that soft texture we crave.
- 1/2 tsp baking soda. Baking soda provides lift during baking which contributes to those perfectly puffy cookies we all love while also helping them spread slightly for ideal shape!
- 1/2 tsp salt. A pinch of salt is absolutely paramount as it enhances sweetness while balancing flavors throughout each bite! Don’t skip this step; even though it’s small in quantity, its impact is significant!
- 1 tsp cream of tartar. Essential for snickerdoodles specifically, cream of tartar contributes tanginess alongside aiding in maintaining chewiness post-baking—creating those signature crinkly tops we associate with this classic cookie!
- 1 ⅔ cups all-purpose flour (210 g). Flour lends structure but too much will yield dry cookies instead of tender morsels; measure carefully! Make sure you’re using spoon-and-level method rather than scooping directly from the bag for precision.
- 1 tsp cinnamon. Cinnamon brings warmth and nostalgia—it’s what makes these cookies snickerdoodles! Not only does it add flavor but also gives off an enticing aroma during baking that’ll have everyone flocking towards your kitchen!
- 2 tbsp sugar (for rolling). This final sprinkle isn’t merely decorative—it adds delightful crunch along with extra sweetness right before baking!
Equipment You’ll Need:
Having the right tools at your disposal can make all the difference in creating beautifully baked goods like these Brown Butter Snickerdoodles! They’re like trusty companions guiding you towards success every step of the way.
- Mixing bowls – A set of mixing bowls will serve various purposes throughout this process—from melting your butter to mixing up your dry ingredients together before combining everything else later on! Opt for glass or stainless steel since they’re easy-to-clean options that won’t absorb odors or stains over time.
- Hand mixer or stand mixer – While you could whisk everything by hand (and believe me, I’ve done so plenty!), having an electric mixer speeds things up tremendously—especially when creaming butter and sugars together until light and fluffy! If investing in one isn’t feasible right now? No worries—you’ll still achieve great results with good old-fashioned elbow grease!
- Baking trays – Using quality baking trays prevents sticking while ensuring even browning across all surfaces during baking time! If you have silicone mats or parchment paper lining them? Even better—the cleanup afterward becomes much simpler too!
- Cookie scoop or tablespoon – Measuring out consistent portions ensures uniformity among each cookie size which guarantees even baking—no one wants some undercooked treats next door when others are perfect!
Now that we’ve gathered our ingredients and equipment let’s dive deeper into preparing these scrumptious Brown Butter Snickerdoodles!
Preparing the Brown Butter Snickerdoodles
Step 1: The Art of Browning Butter
The first step on this flavorful journey is browning your butter—a technique that might sound fancy but is quite simple once you get the hang of it! Start by placing your unsalted butter in a medium saucepan over medium heat. As it melts down slowly, keep stirring gently with a spatula or wooden spoon; watch closely as those lovely solids sink to the bottom while bubbling occurs around its edges—a telltale sign transformation has begun! In just minutes, you’ll notice changing scents wafting through your kitchen—this signals progress toward achieving nutty perfection! Once you see golden flecks form at the bottom along with captivating aromas filling every corner? Remove from heat immediately before moving onto pouring this liquid gold into another bowl where it’ll cool slightly before proceeding further.
Step 2: Mixing Up Sweetness
After allowing your browned butter some time to cool down (about 5 minutes should suffice), it’s time for sweetness overload! Grab either handheld or stand mixer fitted with paddle attachment because we need some serious mixing power here—as we combine both regular granulated sugar along with dark brown sugar until well combined within this luscious buttery mix already waiting patiently inside our large bowl nearby! The goal here is simple: ensure everything melds seamlessly together creating one cohesive mixture free from lumps so each bite will taste harmonious later down line once baked off perfectly golden brown perfection awaits us shortly thereafter!
Step 3: Adding Creamy Goodness
Next comes adding egg goodness along with whole milk plus generous splash vanilla extract into this already sweetened concoction—this is where things start getting exciting because now we’re layering flavors atop each other like artist building masterpiece canvas beneath paintbrush strokes filled warmth reminiscent family gatherings around fireplace sharing stories laughter shared between loved ones present sharing space during cozy evenings spent indoors enjoying treats made lovingly by hand…what could be better? Whip until thickened nicely—about one minute should do trick here ensuring no visible streaks remain afterwards leaving us excitedly anticipating next steps ahead involving dry components waiting patiently nearby ready join party soon enough too!
Step 4: Sifting Together Dry Ingredients
Alright friends—we’re almost there! Time now mix dry ingredients which include cornstarch baking soda salt cream tartar cinnamon plus good ol’ all-purpose flour gathered earlier alongside other goodies awaiting incorporation into dough mixture building blocks integrity structure ensuring perfect chewiness throughout end product awaiting us shortly thereafter being pulled out oven hot heavenly aroma wafting through home bringing smiles faces everywhere present witnessing magic unfold before eyes…so grab sifter whisk stirrer whichever suits mood today then sift everything directly atop wet batter previously whipped till fluffy smooth consistency achieved…don’t worry if flour clouds billow upwards—it’s just happy dance happening within mixing bowl reminding us how wonderful life truly can be especially when delicious morsels await discovery beyond horizon ahead beckoning us forth courageously pressing onward towards ultimate reward awaiting completion journey undertaken thus far together hand-in-hand soulfully connecting experiences shared embracing challenges conquered along way forming bonds stronger than ever before seen past moments fleeting forever captured hearts minds alike bringing joy laughter every step way onwards let’s continue shall we?
Stay tuned as we continue crafting these delectable Brown Butter Snickerdoodles step-by-step until they’re ready for indulgence!
Step 5: The Art of Mixing Your Dough
Now that you’ve added those essential dry ingredients—cornstarch, baking soda, cream of tartar, salt, and cinnamon—it’s time to mix everything together. This step is absolutely paramount because it ensures that every single component is evenly distributed throughout your dough, which means every bite will be a delightful symphony of flavor. Using your mixer on low speed, gently combine these ingredients until they are just incorporated. You want to be careful here; overmixing can lead to tough cookies, and we’re aiming for that soft, chewy texture that makes Brown Butter Snickerdoodles so irresistible.
As you mix, watch for the transformation in your dough—it should become thicker and more cohesive. If it feels too sticky or wet to handle comfortably, don’t panic! A tablespoon more of flour can work wonders in achieving that perfect consistency. Alternatively, if you prefer patience over adding flour right away, you can cover the bowl with a clean kitchen towel and let the dough rest at room temperature for about ten minutes. This resting time allows the flour to absorb some of the moisture from the butter and other wet ingredients, creating a less sticky texture that’s much easier to roll into beautiful balls.
Step 6: Rolling into Perfection
With your dough perfectly mixed and ready to go, it’s time for one of the most satisfying steps—rolling the dough into balls! Using a cookie scoop or simply a tablespoon, take a generous amount of dough and roll it between your palms until it’s smooth and round. There’s something undeniably therapeutic about this process; you can feel each ball taking shape as if you’re crafting little edible treasures meant to be savored.
Once you’ve rolled out all the dough balls, you’re going to coat them in our delightful cinnamon-sugar mixture—this is where those flavors really start to shine! In a small bowl, combine two tablespoons of sugar with one teaspoon of cinnamon. The key here is even coverage; you want each ball to be dusted lightly but thoroughly. This step not only adds an enchanting sweetness but also contributes to that signature snickerdoodle crackle as they bake. After rolling them in this fragrant blend, place them on a baking tray lined with foil, parchment paper, or a silicone baking mat—each option has its benefits! While foil provides a crispier bottom due to better heat conductivity, parchment and silicone mats help prevent sticking and make cleanup a breeze.
Step 7: The Baking Magic
Now comes the moment you’ve been waiting for—the baking! Preheat your oven to 350℉ (175℃) if you haven’t already done so; this precise temperature is crucial for achieving that golden-brown edge while keeping the centers delightfully soft and chewy. Place your cookie tray in the middle rack of the oven to ensure even warmth circulation around each cookie—a massive benefit when it comes to uniform baking.
Bake your Brown Butter Snickerdoodles for about 7-8 minutes. Yes, I know it’s tough waiting around when such delicious scents fill your kitchen! But trust me when I say that leaving them slightly underbaked is what makes these cookies utterly extraordinary; they’ll continue cooking on the tray after being removed from the oven due to residual heat. The edges should look set and just lightly golden while the centers may still appear slightly puffy and soft—that’s exactly what we’re aiming for! If they look too firm or darkened all over, you’ve likely gone too far; remember that these divine treats are meant to melt in your mouth with each bite.
Step 8: Cooling Down with Care
Once those cookies have baked beautifully—golden edges framing soft centers—remove them from the oven and let them cool on the pan for about five minutes before transferring them onto wire racks. Why allow this cooling period? Well, cooling on the pan helps maintain their structure as they finish setting up while allowing you to enjoy those heavenly aromas wafting through your kitchen just a little longer! After five minutes have passed (and you’ve tried not to steal one!), gently lift each cookie using a spatula and transfer them onto wire racks for further cooling.
This part is important because moisture tends to collect underneath baked goods on hot pans; by moving them off quickly after their initial cooling period, you’re ensuring they stay perfectly chewy rather than becoming soggy on one side. As they cool completely on the racks, try not to rush through this stage—allowing them time will enhance their texture even more so they’ll be nothing short of perfection when you finally indulge!
Conclusion:
As we wrap up our journey through this delightful recipe for Brown Butter Snickerdoodles, I can’t help but feel excited about sharing this experience with you! From browning that butter—transforming it into liquid gold—to rolling each dough ball in fragrant cinnamon sugar before sending them off into the oven; every step is infused with love and attention that truly elevates these cookies beyond ordinary treats. It’s not just about baking; it’s about creating something special that brings warmth and happiness into our lives.
This recipe is an absolute must-try—not only for its incredible taste but also for the sheer joy of making it! Picture yourself pulling tray after tray from your oven as those cookies puff up beautifully, filling your home with an utterly intoxicating aroma. Whether you’re baking for a cozy family gathering or simply treating yourself after a long day, these snickerdoodles are perfect for any occasion. They shine brightly during celebrations but also serve as comforting companions on quiet afternoons when all you need is something sweet.
Imagine savoring one with a cup of steaming chai tea or freshly brewed coffee—what a match made in heaven! For an afternoon pick-me-up while catching up with friends over laughter and stories, there’s nothing quite like biting into a warm cookie that melts in your mouth while sipping on something equally comforting. And let’s not forget those cozy movie nights where each snickerdoodle feels like a hug from within; paired with some rich hot chocolate or even vanilla almond milk—it’s simply divine!
Feeling adventurous? This recipe is wonderfully adaptable! You could mix in white chocolate chips or chopped nuts for added texture; imagine how those would contrast against the buttery base and cinnamon notes! Or perhaps swirl in some creamy peanut butter before baking for a nutty twist that sings alongside those classic flavors. The possibilities are endless, so don’t hesitate to experiment! I invite you wholeheartedly to try this recipe out and share your experiences—you never know what delicious adventure awaits when you dive into cooking! Happy baking!
Brown Butter Snickerdoodles
Indulge in the warm, nostalgic flavors of Brown Butter Snickerdoodles—soft and chewy cookies that are quick to make and utterly delightful. The nutty aroma of browned butter infuses each cookie, while a sprinkle of cinnamon sugar adds the perfect touch of sweetness. These treats are ideal for any occasion, from cozy family gatherings to a simple afternoon snack. With no need to chill the dough, you can dive straight into baking bliss! Whether enjoyed fresh from the oven or shared with loved ones, these Brown Butter Snickerdoodles will surely bring joy to your kitchen.
- Prep Time: 15 minutes
- Cook Time: 8 minutes
- Total Time: 23 minutes
- Yield: Approximately 24 cookies 1x
- Category: Dessert
- Method: Baking
- Cuisine: American
Ingredients
- 1/2 cup butter (browned)
- 1/2 cup granulated sugar
- 1/3 cup dark brown sugar
- 1 medium egg
- 1 tsp whole milk
- 1 tsp vanilla extract
- 1/2 tsp cornstarch
- 1/2 tsp baking soda
- 1/2 tsp salt
- 1 tsp cream of tartar
- 1 ⅔ cups all-purpose flour
- 1 tsp cinnamon
- 2 tbsp sugar (for rolling)
Instructions
- Begin by browning the butter in a saucepan over medium heat until it turns amber and has a nutty aroma. Let it cool slightly.
- In a mixing bowl, combine the browned butter, granulated sugar, and dark brown sugar using a mixer until smooth.
- Add the egg, whole milk, and vanilla extract; mix until well blended.
- Sift together cornstarch, baking soda, salt, cream of tartar, flour, and cinnamon in another bowl.
- Gradually incorporate dry ingredients into the wet mixture until just combined.
- Roll dough into balls and coat each ball in a mixture of cinnamon and sugar before placing them on a lined baking tray.
- Preheat the oven to 350°F (175°C) and bake for about 7-8 minutes until edges are golden but centers remain soft.
- Allow cookies to cool on the tray for five minutes before transferring them to wire racks.
Nutrition
- Serving Size: 1 cookie (24g)
- Calories: 105
- Sugar: 8g
- Sodium: 55mg
- Fat: 5g
- Saturated Fat: 3g
- Unsaturated Fat: 2g
- Trans Fat: 0g
- Carbohydrates: 13g
- Fiber: <1g
- Protein: <1g
- Cholesterol: 15mg