Levain Bakery Black and White Cookies
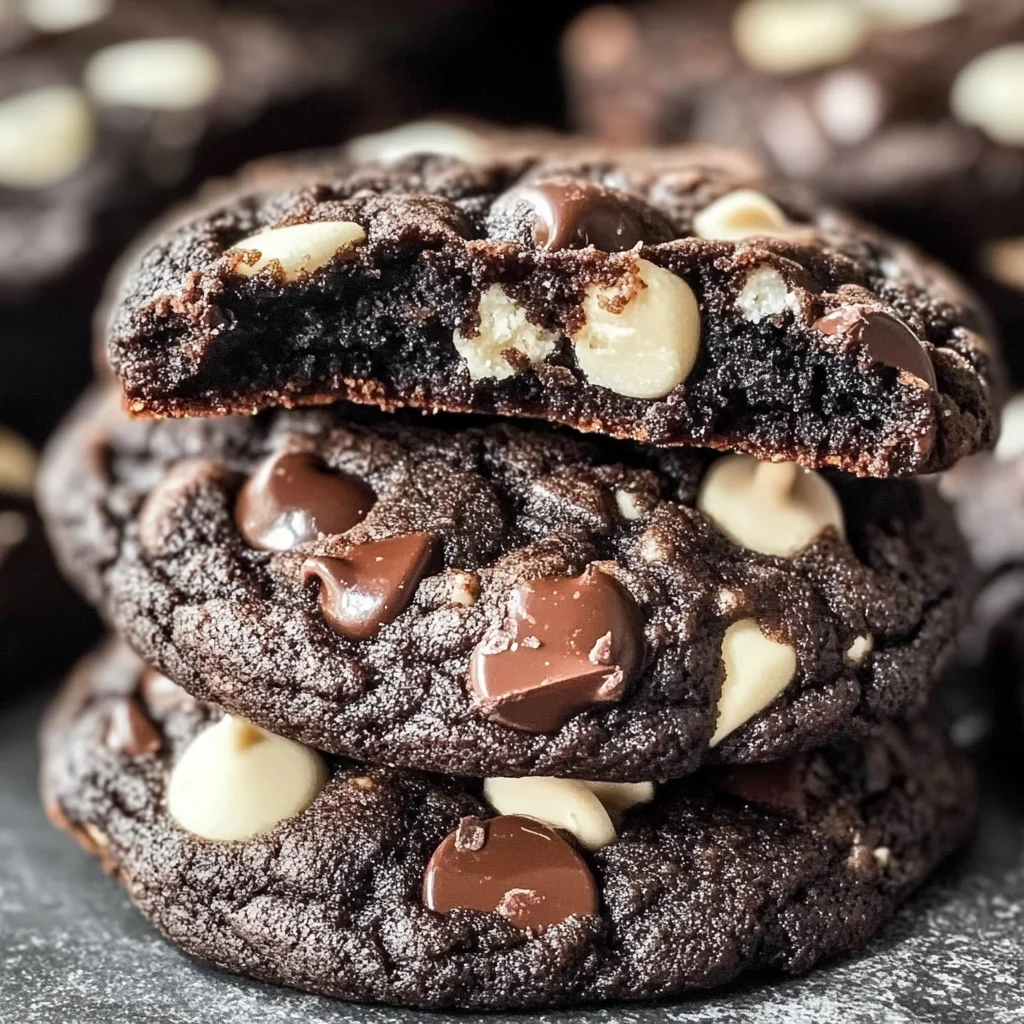
There’s something incredibly special about baking, isn’t there? It’s not just about mixing ingredients or following a recipe; it’s an experience, a heartfelt journey that transforms simple components into something magical. Just picture this: warm, thick cookies emerging from the oven, their aroma wafting through your home, wrapping you in a comforting embrace. The Levain Bakery Black and White Cookies are a perfect embodiment of this joy—a delightful blend of soft, chewy dark chocolate cookies studded with luscious white and milk chocolate chips. These cookies evoke memories of bakery visits and cozy afternoons spent with loved ones, making each bite a nostalgic treasure. I promise you, once you take that first bite, you’ll find yourself lost in a symphony of flavors that brings pure bliss.
Now, let’s delve into the heart and soul of this recipe. Inspired by the famous cookies from Levain Bakery, these treats are not just desserts; they’re an experience waiting to unfold in your kitchen. As we embark on this culinary adventure together, I’ll share every little secret that will ensure your cookies turn out perfectly every time. Whether you’re making them for a special occasion or simply indulging your sweet tooth on a quiet evening at home, these cookies are sure to impress. So grab your apron and let’s create something truly extraordinary!
Levain Bakery Black and White Cookies: A Heavenly Delight
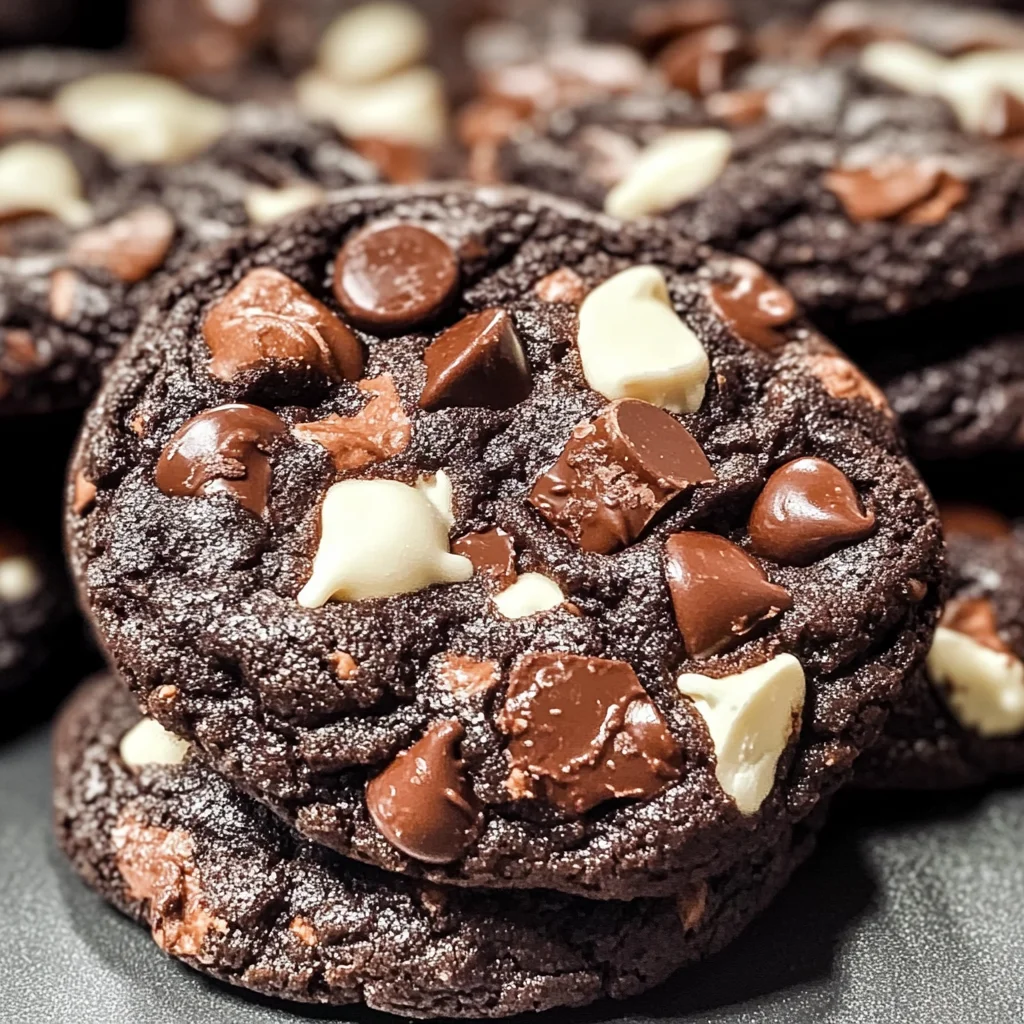
Welcome to the world of cookie perfection! These Levain Bakery Black and White Cookies are here to bring happiness to your kitchen and warmth to your heart. Their thickness and chewiness are what make them stand out from the ordinary cookie crowd. Imagine biting into one—your teeth sinking into the soft dough as bursts of rich dark chocolate intermingle with creamy white and milk chocolate chips. It’s truly an unforgettable treat that brings joy to any gathering or simply brightens your day.
Ingredients:
As we gather our ingredients for these incredible cookies, think of each one as an essential character in our story—each playing a vital role in crafting our masterpiece.
-
1 cup Cold Butter (or barely softened, cut into small cubes). The butter is essential for achieving that rich flavor and tender texture we crave in our cookies. Cold butter helps maintain structure while creaming with sugar—this process is crucial because it creates tiny air pockets that will expand when baking, ensuring those soft centers we adore. If using barely softened butter instead, make sure it’s still cool enough so the cookies don’t spread too thin while baking.
-
1 cup Brown Sugar. This ingredient adds depth to our cookie’s flavor profile through its molasses content—a secret weapon for both sweetness and richness. Brown sugar also contributes to moisture retention within the cookie; it’s why these treats stay wonderfully chewy even after cooling down! When choosing brown sugar, opt for one that’s fresh—the darker varieties will give you an even more profound flavor.
-
1/2 cup Sugar. Regular granulated sugar helps balance the flavors without overshadowing the richness from the brown sugar and cocoa powder. It plays a critical role in creating that delightful crispness on the outer edges while allowing the center to remain soft and chewy—a delightful contrast!
-
2 large Eggs. Eggs are fundamental here—they provide structure and stability but also contribute moisture to our dough. They play a crucial role in binding all ingredients together while helping achieve that beautiful rise during baking. Always use room temperature eggs if possible; they incorporate better with other ingredients.
-
1/2 cup Dark Unsweetened Cocoa. This is where we elevate the chocolate experience! Cocoa powder gives our cookies their rich color and intense chocolate flavor without adding extra fat like melted chocolate would do. Choose high-quality cocoa powder for deeper flavor—trust me; it makes all the difference!
-
2 1/2 cups All-Purpose Flour (or 1 cup cake flour + 1 1/2 cups all-purpose flour). Flour acts as the backbone of our cookie dough—it provides structure while allowing us to create those thick bakery-style cookies we crave! If you love a softer crumb, consider using cake flour; however, I prefer all-purpose flour for its balance between tenderness and chewiness.
-
1 teaspoon Cornstarch. This ingredient works quietly behind the scenes by adding tenderness to our cookie texture—it’s often overlooked but absolutely essential for achieving that melt-in-your-mouth quality we desire.
-
3/4 teaspoon Baking Soda. This leavening agent is what gives our cookies lift as they bake! The baking soda reacts with acids in other ingredients (like brown sugar) to produce carbon dioxide bubbles—this reaction is what creates those lovely airy pockets inside each cookie.
-
1/2 teaspoon Salt. Never underestimate salt’s power! It enhances all flavors present in your dough—making everything taste more vibrant and alive while balancing out sweetness beautifully.
-
(1) 11-ounce bag White Chocolate Chips. These little gems add creamy sweetness that contrasts beautifully with dark chocolate flavors throughout each bite—perfectly complementing our rich cocoa base!
-
1 cup Milk Chocolate Chips. Like their white counterparts, milk chocolate chips introduce another layer of sweetness along with smooth creaminess—creating a delicious blend every chocolate lover will adore!
Equipment You’ll Need:
Having the right tools makes our baking journey smoother—and trust me when I say these tools will be your best friends in creating perfect Levain Bakery Black and White Cookies!
-
Mixing Bowl – A sturdy mixing bowl is essential for combining ingredients smoothly without any spills or messes! Look for one that’s large enough to allow plenty of room for whisking or mixing without fear of overflow.
-
Electric Mixer – An electric mixer greatly simplifies creaming butter and sugars together; it saves time while ensuring everything blends thoroughly! If you don’t have one handy, a whisk can work—but expect some serious elbow grease!
-
Rubber Spatula – This versatile tool is perfect for folding dry ingredients into wet mixtures gently without deflating any air we’ve worked so hard to incorporate earlier during creaming!
-
Baking Sheets – Light-colored baking sheets are non-negotiable here—they ensure even cooking without overly browning bottoms too quickly! Always line them with parchment paper for easy removal post-baking!
-
Food Scale (optional) – While measuring by volume works fine most times; weighing out each ball ensures uniformity across batches—which leads us straight towards consistent results every time!
Now that we’re well-equipped with all necessary tools alongside mouthwatering ingredients ready at hand—it’s finally time roll up those sleeves & dive deep into preparing these delectable Levain Bakery Black and White Cookies!
Step 1: Preheating & Creaming: Setting Up For Success
First things first: preheat your oven to 400 degrees Fahrenheit! Preheating ensures our environment reaches optimal heat levels before popping those beauties inside—resulting in perfectly baked cookies every single time! Next comes my favorite part: creaming together cubed cold butter along with both sugars until light & fluffy—a process lasting about 3–4 minutes max! Why do we do this? Well…it’s crucial because air gets trapped between fat molecules during this stage leading towards those airy structures when they expand during baking times ahead! Don’t forget halfway through this step—you’ll want scrape down sides periodically so everything incorporates nicely within mixture itself…
Step 2: Adding Eggs & Vanilla
Once your mixture looks fluffy like clouds hung low on an overcast day—it’s time add two large room-temperature eggs (and vanilla extract if desired)! Mixing them in should take no longer than just one minute—but oh boy does it make such difference…the added moisture binds everything together beautifully whilst giving off irresistible aromas lingering around kitchen space—the scent alone can make hearts flutter…so trust me here folks—the moment feels special indeed…
Step 3: Folding In Dry Ingredients
With wet ingredients combined harmoniously—it’s showtime for dry elements now! Gently fold unsweetened cocoa powder mixed alongside measured flour/cornstarch/baking soda/salt directly into previous concoction until blended well enough—not overmixing though since overworking gluten might lead towards tough results instead…remember—to keep mixture lusciously moist yet thickened appropriately—we’re aiming towards thick rounded balls rather than flat pancakes post-baking…
Step 4: Incorporate Chocolate Chips
Finally comes my absolute favorite part—that moment where delectable white & milk chocolate chips get folded lovingly within dough itself—it’s like throwing glitter onto already beautiful creation!! Ensure even distribution throughout batter ensuring every single bite brings euphoric pleasure akin heavenly bites enjoyed life’s sweetest moments captured forever…don’t rush through this stage either—it matters tremendously how evenly dispersed they become within each ball formed ahead…
Stay tuned as we continue crafting these magnificent cookies together—I can assure you’re going fall head over heels once finished product arrives warm right from oven!!
Making Your Dreamy Levain Bakery Black and White Cookies
Step 5: The Art of Portioning – Creating Cookie Dough Balls
Now that you have a beautifully combined dough, it’s time to shape these luscious cookies. This is where the magic truly begins! Grab a kitchen scale if you have one, as it can make all the difference in achieving that bakery-style thickness we all adore. You’ll want to weigh out six-ounce portions of dough for each cookie. This weight is crucial because it ensures that our cookies bake evenly and become those thick, decadent treats we’re aiming for. If you don’t have a scale, just remember: aim for a generous handful that feels substantial in your palm—about the size of a small grapefruit.
Once you’ve portioned the dough, gently roll each piece into a smooth ball. Trust me on this; the rolling process helps create surface tension, which will lead to those beautiful, puffy cookies with just the right amount of chewiness inside. Place these dough balls onto a light-colored baking sheet lined with parchment paper. Why light-colored? Darker sheets absorb heat and can cause the bottoms of your cookies to brown too much before they’re fully baked. We want that perfect golden edge while keeping the center soft and gooey. So take your time here and enjoy this tactile part of baking!
Step 6: The Importance of Baking Time and Temperature
Now let’s talk about baking! Preheat your oven to a steamy, hot 400 degrees Fahrenheit—this high temperature is essential for achieving that glorious rise we crave in our cookies. When they hit the oven, you’ll notice how quickly they puff up into those signature thick shapes, creating an enticing aroma that fills your home with warmth and comfort. Place your baking sheet in the center rack of the oven and set the timer for 9-11 minutes.
It’s important to keep an eye on them as they near the end of their baking time. What should you look for? The edges will be set and slightly golden, while the center may still look soft—it’s absolutely paramount not to overbake! Remember, these cookies will continue cooking slightly after being removed from the oven due to residual heat (a process known as carryover cooking). If you see any cracks forming on top—oh my goodness! That’s a sign they’re just about perfect. I promise you, patience here pays off tenfold.
Step 7: Cooling – A Crucial Step Not to Skip
This step might sound simple but trust me when I say it’s one of the most vital parts of cookie-making! Once those delightful little towers are out of the oven, allow them to rest on their baking sheet for at least 10 minutes before transferring them to a wire rack. Why? When cookies come out hot from the oven, they are incredibly fragile; moving them too soon can lead to tragic breakage or flattening—a heartbreak no baker wants to endure!
During this cooling period, something magical happens: as they cool down, their structure stabilizes and solidifies just enough so that when you finally sink your teeth into one later on, you’ll experience that satisfying chewiness throughout without fear of crumbling apart! Plus, letting them rest allows those flavors to meld beautifully together; every bite becomes an indulgent experience bursting with rich chocolatey goodness.
Step 8: The Grand Finale – Enjoying Your Black and White Cookies!
After what might feel like an eternity (but really is just about ten minutes), it’s time for the grand reveal! Carefully transfer your cooled cookies onto a wire rack if you haven’t already done so—this helps them cool completely without becoming soggy from steam trapped underneath. Now comes perhaps my favorite part: tasting these heavenly creations!
As you take your first bite into one of these Levain Bakery Black and White Cookies, allow yourself to be transported into chocolate heaven! Feel how soft yet chewy the texture is as it melts in your mouth; each layer yields a burst of sweet white chocolate mingling with deep dark cocoa flavor that’s nothing short of extraordinary. Whether enjoyed fresh out of the oven or saved for later (if you can resist!), these cookies are more than just dessert—they’re memories waiting to happen.
Final Touches – Making Them Yours
If you’re feeling adventurous or simply want to elevate these cookies even further, consider adding a sprinkle of sea salt atop each one just before they go in the oven—it creates an utterly intoxicating contrast between sweet and salty that takes them over-the-top deliciousness! Or perhaps experiment by folding in some toasted nuts or dried fruit for added texture.
Remember that baking should always be fun—don’t hesitate to make this recipe uniquely yours. Enjoy every moment spent creating something special; after all, sharing food made with love has an incredible way of bringing people together. I can’t wait for you to try this recipe—you’re going to fall head over heels for these Levain Bakery Black and White Cookies! Happy baking!
Storage and Enjoyment Tips for Your Levain Bakery Black and White Cookies
Now that your kitchen is filled with the intoxicating aroma of freshly baked cookies, it’s time to dive into the delightful world of enjoying and preserving these treasures. Trust me, once you take a bite of that thick, chewy cookie featuring a perfect blend of dark cocoa and sweet chocolate chips, you’ll want to savor every last crumb. But let’s be honest—sometimes we bake more than we can eat in one sitting! So how do we keep that bakery-fresh magic alive? Let’s talk about storing these beauties to ensure they remain as delicious as the moment they came out of the oven.
Storing Leftover Levain Bakery Black and White Cookies
To keep your Levain Bakery Black and White Cookies in their prime, the best approach is to store them in an airtight container at room temperature. This method ensures they stay soft and chewy, staying true to that bakery-style texture we all adore. Ideally, consume them within a week for the best experience; however, I promise you they will still taste delightful even after a few days! If you want an extra tip for maintaining their luscious quality, consider adding a slice of bread to the container. This non-negotiable trick not only helps retain moisture but also adds a subtle softness that makes each cookie feel like it was just baked. As you unwrap one from your storage container, the aroma will still waft up to greet you, reminding you that these cookies are truly extraordinary treats.
Freezing Levain Bakery Black and White Cookies for Later
Feeling like stocking up? Freezing your cookies is an absolute game changer. To freeze them properly, simply allow them to cool completely after baking, then place them in a single layer on a baking sheet in your freezer until they are firm. Once frozen solid, transfer them into a freezer-safe bag or container—this way they won’t stick together and will maintain their shape. These cookies can keep beautifully frozen for about three months! When you’re ready for that rich chocolate indulgence again, just pull one (or a few) from the freezer. You can enjoy them straight from there or pop them in the microwave for about 15-20 seconds for an utterly intoxicating warm treat. The convenience of having these gourmet delights at your fingertips makes life so much sweeter—literally!
Dessert
Levain Bakery Black and White Cookies

Indulge in the bliss of homemade Levain Bakery Black and White Cookies, a delightful treat that combines rich dark chocolate with creamy white and milk chocolate chips. These thick, chewy cookies are not just a dessert; they evoke warmth, nostalgia, and joy with every bite. Perfect for holidays, gatherings, or cozy nights at home, these cookies are sure to impress friends and family alike. The magic happens in your kitchen as you create these delectable sweets, bringing together simple ingredients to craft an unforgettable experience. Get ready to bake up a batch of happiness!
- Prep Time: 15 minutes
- Cook Time: 11 minutes
- Total Time: 26 minutes
- Yield: Approximately 10 servings 1x
- Category: Dessert
- Method: Baking
- Cuisine: American
Ingredients
- 1 cup Cold Butter (cut into small cubes)
- 1 cup Brown Sugar
- 1/2 cup Granulated Sugar
- 2 large Eggs (room temperature)
- 1/2 cup Dark Unsweetened Cocoa Powder
- 2 1/2 cups All-Purpose Flour
- 1 teaspoon Cornstarch
- 3/4 teaspoon Baking Soda
- 1/2 teaspoon Salt
- 11-ounce bag White Chocolate Chips
- 1 cup Milk Chocolate Chips
Instructions
- Preheat your oven to 400°F (200°C).
- In a mixing bowl, cream cold butter with brown sugar and granulated sugar until light and fluffy.
- Add room temperature eggs and mix until combined.
- In a separate bowl, whisk together cocoa powder, flour, cornstarch, baking soda, and salt.
- Gradually fold the dry ingredients into the wet mixture until just combined.
- Gently fold in white chocolate chips and milk chocolate chips.
- Portion out six-ounce balls of dough onto a lined baking sheet.
- Bake for 9-11 minutes until edges are golden; centers should remain soft.
- Allow cookies to cool on the baking sheet for at least 10 minutes before transferring to a wire rack.
Nutrition
- Serving Size: 1 serving
- Calories: 380
- Sugar: 28g
- Sodium: 150mg
- Fat: 21g
- Saturated Fat: 12g
- Unsaturated Fat: 7g
- Trans Fat: 0g
- Carbohydrates: 43g
- Fiber: 2g
- Protein: 5g
- Cholesterol: 60mg