Crispy Hawaiian Garlic Chicken: A Spicy Island-Inspired Delight
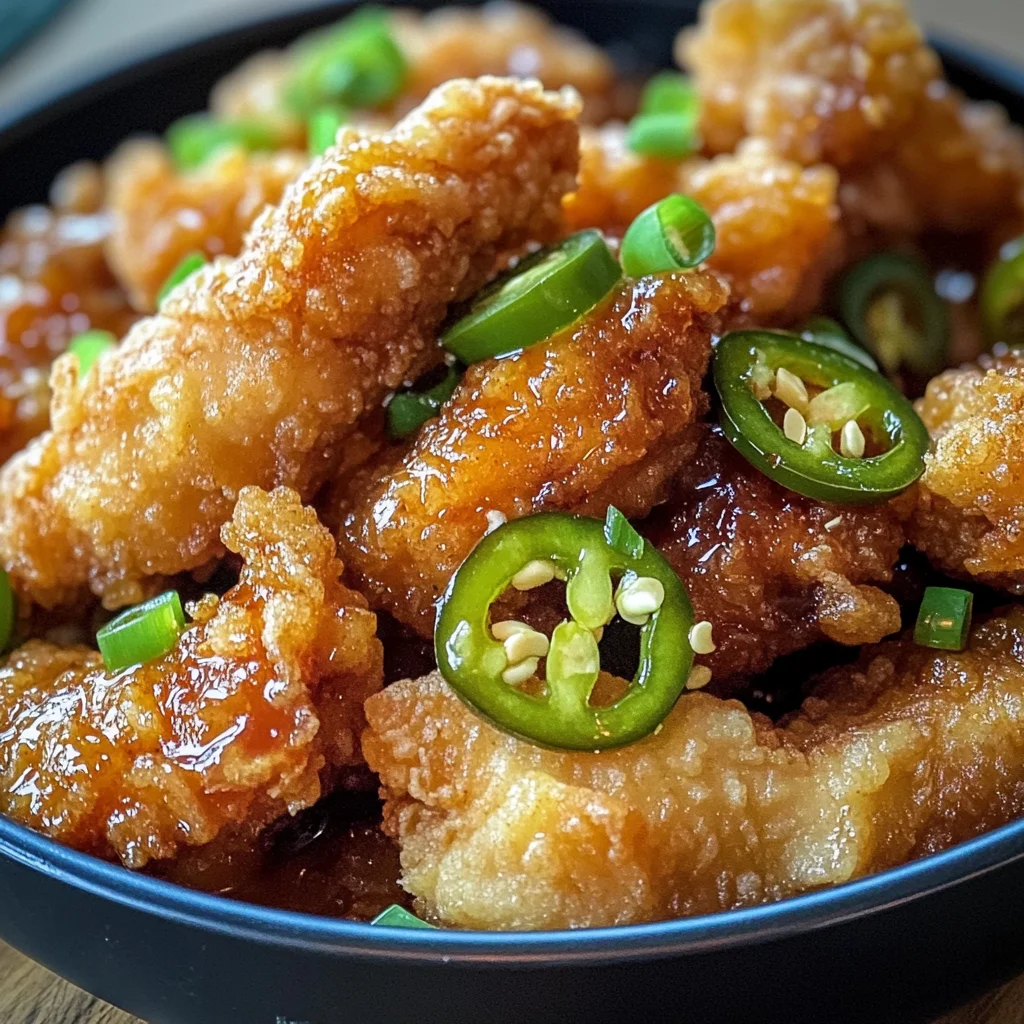
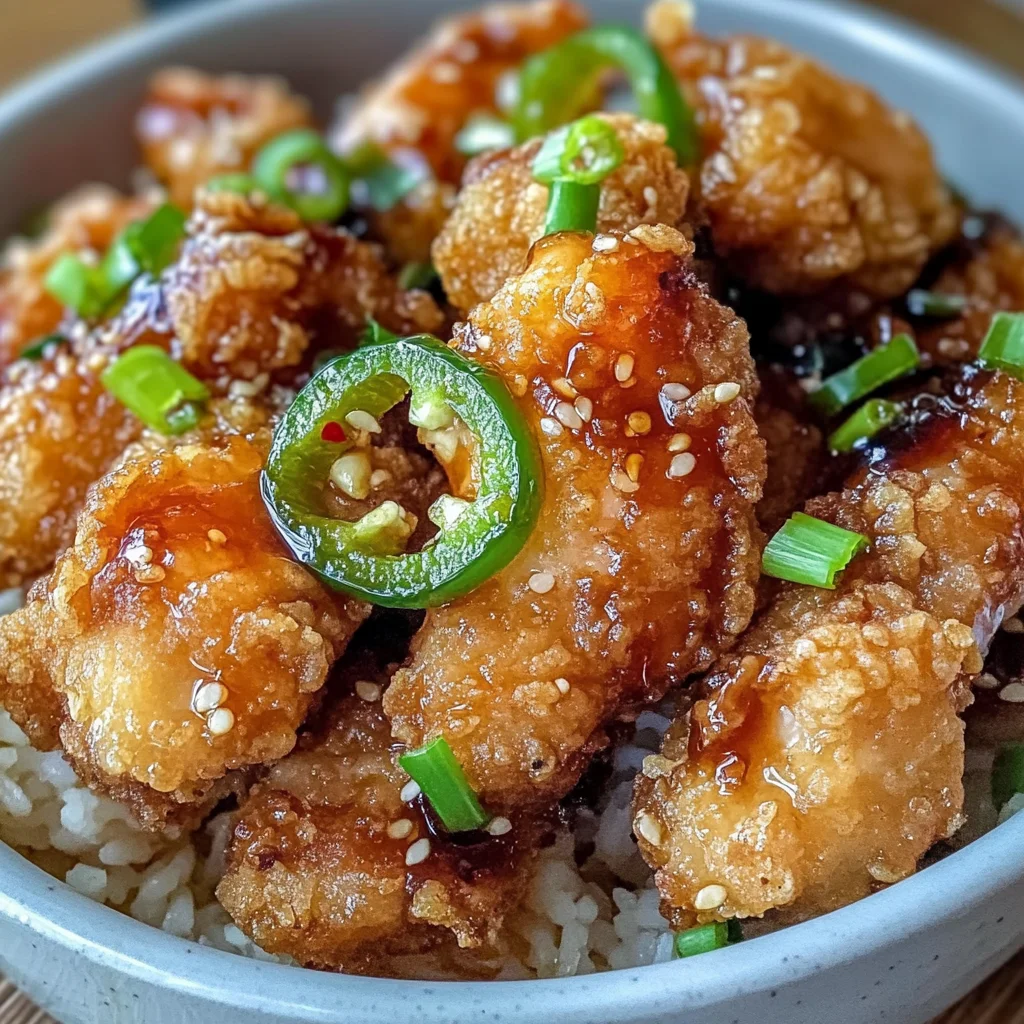
Crispy Hawaiian Garlic Chicken is more than just a meal; it’s a delightful journey that takes you to the sun-drenched shores of Hawaii, where the air is rich with the aroma of sizzling spices and sweet tropical breezes. Each bite of this dish reveals layers of flavor—tender morsels of chicken thighs fried to golden perfection, enveloped in a luscious soy garlic sauce that dances on your palate. It’s that enticing combination of sweetness from the sugar, umami from the soy sauce, and just a hint of heat from the jalapeños that creates an experience so delicious, it feels like a warm hug on a plate. Trust me, once you take that first bite, you’ll find yourself transported to those picturesque island landscapes—this is one recipe you’ll want to keep close to your heart.
In every family kitchen, there are recipes that hold sentimental value, often passed down through generations or created in moments of culinary inspiration. The Crispy Hawaiian Garlic Chicken embodies that spirit wonderfully—it’s perfect for gatherings with friends, cozy weeknight dinners, or whenever you crave something special yet comforting. Imagine gathering around the table with loved ones, sharing stories and laughter while savoring this vibrant dish together. It’s an invitation to celebrate flavors that not only nourish our bodies but also connect us to each other in profound ways.
Crispy Hawaiian Garlic Chicken: A Spicy Island-Inspired Delight: Savor the Flavors of Paradise
Welcome to this mouthwatering adventure! As we dive into making Crispy Hawaiian Garlic Chicken, I can’t wait for you to experience the explosion of flavors and textures that awaits. This recipe is not just about cooking; it’s about crafting something truly special that will leave everyone at your table asking for seconds. So let’s gather our ingredients and get ready for some fun in the kitchen!
Ingredients:
Embarking on this culinary journey requires quality ingredients that come together harmoniously to create magic. Let’s explore each component and understand why they’re essential for achieving that perfect Crispy Hawaiian Garlic Chicken.
- 1 ½ pounds boneless, skinless chicken thighs. Choosing boneless skinless chicken thighs is key for this dish as they are incredibly tender and juicy compared to chicken breasts. Their higher fat content allows them to stay moist during frying while developing a beautifully crispy exterior. When selecting chicken thighs, look for pieces that are plump and have a fresh smell; avoid any with discoloration or an off-putting scent.
- 1 jalapeño (optional), sliced into ¼-inch thick slices. The jalapeño adds a vibrant kick and smoky flavor to our dish. If you’re sensitive to spice, don’t worry—you can easily omit it or substitute it with a milder pepper like bell peppers or banana peppers. If you decide to use it but want less heat, simply remove the seeds before slicing; this way, you’ll still enjoy its flavor without overwhelming your taste buds.
- ½ teaspoon salt. Salt is crucial in enhancing all the flavors in your dish; think of it as bringing harmony among ingredients. It draws out moisture from the chicken while seasoning it perfectly before frying. When seasoning your meat, be sure to distribute the salt evenly—it’s important for achieving consistent flavor throughout each piece.
- ½ cup flour. This ingredient contributes significantly to our crispy coating! Flour forms the base layer that helps bind all those wonderful seasonings to our chicken thighs during frying. Opt for all-purpose flour here as it creates a nice texture when fried—light yet sturdy enough to hold its shape.
- ¼ cup cornstarch. You might be wondering why cornstarch is included in our coating mixture—it’s because it’s absolutely paramount for achieving maximum crispiness! Cornstarch absorbs moisture better than flour alone and creates an ultra-crispy outer layer when fried. Trust me on this; it makes all the difference!
- ¼ teaspoon coarse ground black pepper. This addition introduces a gentle warmth and depth of flavor without overpowering our dish’s essence. The coarseness adds texture too! When seasoning at this stage, feel free to adjust according to your taste preferences—a little extra pepper never hurt anyone if you enjoy some zing!
- Oil for frying (enough to submerge chicken). Selecting the right oil is essential for achieving perfect frying results; I recommend using vegetable oil or canola oil due to their high smoke points which prevent burning while cooking at high temperatures. Always ensure you have enough oil in your pan so each piece can be submerged fully—it ensures even cooking and crisping!
- ¼ cup soy sauce. Soy sauce brings an incredible umami flavor profile while also adding depth and richness through its salty notes—think liquid gold! Opt for low-sodium varieties if you’re watching sodium intake; they still provide great taste without being overly salty.
- ¼ cup sugar. The sugar serves multiple purposes: balancing out the savory elements from soy sauce while also enhancing caramelization during frying—this creates those irresistible crispy edges we crave! Feel free to use brown sugar instead if you prefer its deeper molasses notes.
- 3 tablespoons water. Water helps dissolve sugar within our sauce mixture ensuring everything blends harmoniously together—it’s simple yet impactful! Don’t skip this step as it aids in creating a smoother consistency once heated.
- ½ teaspoon ground ginger. Ground ginger adds warmth along with an aromatic touch which beautifully complements garlic’s punchiness later on—it balances flavors wonderfully! Fresh ginger could work too if you prefer its brighter notes just be sure to finely mince it before adding!
- 2 tablespoons garlic, minced. Ahh garlic—the star player in this dish! Its pungent aroma enhances every bite making it utterly intoxicating alongside sweet and spicy elements present throughout our meal—freshly minced garlic delivers maximum flavor impact!
Now that we’ve laid out our ingredients with care and understanding let’s gather those essential tools together so we can start creating something truly extraordinary!
Equipment You’ll Need:
Having the right tools at your disposal makes cooking not just easier but more enjoyable too! Think of these items as partners on your culinary adventure—they’ll help us navigate through each step smoothly while ensuring success along the way.
- Deep frying pan or wok – This vessel is non-negotiable when it comes time for frying! Its deep sides allow ample room for bubbling oil which means less splatter and perfectly cooked chicken pieces every time—you’ll want one large enough so multiple batches can fit comfortably without overcrowding!
- Slotted spoon – A slotted spoon will become your best friend during frying sessions as it’ll allow excess oil to drain away effortlessly when retrieving those perfectly crisped nuggets from hot oil—you’ll appreciate how easy cleanup becomes thanks due diligence here!
- Mixing bowls – A couple of mixing bowls come in handy throughout various stages—from marinating chicken pieces before dredging them into seasoned coatings—to preparing sauces—we need different sizes depending on what task awaits us next!
- Measuring cups & spoons – Precision matters immensely when crafting flavorful dishes like ours—it ensures everything balances beautifully together resulting flavorful outcomes rather than guessing ingredients leading possible mishaps later down road so keep these close by at all times!
With our ingredients assembled alongside trusty equipment ready-to-go let’s dive deep into preparing this delectable Crispy Hawaiian Garlic Chicken: A Spicy Island-Inspired Delight step-by-step until every detail shines brightly before serving up joyous memories shared around dinner tables everywhere!
Step 1: Cut and Season Your Chicken
To begin this flavorful journey into Crispy Hawaiian Garlic Chicken goodness, start by cutting those boneless skinless chicken thighs into 1-inch pieces—the goal here is uniformity since even cooking ensures tenderness throughout each nugget! Once they’re cut down into manageable bites (I promise it makes eating easier!), generously season them with salt and coarse ground black pepper—it may seem simple but trust me; seasoning prior lays down foundational flavors within every morsel once they hit hot oil later on so don’t rush through this vital step!
Step 2: Prepare Your Jalapeños
If you’ve opted for jalapeños (and I wholeheartedly encourage you do!), slice them carefully into ¼-inch thick rings now—they’ll add lovely smokiness alongside heat which beautifully contrasts against sweetness found within soy sauce later—in fact removing seeds beforehand gives more control over spiciness levels making them enjoyable even if you’re sensitive towards fiery sensations! However if spiciness isn’t quite your jam? No worries whatsoever—simply set aside these beauties until we’re ready or swap them out altogether with milder peppers instead—your choice completely!
Step 3: Create Your Coating Mixture
Next up is creating magic through combining flour, cornstarch (our secret weapon) salt & black pepper together within one mixing bowl—it might seem like an ordinary mixture but trust me when I say it’s crucial towards achieving that coveted crispiness we desire so much! As mentioned earlier—the cornstarch works wonders absorbing moisture better than plain flour alone thus leading us towards incredible crunch after frying—a light dredging really adheres nicely creating beautiful golden crusts around juicy center pieces inside once cooked properly—I believe you won’t regret taking time doing this step right either!
Step 4: Heat Your Oil
Now onto heating up oil within deep frying pan or wok over high heat until reaching around 350°F (175°C)—this temperature range allows crispness without overcooking inside simultaneously! Not sure if it’s ready? Drop small amounts from coating mixture into hot oil—if they sizzle immediately upon contact then voilà! You’re set here—but please ensure patience prevails since adding too many pieces at once may cause temperature drop leading soggy results instead golden perfection we crave—therefore fry batches respecting timing between each round ensuring everyone gets treated equally deliciousness wise too!
As we continue moving forward through preparation stages ahead remember—we’re creating something truly special here; meticulous attention pays off big-time allowing final outcome shine brightest among others whenever served up whether casual weeknight dinners or festive gatherings alike—the joy shared around meals made home always warms hearts beyond measure…so let’s keep going strong together till completion arrives soon enough!
Step 5: Perfecting the Crispy Chicken Fry
Now that we have our chicken beautifully coated and ready to go, let’s dive into the frying process, which is truly where the magic happens. Start by heating up your oil in a deep frying pan or wok over high heat—aim for a sizzling temperature of 350°F (175°C). If you don’t have a thermometer handy, here’s a little trick: drop a small amount of your coating mixture into the oil. If it sizzles and bubbles up immediately, congratulations! Your oil is ready for action. This step is absolutely paramount because frying at the right temperature ensures that your chicken achieves that coveted golden-brown crispiness while preventing it from soaking up too much oil. We want crispy, not greasy!
Once your oil is hot and ready, it’s time to fry those chicken pieces. This part requires a bit of patience; don’t rush it! Fry in batches, placing only enough chicken pieces in the pan to avoid crowding—about six to eight pieces at a time should do. Overcrowding can lower the oil temperature and lead to soggy chicken instead of that delightful crunch we’re after. Fry each batch for about 4-5 minutes, keeping an eye on them as they turn golden brown and begin to float slightly in the oil. The visual cue here is key: you want that golden hue to develop without burning. Once they reach perfection, use a slotted spoon to remove the chicken from the oil and place it on a plate lined with paper towels to drain any excess oil. This step helps maintain that crispy texture we all crave while ensuring no greasy residue remains.
Step 6: Sizzling Jalapeño Rings
While your chicken is resting comfortably on its towel-lined plate, it’s time to give those jalapeños some love! These vibrant rings are not just an afterthought; they add a whole new level of flavor and texture that elevates this dish beyond ordinary fried chicken. Heat the same oil back up for frying the jalapeños because why waste all that deliciousness? Just like with the chicken, make sure your oil is hot enough by checking with a small piece of batter—if it sizzles vigorously, you’re good to go!
Carefully add your sliced jalapeños into the hot oil in small batches—this will help keep their heat consistent and ensure they fry evenly without getting soggy. Fry them for about 30 seconds or until they become crispy and slightly blistered. You’ll notice their bright green color intensifying as they cook—a true feast for your eyes! After frying, transfer them onto another paper towel-lined plate to absorb excess oil. Trust me when I say these little rings are not just for garnish; they infuse every bite of chicken with an intoxicating smokiness and heat that will have everyone coming back for seconds (or thirds!).
Step 7: Whisking Together the Irresistible Sauce
With your chicken and jalapeños fried to perfection, let’s create that heavenly sauce that ties all these beautiful components together into one delectable dish! In a saucepan over medium-high heat, combine ¼ cup soy sauce, ¼ cup sugar, 3 tablespoons water, ½ teaspoon ground ginger, and 2 tablespoons minced garlic. As you mix these ingredients together, you’ll notice how each component plays its unique role—the soy sauce provides depth with its umami richness while sugar balances it out beautifully with sweetness.
Bring this mixture to a gentle boil while whisking continuously until the sugar dissolves completely—this process usually takes about 2-3 minutes. It’s essential to keep whisking during this time so nothing sticks to the bottom of your pan or scorches; burnt garlic or ginger can ruin this exquisite sauce! Once boiling, reduce the heat and turn off the burner—you want this sauce thickened but not overly reduced. The goal here is glossy perfection—the sauce should cling lovingly to each piece of chicken when tossed later on.
Step 8: Tossing Everything Together
Now comes my favorite part—the grand assembly! In a large mixing bowl (and I mean large enough to accommodate all that goodness), gently place your freshly fried chicken pieces along with those crispy jalapeño rings we’ve lovingly prepared. Pour that beautifully thickened sauce over everything like liquid gold—oh my goodness, just imagine how divine this looks already! Now it’s time for some tossing magic—using tongs or a spatula, gently toss everything together until every piece of chicken and each jalapeño ring are evenly coated in that irresistible soy garlic goodness.
But here’s where patience really pays off: be careful not to over-mix! While we want each piece well-coated in sauce, we also want our glorious crispy exterior intact so every bite maintains that satisfying crunch we’ve worked so hard for. As you toss gently but thoroughly (think of it as giving each piece of chicken a warm hug), watch how the sauce clings beautifully without making things soggy. This delicate balance between crispiness and sauciness is what makes this dish truly extraordinary.
Final Touches: Serving Your Crispy Hawaiian Garlic Chicken
As you prepare to serve this masterpiece, take a moment to appreciate what you’ve created—it’s not just food; it’s an experience bursting with flavors reminiscent of sun-soaked Hawaiian shores! Transfer your coated Crispy Hawaiian Garlic Chicken onto a serving platter with pride; sprinkle those crispy jalapeños generously on top for added flair and flavor. To elevate your presentation even more—and trust me, every detail counts—consider garnishing with freshly chopped cilantro or green onions.
And oh! Don’t forget about adding lime wedges on the side; there’s something utterly refreshing about squeezing fresh lime juice right before taking your first bite—it brightens all those rich flavors while adding an exhilarating zing! Serve immediately alongside fluffy steamed rice or even quinoa if you’re feeling adventurous—it will soak up all that delicious sauce beautifully.
I promise you; this dish will be met with applause around your dinner table! With its symphony of flavors—sweetness from sugar contrasted against savory soy notes infused with spicy jalapeños—every bite promises joy wrapped in culinary delight. So gather around friends and family because this isn’t just dinner; it’s an island-inspired celebration waiting to happen! Enjoy every moment as you savor each flavorful morsel you’ve created from scratch—you deserve it!
Conclusion:
As we wrap up our culinary journey through making Crispy Hawaiian Garlic Chicken: A Spicy Island-Inspired Delight, I can’t help but feel an overwhelming sense of joy knowing you’re about to embark on this flavorful adventure yourself! This recipe isn’t just about cooking; it’s about crafting memories infused with vibrant flavors and heartfelt connections. The combination of tender chicken thighs paired with that intoxicating soy garlic sauce creates an experience that dances on your palate—a true symphony of sweet, salty, and spicy notes that elevates ordinary meals into extraordinary feasts.
This dish is undeniably a “must-try” not only for its exceptional taste but also for the sheer joy it brings when preparing it. Picture yourself gathering friends around the table or serving it up at a family gathering—the laughter and conversation flowing as everyone digs into those crispy morsels. With every bite, you’ll find not just deliciousness but also warmth and comfort—a perfect fit for weeknight dinners or festive celebrations alike!
Imagine savoring one of these golden-crispy pieces alongside a fluffy mound of jasmine rice soaking up all that wonderful sauce; perhaps with a side of grilled vegetables glistening with olive oil and herbs. For an afternoon pick-me-up, pair them with a tropical fruit salad bursting with mangoes and pineapples. Or perhaps elevate your experience further with some fragrant coconut rice—each bite transporting you straight back to those sun-kissed beaches!
Feeling adventurous? This recipe is wonderfully adaptable! You might try swapping out the garlic for fresh herbs like basil or cilantro for an entirely new flavor profile; each variation holds its own unique charm! Or consider adding some pineapple chunks into the frying mix—imagine those sweet bursts against the backdrop of savory chicken! Whatever path you choose on this culinary journey, I invite you to explore these variations and share your experiences with me. Trust me; each twist can bring something profoundly satisfying to your table.
Crispy Hawaiian Garlic Chicken
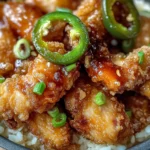
Discover the irresistible flavors of Crispy Hawaiian Garlic Chicken: A Spicy Island-Inspired Delight—perfectly fried chicken coated in savory garlic soy sauce!
- Prep Time: 20 minutes
- Cook Time: 25 minutes
- Total Time: 45 minutes
- Yield: Serves approximately four people 1x
- Category: Dinner
- Method: Frying
- Cuisine: Hawaiian
Ingredients
- 1 ½ pounds boneless, skinless chicken thighs
- 1 jalapeño, sliced (optional)
- ½ teaspoon salt
- ½ cup all-purpose flour
- ¼ cup cornstarch
- ¼ teaspoon coarse ground black pepper
- Oil for frying
- ¼ cup low-sodium soy sauce
- ¼ cup sugar (brown sugar optional)
- 3 tablespoons water
- ½ teaspoon ground ginger
- 2 tablespoons minced garlic
Instructions
- Cut the chicken thighs into 1-inch pieces and season with salt and pepper.
- If using, slice jalapeños into rings.
- In a bowl, mix flour, cornstarch, salt, and black pepper.
- Heat oil in a deep frying pan to about 350°F (175°C).
- Dredge chicken pieces in the coating mixture and fry in batches for about 4-5 minutes until golden brown; drain on paper towels.
- Fry jalapeño rings for about 30 seconds until crispy; drain on paper towels.
- In a saucepan over medium heat, combine soy sauce, sugar, water, ginger, and garlic; bring to a boil until sugar dissolves.
- Toss fried chicken and jalapeños in the sauce until evenly coated.
Nutrition
- Serving Size: Approximately 4 ounces of chicken with sauce
- Calories: 380
- Sugar: 7 grams
- Sodium: 580 mg
- Fat: 18 grams
- Saturated Fat: 2 grams
- Unsaturated Fat: 15 grams
- Trans Fat: 0 grams
- Carbohydrates: 32 grams
- Fiber: 1 gram
- Protein: 28 grams
- Cholesterol: 90 mg