Best Dutch Apple Pie Recipe
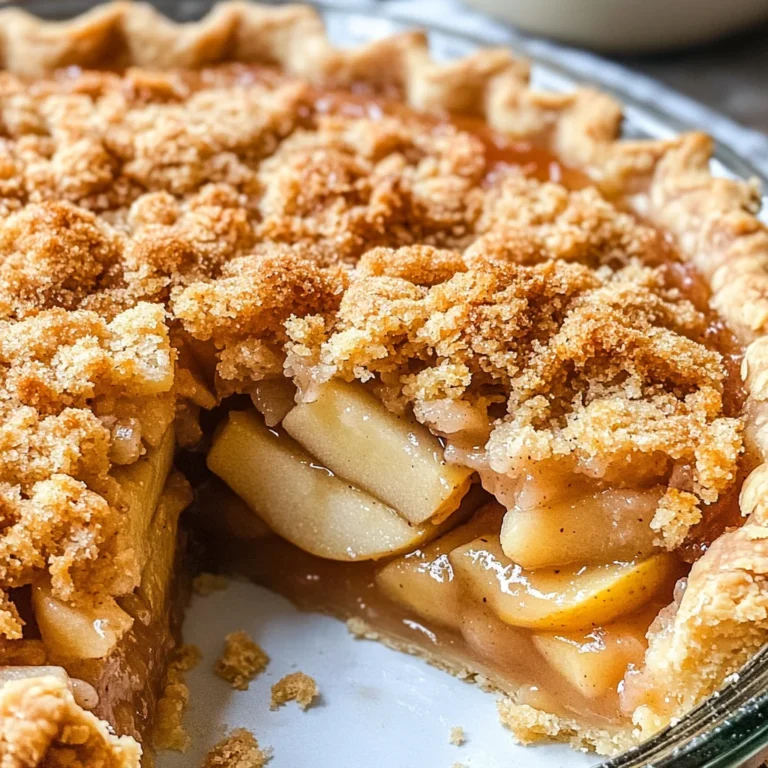
There’s something deeply comforting about a homemade Dutch apple pie, isn’t there? The very idea transports me to sun-drenched kitchen afternoons, where laughter dances with the fragrant warmth of cinnamon and buttery pastry. This is not just about baking; it’s about weaving memories into the fabric of your home. Each slice reveals tender apples, lovingly embraced by a flaky crust and crowned with that irresistible crumb topping—it’s a symphony of flavors that speaks to the heart. When you take that first bite, the balance of sweet and tart, combined with the crunch of the topping, creates an experience that is nothing short of extraordinary. And I promise you, this Best Dutch Apple Pie Recipe will be your new favorite way to celebrate life’s little moments.
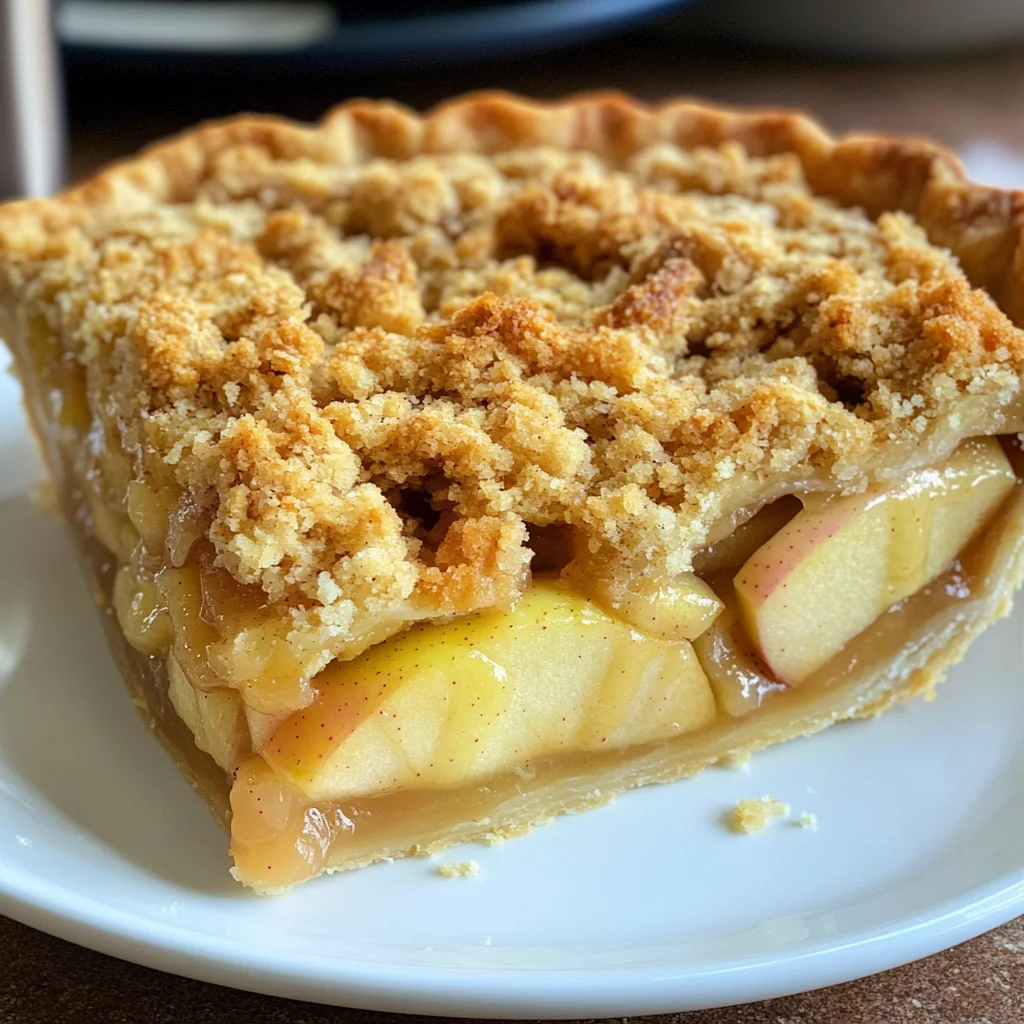
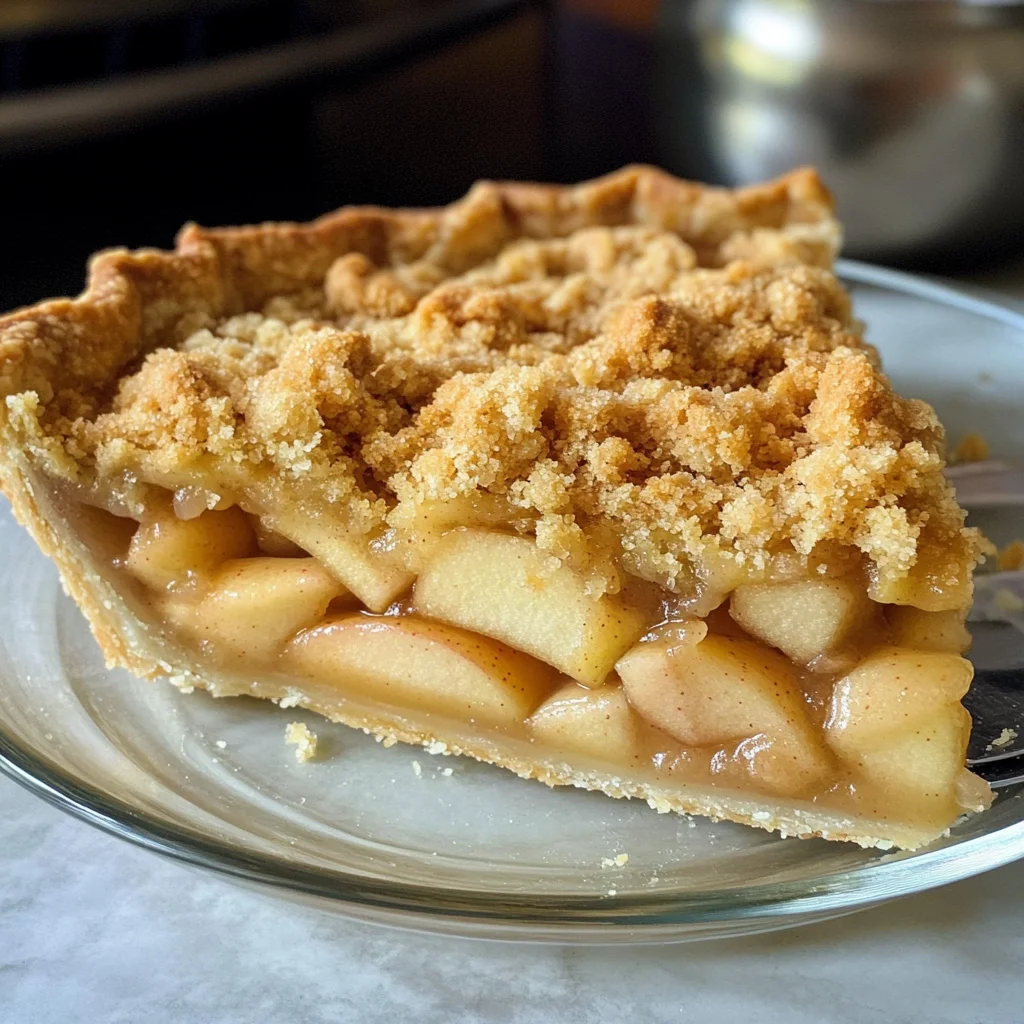
What makes this pie truly special is its heritage. Originating from the Netherlands, Dutch apple pie differs from its classic American counterpart by featuring a delightful crumb topping instead of a traditional top crust. It’s a beautiful marriage of tradition and innovation that invites you to explore flavors in unexpected ways. Whether you’re gathering around the table for Thanksgiving or simply enjoying a quiet evening at home, this pie brings people together in the most delicious way possible. Just imagine slicing into that golden crust and watching the warm apple filling beckon—it’s a moment worth savoring.
Best Dutch Apple Pie Recipe: A Slice of Heaven
As we embark on this culinary journey together, I want you to feel the excitement bubbling up inside you! Baking this pie is not just about following instructions; it’s an opportunity to express love through food. With every step, you’ll be creating something magical—a stunning dessert that will leave your friends and family in awe. So let’s gather our ingredients and get ready for some serious baking joy!
Ingredients:
Before we dive into baking bliss, let’s chat about our cast of characters—the ingredients that will come together to create this stunning Dutch apple pie. Each one plays a crucial role, so let’s make sure we understand why they matter.
- 1 ¼ cups all-purpose flour. This is the backbone of our flaky crust! All-purpose flour strikes the perfect balance between tenderness and structure; it provides just enough gluten for elasticity without making our crust tough. When selecting flour, look for brands that are finely milled—this ensures an even texture in your dough. If you’re feeling adventurous or need a gluten-free alternative, almond or oat flour can also work beautifully.
- ½ teaspoon salt. Salt is truly magic in baking—it enhances flavors and balances sweetness while helping to create a more complex taste profile in your crust. Don’t skip this ingredient! A pinch of salt brings out the natural sweetness of our apples later on.
- ½ cup frozen butter. Freezing your butter beforehand allows us to achieve those gorgeous flaky layers in our pie crust! When you shred it directly into the flour mixture, those little pieces remain intact as they melt during baking—creating steam pockets that yield the flakiness we’re after. Opt for high-quality unsalted butter here; it’s essential for rich flavor without overwhelming saltiness.
- 4-5 tablespoons chilled water. Water acts as our binding agent here, but we must handle it gently! Adding it gradually prevents overworking our dough—if we add too much or mix too vigorously, we risk turning our fluffy crust into something tougher than desired. Chilled water helps keep everything cool as well, which is essential for maintaining butter’s integrity.
- ½ teaspoon cider vinegar. This little splash does wonders! It helps tenderize the dough while imparting a slight tanginess that complements our sweet filling beautifully. Plus, it works hand-in-hand with our flour to prevent gluten from developing too much—a non-negotiable factor if you want a tender crust!
- 7 tablespoons melted butter. A key player in enriching both our crumb topping and apple mixture, melted butter provides moisture and binds everything together harmoniously while enhancing overall flavor with its richness.
- ⅔ cup brown sugar. This adds depth with its caramel notes—perfectly pairing with the tartness of Granny Smith apples! Brown sugar also retains moisture more effectively than granulated sugar, ensuring your pie remains luscious rather than drying out during baking.
- ½ teaspoon cinnamon & ⅛ teaspoon nutmeg. These spices are like warm hugs in your dessert! They bring warmth and complexity to each bite while complementing the sweetness of apples beautifully—making every slice profoundly satisfying.
- 1 cup flour, ½ cup butter, ¼ cup water, 3 tablespoons flour, ¼ cup granulated sugar, ¼ cup brown sugar, & 1 ½ teaspoons cinnamon – These ingredients combine to form our delectable crumb topping! The blend creates an irresistibly crunchy layer on top that contrasts perfectly with soft apples beneath it; this combination is what sets Dutch apple pie apart from others!
- 2 ½ lbs granny smith and pink lady apples (or honeycrisp) cored (peeled) & cut into ¼ inch slices. Choosing these varieties ensures vibrant flavor; Granny Smith lends acidity while Pink Lady adds sweetness—a match made in heaven! Always opt for fresh apples; they should be firm to ensure they hold their shape during baking yet tender enough when cooked through.
Now that we’ve gathered all these wonderful ingredients, let’s move on to preparing them into something unforgettable!
Equipment You’ll Need:
Before we jump into preparing our Best Dutch Apple Pie Recipe, let’s take a moment to gather some essential tools that will make your baking experience smooth and enjoyable! Having the right equipment at your fingertips transforms cooking from a chore into an adventure filled with creativity.
- Mixing bowls – You’ll need a few different sizes for mixing doughs and batters comfortably; glass or stainless steel bowls are best since they don’t retain odors or stains like plastic can sometimes do.
- Rolling pin – This trusty tool helps roll out dough evenly without tearing—which means no more awkward patches on your beautiful pie crust! Opt for a heavier model if possible; it gives better control when rolling out delicate pastry doughs.
- Pie dish (9-inch) – The right dish matters here: choose a glass or ceramic one for even heat distribution—you want every edge baked perfectly golden brown!
- Pastry cutter or box grater – Using either tool will help shred cold butter efficiently into flour while ensuring maximum flakiness when baked!
- Measuring cups & spoons – Precision is vital when baking; having accurate measuring tools guarantees consistency across batches—trust me: no one enjoys guessing how much “a pinch” really means!
With these tools assembled alongside your lovely ingredients list—we’re now ready to bring this heavenly Dutch apple pie recipe to life!
Step 1: Crafting Our Flaky Crust
Let’s begin by whisking together the all-purpose flour and salt in one large bowl until well combined; this initial step sets up our dry ingredients beautifully! Next comes my favorite part—grating frozen butter right into this mixture using either a box grater or pastry cutter until small clumps form throughout (think tiny pebbles!). This process ensures those little bits remain intact as they melt during baking—a crucial element for achieving those lovely flaky layers we desire in every slice!
Now here’s where things get exciting: stir together chilled water with cider vinegar separately before adding them gradually—one tablespoon at a time—to our flour-butter mix using a fork just until everything starts coming together nicely without overmixing (we want tenderness!). Once you’ve reached that clumpy stage where it almost holds itself together—don’t hesitate to use your hands gently finishing off mixing until fully integrated into cohesive disk shape wrapped tightly in plastic wrap before chilling thoroughly (at least two hours or overnight if possible). Trust me on this—you’ll thank yourself later when slicing through perfectly crisp layers!
Step 2: Prepping Our Crust
After patiently waiting those hours which felt like eternity (I know!), preheat your oven to 375 degrees F (190 degrees C) while letting excitement simmer inside you as we roll out dough next! Lightly dusting both countertop surface & rolling pin ensures ease when rolling out chilled disk evenly until reaching approximately twelve inches wide—a beautiful circle ready for tucking gently into prepared pie dish waiting eagerly nearby!
When transferring rolled-out dough onto pan—folding over lightly across pin works wonders—or simply lift carefully using hands avoiding tearing edges altogether while gently fitting it snugly within dish edges trimming excess hanging down around sides before tucking under along edge creating lovely fluted design (a beautiful touch!). Now comes an optional step worth taking: cover overhang edges tightly using aluminum foil then fill center generously with pie weights ensuring bottom doesn’t puff up during initial bake time!
Step 3: Blind Baking
We’re moving forward now as we slide prepared dish filled elegantly into preheated oven allowing blind bake action happening first here lasting fifteen minutes until edges are lightly set before carefully removing weights along foil afterward revealing delicate beauty underneath still intact below surface level after another brief bake lasting ten-fifteen minutes longer until crust turns lightly golden brown throughout all areas visible upon inspection revealing perfection achieved through patience shown thus far!
Step 4: Creating Our Heavenly Filling
While awaiting results from crusts’ initial bake frenzy-time spent whipping up scrumptious filling awaits us next within small bowl whisking melted butter alongside brown sugar followed closely behind by fragrant cinnamon & nutmeg filling air around us invitingly before sprinkling measured amounts flour gently folding all together until blended seamlessly leaving behind delightful aromas wafting everywhere once done mixing thoroughly covering bowl then storing away briefly within refrigerator allowing flavors meld together perfectly before meeting sliced apples shortly thereafter reminding ourselves how special everything feels right now preparing such decadent creations ahead!
With these early steps complete—we’re making progress toward assembling masterpiece ahead soon enough gathering ourselves back shortly diving deep further discovering wonders unfolding within delicious world surrounding us now awaiting next phases eagerly progressing onward toward tasting triumphs ahead finally delightfully shared among loved ones gathered near close sharing stories whilst indulging each bite savorously reminding us why we cherish cooking/baking dearly daily adventures alike bringing warmth connection throughout lives shared forevermore…
Stay tuned as we continue crafting each delicious element leading toward finishing touches completing final creation soon enough ready proudly served desserts cherished fondly forevermore indeed capturing hearts everywhere gathered warmly around tables filled laughter echoed memories created anew every single time enjoyed thoroughly celebrated always uniting souls uniquely given moments shared endlessly treasured everlastingly well beyond simple act preparation itself truly exceptional artistry enjoyed endlessly at homes built upon shared love expressed genuinely tasted deeply felt joyfully experienced timelessly always remembered fondly returning back often reliving memories created wholly enriched experiences undeniably lived eternally cherished forevermore…
Step 5: Creating the Irresistible Apple Filling
Now that your crust is prepped and ready to go, let’s talk about the heart of this Best Dutch Apple Pie Recipe—the filling! In a small saucepan, combine the melted butter, water, flour, granulated sugar, brown sugar, and cinnamon. This mixture is like liquid gold; it’s going to bind all those beautiful apple slices together and create a luscious sauce that perfectly complements the tartness of Granny Smith and the sweetness of Pink Lady apples. Cook this medley over medium-low heat while stirring frequently until it reaches a gentle boil. Trust me on this step; you want that slightly thickened consistency to coat the apples beautifully. Once it starts bubbling away, let it simmer for about three minutes—this will allow the flavors to marry and intensify.
After simmering, pour this warm concoction over your sliced apples in a large mixing bowl. Give everything a good toss to ensure each slice is generously coated in that wonderful buttery goodness. I can’t stress enough how important this step is! It not only adds flavor but also helps to keep your pie from becoming too watery when it bakes. Nobody wants a soggy bottom pie! The warmth from the mixture will start softening those apples just a bit, making them tender and juicy when baked. Set this aside while we move on to our crumb topping.
Step 6: Crafting the Perfect Crumb Topping
Now we’re diving into one of my favorite parts of this recipe—the crumb topping! This is where we elevate our pie from delicious to utterly intoxicating. In a small bowl, whisk together some melted butter, brown sugar, cinnamon, and nutmeg—the aroma alone is enough to make your heart skip a beat! Then, using a fork, gradually add in flour until you achieve that perfect crumbly texture. You want it to be somewhat clumpy but still manageable; think of it as creating tiny mountains of flavor that will bake up golden brown on top of your pie.
Don’t rush through this step; take your time breaking up any large clumps with your fork so they evenly distribute over the apples later on. This crumb topping is absolutely paramount; it adds that signature crunchy contrast to the tender apples beneath and creates an irresistible texture in every bite. Once mixed well, cover your bowl and pop it in the fridge for about 10-15 minutes while you prepare for assembly—this chilling process will help solidify the butter again, contributing to those beautiful crumbs when baked.
Step 7: Assembling Your Pie
With both your filling and topping prepped and resting nicely in their respective bowls, it’s time for the fun part—putting everything together! Start by taking your beautifully pre-baked crust out of the oven (remember how we pricked it? That was crucial!). Carefully spoon in your apple filling like you’re tucking each slice into bed—laying them flat as you go ensures even cooking and maximizes surface area for all that glorious crumb topping. Take a moment here to admire those vibrant colors; trust me when I say that visual appeal makes all the difference.
Once you’ve laid out all those apple slices snugly in their crusty home, it’s time to reach back into the fridge for that chilled crumb topping. Using a fork again, break up any remaining clumps if needed before sprinkling it generously over the apples. Don’t skimp here; you want an even layer covering every inch so each slice gets its fair share of that sweet buttery crunch when served. After everything is set in place, gently transfer your pie onto a baking sheet lined with parchment paper—this little trick saves you from messy spills in case any juices bubble over during baking.
Step 8: Baking Your Perfect Best Dutch Apple Pie
Now comes one of my favorite moments—the aroma wafting through your kitchen as this masterpiece bakes! Preheat your oven to 375°F (190°C) if you haven’t already done so—this temperature is key in developing that golden crust while allowing the filling to bubble away joyfully inside. Place your assembled pie on the center rack and bake uncovered for about 50-55 minutes or until the topping turns beautifully golden brown and bubbly juices start peeking out from under those crispy crumbs.
As tempting as it may be, resist opening that oven door too often—each peek releases heat and can affect baking times dramatically! Instead, keep an eye out for visual cues: look for bubbling around the edges as well as an enticingly fragrant aroma filling your space (I mean seriously—it’s heavenly!). A good test for doneness involves shaking the pie gently after about 45 minutes; if it jiggles slightly without sloshing around too much then you’re right on track! Once finished baking, allow it to cool on a wire rack for several hours before slicing into it—you’ll want those filling juices to set up so every slice holds its shape beautifully.
Final Touches: Serving Your Slice of Heaven
After what feels like an eternity waiting (but really just a few hours), it’s finally time for my absolute favorite part—slicing into your gorgeous Best Dutch Apple Pie Recipe! When you cut into that first piece, notice how perfectly everything holds together—the tender apples enveloped by that flaky crust topped with crunchy crumbs are nothing short of perfection. As you serve each slice warm with perhaps a scoop of dairy-free vanilla ice cream or whipped coconut cream on top (because why not indulge?), take a moment to appreciate all your hard work!
This pie isn’t just dessert; it’s an experience filled with warmth and love—a shared moment among friends or family where sweet memories are made around the table. I promise you’ll be hearing compliments long after everyone has had their fill because there’s something profoundly satisfying about homemade treats like this one. So grab your forks and dig in—it’s time to celebrate life’s simple pleasures through every delightful bite of this Dutch apple pie!
Storage and Enjoyment Tips for Your Best Dutch Apple Pie Recipe
The moment you pull your pie from the oven, it’s pure magic – golden, fragrant, and utterly inviting. But let’s be real, sometimes there are leftovers, and that’s not a bad thing! Storing your pie properly ensures that every slice remains as delightful as the first. If you’re lucky enough to have some of this homemade treasure left over, it’s crucial to know how best to preserve its deliciousness.
Storing Leftover Best Dutch Apple Pie Recipe
To keep your Best Dutch Apple Pie delightful even after it’s been baked, wrap it carefully in plastic wrap or foil if you’re planning to store it at room temperature for just a day or two. For longer storage, I recommend placing it in an airtight container – this is a game-changer for maintaining freshness. Ideally, you’ll want to enjoy it within three days; however, if you follow these steps, you might find the flavors intensify beautifully over time. It’s also worth noting that the crust can soften slightly after a day or two due to moisture from the filling; if that happens, simply pop a slice in the oven at 350°F for about 10 minutes to revive its crispness. Trust me on this one – the aroma will be intoxicating as it warms up!
Freezing Components for Later
If you want to enjoy your pie at a later date, freezing is an absolutely fantastic option! To freeze your Best Dutch Apple Pie, be sure to let it cool completely before wrapping it tightly in plastic wrap and then aluminum foil – this double-layer protection keeps freezer burn at bay. You can also freeze the unbaked pie; just assemble it up until the final bake step and wrap it well. It can stay frozen for up to three months. When you’re ready for that comforting slice of home-baked goodness, simply remove the pie from the freezer and bake straight from frozen at 375°F for about 60-70 minutes until bubbly and golden. What a wonderful way to bring warmth into your home on a chilly evening without any extra effort!
There you have it – whether enjoyed fresh or saved for later indulgence, every bite of this Best Dutch Apple Pie promises warmth and nostalgia.
Best Dutch Apple Pie
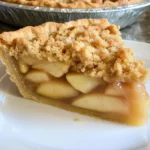
Indulge in the warmth and nostalgia of a homemade Dutch Apple Pie, where tender apples are enveloped in a flaky crust and crowned with a buttery crumb topping. This classic dessert, with its roots in the Netherlands, sets itself apart from traditional apple pies with its delightful texture and unique flavors. Each bite delivers a perfect balance of sweet and tart, complemented by the comforting spices of cinnamon and nutmeg. Ideal for gatherings or quiet evenings at home, this pie not only satisfies your sweet tooth but also brings people together to create lasting memories. Experience the joy of baking this Best Dutch Apple Pie Recipe and transform your kitchen into a haven of deliciousness.
- Prep Time: 30 minutes
- Cook Time: 70 minutes
- Total Time: 1 hour 40 minutes
- Yield: Serves approximately 8 slices 1x
- Category: Dessert
- Method: Baking
- Cuisine: Dutch
Ingredients
- 1 ¼ cups all-purpose flour
- ½ teaspoon salt
- ½ cup frozen butter
- 4–5 tablespoons chilled water
- ½ teaspoon cider vinegar
- 7 tablespoons melted butter
- ⅔ cup brown sugar
- ½ teaspoon cinnamon
- ⅛ teaspoon nutmeg
- 2 ½ lbs Granny Smith and Pink Lady apples, cored and sliced
Instructions
- Preheat oven to 375°F (190°C). In a large bowl, whisk together flour and salt. Grate frozen butter into the mixture until crumbly.
- Gradually add chilled water and cider vinegar until dough forms. Shape into a disk, wrap in plastic, and refrigerate for at least two hours.
- Roll out the dough to fit a pie dish; blind bake for 15 minutes with weights, then an additional 10–15 minutes until golden.
- In a small saucepan, combine melted butter, water, flour, sugars, cinnamon, and nutmeg; cook until slightly thickened.
- Toss warm mixture with sliced apples; pour over pre-baked crust.
- For the crumb topping, combine melted butter, flour, sugars, cinnamon, and nutmeg until clumpy; sprinkle over apples.
- Bake for 50–55 minutes until bubbly and golden brown.
Nutrition
- Serving Size: 1 serving
- Calories: 300
- Sugar: 20g
- Sodium: 150mg
- Fat: 14g
- Saturated Fat: 8g
- Unsaturated Fat: 5g
- Trans Fat: 0g
- Carbohydrates: 40g
- Fiber: 3g
- Protein: 2g
- Cholesterol: 25mg