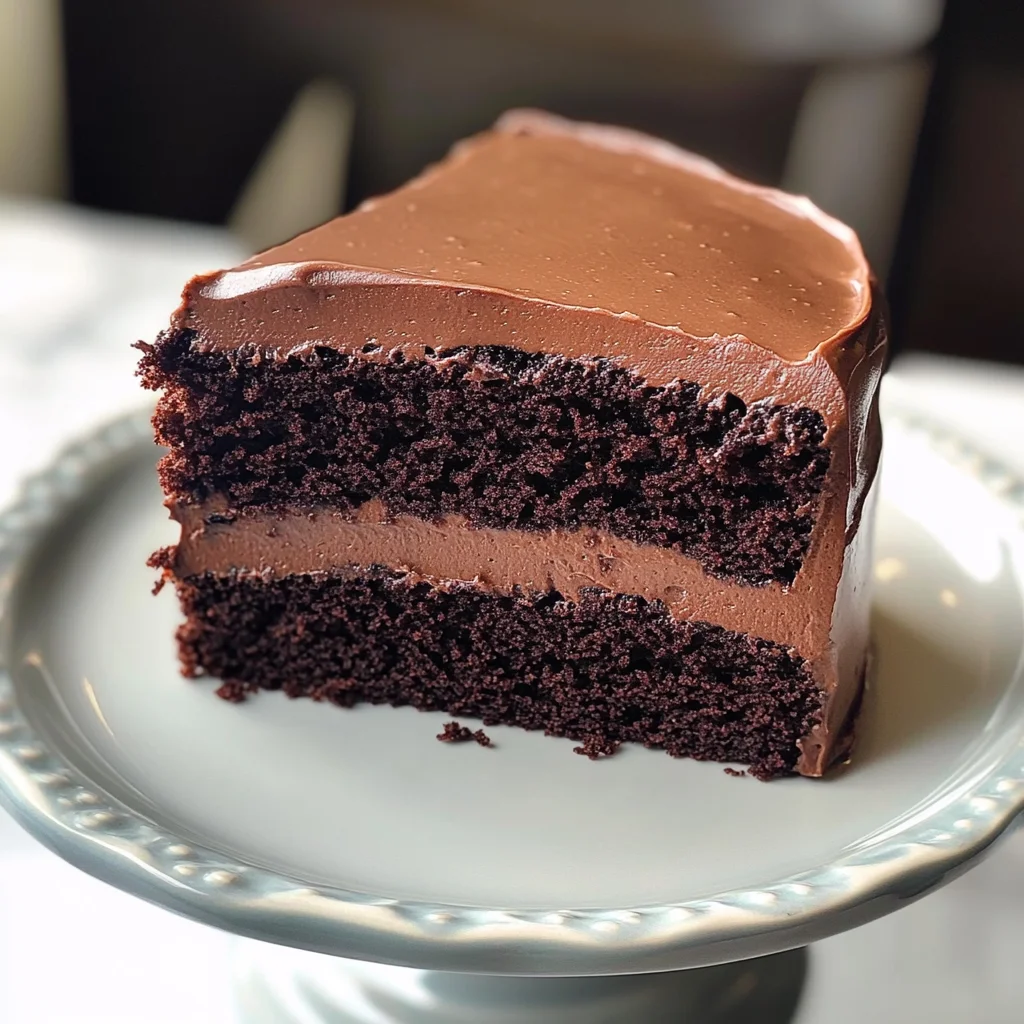
Ina Garten Chocolate Fudge Cake Recipe
There’s something undeniably enchanting about the aroma of chocolate wafting through your kitchen, a promise that something extraordinary is on its way. The Ina Garten Chocolate Fudge Cake Recipe is not just a cake; it’s a heartfelt experience, an invitation to savor life’s sweetest moments with those you cherish. As you mix the ingredients, you’ll feel the warmth of tradition melding with the thrill of creativity, creating a symphony of flavors that dances on your palate. This cake is rich and moist, each bite enveloped in a smooth ganache frosting that feels like liquid gold. I promise you, when you serve this dessert, it won’t just be a treat—it’s going to be the highlight of any celebration or cozy gathering.
What makes this cake truly special is not only its decadent taste but also the joyful memories it creates. Picture yourself in your kitchen, flour dust swirling like fairy dust as you whisk together the ingredients. This recipe has been passed down through generations and is perfect for birthdays, anniversaries, or even just a well-deserved indulgence after a long week. Each slice tells a story—a moment shared over laughter and love, where every forkful brings smiles and satisfied sighs. It’s these simple yet profound connections that make cooking so worthwhile.
Ina Garten Chocolate Fudge Cake Recipe: A Slice of Pure Bliss
Let’s embark on this delightful journey together! Creating the Ina Garten Chocolate Fudge Cake is not only about mixing ingredients; it’s about infusing your love for baking into each step and savoring every moment along the way. With its rich layers and silky ganache frosting, this cake will surely become your go-to recipe for any occasion.
Ingredients:
As we gather our ingredients for this chocolate masterpiece, let me assure you that each component plays an essential role in crafting a cake that’s nothing short of extraordinary. Let’s dive into what makes each ingredient crucial!
- 1 ¾ cups all-purpose flour. Flour serves as the backbone of our cake, providing structure and stability while allowing us to achieve that perfect crumb texture. When choosing your flour, look for one with a medium protein content; all-purpose flour strikes just the right balance between strength and tenderness. You might even consider sifting it before measuring to aerate it further—this small step can make such a difference in achieving that lightness we’re aiming for!
- 2 cups sugar. Sugar isn’t just about sweetness; it’s crucial for achieving moistness and tenderness in our cake. When baked, sugar helps create that delightful caramelization along with contributing to the overall flavor profile—think of it as the magic dust that enhances all other flavors! Always opt for granulated sugar here; it dissolves beautifully during mixing, ensuring an even distribution throughout the batter.
- ¾ cup cocoa powder. This is where we introduce deep chocolatey goodness! Cocoa powder adds not only color but also an intense flavor profile to our cake. It’s essential to use high-quality cocoa powder (Dutch-processed or natural); trust me when I say it will elevate your chocolate experience from good to absolutely divine! If you’re feeling adventurous, try experimenting with different brands to discover which one resonates most with your taste buds.
- 2 tsp baking soda & 1 tsp baking powder. Both are leavening agents but serve distinct purposes—baking soda needs an acid to activate (which we have in our buttermilk), while baking powder can work independently. Together they ensure our cake rises beautifully without collapsing afterwards! It’s paramount to check expiration dates on these; old leaveners can lead to flat cakes—such heartbreak!
- 1 tsp salt. Never underestimate salt’s power in baking! It enhances flavors and balances sweetness while also strengthening gluten—this means a better texture overall! Just be sure not to skip this step; adding salt helps bring out those rich chocolate notes even more profoundly.
- 1 cup buttermilk. Buttermilk adds moisture while also providing acidity which reacts with baking soda for a lovely rise and tender crumb structure—it’s simply non-negotiable! If you don’t have buttermilk on hand, you can make a quick substitute by adding 1 tablespoon of lemon juice or white vinegar to regular milk—let it sit for about 5 minutes before using!
- ½ cup vegetable oil. Oil keeps our cake moist longer than butter would—it’s crucial for that melt-in-your-mouth texture we’re after! While some may prefer butter for flavor reasons, trust me when I say oil leads us directly toward nostalgia-inducing decadence here.
- 2 eggs. Eggs are key players in binding ingredients together while contributing richness and moisture as well! Room temperature eggs mix more easily into batters compared to cold ones from the fridge; take them out ahead of time or quickly soak them in warm water if you’re short on time!
- 2 tsp vanilla extract. Vanilla extract adds depth and complexity—a magical essence that complements chocolate perfectly! Always opt for pure vanilla extract over imitation; it makes an incredible difference in flavor quality!
- 1 cup hot coffee. Here comes my secret weapon—a cup of hot coffee enhances the chocolate’s richness without adding any coffee flavor! It amplifies everything else happening within our batter; don’t skip this step—it’s absolutely paramount!
- 8 oz semisweet or bittersweet chocolate, chopped finely or in chips depending on preference (I adore bittersweet!). This will be melted down later for ganache frosting—it brings forth intense richness while ensuring silky smoothness!
- 1 cup heavy cream & 2 tbsp butter & 1 tsp vanilla extract (for ganache). These three come together beautifully—the cream adds body while butter lends shine when melted down into luscious ganache frosting—you’ll want every last drop spread generously atop your cooled cake!
Now that we’ve gathered everything needed for our delicious creation let’s move on to how we’ll bring this beauty together.
Equipment You’ll Need:
Having the right tools makes all the difference in creating culinary masterpieces like our Ina Garten Chocolate Fudge Cake Recipe! While they may not be “ingredients,” think of them as essential partners guiding us through each step seamlessly.
- Two 9-inch round cake pans – These are crucial as they determine both shape and size; lining them with parchment paper ensures easy release post-baking—nobody wants their hard work stuck inside stubborn pans!
- Mixing bowls – A set of various sizes will help keep things organized during prep; I recommend having at least one large bowl (for dry ingredients) plus another medium-sized bowl (for wet ones). Sturdy options made from glass or stainless steel make clean-up easier too since they resist staining.
- Whisk and spatula – A whisk helps combine dry ingredients effectively while integrating wet ones smoothly too; meanwhile spatulas ensure no precious batter gets left behind—scraping every last bit counts when making something so delectable!
- Electric mixer (handheld or stand) – While mixing by hand is possible here if you’re feeling up for it—you’ll find using an electric mixer saves time significantly especially when creaming butter/sugar mixtures until fluffy perfection achieved!
Each tool contributes uniquely towards crafting success—having them ready will make your baking experience smoother—and more enjoyable too!
Preparing the Ina Garten Chocolate Fudge Cake Recipe
Step 1: Prepping Your Pans – The Foundation of Greatness
The first step towards creating your stunning cake starts with prepping those pans—the foundation upon which all deliciousness rests! Preheat your oven to 350°F (175°C), then generously grease both round pans using either non-stick spray or softened butter followed by lining them with parchment paper circles at their bottoms—it ensures effortless removal once baked without tearing apart delicate layers! Trust me on this: taking time now means less heartbreak later when serving up slices full glory rather than crumbles stuck inside pans!
Step 2: Mixing Dry Ingredients – The Symphony Begins
In a large mixing bowl, whisk together flour, sugar, cocoa powder along with baking soda & powder plus salt until combined thoroughly—this process allows air incorporation leading towards fluffier results later during baking phase! Remember: each ingredient harmonizes together creating our end goal—don’t rush through this vital initial stage—take pride knowing you’re building something wonderful from scratch right before eyes!
Step 3: Combining Wet Ingredients – Uniting Forces
In another bowl combine buttermilk alongside vegetable oil followed by eggs & vanilla extract until well blended—you’ll notice how creamy mixture becomes almost frothy as components unite into harmony here…it’s beautiful watching science unfold right before us isn’t it? Now pour this luscious blend directly onto dry mixture previously prepared without hesitation—we want everything evenly distributed bringing forth maximum flavor potential post-bake!
Step 4: Incorporating Coffee – Elevating Richness
Here comes my favorite part: slowly stir hot brewed coffee into batter mixture until fully incorporated—it might seem odd at first yet trust me…it elevates depth immensely whilst amplifying existing chocolate flavors brilliantly beyond belief…don’t worry about caffeine jitters either—the heat activates magic within chocolate soothes any intensity away leaving just blissful indulgence instead awaiting those lucky enough who get served slices later on…
Stay tuned as we continue building upon these steps further towards completing our irresistible creation—I promise you won’t regret following along every bit passionately crafted along way here today!
Step 5: The Art of Baking—Creating the Cake Layers
Now that you have your batter beautifully blended, it’s time to bring the magic to life by baking those luscious chocolate cake layers. Begin by dividing your rich, velvety batter evenly between the two prepared 9-inch cake pans, ensuring that each pan gets roughly the same amount. This step is crucial because it guarantees that both layers cook uniformly and finish at the same time, preventing one from being overdone while the other remains undercooked. As you pour in the batter, take a moment to admire its glossy sheen; this is a sign of all those lovely ingredients working together to create a decadent texture.
Once your pans are filled, gently tap them on the countertop to release any air bubbles trapped within the batter. This simple technique can make a world of difference in achieving a smooth cake layer without unsightly holes. Place your pans in the preheated oven, setting your timer for 30 minutes. But remember, ovens can be quirky! At around 25 minutes, start checking for doneness by inserting a toothpick into the center of each cake. If it comes out clean or with just a few moist crumbs clinging to it, you’re golden! If not, give them another 5-10 minutes but keep a close watch. Trust me on this—overbaking can lead to dry cakes, and we want yours to be moist and utterly intoxicating.
Step 6: Ganache Magic—Crafting Your Smooth Frosting
While your cake layers are cooling down (and believe me, patience is key here!), let’s dive into the creation of that luscious ganache frosting that will crown this chocolate masterpiece. Start by placing your chopped chocolate into a heatproof bowl—semisweet or bittersweet will work beautifully here. I’ve always been captivated by how just two ingredients can transform into pure liquid gold when combined properly! In a small saucepan over medium heat, gently warm your heavy cream until it begins to simmer; don’t rush this step! As soon as you see tiny bubbles forming around the edges, pour that steaming cream directly over your chopped chocolate.
Now comes the waiting game—allow the mixture to sit for about two minutes without stirring. This is absolutely paramount because it gives the chocolate time to soften and melt beautifully in that hot cream bath. After those two long (but oh-so-worth-it) minutes have passed, grab a spatula and gently stir the mixture until it becomes smooth and glossy. You’ll notice how silky and shiny it looks; this is what makes ganache so incredibly luxurious! To finish it off, add in your butter and vanilla extract for an extra layer of flavor that elevates this frosting from ordinary to extraordinary. Set aside your ganache at room temperature; letting it cool slightly will help thicken it for spreading but don’t let it get too firm—trust me, consistency is everything!
Step 7: Frosting Perfection—Dressing Your Cake
Now that both your cakes are completely cool (and I cannot stress enough how important this is—warm cakes plus frosting equals disaster!), it’s finally time for my favorite part: frosting! Carefully remove each cake layer from its pan by running a knife around the edges before flipping them onto a wire rack or plate. Take a moment to admire their beautiful domed tops; if they’ve puffed up unevenly during baking (which can happen), gently level them off with a serrated knife for an even finish—this ensures a stunning presentation when served.
Place one layer on your serving platter (feel free to use parchment paper underneath for easy cleanup), and scoop about one-third of your cooled ganache on top of it. Use an offset spatula or back of a spoon to spread it evenly across the surface—it should glide effortlessly if you’ve achieved that perfect consistency! Top with the second layer of cake and repeat this process using another third of ganache until you’ve created an enviable tower of chocolate goodness. Don’t forget about frosting the sides too! A thin layer around the perimeter adds that professional touch we all crave—plus, who doesn’t love more chocolate? If you find yourself with some leftover ganache, drizzle it decoratively over the top or serve alongside each slice for extra indulgence!
Step 8: The Finishing Touches—Serving Your Creation
At last, we arrive at one of my favorite moments—the grand reveal! Once you’ve frosted your cake splendidly with its velvety ganache coat, it’s best to allow everything to set together before slicing into this beauty. Chilling isn’t just about aesthetics; allowing your cake to rest in the fridge for about 30 minutes helps firm up that luscious ganache so every slice holds together perfectly when cut. Believe me when I say there’s something profoundly satisfying about cutting into a well-chilled cake where every layer stays intact instead of slipping apart like an uncooperative dance partner!
When you’re ready to serve, pull out your knife and carefully cut through those decadent layers—you’ll hear that satisfying ‘crunch’ as you break through that glossy exterior into soft chocolate bliss. Each piece should reveal an inviting swirl of rich chocolate goodness—a true testament to all those wonderful ingredients coming together in harmony! Pair each slice with fresh berries or perhaps even some whipped coconut cream if you’re feeling adventurous; after all, life is meant for enjoying deliciousness in every form possible.
And there you have it—the Ina Garten Chocolate Fudge Cake Recipe transformed into something truly extraordinary right in your kitchen! It may seem like quite an undertaking but trust me; every minute spent is worth its weight in gold when you witness those smiles around the table as everyone savors each bite. So go ahead—bake with love, share generously, and embrace every moment spent creating memories over this delightful dessert!
Storage and Enjoyment Tips for Your Ina Garten Chocolate Fudge Cake Recipe
Ah, the moment has arrived! Your kitchen is filled with the intoxicating aroma of chocolate, and your creation is ready to shine. Trust me, this cake isn’t just a dessert; it’s a celebration waiting to happen. But what happens when you have a slice (or several) left over? Don’t worry—I’ve got you covered with some simple yet effective storage tips that will keep your Ina Garten Chocolate Fudge Cake as delightful as the day it was baked!
Storing Leftover Ina Garten Chocolate Fudge Cake Recipe
To preserve the divine essence of your cake, it’s essential to store it in an airtight container. This ensures that each slice remains moist and decadent, free from any unwanted air exposure that could dry it out. If you don’t have an airtight container on hand, wrapping the cake tightly in plastic wrap or aluminum foil works wonders too! Ideally, you want to keep your leftovers at room temperature for up to three days. However, if you find yourself with more cake than you can manage (which I can totally understand!), refrigerating it will allow for up to a week of delicious enjoyment. For an added tip—placing a slice of bread in the container can help maintain moisture, making each bite feel like it just came out of the oven! And let me tell you, even after a few days, this cake retains its rich flavors beautifully and becomes even more profound as the ingredients meld together. When you’re ready to indulge again, simply take a slice—no need for reheating unless you’re looking for that warm chocolate experience!
Freezing Ganache for Later
If you’ve made extra ganache or want to save some slices of your cake for those unexpected cravings (because trust me, they will come!), freezing is an excellent option. To freeze your ganache or leftover slices properly, allow them to cool completely first. Then transfer them into freezer-safe bags or containers, making sure to remove as much air as possible—this keeps them fresh and prevents freezer burn. You can enjoy this delightful treat frozen for up to three months without losing any of its charm! When you’re ready to enjoy that rich chocolatey goodness again, simply thaw it overnight in the fridge or at room temperature for a couple of hours. The convenience factor here is genuinely fantastic because having a piece of this indulgent cake waiting for you in the freezer feels like having a little slice of happiness tucked away for later. So go ahead and embrace the joy of freezing—trust me; future-you will thank present-you immensely!
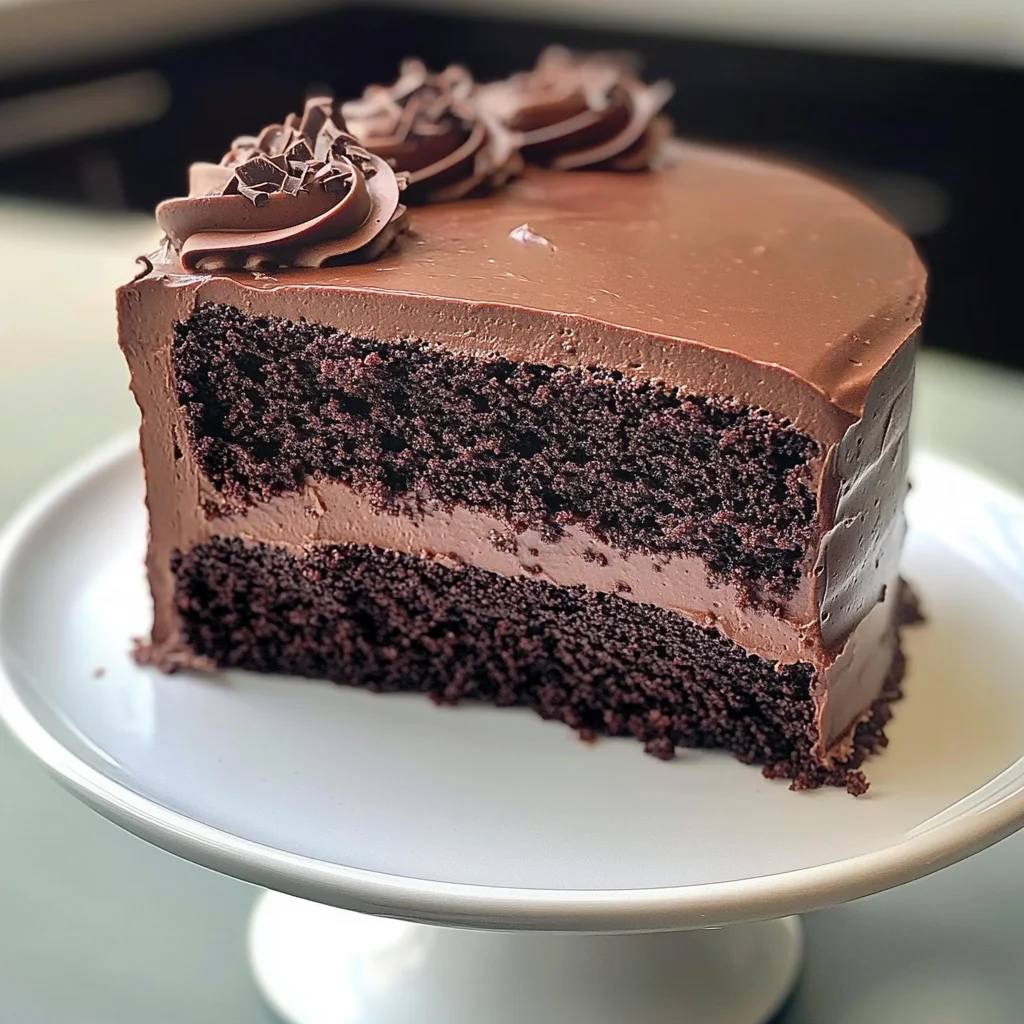
Ina Garten Chocolate Fudge Cake
Indulge in the ultimate chocolate experience with the Ina Garten Chocolate Fudge Cake Recipe. This luscious cake is a celebration of rich flavors, featuring moist layers enveloped in velvety ganache frosting. Every slice is a delightful blend of nostalgia and creativity, perfect for birthdays, anniversaries, or simply a treat after a long week. As you bake, you’ll enjoy the enchanting aroma of chocolate that fills your kitchen and creates joyful memories with loved ones. This cake isn’t just a dessert; it’s an invitation to savor life’s sweetest moments together. Let’s embark on this baking adventure and create something extraordinary!
- Prep Time: 20 minutes
- Cook Time: 30 minutes
- Total Time: 50 minutes
- Yield: Approximately 12 servings 1x
- Category: Dessert
- Method: Baking
- Cuisine: American
Ingredients
- 1 ¾ cups all-purpose flour
- 2 cups granulated sugar
- ¾ cup cocoa powder
- 2 tsp baking soda
- 1 tsp baking powder
- 1 tsp salt
- 1 cup buttermilk
- ½ cup vegetable oil
- 2 large eggs
- 2 tsp vanilla extract
- 1 cup hot coffee
- 8 oz semisweet or bittersweet chocolate (chopped)
- 1 cup heavy cream
- 2 tbsp butter
Instructions
- Preheat your oven to 350°F (175°C). Grease two 9-inch round cake pans and line them with parchment paper.
- In a large mixing bowl, whisk together flour, sugar, cocoa powder, baking soda, baking powder, and salt until combined.
- In another bowl, mix buttermilk, vegetable oil, eggs, and vanilla extract until creamy. Pour the mixture into the dry ingredients.
- Gradually stir in hot coffee until fully incorporated.
- Divide batter evenly between prepared pans and tap gently to remove air bubbles. Bake for 30 minutes or until a toothpick comes out clean.
- While cooling, prepare ganache by heating heavy cream until simmering and pouring over chopped chocolate; let sit for two minutes before stirring until smooth.
- Frost cooled cakes with ganache as desired.
Nutrition
- Serving Size: 1 slice (100g)
- Calories: 410
- Sugar: 45g
- Sodium: 320mg
- Fat: 22g
- Saturated Fat: 10g
- Unsaturated Fat: 10g
- Trans Fat: 0g
- Carbohydrates: 50g
- Fiber: 3g
- Protein: 4g
- Cholesterol: 50mg