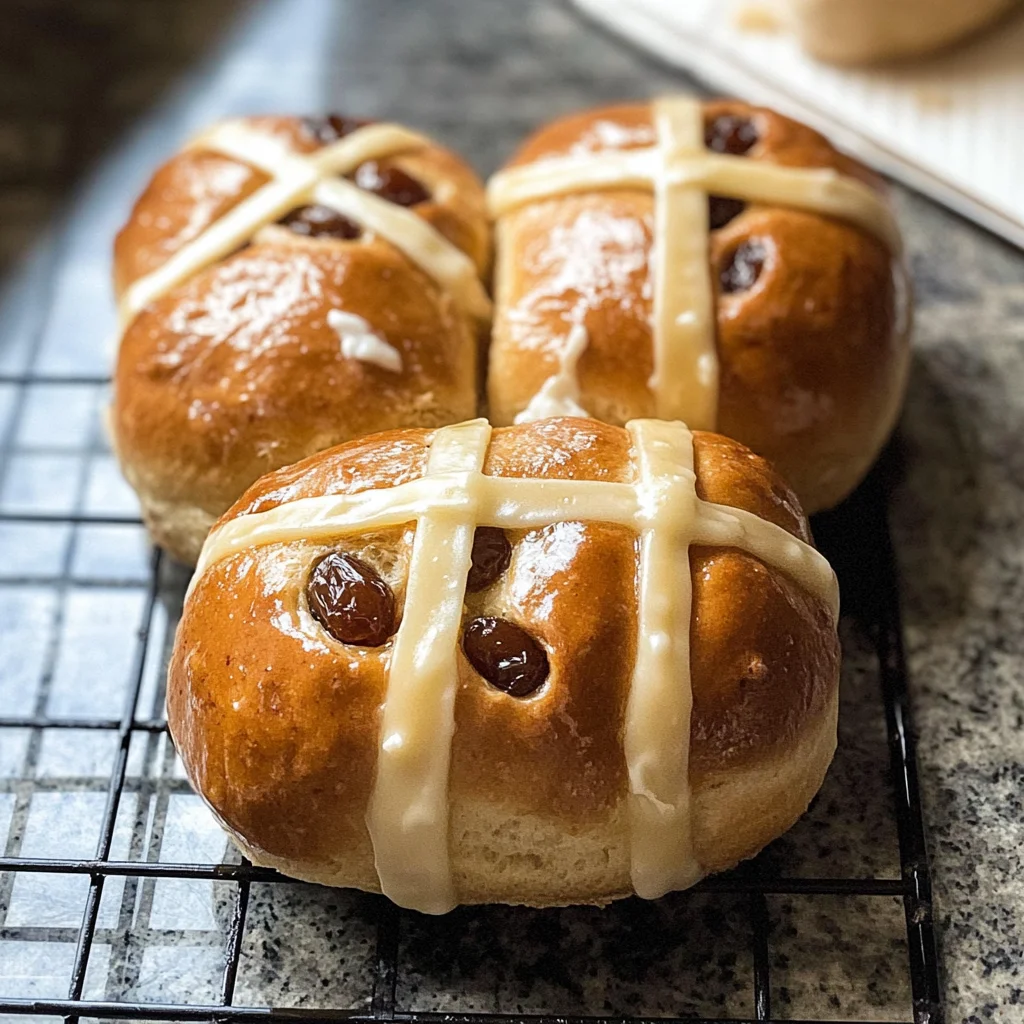
Hot Cross Buns recipe
There’s something deeply enchanting about the aroma of freshly baked bread wafting through your home. It’s more than just a delightful scent; it’s a warm embrace, a connection to cherished memories, and a promise of comfort. Today, I’m excited to share with you my beloved Hot Cross Buns recipe, a creation that brings together tradition and modernity in every fluffy bite. Imagine biting into a soft bun that’s perfectly spiced with cinnamon and allspice, studded with sweet sultanas, and a hint of zesty orange. These buns are not merely food; they are an experience that awakens the senses and fills the heart with joy.
As I stood in my kitchen whipping up these lovely buns, I couldn’t help but think about how this recipe has woven its way through generations. Hot Cross Buns have long been associated with Easter celebrations, but honestly, who says we can’t enjoy them any time of year? The combination of sweet and spicy flavors creates an utterly intoxicating symphony that feels like a warm hug on a chilly day. They’re perfect for sharing with loved ones over coffee or tea, or simply enjoying as a comforting snack while curled up with your favorite book. Trust me when I say, once you’ve tasted these homemade beauties, store-bought will never feel quite the same again!
Hot Cross Buns recipe: A Warm Hug in Every Bite
Let’s embark on this delightful culinary journey together! Making hot cross buns from scratch may seem daunting at first glance, but I promise you, it’s easier than it sounds—and incredibly rewarding. There’s nothing quite like pulling warm buns from the oven and watching them rise perfectly golden before your eyes. So grab your apron and let’s dive into making these fluffy delights!
Ingredients:
As we prepare to whip up our Hot Cross Buns recipe, let’s take a moment to appreciate each ingredient that plays a vital role in crafting these delicious little treats.
- 3 teaspoons instant or rapid rise yeast (9 grams): Yeast is the magical ingredient responsible for the rise in our dough. Using instant or rapid rise yeast means we can skip some waiting time because it activates faster—an absolute boon for busy bakers! Always check if your yeast is still active before starting; mixing it with warm milk should create tiny bubbles within minutes if it’s alive and kicking.
- 1/2 cup (110g) caster sugar (superfine sugar): This isn’t just about sweetness—it’s crucial for feeding our yeast during fermentation. Caster sugar dissolves quickly in liquids, ensuring that it incorporates smoothly into our dough without leaving any gritty texture behind. If you don’t have caster sugar on hand, you can blitz granulated sugar in a blender for a few seconds until fine.
- 1 1/2 cups (375ml) milk, warm (full fat or low fat): Milk adds richness and moisture to our buns while also being the perfect partner for activating yeast. Warm milk helps to create an inviting environment for yeast fermentation—think of it as giving those little organisms their cozy blanket! You want it warm but not hot; around 110°F (43°C) is ideal.
- 4 1/4 cups (640g) bread flour (or plain/all-purpose): Bread flour has higher protein content than all-purpose flour which contributes to better gluten development—a key factor for achieving those fluffy buns we’re aiming for. If you only have all-purpose flour on hand, don’t worry! It will still yield delicious results; just keep an eye on your dough’s texture as you mix.
- 2 tsp cinnamon powder: Ah, cinnamon—the spice of warmth and comfort! It lends an aromatic quality that pairs beautifully with the sweetness of our sultanas. Plus, it adds that nostalgic touch that makes every bite feel like home.
- 2 tsp All Spice (OR Mixed Spice): This blend elevates our buns by adding layers of flavor complexity—think nutmeg and cloves mingling with cinnamon for an unforgettable taste experience. If you can’t find allspice or mixed spice in stores or prefer to make your own blend, feel free to mix equal parts ground cloves and nutmeg along with cinnamon.
- 1/2 tsp salt: Salt enhances flavors and balances sweetness while controlling yeast activity during fermentation. It’s often called the unsung hero in baking because it plays such an essential role without being overtly noticeable.
- 1 1/2 cups (210g) sultanas: These plump little gems bring bursts of sweetness to each bun—a delightful contrast to the spices that envelop them. If sultanas are unavailable, golden raisins can be used instead; they’ll provide similar sweetness without compromising flavor.
- 1 – 2 oranges, zest only: Zest adds brightness to our buns without overwhelming them—just think of it as sunshine captured within those delicate strands! Make sure you’re using organic oranges when possible so you avoid any unwanted pesticides on the peel.
- 50g / 3.5 tbsp unsalted butter, melted and cooled: Butter enriches our dough while adding tenderness—this step is key to achieving those soft interiors we crave in every bite! Allowing butter to cool slightly before adding prevents cooking the eggs or altering the yeast’s effectiveness.
- 1 egg (at room temperature): Eggs act as binders while also enriching flavor and color in our buns. Using eggs at room temperature ensures they incorporate smoothly into the dough—a non-negotiable step if you’re after optimal results!
- 1/4 cup (35g) Extra bread flour: This small amount becomes crucial if your dough feels too sticky during mixing—it helps achieve just the right consistency without turning overly dry.
- 1/2 cup (75g) flour (any white flour): We’ll use this later for rolling out our dough; having extra white flour handy ensures sticking doesn’t become an issue when shaping those beautiful buns!
- 5 tbsp water: Water is essential for adjusting dough consistency as needed during kneading—it gives us flexibility depending on humidity levels or how absorbent our flour proves to be.
- 1 tbsp apricot jam: This will act as our glaze after baking—adding shine while providing subtle sweetness without being cloying! If apricot jam doesn’t suit your taste buds, feel free to swap it out for another fruit preserve you love.
- 2 tsp water: A touch more water combined with apricot jam creates the perfect consistency for glazing our buns after they emerge from their cozy oven bath!
Equipment You’ll Need:
Having the right tools on hand makes all the difference between cooking feeling like a chore versus an enjoyable experience filled with creativity and joy! While they aren’t technically ingredients themselves, each piece of equipment serves as an essential partner in this culinary dance we’re about to undertake.
- Stand mixer fitted with a dough hook – This tool is perfect when mixing up sticky doughs like ours because it does most of the heavy lifting for us! It saves time compared to kneading by hand while ensuring thorough incorporation—all without tiring out those precious arms!
- Large mixing bowl – A sturdy bowl provides ample space for mixing dry ingredients before introducing wet ones—no one likes ingredients flying everywhere during prep! Opt for glass or stainless steel bowls which prove durable against heat if necessary later down track when proofing might occur near warmth sources like ovens!
- Measuring cups & spoons – Precision matters greatly when baking; accurate measurements prevent mishaps leading results astray from expectations laid out beforehand! Invest in good-quality measuring tools so consistency reigns supreme across batches made throughout seasons ahead!
- Baking sheet lined with parchment paper – This trusty companion guarantees easy transfer once formed into individual portions prior baking—they won’t stick stubbornly upon removal post-cooking either thanks its nonstick properties helping maintain shape intact until served proudly guests gathered around table awaiting delightfully golden creations emerge forth oven doors wide open inviting aromas fill air around everyone nearby!
Preparing the Hot Cross Buns recipe / Making Your Dough
Step 1: Mixing Dry Ingredients
First things first—let’s take care of blending those dry ingredients together! In your large mixing bowl or stand mixer fitted with a dough hook attachment, combine 4¼ cups of bread flour along with 3 teaspoons of instant yeast, ½ cup caster sugar, 2 teaspoons each of cinnamon powder and allspice, plus ½ teaspoon salt. Mixing these components helps activate flavors while creating an even base where everything else can come together harmoniously later down line—think about how much easier life becomes when start things off right! Briefly give them a stir until uniformly combined; this shouldn’t take long at all!
Step 2: Adding Wet Ingredients
Now comes one of my favorite parts—the wet ingredients! Slowly pour in that warming hug known as milk alongside melted butter followed by adding one egg right into center along remaining sultanas plus freshly zested orange peel too—how exciting does this sound already? Mix away until everything blends seamlessly into cohesive mass resembling thick batter—it may seem sticky initially but trust me here…that’s exactly what we want! Once incorporated fully allow rest few moments allowing flavors meld beautifully before transitioning onto next phase kneading process needs proper attention devoted towards achieving optimal elasticity necessary ensuring these buns rise splendidly during oven time ahead…
Step 3: Kneading Your Dough
Now let’s get physical—but don’t fret because kneading doesn’t mean working yourself into exhaustion rather embracing rhythmic motions guiding soft pliable mass under hands gently folding bringing gluten strands together strengthening structure throughout mixture creating ultimate fluffiness desired finish product yields magnificence worthy sharing amongst family friends alike gathered round tables eagerly anticipating tasting heavenly treats crafted from scratch—from YOU nonetheless! Knead either using stand mixer method described earlier set speed low gradually increasing tempo over several minutes observing changes taking place until smooth elastic texture emerges however should decide go old school opting manual technique dust work surface lightly then push pull fold over itself repeatedly maintaining consistent rhythm establishing connection between baker masterpiece taking form right hands…
Step 4: Time To Rise!
After kneading until smooth elastic perfection achieved let rest covered bowl warm cozy spot approximately one hour allowing fermentation process unfold magically transforming humble ball into divine creation poised ready conquer hearts souls through sheer deliciousness encapsulated golden crispy exteriors awaiting reveal hidden treasures nestled within tender crumb filled bursting flavorful surprises waiting discovery each eager mouthful taken blissfully savoring essence carefully cultivated throughout journey beginning simple ingredients ending extraordinary flavors fusing together culminating artistic expression beyond mere sustenance nourishment…
And there you have it—the first steps toward creating your own batch of glorious Hot Cross Buns! Stay tuned as we continue this delightful adventure together through shaping rising baking processes yielding irresistible aromatic morsels worthy celebration shared amongst loved ones near dear always remembering importance connection shared food made lovingly heart soul intertwined always…
Hot Cross Buns Recipe: The Joy of Baking
Step 5: Kneading to Perfection
Now that your dough is mixed and ready, it’s time to knead! This step is crucial because kneading develops the gluten structure in the flour, transforming a sticky mix of ingredients into a smooth, elastic dough. Whether you’re using a stand mixer or your own two hands, take a moment to appreciate this transformation. If using a stand mixer with a dough hook, keep it on medium speed for about five minutes. You’ll know it’s ready when the dough pulls away from the sides of the bowl and has become an elastic mass that doesn’t stick excessively to your fingers. If you’re kneading by hand, sprinkle some extra flour on your work surface and get in there! Knead for about ten minutes. It may seem like a workout, but trust me—this is where all the magic happens! As you work the dough, keep an eye out for its texture; it should be smooth and slightly tacky but not overly sticky. If it feels too wet, sprinkle just a bit more flour until you achieve that perfect balance. Remember, patience is key here; don’t rush through this step!
Step 6: First Rise – Letting It Rest
After kneading to perfection, it’s time for the first rise, and this is where the magic truly begins! Place your beautifully kneaded dough in a lightly greased bowl and cover it with a clean kitchen towel or plastic wrap. The goal here is to create a warm environment that encourages your yeast to work its wonders—this will lead to those fluffy buns we all crave! Find a cozy spot in your kitchen where the temperature hovers around 75°F (24°C); if your kitchen is cooler than this, consider placing the bowl in an oven with just the light on or near a warm window. Allow it to rise for about 1 to 1.5 hours until doubled in size—yes, you heard me right! This time spent rising allows the flavors to deepen while imbuing your buns with that irresistible airy texture. Just imagine opening your oven door later to find those little puffs of joy awaiting you!
Step 7: Shaping Your Buns
Once your dough has completed its first rise and looks like it’s ready for a party (doubled in size!), it’s time for shaping—and this part brings me so much joy! Gently punch down the dough; this action releases excess gas produced during fermentation and creates space for even more flavor development as they bake. Transfer the dough onto a lightly floured surface and divide it into twelve equal pieces. Now comes the fun part: shaping each piece into smooth balls! To do this effectively, gently pull each piece’s edges towards its center and pinch them together before rolling them between your palms—this technique helps create tension on the surface of each bun which will yield beautiful golden tops during baking. As you shape each one, place them spaced closely together in a greased baking dish (or line it with parchment paper). Don’t worry if they touch; they’ll rise together beautifully when baked! Trust me; seeing those little rounds nestled together is enough to fill anyone with anticipation.
Step 8: Second Rise – Patience Pays Off
After shaping those adorable buns, they deserve another moment of rest—a second rise that lasts about 30-45 minutes. Cover them again with that trusty kitchen towel or plastic wrap; we want our buns cozy as they puff up once more! At this stage, you’ll notice how these little beauties begin to expand again—it’s like watching magic unfold right before your eyes! This second rise is absolutely paramount because it allows every bun to reach its full potential before heading into the oven; think of it as giving them one last chance to relax and gain confidence before they face their final challenge—the heat of baking! During this time, preheat your oven to 375°F (190°C) so it’s roaring hot when you’re ready to bake. Keep an eye on those buns; ideally, they should almost double again in size but still maintain their lovely round shape. If you press gently on one with your finger and it springs back slowly—that’s how you know they’re ready for their grand debut!
Conclusion:
As we wrap up this delightful journey through crafting my cherished Hot Cross Buns recipe, I can hardly contain my excitement! Each step has been infused with love and passion, guiding you toward creating something truly extraordinary. The combination of warm spices like cinnamon and allspice mingling with sweet sultanas and bright orange zest elevates these buns far beyond ordinary baked goods. Just imagine slicing into one of these beauties: the soft dough gives way to a tender crumb that envelops your senses in warmth. It’s not merely about baking; it’s about creating memories filled with joy and comfort.
Why should this recipe be on your must-try list? Well, it isn’t just about flavor – it’s also about the experience of making it together with family or friends. The sheer joy of kneading that dough by hand or watching it rise gives everyone involved a sense of connection with each other and with generations before us who have cherished similar recipes. Imagine pulling these golden-brown delights from your oven: the enticing aroma wrapping around you like a warm hug as everyone gathers around to share stories over tea or coffee. It’s more than food; it’s an experience rich with tradition!
Now, let’s talk about serving suggestions! Imagine savoring one of these sumptuous buns slathered with velvety butter as it melts into every crevice – pure magic on your taste buds! For an afternoon pick-me-up, pair them with your favorite cup of herbal tea or perhaps a creamy hot chocolate while chatting away with friends. And if you’re feeling particularly indulgent after dinner? Try topping one off with a drizzle of honey or a smear of tangy cream cheese spread—talk about heaven on earth!
Feeling adventurous? This recipe is wonderfully adaptable! You could swap out sultanas for dried cranberries or even add nuts for crunch if that’s what tickles your fancy. What about adding some chocolate chips for those sweet cravings? Each variation breathes new life into this timeless classic while still honoring its roots. So why not gather those ingredients and let this recipe inspire your culinary creativity? I would love nothing more than for you to try it out and share your own experiences—whether through comments or pictures on social media—I can’t wait to hear how much joy these buns bring into your life!
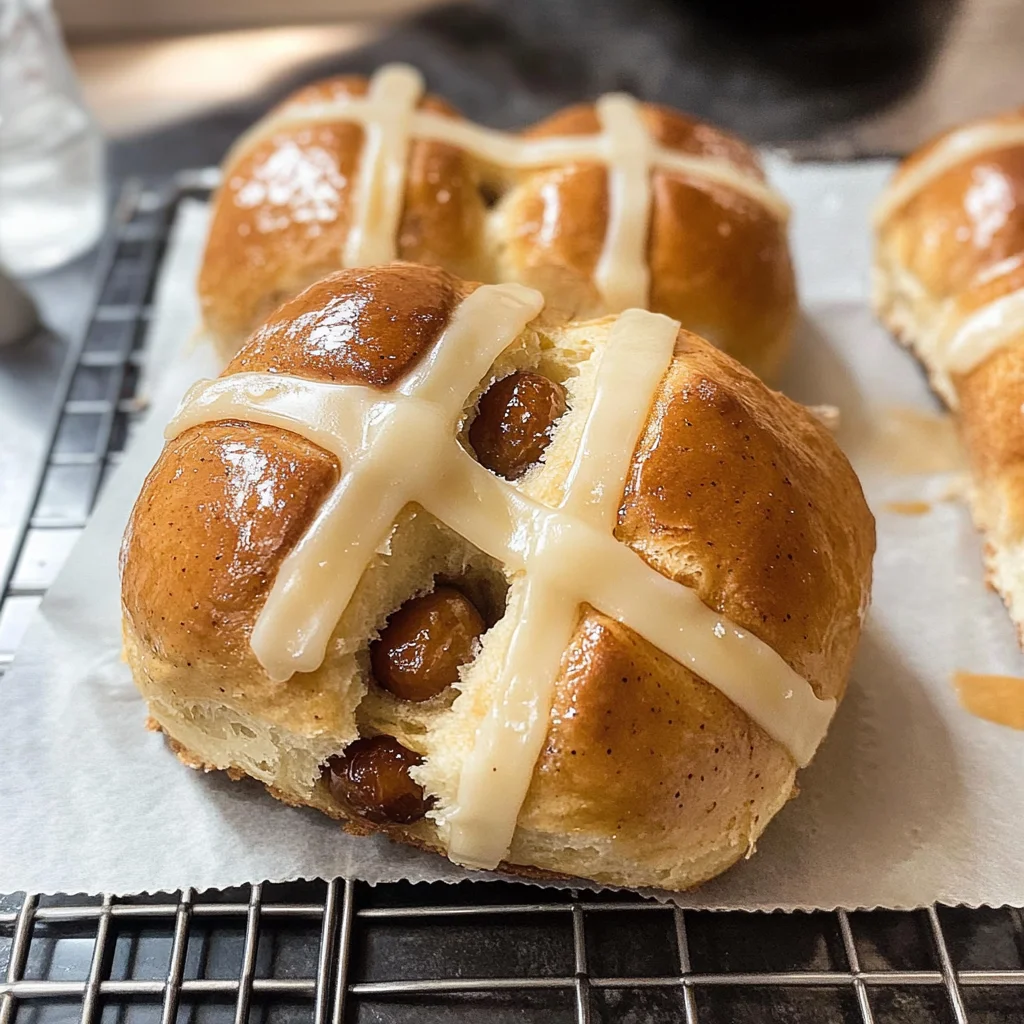
Hot Cross Buns
There’s something truly magical about homemade Hot Cross Buns, particularly when the aroma fills your kitchen and sweeps you into a world of comfort and nostalgia. These fluffy, spiced buns are studded with sweet sultanas and zesty orange peel, making them a delightful treat at any time of year. Perfect for sharing with loved ones over coffee or tea, this recipe is not only simple to follow but also invites creativity in its variations. Whether you enjoy them fresh from the oven or toasted with butter, these buns promise warmth and joy in every bite.
- Prep Time: 20 minutes
- Cook Time: 25 minutes
- Total Time: 45 minutes
- Yield: Approximately 12 servings 1x
- Category: Dessert
- Method: Baking
- Cuisine: Baked Goods
Ingredients
- 3 teaspoons instant yeast
- 1/2 cup caster sugar
- 1 1/2 cups warm milk
- 4 1/4 cups bread flour
- 2 teaspoons cinnamon powder
- 2 teaspoons allspice
- 1/2 teaspoon salt
- 1 1/2 cups sultanas
- Zest of 1–2 oranges
- 50g unsalted butter (melted)
- 1 egg (room temperature)
Instructions
- In a large mixing bowl, combine bread flour, yeast, sugar, cinnamon, allspice, and salt; mix well.
- Gradually add warm milk, melted butter, and egg; stir until a sticky dough forms.
- Knead the dough on a floured surface for about 10 minutes until smooth and elastic.
- Place the kneaded dough in a greased bowl; cover and let it rise in a warm spot for 1-1.5 hours or until doubled in size.
- Punch down the dough gently, then fold in sultanas and orange zest.
- Divide the dough into twelve equal pieces; shape each piece into a ball.
- Place shaped buns close together in a greased baking dish; cover and let rise for another 30-45 minutes.
- Preheat your oven to 375°F (190°C) while the buns rise.
- Bake for about 20-25 minutes until golden brown; cool slightly before glazing with apricot jam mixed with water.
Nutrition
- Serving Size: 1 serving
- Calories: 240
- Sugar: 10g
- Sodium: 200mg
- Fat: 5g
- Saturated Fat: 3g
- Unsaturated Fat: 2g
- Trans Fat: 0g
- Carbohydrates: 44g
- Fiber: 2g
- Protein: 6g
- Cholesterol: 30mg