Deviled Egg Recipe
There’s something undeniably special about a plate of deviled eggs that transcends mere food; they’re like tiny little bundles of joy, each bite bursting with a creamy, tangy goodness that dances on your palate. I’ve always been captivated by the way these simple ingredients come together to create an appetizer that feels both timeless and innovative. The moment you pop one into your mouth, it’s as if you’re partaking in a culinary tradition that has woven its way through family gatherings and festive celebrations for generations. Each egg, perfectly halved and filled with a luscious yolk mixture, is not just an appetizer — it’s an experience that brings people together around the table and sparks conversation.
In my kitchen, deviled eggs have been a staple at every gathering, from summer barbecues to holiday feasts. They hold a certain nostalgic charm that reminds me of my childhood when my grandmother would whip up a batch as we prepared for family reunions. The contrast of flavors—the creaminess of the yolks against the slight acidity of the mustard—is utterly intoxicating and profoundly satisfying. What makes this deviled egg recipe so special is that it’s incredibly easy to prepare while still delivering an impressive result. You don’t need to be a culinary expert to get it right; trust me, I promise you can master this classic dish with just a few simple steps!
Deviled Egg Recipe: A Timeless Classic with a Twist
Let’s dive into this delightful journey together! Making deviled eggs is not just about following steps; it’s about embracing the joy of cooking and sharing something truly wonderful with loved ones. Each ingredient plays its part in creating what I believe is one of the best appetizers out there—simple yet sophisticated, familiar yet full of flavor.

Ingredients:
As we embark on this culinary adventure, let’s take a moment to appreciate each ingredient’s role in our deviled egg creation. Each element contributes not only flavor but also texture and color, making our dish visually appealing and delicious.
- 6 large eggs. These beauty orbs are the foundation of our deviled egg recipe, acting as both the canvas and main ingredient. When selecting eggs, look for fresh ones with unblemished shells; this ensures you’re working with quality ingredients. Fresh eggs are vital because they yield firmer whites and richer yolks—qualities that make your filling creamy and easy to pipe or spoon into those lovely white halves.
- 3 tablespoons mayonnaise. This silky condiment is non-negotiable for achieving that smooth filling texture we crave in deviled eggs. It adds richness while balancing out the flavor profile beautifully. When choosing mayonnaise, opt for high-quality brands or even homemade if you’re feeling adventurous! The creaminess of mayonnaise melds perfectly with the yolks, creating a luxurious filling that feels indulgent without being overwhelming.
- 1 teaspoon yellow mustard. Ah, the tangy kick! Yellow mustard adds just the right amount of acidity to cut through the richness of the egg yolks and mayonnaise mix. It brings everything alive! If you’re looking for alternatives, feel free to experiment with Dijon or spicy brown mustard for an exciting twist—both will lend their unique character without overpowering the traditional taste we’re aiming for.
- 1/4 teaspoon paprika. This vibrant spice isn’t just for garnishing; it adds depth and warmth to our filling.
I love using sweet paprika here as it offers a gentle smokiness without too much heat; however, if you want more complexity, smoked paprika can elevate your dish further by adding layers of flavor. - 1/8 teaspoon salt & 1/8 teaspoon black pepper. These two humble seasonings are crucial in enhancing all other flavors in our mixture. Salt amplifies taste while black pepper adds just a hint of warmth—a perfect contrast to all that creaminess! Don’t underestimate their power; seasoning at each step can truly transform your deviled eggs from ordinary to extraordinary.
- Optional toppings: chives, paprika, parsley. These garnishes serve not only as visual appeal but also as an opportunity to infuse additional flavor into each bite! Fresh herbs like chives or parsley add brightness and freshness while paprika brings back color contrast—always aim for dishes that please both the eyes and palate!
Equipment You’ll Need:
Having the right tools makes cooking so much smoother and more enjoyable! While these items may not be ingredients, they are essential partners in creating something wonderful together.
- Saucepan – A medium-sized saucepan is perfect for boiling our eggs evenly without overcrowding them. It ensures thorough cooking while maintaining control over temperature changes during boiling.
- Ice bath bowl – This simple bowl filled with ice water is crucial after boiling; it stops the cooking process immediately, preventing rubbery whites while allowing us to achieve tender yet firm textures in our hard-boiled eggs.
- Mixing bowl – You’ll need a sturdy mixing bowl for mashing those yolks into submission! A good mixing bowl allows space for whisking in all those delightful ingredients without spilling over.
- Fork or potato masher – A fork works wonders when mashing yolks smoothly into submission—don’t rush this step! The goal here is uniform consistency that blends well with other ingredients for optimal creaminess.
- Spoon or piping bag – To fill those beautiful egg whites with our luscious yolk mixture, you can use either a spoon (simple yet effective!) or a piping bag if you want to elevate presentation effortlessly!
Now that we have everything lined up perfectly let’s get started on preparing this scrumptious Deviled Egg Recipe!
Step 1: Boiling Our Eggs to Perfection
First things first—place your six large eggs gently into your saucepan in a single layer so they cook evenly without cracking during boiling. Cover them generously with cold water—this helps ensure they heat gradually without shocking them (which causes cracks). Bring water to boil over medium-high heat while keeping an eye on those beauties; once bubbling begins, reduce heat slightly but maintain it at simmering point for exactly 10 minutes—a crucial time frame for achieving firm yet tender hard-boiled eggs!
Step 2: Cooling Down Quickly
Once those ten minutes are up—and oh my goodness does it smell divine—carefully drain off hot water (watch out!) then immediately run cold water over eggs until cool enough to handle comfortably before transferring them directly into an ice bath filled with refreshing cold water! This step might seem simple but trust me—it’s absolutely paramount! Rapid cooling keeps whites tender while making peeling easier later on—no one wants craggy edges on their lovely egg halves!
Step 3: Peeling & Halving
After letting them chill long enough (about five minutes should do), gently tap each egg against your counter until cracks appear all around before carefully peeling away shells under running water if needed—that little trick helps remove stubborn bits stuck behind! Once peeled successfully (yay!), pat them dry lightly before slicing each one lengthwise down the middle like creating two perfect halves ready for stuffing!
Step 4: Yolk Removal & Mashing
Now comes one of my favorite parts—the yolk extraction process! With utmost care using either fingers or small spoons (or whatever works best), scoop out those golden treasures from their white nests right into your mixing bowl where they’ll get mashed shortly thereafter until smooth as silk using either fork methodically followed by whisking briefly afterwards if necessary ensuring no lumps remain—this texture matters greatly when blending additional ingredients later!
Stay tuned as we continue crafting these delightful deviled egg halves into something truly extraordinary—after all, we’re just getting started on this joyous culinary journey together!
Crafting the Perfect Deviled Egg Recipe: A Culinary Journey
Step 5: Gently Mash Your Egg Yolks to Creamy Perfection
Now we come to one of the most satisfying parts of our deviled egg recipe—mashing the yolks! With a fork in hand, take those beautiful golden yolks and start to gently break them apart. You’ll notice how they crumble and give way under the pressure of your fork, creating a fine, smooth texture that will be the base of our creamy filling. Don’t rush this step; it’s essential for achieving that luxurious consistency we all crave. If you’re too hasty, you might end up with chunks instead of that dreamy, velvety mix we want! As you mash, think about how this step transforms the yolks from their solid state into a silky canvas ready to embrace all the flavors we’re about to add.
The goal here is to have your yolks resemble a soft paste rather than coarse crumbs. This is crucial because a well-mashed yolk allows for better incorporation of the other ingredients, resulting in an even creaminess throughout. I promise you, taking your time to get this right will make such a difference when it comes time to fill those egg whites! Once you achieve that beautiful texture, take a moment to admire your handiwork; it’s like tiny golden clouds just waiting to be elevated into something extraordinary.
Step 6: Blending in the Magic Ingredients
In this step, we’re going to blend our mashed yolks with some delightful ingredients that will elevate our deviled egg recipe into something truly magical. Into your bowl with those perfectly mashed yolks, add three tablespoons of mayonnaise—this is where we get that luscious creaminess that makes deviled eggs so addictive! Mayonnaise not only adds flavor but also richness; think of it as liquid gold that binds everything together beautifully. Next, whisk in one teaspoon of yellow mustard for that tangy kick—it’s what gives deviled eggs their classic taste and an irresistible zing.
After adding 1/4 teaspoon of paprika for warmth and color, along with 1/8 teaspoon each of salt and black pepper for seasoning, mix everything together until it’s fully combined and smooth. Don’t just stir aimlessly; gently fold these ingredients into your yolks while envisioning how each element contributes to the overall flavor profile. The mustard will bring brightness, while the paprika adds depth—a true symphony of flavors coming together! Trust me on this—tasting your mixture at this stage is non-negotiable because it’s where you’ll adjust any seasoning according to your liking. Maybe you want a bit more mustard or a pinch more salt? Feel free to experiment!
Step 7: Filling Those Egg Whites Like a Pro
Here comes another exciting part—the filling! Grab a spoon or even better, if you have it on hand, use a piping bag fitted with a star tip for an extra touch of elegance (and trust me when I say it makes everything look oh-so-fancy!). Take one half of an egg white and gently spoon or pipe in your glorious yolk mixture until it’s heaped generously over the top. The goal is to create little mounds that are not only aesthetically pleasing but also promise an explosion of flavor in every bite.
Don’t be shy with this part; remember that presentation matters too! Filling them generously means every bite will be filled with that creamy goodness. If you’re using a piping bag, fill it about two-thirds full and gently squeeze from the top down while lifting away from the egg white base—this technique creates lovely swirls on top that are simply irresistible! It’s these small details that can elevate your dish from ordinary to extraordinary, making your deviled eggs not just delicious but visually stunning as well.
Step 8: Adding Those Final Touches
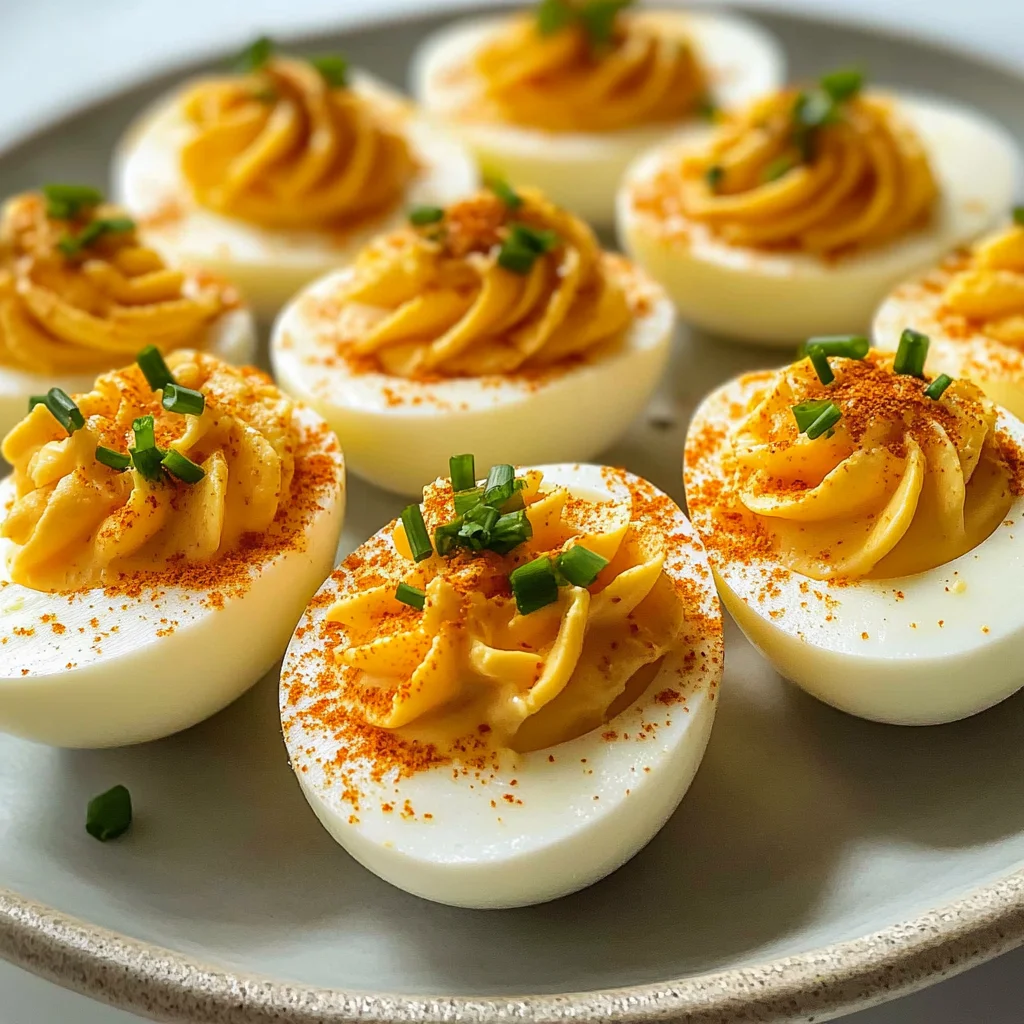
Now let’s sprinkle some love on top! This is where you can truly let your creativity shine through. Optional toppings like finely chopped chives add freshness and color; they contrast beautifully against the rich filling and provide a wonderful crunch. A dusting of paprika not only enhances the vibrant color but adds an additional layer of flavor—what’s not to love? And if you’re feeling adventurous, consider garnishing with fresh parsley or even crumbled vegan bacon bits for an unexpected twist!
Once you’ve adorned each egg half with these finishing touches, take a moment to appreciate your work before serving them up. Presentation is key here—arranging them artfully on a platter can make them feel like stars at any gathering. If time allows—and I highly encourage you to wait—refrigerate them for about 15-30 minutes before serving; it allows all those wonderful flavors to meld together beautifully and makes for an incredibly refreshing bite when enjoyed chilled. It’s amazing how patient waiting just a little longer can transform your dish into something truly special!
Final Thoughts on Your Deviled Egg Recipe Adventure
As we wrap up this journey through crafting an exquisite deviled egg recipe together, I genuinely hope every step filled you with excitement and anticipation! Whether you’re serving these delightful bites at a family gathering or enjoying them during quiet evenings at home paired with laughter among friends, these deviled eggs promise both comfort and joy in every morsel. Always remember—the heart behind cooking lies in sharing those moments around food that bring us closer together.
So gather around your table, invite loved ones over or indulge solo—you deserve it! These deviled eggs aren’t just appetizers; they’re small bites filled with love and warmth from my kitchen to yours. Enjoy every moment spent creating them as much as savoring each delicious bite!
Storage and Enjoyment Tips for Your Deviled Egg Recipe
Now that your deviled eggs are beautifully assembled and ready to dazzle your taste buds, let’s talk about how to preserve this delightful dish so you can enjoy them even longer! These little bites of heaven can be a fantastic addition to any gathering or simply a comforting snack at home. But what if you have some leftovers? Don’t fret; I’ve got you covered with some essential storage tips to keep those creamy morsels tasting as fresh as the moment they were made.
Storing Leftover Deviled Egg Recipe
To store your leftover deviled egg recipe, I recommend placing them in an airtight container—this is key to preserving their flavor and texture. Ideally, you want to keep them in the refrigerator where they will stay fresh for up to three days. Trust me on this; the first day is when they’re at their peak deliciousness, but they hold up surprisingly well for a short time after. For an extra layer of protection against drying out, try placing a slice of bread in the container with the eggs. It sounds quirky, but it works wonders! The bread absorbs excess moisture while keeping your deviled eggs creamy and delightful. As for flavor after storage, while they may lose a tad bit of zestiness over time, a quick sprinkle of fresh paprika or herbs just before serving can reinvigorate them beautifully. Serve them chilled straight from the fridge for a refreshing snack!
Freezing the Egg Yolks for Later
If you find yourself wanting to make this deviled egg recipe ahead of time, consider freezing just the yolk mixture! To do this properly, simply prepare the filling as per the recipe, then spoon it into an ice cube tray or small freezer-safe container. When stored correctly in the freezer, it can last up to three months! Isn’t that convenient? When you’re ready to indulge again, simply thaw overnight in the fridge and give it a good stir before refilling those whites. This method not only saves time but also reduces waste—perfect for anyone who loves meal prepping! The best part? You’ll always have that luscious yolk mixture on hand whenever the craving strikes.
With these handy storage tips, you’ll ensure that every bite of your deviled eggs remains utterly intoxicating—ready to impress at any moment!
Deviled Egg Recipe

Deviled eggs are a classic appetizer that brings warmth and joy to any gathering. With their creamy, tangy filling nestled in perfectly halved egg whites, these delightful bites are not just food; they’re an experience that encourages sharing and conversation. This easy deviled egg recipe captures the essence of comfort food while being incredibly simple to make. Ideal for picnics, parties, or simply as a snack, you’ll find yourself returning to this recipe time and again.
- Prep Time: 10 minutes
- Cook Time: 10 minutes
- Total Time: 20 minutes
- Yield: Makes 12 deviled egg halves 1x
- Category: Appetizer
- Method: Boiling
- Cuisine: American
Ingredients
- 6 large eggs
- 3 tablespoons mayonnaise
- 1 teaspoon yellow mustard
- 1/4 teaspoon paprika
- 1/8 teaspoon salt
- 1/8 teaspoon black pepper
- Optional toppings: chives, parsley
Instructions
- Place the eggs in a saucepan and cover with cold water. Bring to a boil over medium-high heat. Once boiling, reduce heat and simmer for 10 minutes.
- Drain the hot water and transfer eggs to an ice bath until cool.
- Peel the eggs gently under running water and slice each in half lengthwise.
- Scoop out the yolks into a mixing bowl and mash until smooth.
- Mix in mayonnaise, yellow mustard, paprika, salt, and pepper until creamy.
- Spoon or pipe the filling back into the egg whites.
- Garnish with optional toppings before serving.
Nutrition
- Serving Size: 1 egg half (30g)
- Calories: 70
- Sugar: 0g
- Sodium: 90mg
- Fat: 5g
- Saturated Fat: 1g
- Unsaturated Fat: 3g
- Trans Fat: 0g
- Carbohydrates: 1g
- Fiber: 0g
- Protein: 6g
- Cholesterol: 165mg